1/16 RC US 155mm Gun Motor Carriage M12 - Build
Re: 1/16 RC US 155mm Gun Motor Carriage M12 - Build
Close up of the right idler adjuster. Yes, i need to cut the excessive length of the bolt.
Overview of the rear plate of the 1/35 kit.
Overview of the rear plate of the 1/16 model. The mounts for the tow hooks will be added at the end of the build as they will be damaged during the manipulation of the model during the heavy construction.
The Taigen T48 Sherman metal tracks have been installed. Looking good.
The next step is to perform more surgery on the patient, cutting the greyed out areas, which will be followed by the complete rebuilding of the fighting compartment interior, and also of the details on top of the vehicle. I know that some guys, having paid good money for a "kit", somehow feel obliged to follow instructions and build it as is. Personally, i do not worry about hurting the feelings of the kit designer, and push his basic design further. He surely does not worry about it either. This is where the fun is, even if it would probably make more sense to simply discard the kit and scratch build the whole thing.
Regards, Louis
Re: 1/16 RC US 155mm Gun Motor Carriage M12 - Build
Hello,
The next two posts are for the basic interior structure of the fighting compartment.
The inaccurate Vandra resin hull sections at the back are cut strait with a metal saw blade for redesign and replacement. Other invalid details are removed completely.
First, a support base for the floor is created at the proper height, all measurements extrapolated to 1/16 from the 1/35 kit. Take note that i am using a Mato M4A1 lower hull, not a Heng Long M4A3 hull so things might be a bit different using that hull but the concept is the same.
The floor is deposited on the support. As part of the removable gun and crew compartment tub, it needs to remain removable.
The floor is connected to the upper hull through the tub sides added to match the Vandra upper internal hull width with the floor, a perfect match as everything aligns.
The new hull sections are drawn, cut and installed. It looks easier than it is because of the need to integrate with the resin upper hull. The part needs to be glued according to their associated link with the removable tub.
The gun/crew compartment tub structure is ready and easily removable. It just firmly slides in place, no need for magnets or other devices. There is still room in the hull under the floor for the battery, at least.
Reference in the M12 book showed extra details that were not captured in the Academy 1/35 kit, and added to the 1/16 model.
Left side views, minus the finer details that will be added later in the build as these would be in the way or damaged during heavy construction.
continuing on following post
Last edited by lmcq11 on Thu Feb 17, 2022 7:25 pm, edited 3 times in total.
Re: 1/16 RC US 155mm Gun Motor Carriage M12 - Build
The rear right side reference also show some added details and differences with the 1/35 that were accounted for.
The right side of the tub.
Overview of the new fighting compartment structure.
Resin bolt heads moulded on the sides and the inaccurate details on the top were mostly removed for redesign. Notice the new accurate metal idler wheel installed on the Mato Sherman idler adjusters, replacing the ugly and inaccurate (two halves) ones that were provided with the adjuster. Hub caps remain to be put on at the end of the build.
Taigen T48 metal tracks look very good to me. I did not run a motorized test yet but the associated Taigen sprockets seem to turn them perfectly.
Take note that the height of the upper hull need to be measured, made absolutely flat and adjusted as required before the fenders are added at the front of the vehicle. The Vandra kit upper hull does not come flat when simply deposited on a lower hull.
Next step, finishing the fighting compartment before switching to the howitzer gun, something i have been waiting for. The plan is to rebuild it all.
Regards, Louis
-
- Sergeant
- Posts: 666
- Joined: Thu Nov 04, 2021 4:30 pm
- Location: Paris
Re: 1/16 RC US 155mm Gun Motor Carriage M12 - Build
Great job Louis, the amount of work you're putting in that kit to get it looking great is paying off.
My parts for 3D printing :
https://cults3d.com/@CaptainTox
- Kaczor
- 2nd Lieutenant
- Posts: 2283
- Joined: Fri May 18, 2018 9:58 am
- Location: Ciechanow, Poland
- Contact:
Re: 1/16 RC US 155mm Gun Motor Carriage M12 - Build
in the end, you will have like 2% of the Vandra left 

Re: 1/16 RC US 155mm Gun Motor Carriage M12 - Build
I would say between 10 and 20 percent of the kit will be used. For a rivet counter like me, its not the best investment i have made. But somehow, its better than starting with nothing.Kaczor wrote:in the end, you will have like 2% of the Vandra left
Thanks, its fun fixing stuff, finding solutions and do things i have not seen before.MonsieurTox wrote:Great job Louis, the amount of work you're putting in that kit to get it looking great is paying off.
Continuing with the build.
Before building the gun base, its time to complete the interior. We can see that the single diamond style treadplate at the back is in 3 sections, two are missing in this photo. There is an horizontal metal rack on the floor to hold on to something.
View of the 1/35 kit, showing the ammo holders on the side walls. I did not find yet how the ammo rounds were secured to them, likely some latch or removable bracket. Kit and references are not showing the whole thing.
The Vandra kit comes with 10 nicely moulded ammo rounds in resin, ready to fire with the fuse on. The diameter is actually good for a 155mm round... phew.
The fighting compartment floor is done with the ammo racks on the sides. The air filters are the Mato M4A1 filters modified with a new top and side details. The floor rack seen earlier will be added later.
The interior will look impressive with the ten 155mm ammo rounds stored in place, a rare sight in 1/16 scale RC.
You can fully see why the raised fighting compartment floor of the Vandra kit need to be lowered as it should be for an accurate representation of the M12, otherwise nothing would be right, including the midget size engine air filters provided with the kit... i did salvage the top of the Vandra air filters to transplant on the Mato ones, with some modifications.
Switching effort to the howitzer gun barrel. The M1918M1 howitzer that equips the M12 is quite large and is not a single tapered barrel length. It is mostly a suite of cylindrical sections in descending diameter size. This is the Academy 1/35 kit barrel used as a model for extrapolation to 1/16.
I decided to replace the Vandra howitzer and built a new one from scratch. The resin barrel is quite heavy and would likely give problems with the recoil system to be designed. It needs to be light. Every section of the Vandra barrel is also undersized. As you can see, the 155mm round is too large to exit the barrel, the extrapolated Vandra muzzle in real life would have a diameter of 144mm.
For rigidity, simplicity and lightness, i have selected to create the barrel in Carbon fiber tubes. This is possible here because the M1918M1 individual barrel sections are not tapered.
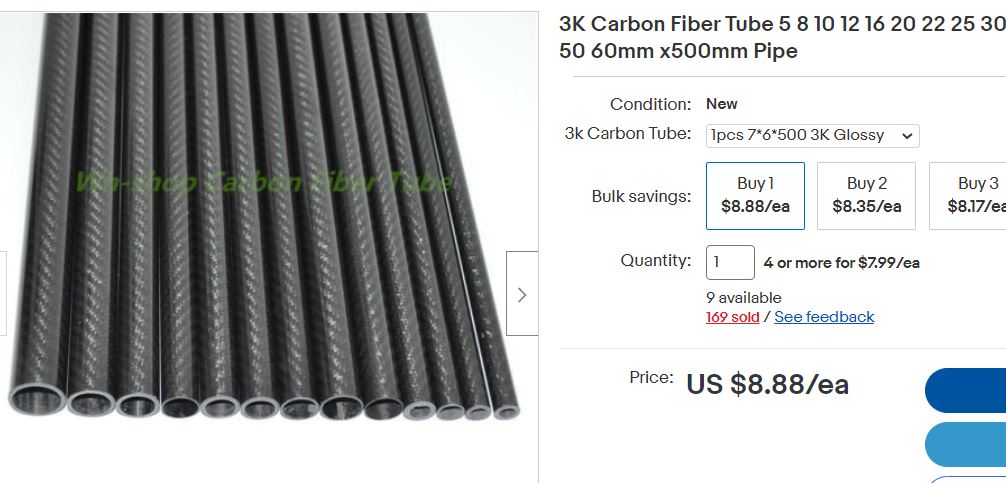
Carbon fiber tubes of diameter going from 5mm to 60mm in diameter, matt or glossy, can be purchased on ebay from various Chinese vendors. The cost depends on the diameter sizes and length. I purchased mine a couple of years ago. The buyer need to shop around for the best deal. As i needed only a few inches per diameter size, the total cost of the material was below $100 and i only used about half the length. I have enough for another barrel if i wanted to. A metal barrel would be complicated to create, heavy and would cost a fortune.
continuing barrel story on following post
Last edited by lmcq11 on Sun Feb 20, 2022 12:10 am, edited 5 times in total.
- HERMAN BIX
- Major-General
- Posts: 11549
- Joined: Sun Jan 12, 2014 12:15 am
- Location: Gold Coast,Australia
Re: 1/16 RC US 155mm Gun Motor Carriage M12 - Build
Carbon fibre tubes eh !! Well here was me thinking you might go for a section of fishing rod
I still can’t get over your level of forward vision for problem solving,, it’s like you thought of this barrel dilemma 2 years ago & just parked it for the right time.
That’s clever

I still can’t get over your level of forward vision for problem solving,, it’s like you thought of this barrel dilemma 2 years ago & just parked it for the right time.
That’s clever

HL JAGDPANTHER,HL TIGER 1,HL PzIII MUNITIONSCHLEPPER, HL KT OCTOPUS,HL PANTHER ZU-FUSS,HL STuG III,HL T34/85 BEDSPRING,
HL PZIV MALTA,MATORRO JAGDTIGER,HL F05 TIGER,TAMIYA KT,HL PANTHERDOZER,HL EARLY PANTHER G,TAIGEN/RAMINATOR T34/76,
HL AN-BRI-RAM SU-85
HL PZIV MALTA,MATORRO JAGDTIGER,HL F05 TIGER,TAMIYA KT,HL PANTHERDOZER,HL EARLY PANTHER G,TAIGEN/RAMINATOR T34/76,
HL AN-BRI-RAM SU-85
Re: 1/16 RC US 155mm Gun Motor Carriage M12 - Build
The tubes have a 1mm thick wall. I selected my tubes from a diameter of 30mm down to 10mm in 2mm increment so that they can be assembled together.
They slides into each other to create a perfectly strait and light howitzer barrel.
When i needed to create thickness, i simply added layers of tubing. The overlapped joints are tight and perfect. The carbon tubes are easily cut with a hand metal saw blade. Carbon can also be filed with a nail file.
The M1918M1 barrel has been created in 10 sections. Extra length was added to each section for the overlap. Some tube sections are only to provide thickness at the joints, but need to remain long enough in order to make the barrel absolutely strait.
The new carbon gun barrel at the top is assembled. Below it is the original Vandra resin gun barrel. At the bottom is the 1/35 barrel, used to extrapolate all dimensions and length of each sections.
Notice the difference in diameter between the two.
Barrel is done in about 2 hours of work. I reused a slice of the Vandra resin breech... I will be finetuning it in the weeks to come.
I have not glued all the sections together yet until the mount, recoil and flash are designed.
Just a little bit bigger than it should but i least the new barrel can accept the 155mm arounds.
Next step, the gun mount and cradle.
Regards, Louis
Last edited by lmcq11 on Sun Feb 20, 2022 12:12 am, edited 7 times in total.
Re: 1/16 RC US 155mm Gun Motor Carriage M12 - Build
thank you, Yes, i purchased them to create an M40 Howitzer that i had in mind two years ago. Did not get to it.HERMAN BIX wrote:Carbon fibre tubes eh !! Well here was me thinking you might go for a section of fishing rod
I still can’t get over your level of forward vision for problem solving,, it’s like you thought of this barrel dilemma 2 years ago & just parked it for the right time.
Re: 1/16 RC US 155mm Gun Motor Carriage M12 - Build
Hello, this post is for the howitzer base.
View of the base. We can see;
- a large base plate
- a large core tube in the middle
- support brackets that are lightened with a large hole
- the bolts are not equally spread out around the outer rings between brackets
- the internal ring is not another smaller base on top of the big one, it is a thin metal ring
- we cannot see it well but there is a raised structure at the back of the base.
View of the Vandra and Academy bases. Both are not accurate and molded in too few parts to be properly detailed.
The 1/16 Vandra base in undersized and is missing the whole raised structure at the back. It is showing a secondary base layer instead of the thin internal ring. Bolts are not properly positioned.
The 1/35 Academy has the raised structure. Bolts are positioned correctly in the front. It is missing the holes in the support brackets. It is showing a secondary base layer instead of the thin ring.
I decided to scratch build a new base. Seen here is the Vandra part over the new base plate to show how undersized the Vandra base really is.
The new 1/16 howitzer base is coming together the the same way as the real thing with the individual part independently created and assembled.
Comparing the three bases.
This is the new and completed 1/16 scale M12 howitzer base. It took me about 4 hours of work.
At this time, the base is simply deposited in the fighting compartment to check out the integration. Looking good.
As the open fighting compartment is the highlight on this build, it is important to me to make it the most interesting and accurate possible.
That's it for now. I started other components that are still work in progress, such as the howitzer mount and also the scratch built howitzer breech that can open and close. More to come on these in the next few days.
Regards, Louis