Yes ...always want to do this, and now I reckon I actually have the tools to do it.
Main hull sections will be plasticard, but the challenge lies with the suspension. I intend to 3D print this in the main. Tracks will be heng long ones, as I reckon the Panzer III tracks are quite close, or failing that .... KV1 items. Initial build will be with basic HL motors and board, with improved items planned once the project is basically a runner. No point in spending a massive pile of cash on the thing until it's a runner....then I can upgrade.
Progress to date:
It has taken quite a few goes to get the basic suspension units right. The swing arms and central mount point were tricky to size and match up, and I had issues 3D printing the wheels where the large surface area caused adhesion problems on the print bed. Damn things did not want to come off!
Just completed the test builds with pilot holes for the pivots and completed the trial assembly of the units once I had got all the parts printing the way I wanted.
I then discovered that the 2.5mm and 3mm drills would not go in my drill press....and hand drilling was not accurate enough. Especially going through the thick central block. Heat build up just melts the plastic. I am not going to go back and re-print the affected parts with the correct diameter holes built into the design. I may need to clean them up with a drill afterwards, but I won;t have as much drill work to do. I also need to add a locating pin for the upper shock mounts.
The shocks themselves are a problem....The components are too small to easily 3D print, and when I tried...the strength was not there. I need to come up with a better approach.
Overall....I quite like the way the first test model printed, but will have to do some cleaning up of the wheels on the final models to smooth them out but other than that..it's all been fairly simple to sort out.
Lessons learned:
1) Drill gently on heat intolerant parts!
2) I need a drill press that takes small diameter drill bits!
(will upload pics later )
T35 scratch build
Re: T35 scratch build
Thanks Mick...I have ordered one of the cheap ones to see how it goes. You get used to a drill press and forget how damn hard it is to drill vertical holes with a hand drill
Re: T35 scratch build
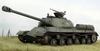
Here's the main part I am trying to build to start with:

Of course...I needed somne schematics to work from, and they needed to be teh actual size too. Not an easy task for a photocopier, but the one I used had a direct scale up, so I just printed the drawings whatever size they were, measured up...and worked out he enlargement factor. Then I copied htem on A3 moving the picture on the bed to cover all parts. I have side, front, back and top views.

And the progress so far...damn...so much to do!

The initial test model of hte suspension taught me many things and a new and better version is nearing completion ready for proto-typing. This will have all the holes premade to the right sizes on the thick pieces.
I now have a drill head for my drill press, so I can drill the other holes I need parallel. Threading the bolts into the outer suspension arms worked well and looked neat and tidy. Sure, the back is less so with the cap head bolts showing, but even then...it looks OK. I have simplified the back pieces to remove the detail I had on them as well. No point when it's hidden by a bolt head!
The only sticking point right now is the spring units. I still have not got them right ... but I have a few ideas still to try on that score.
Of course...I needed somne schematics to work from, and they needed to be teh actual size too. Not an easy task for a photocopier, but the one I used had a direct scale up, so I just printed the drawings whatever size they were, measured up...and worked out he enlargement factor. Then I copied htem on A3 moving the picture on the bed to cover all parts. I have side, front, back and top views.
And the progress so far...damn...so much to do!
The initial test model of hte suspension taught me many things and a new and better version is nearing completion ready for proto-typing. This will have all the holes premade to the right sizes on the thick pieces.
I now have a drill head for my drill press, so I can drill the other holes I need parallel. Threading the bolts into the outer suspension arms worked well and looked neat and tidy. Sure, the back is less so with the cap head bolts showing, but even then...it looks OK. I have simplified the back pieces to remove the detail I had on them as well. No point when it's hidden by a bolt head!
The only sticking point right now is the spring units. I still have not got them right ... but I have a few ideas still to try on that score.
Re: T35 scratch build
A spring around a dashpot damper at that scale would be an engineering marvel. How do the RC car struts compare for size? Especially given most of the unit will be covered by the side armour.
-
AlwynTurner

- 2nd Lieutenant
- Posts: 2656
- Joined: Thu Oct 23, 2014 10:47 am
- Location: Chapel-en-le-Frith, Derbyshire
Re: T35 scratch build
Hi Pak36, great build and following along, this is where I have bought compression springs
http://stores.ebay.co.uk/firstcompression/
If you are using panzer 3/4 tracks then they shouldn't be a problem, if you need wider tracks then you could look at KV1.
Alwyn

http://stores.ebay.co.uk/firstcompression/
If you are using panzer 3/4 tracks then they shouldn't be a problem, if you need wider tracks then you could look at KV1.
Alwyn
YOU'RE NEVER TOO OLD TO HAVE A HAPPY CHILDHOOD!
Saladin scratchbuild, Matilda scratchbuild, Churchill scratchbuild, Crusader scratchbuild, M10 Achiĺles scratchbuild, Universal Carrier scratchbuild
Saladin scratchbuild, Matilda scratchbuild, Churchill scratchbuild, Crusader scratchbuild, M10 Achiĺles scratchbuild, Universal Carrier scratchbuild
-
Raminator

- Warrant Officer 2nd Class
- Posts: 1309
- Joined: Tue Aug 11, 2015 9:57 am
- Location: Newcastle, Australia
Re: T35 scratch build
A great start on the land battleship, those suspension parts look great. What material are you using, out of interest? I know you can use solvent vapours with some materials to help smooth out the print lines, could help where you can't do it physically (like in the wheels).
Any plans to make all of the turrets functional?
Any plans to make all of the turrets functional?
Re: T35 scratch build
The parts are in PLA to start with. Should be OK. If I get breakages, I might have to redo some parts in ABS to get less brittleness.
RC car shocks are my plan B if I can find them in the right scale.
The tracks are going to have to be KV1 units for size. I would then also be able to use the KV1 drive sprocket which is very close to being correct for the T35. Saves opening another can of worms
Acetone smooths the surfaces out, but a good coat of filler primer and a rub back will do a lot to improve the finish. No point in doing that until I have finished the final dry-build and am ready to strip for painting.
I'm happy with how it's going so far
Re: T35 scratch build
Ahhh..joy.
I spent ages 3D printing loads of wheels, swing arms, hubs and suspension supports...
and forgot to order the bucketload of 35mm long M3 bolts I needed to bolt it all up. Doh.
Now I have 8 main suspension units which I simplified on the inner side to leaver a nice flat space for a cap-head bolt and have drilled hte outer holes to 2.5mm and cut an M3 thread in so no nut is required on the outside. 35mm long bolts will sit just nicely without cutting.
I will use the spare time to knock up the front idlers and the smaller support wheels on the front end of the tracks.
Then I need to sort out a set of KV1 drive gears and probably 3 KV1 tracks.....though it might be 4. These are looooong tanks.
The wheels will be getting a bit of a clean up, as they have a slight lip where they sat on the printer bed, and I also want to remove the hint of facetting from the 3D mesh. I'll spin them up on the pillar drill with a bit of very fine abrasive. Will have to order the plasticard too ... soon as I find it in the 600mm lengths I am going to need to make the hull lower without joins and the track guards too.
-
blimp
- Sergeant
- Posts: 738
- Joined: Sat Dec 11, 2010 12:29 am
- Location: Watford , NW Londonistan . U.K.
Re: T35 scratch build
Hello Pak36 , evilbay is your friend i.e. http://www.ebay.co.uk/itm/like/32271170 ... 981&crdt=0
to the bouncy room ! Yay !
Re: T35 scratch build
Well..I have waited forever to get my big bag of m3 bolts...but now they are here, I can actually start assermbling my bogey sections.
In the meantime...work is well underway on the front idlers
Still got to sort my spring issue...but that will come
In the meantime...work is well underway on the front idlers
Still got to sort my spring issue...but that will come
