Oh flowers - for me?ALPHA wrote:Scares me how accurate and precise the work is ...with that said...in every step...there is something taught and learned eh KaiserKiaser wrote:Always exceptional work and well organised
ALPHA
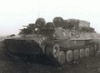
Torro Heavy Metal King Tiger
Re: Torro Heavy Metal King Tiger
Greeting Hotte
IG-Panzerjäger Berlin
HL Tiger I late (ElMod)
Torro Kingtiger (ElMod)
Tamiya Tiger I early (ElMod)
Tamiya Panther G (ElMod)
The thinking is allowed to all people, but many are spared. (Curt Goetz 1888-1960)
IG-Panzerjäger Berlin
HL Tiger I late (ElMod)
Torro Kingtiger (ElMod)
Tamiya Tiger I early (ElMod)
Tamiya Panther G (ElMod)
The thinking is allowed to all people, but many are spared. (Curt Goetz 1888-1960)
Re: Torro Heavy Metal King Tiger
With the gun cradle I've ended last time and at this point it goes on. As I wrote in the last report was the gun cradle easy screwed against the front plate of the turret and with headless screws the gun mantlet locked into the gun cradle.

Now to the gun recoil; the recoil way was at the original King Tiger between 530 and 570 mm, in scale 1:16 then between 33 und 35 mm.
For the recoil mechanics I've used an Aluminum-U-profile of 50 mm length, which was on 40 mm lengthwise slotted and with a file reworked.

The follower and also simultaneous slide shoe I've build from round brass, in the middle the bracket for the gun tube, at both sides a drilling with M3 threads – here was two brass pins screwed in which will be also a lead. Above was soldered the starting point for the recoil lever of the servo.

Thereafter I've built from Aluminum-profiles and polystyrene plates a part, which will receive the recoil unit and simultaneously also in side and height locked.


At the left and right side was little Aluminum angles screwed as brackets for the servos and the whole was then screwed at the gun cradle. Important was for me, that the complete unit keeps dismountable.

Thereafter followed mounting of the servo for gun recoil…

…and then the servo for gun elevation.

The starting point for the elevation linkage was built from a piece of brass U-profile…

…and has been screwed easy at the turret roof.


And by the way was also the gun mantlet yet adjusted slightly; the rear, formerly screwed ring was now glued.

The gun mantlet received at each side a cast seam…

…and all in all a cast structure with Mr. Surfacer 500.

Here now the maximum possible elevation angles, the positive…

…and the negative.

Also the muzzle break has been slightly adjusted - for a comparison; the original…

…and adjusted.

Continued in the next part…
Now to the gun recoil; the recoil way was at the original King Tiger between 530 and 570 mm, in scale 1:16 then between 33 und 35 mm.
For the recoil mechanics I've used an Aluminum-U-profile of 50 mm length, which was on 40 mm lengthwise slotted and with a file reworked.
The follower and also simultaneous slide shoe I've build from round brass, in the middle the bracket for the gun tube, at both sides a drilling with M3 threads – here was two brass pins screwed in which will be also a lead. Above was soldered the starting point for the recoil lever of the servo.
Thereafter I've built from Aluminum-profiles and polystyrene plates a part, which will receive the recoil unit and simultaneously also in side and height locked.
At the left and right side was little Aluminum angles screwed as brackets for the servos and the whole was then screwed at the gun cradle. Important was for me, that the complete unit keeps dismountable.
Thereafter followed mounting of the servo for gun recoil…
…and then the servo for gun elevation.
The starting point for the elevation linkage was built from a piece of brass U-profile…
…and has been screwed easy at the turret roof.
And by the way was also the gun mantlet yet adjusted slightly; the rear, formerly screwed ring was now glued.
The gun mantlet received at each side a cast seam…
…and all in all a cast structure with Mr. Surfacer 500.
Here now the maximum possible elevation angles, the positive…
…and the negative.
Also the muzzle break has been slightly adjusted - for a comparison; the original…
…and adjusted.
Continued in the next part…
Greeting Hotte
IG-Panzerjäger Berlin
HL Tiger I late (ElMod)
Torro Kingtiger (ElMod)
Tamiya Tiger I early (ElMod)
Tamiya Panther G (ElMod)
The thinking is allowed to all people, but many are spared. (Curt Goetz 1888-1960)
IG-Panzerjäger Berlin
HL Tiger I late (ElMod)
Torro Kingtiger (ElMod)
Tamiya Tiger I early (ElMod)
Tamiya Panther G (ElMod)
The thinking is allowed to all people, but many are spared. (Curt Goetz 1888-1960)
Re: Torro Heavy Metal King Tiger
Yes indeed Hotte...all well deserved toohotte8487 wrote:Oh flowers - for me?ALPHA wrote:Scares me how accurate and precise the work is ...with that said...in every step...there is something taught and learned eh KaiserKiaser wrote:Always exceptional work and well organised
ALPHA
ALPHA
Re: Torro Heavy Metal King Tiger
I’ve ended in my last report with gun mantlet and muzzle brake - at least to the gun mantlet I will come back later for a few details. But first it will go on with the driving ring for the slip ring. This one received at this time additionally a cutout at the front for the recoil unit.

Then was centrally a hole for the slip ring drilled...

…and thereafter was the driving ring mounted into the rotation ring, here a view from inside...

…and here from below.

The slip ring himself finds his place, here again a view from inside...

…and here from below. Therewith the slip ring not excessively protrudes into the turret; I've used an approximately 1 cm thick adapter plate of aluminum in-between. At the bottom side were used countersunk screws so that no cable while endless turret rotating hooked behind somewhere and then tears off.

Now again to the gun mantlet. Throughout the whole production period received the Kingtiger with Henschel turret a couple of changes. Many pictures demonstrate this, but the gun mantlet remained unchanged.
As here to see has Torro's gun mantlet two stages,...

…but the original mantlet only one.

Therefore was the gun mantlet again reworked; the rear stage was closed with putty, then sanded and finally again with Mr. Surfacer treated.


At the same time I've concerned me around a few other details; these all at the rear side of the gun mantlet. A photo from this detail in original...

My gun mantlet was at the rear side completely hollow, only the external form was reproduced. For that I've cut a little piece of polystyrene and glued into gun mantlet. From this point was then filled up with Apoxie Sculpt and simultaneously half round rough formed.


Then followed again sanding…

…and received at the rear side also an undercoat with Mr. Surfacer.


And here the whole now in mounted condition…


At this time I'm noticed another detail; Torro has attempted to represent the wiring at the nuts of the mantlet, but this was not good detailed.

Therefore was then the coined wiring removed, through the nuts drilled and with thin stranded wire twisted; finally again finished with a coat of Mr. Surfacer.


The turret receive still more changes, but for today is this all.
Then was centrally a hole for the slip ring drilled...
…and thereafter was the driving ring mounted into the rotation ring, here a view from inside...
…and here from below.
The slip ring himself finds his place, here again a view from inside...
…and here from below. Therewith the slip ring not excessively protrudes into the turret; I've used an approximately 1 cm thick adapter plate of aluminum in-between. At the bottom side were used countersunk screws so that no cable while endless turret rotating hooked behind somewhere and then tears off.
Now again to the gun mantlet. Throughout the whole production period received the Kingtiger with Henschel turret a couple of changes. Many pictures demonstrate this, but the gun mantlet remained unchanged.
As here to see has Torro's gun mantlet two stages,...
…but the original mantlet only one.
Therefore was the gun mantlet again reworked; the rear stage was closed with putty, then sanded and finally again with Mr. Surfacer treated.
At the same time I've concerned me around a few other details; these all at the rear side of the gun mantlet. A photo from this detail in original...
My gun mantlet was at the rear side completely hollow, only the external form was reproduced. For that I've cut a little piece of polystyrene and glued into gun mantlet. From this point was then filled up with Apoxie Sculpt and simultaneously half round rough formed.
Then followed again sanding…
…and received at the rear side also an undercoat with Mr. Surfacer.
And here the whole now in mounted condition…
At this time I'm noticed another detail; Torro has attempted to represent the wiring at the nuts of the mantlet, but this was not good detailed.
Therefore was then the coined wiring removed, through the nuts drilled and with thin stranded wire twisted; finally again finished with a coat of Mr. Surfacer.
The turret receive still more changes, but for today is this all.
Greeting Hotte
IG-Panzerjäger Berlin
HL Tiger I late (ElMod)
Torro Kingtiger (ElMod)
Tamiya Tiger I early (ElMod)
Tamiya Panther G (ElMod)
The thinking is allowed to all people, but many are spared. (Curt Goetz 1888-1960)
IG-Panzerjäger Berlin
HL Tiger I late (ElMod)
Torro Kingtiger (ElMod)
Tamiya Tiger I early (ElMod)
Tamiya Panther G (ElMod)
The thinking is allowed to all people, but many are spared. (Curt Goetz 1888-1960)
Re: Torro Heavy Metal King Tiger
Many Kingtiger models will be shown like their big role models with lack side fenders or without side fenders. At Tamiya's King Tiger is this option available; Torro doesn't provide this option. If you will nevertheless display this option, you have to make your own construction. I will now do something more.
At the beginning I've cut only the front fenders; this to receive a good base to measure.

If you cut off the side fenders you will receive a little gap in the sidewall; the size of this gap was measured. Also the track cover plate has to be cut for the thickness of the original side fenders. The lateral angle has to be maintained.

For both insides I've cut reinforcements from a 1 mm thick polystyrene plate and for each side a stripe from 2 mm thick polystyrene to fill the gap in the sidewalls. Simultaneously were the side fenders cut off until to the height of the sidewall.

Fitting…


At the front plate were the rest of the front fenders sanded.


As announced, also the track cover plate has to be cut off; for that I've built me a template from two aluminum angles.

The template was screwed through the track cover plate; due to the offset was given the length and the angle for cut off. I’ve used a sharp scalpel and after that was the cutline sanded.

Now was the Kingtiger ready for cut off the rest of the side skirts.

From the side looks that than so…

…and so from top.

The bead was after that sanded down, here a view at the left side…

…and here at the right side.

It goes on soon.
At the beginning I've cut only the front fenders; this to receive a good base to measure.
If you cut off the side fenders you will receive a little gap in the sidewall; the size of this gap was measured. Also the track cover plate has to be cut for the thickness of the original side fenders. The lateral angle has to be maintained.
For both insides I've cut reinforcements from a 1 mm thick polystyrene plate and for each side a stripe from 2 mm thick polystyrene to fill the gap in the sidewalls. Simultaneously were the side fenders cut off until to the height of the sidewall.
Fitting…
At the front plate were the rest of the front fenders sanded.
As announced, also the track cover plate has to be cut off; for that I've built me a template from two aluminum angles.
The template was screwed through the track cover plate; due to the offset was given the length and the angle for cut off. I’ve used a sharp scalpel and after that was the cutline sanded.
Now was the Kingtiger ready for cut off the rest of the side skirts.
From the side looks that than so…
…and so from top.
The bead was after that sanded down, here a view at the left side…
…and here at the right side.
It goes on soon.
Greeting Hotte
IG-Panzerjäger Berlin
HL Tiger I late (ElMod)
Torro Kingtiger (ElMod)
Tamiya Tiger I early (ElMod)
Tamiya Panther G (ElMod)
The thinking is allowed to all people, but many are spared. (Curt Goetz 1888-1960)
IG-Panzerjäger Berlin
HL Tiger I late (ElMod)
Torro Kingtiger (ElMod)
Tamiya Tiger I early (ElMod)
Tamiya Panther G (ElMod)
The thinking is allowed to all people, but many are spared. (Curt Goetz 1888-1960)
-
billpe
- Warrant Officer 2nd Class
- Posts: 1144
- Joined: Tue Jan 29, 2013 1:59 pm
- Location: The bowels of Kent
Re: Torro Heavy Metal King Tiger
Looking good.
Just so you're aware, the only difference between the mantlets you see on king Tigers is the amount of grinding done on them in the factory. Earlier ones were turned on a giant lathe, which was a total waste of time.
Just so you're aware, the only difference between the mantlets you see on king Tigers is the amount of grinding done on them in the factory. Earlier ones were turned on a giant lathe, which was a total waste of time.

Re: Torro Heavy Metal King Tiger
Really nice work and very scale looking. Turret mod spot on 
Re: Torro Heavy Metal King Tiger
Thanks for the kind words - now we continue with the report. 
Greeting Hotte
IG-Panzerjäger Berlin
HL Tiger I late (ElMod)
Torro Kingtiger (ElMod)
Tamiya Tiger I early (ElMod)
Tamiya Panther G (ElMod)
The thinking is allowed to all people, but many are spared. (Curt Goetz 1888-1960)
IG-Panzerjäger Berlin
HL Tiger I late (ElMod)
Torro Kingtiger (ElMod)
Tamiya Tiger I early (ElMod)
Tamiya Panther G (ElMod)
The thinking is allowed to all people, but many are spared. (Curt Goetz 1888-1960)
Re: Torro Heavy Metal King Tiger
After this preparations I glued the side parts and the internally reinforcements.

And, if you have enough ferrules, you can glue both sides at the same time.

After gluing it looks like this…


During a fitting of upper and lower hull I noted that there was a gap between track cover plates and the bug plate; so I’ve decided to close this with a stripe polystyrene.

Simultaneously I've built in a kind of a strut bar; so that my track cover plate is in a horizontally location. Good to see are the extensions at the track cover plates; with sand paper have they received their final form.

At the following trial fitting looks this much better.


The complete side plates were sanded until they received a level surface; the casting antenna tube was removed.

After that I’ve to close the small slits in the side walls behind the rear plate.


At bottom fits all parts very good; here a view from right…

…and here from left.

It goes further in the next part.
And, if you have enough ferrules, you can glue both sides at the same time.
After gluing it looks like this…
During a fitting of upper and lower hull I noted that there was a gap between track cover plates and the bug plate; so I’ve decided to close this with a stripe polystyrene.
Simultaneously I've built in a kind of a strut bar; so that my track cover plate is in a horizontally location. Good to see are the extensions at the track cover plates; with sand paper have they received their final form.
At the following trial fitting looks this much better.
The complete side plates were sanded until they received a level surface; the casting antenna tube was removed.
After that I’ve to close the small slits in the side walls behind the rear plate.
At bottom fits all parts very good; here a view from right…
…and here from left.
It goes further in the next part.
Greeting Hotte
IG-Panzerjäger Berlin
HL Tiger I late (ElMod)
Torro Kingtiger (ElMod)
Tamiya Tiger I early (ElMod)
Tamiya Panther G (ElMod)
The thinking is allowed to all people, but many are spared. (Curt Goetz 1888-1960)
IG-Panzerjäger Berlin
HL Tiger I late (ElMod)
Torro Kingtiger (ElMod)
Tamiya Tiger I early (ElMod)
Tamiya Panther G (ElMod)
The thinking is allowed to all people, but many are spared. (Curt Goetz 1888-1960)
Re: Torro Heavy Metal King Tiger
With closing the slits in the side walls it goes on.

Here from the inside. As next I’ve decided me to build in reinforcement between upper hull roof and side plates; these was customized from polystyrene plates.


Already cut out…

…drilled; with a bolt screwed together and after that together reworked.

The reworked single parts…

…and here are the finished parts already with a built-in Neodymium-magnet. The big holes are later good to use as cable feedthrough.

The mounting in the upper hull…

…and here the counterpart for that at the track cover plate.

Again follows a fitting – all parts matched very well together; the complete upper hull is now very stable.


And it goes on – next time…
Here from the inside. As next I’ve decided me to build in reinforcement between upper hull roof and side plates; these was customized from polystyrene plates.
Already cut out…
…drilled; with a bolt screwed together and after that together reworked.
The reworked single parts…
…and here are the finished parts already with a built-in Neodymium-magnet. The big holes are later good to use as cable feedthrough.
The mounting in the upper hull…
…and here the counterpart for that at the track cover plate.
Again follows a fitting – all parts matched very well together; the complete upper hull is now very stable.
And it goes on – next time…
Greeting Hotte
IG-Panzerjäger Berlin
HL Tiger I late (ElMod)
Torro Kingtiger (ElMod)
Tamiya Tiger I early (ElMod)
Tamiya Panther G (ElMod)
The thinking is allowed to all people, but many are spared. (Curt Goetz 1888-1960)
IG-Panzerjäger Berlin
HL Tiger I late (ElMod)
Torro Kingtiger (ElMod)
Tamiya Tiger I early (ElMod)
Tamiya Panther G (ElMod)
The thinking is allowed to all people, but many are spared. (Curt Goetz 1888-1960)
