There is something that the 3D printer industry barely mentions when describing their printers.
Sure you can see all of the demo's, things being printed etc, but the part that they do not show you is creating something to print. Many of the items are downloaded off the web, rather than designed by the person who has a printer.
This is where it gets complicated. The drawing has to be a 3d one, rather than a 2d 'flat' one, eg blueprints. The only way I can describe the process is to say that if it was an inkjet printer, there is no button to press that will produce 'War & Peace - Part 2'. The file has to be created before anything can be printed.
The drawing is done in 3d.
Another program slices that drawing into 'layers'. This is because that is how a 3d printer, prints. Same as an inkjet printer, but that only prints one layer. After each layer on a 3d printer the print head raises and then it prints the next layer, or slice.
There are additional complications as not everything can be printed as a one piece item. Overhangs on the item need supports, the printer cannot drop a layer in mid-air. On top of that most printers are pretty much limited to a 20cm x 20cm size. So, if someone came up with the 3d drawings for say a tank, that would have to be split down into component parts in order that it could be printed 'and' produce decent quality output.
The next thing is print speed. Even a very small 2cm item will take probably 30 mins to print. Printing the components to make a tank would probably be an overnight job on a domestic 3d printer.
Domestic scanners are pretty poor according to web reviews, and that leaves getting a part scanned commercially. The best bet would be to produce the 3d drawings and send them to an industrial scale 3d printing company (there are several online) and pay for them to be printed in ABS, metal or whatever.
The best way to look at a 3d printer is to test that the drawings are good to print prior to sending them to a commercial printer, making one off items, or prototypes. The time it takes to produce decent 3d plans is considerable, and you can add to that the time it takes to learn how to use the software?
To be honest my advice to anyone thinking of 3d printing is to get hold of some design software, and see what you can design using it. If anyone can't pass that stage then the 3d printer itself will very soon become an ornament.
The 3D Printer Thread
-
wibblywobbly

- Major
- Posts: 6396
- Joined: Fri Oct 17, 2008 9:30 am
- Location: South Wales Valley
- Contact:
Re: The 3D Printer Thread
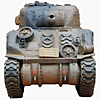
Tiger 1 Late
Panther G
King Tiger
M36 B1
Panther G
King Tiger
M36 B1
Re: The 3D Printer Thread
Swamprat33 wrote:Hi all, I guess this is something for WOZ in particular.
I also do 28mm WW2 wargaming and for this I use 1/56 scale armour.
I am wanting to 'make' a Crusader 111 AA tank. The tank hull is available, and i have one on order.
I was planning on scratch building the AA turret which houses 2 x 20mm cannon.
I have a set of plans and it looks fairly straight forward but i'm now wondering if someone could knock one out on a 3d printer.
Is it Possible to make one from scaled plans, or easier to replicate an existing part.
Can you also say, scan a 1/72 scaled item and then increase size to 1/56 and then print?
I am aware of some aspects of 3d printing and would love to understand better, but not sure if i can justify the expense and time needed for another toy.
Your advice would be much appreciated.
Cheers
Tim
There's already plenty of tanks out there, check out this guys work
http://www.thingiverse.com/thing:232248
http://www.thingiverse.com/thing:310476
http://www.thingiverse.com/thing:539511
They're in 1/200 but it'd be easy to rescale them.
Also do a search for "tank" on thingverse, some amazing stuff up there already. Unfortunately most aren't printable, but they make a good base to start from. There's a highly detailed PZIV thats about 1/6 scale.

Re: The 3D Printer Thread
Hi Guys,
One of the major factors in my being able to build my First World War Tank, was first finding a Laser Cutting Firm that would put up with me, then my Brother purchasing a MakerBot 3D Printer. The Printer has been invaluable in enabling me to make parts I would simply not been able to left to my own abilities. It has also given me the confidence to 'Have a Go' and print parts off multiple times, tweaking the design each time as I go.
Two years ago I only used my CAD Program for 2D Drawings, now I don't even give it a thought about having a go at making parts in 3D. It is simply a case of picking a program and being prepared to take the time to get comfortable with whatever program you go for.
As has been pointed out, one of the issues with printing is often deciding how to break the object into a printable final product. Again this is often just a case of trial and error. After a while you get to a point were it just becomes second nature to how a part is going to need to be printed.
I have attached some photos of the Track for my 1/6 Scale Tank that show just how many changes I went through and the different ways of approaching the same subject.
In the case of my Tack Links, after finally getting the design to a point were I was happy i then had the part Powder Printed (The Blue Link) by an Online Firm before getting it cast in aluminium.
Helen x
- Attachments
-
- DSCF7370.jpg (35.48 KiB) Viewed 1553 times
-
- Old & New Track Link 1.jpg (23.34 KiB) Viewed 1553 times
-
- DSCF5486.jpg (53.94 KiB) Viewed 1553 times
-
- DSCF5485.jpg (30.25 KiB) Viewed 1553 times
-
- DSCF5229.jpg (37 KiB) Viewed 1553 times
-
- DSCF5053.jpg (24.33 KiB) Viewed 1553 times
-
- DSCF5051.jpg (25.84 KiB) Viewed 1553 times
-
- DSCF5049.jpg (28.08 KiB) Viewed 1553 times
-
wibblywobbly
- Major
- Posts: 6396
- Joined: Fri Oct 17, 2008 9:30 am
- Location: South Wales Valley
- Contact:
Re: The 3D Printer Thread
Top job on those track links, my brother uses CAD in his company, so I am hoping that he will be able to free up some time to show me the ropes. If I can master that then I will be over the moon. Interesting that you had the links made in alloy, it opens up a whole host of options for getting unique track designs done for those tanks that they aren't made for.
The box of bits that will become my printer is due for delivery today, and once it is up and running my first objective will be to create detail parts for my existing vehicles that I can't buy anywhere and that are too small to make from styrene accurately. I am just hoping/praying that it all goes together smoothly.
RobG
Tiger 1 Late
Panther G
King Tiger
M36 B1
Panther G
King Tiger
M36 B1
-
Swamprat33

- Lance Corporal
- Posts: 241
- Joined: Wed Aug 29, 2012 10:48 pm
- Location: Milton Keynes Area
Re: The 3D Printer Thread
To be quite honest at this time, i think i will do the old fashioned and traditional thing and create the turret out of plastic card & milliput.
I am only wanting one tank turret and i am happy to spend a couple of evenings actually making something physical that i can touch and curse if and when i get it wrong.
I have plans, a 15mm (1/100) model and plenty of photos as well as the 1/56 tank hull to mate it to so should not be too complicated.
The more i read about the 3d printers, the more i feel that i should be put into hibernation and then see what happens over the next 10 years.
I certainly wont splash a pile of cash on one soon as the definition is just not there for fine detail yet.
I will still follow the threads on 3d printing with interest though.
Cheers
Tim
1/6 Armortek Panther ausf.G
1/6 Armortek Panzer III ausf.J
1/6 Type 82 Funkwagen
1/6 Sdkfz 250/9
1/6 Sdkfz 2 Kettenkrad
1/6 Armortek Panzer III ausf.J
1/6 Type 82 Funkwagen
1/6 Sdkfz 250/9
1/6 Sdkfz 2 Kettenkrad
Re: The 3D Printer Thread
Love the WWI tank.
I decided to have a go at printing one of the 1/200 tanks out (this is it minus the supports but before any clean up.) It's 30mm long.

This was done at quite a fast speed at 0.1mm* layers (with a 0.4mm nozzle) and I think it's not bad considering I haven't set up my printer for fine detail. Someone managed to get my model of printer to print 0.02mm layers and with a 0.2mm nozzle the level of detail that that can already be achieved is incredible (if you're prepared to spend a bit of time calibrating it all up).
The only down side is the amount of time printing takes. The Cromwell in the pic took 40 mins to print. At 0.02mm it'd take about 5 times that, so 3hrs 40. Add a 0.2mm nozzle you're looking at 7hrs and remember that I printed it at a fast speed (60mm/s) for detail you need to drop it down to about 20mm/s so now you're looking at around 21 hours for a super detailed 1/200 scale tank. The more expensive SLA printers take just as long.
Mind you once it starts printing you can be doing other things (designing the next part) and you can print out as many copies as you like.
*0.1mm is about the thickness of a piece of printer paper.
I decided to have a go at printing one of the 1/200 tanks out (this is it minus the supports but before any clean up.) It's 30mm long.
This was done at quite a fast speed at 0.1mm* layers (with a 0.4mm nozzle) and I think it's not bad considering I haven't set up my printer for fine detail. Someone managed to get my model of printer to print 0.02mm layers and with a 0.2mm nozzle the level of detail that that can already be achieved is incredible (if you're prepared to spend a bit of time calibrating it all up).
The only down side is the amount of time printing takes. The Cromwell in the pic took 40 mins to print. At 0.02mm it'd take about 5 times that, so 3hrs 40. Add a 0.2mm nozzle you're looking at 7hrs and remember that I printed it at a fast speed (60mm/s) for detail you need to drop it down to about 20mm/s so now you're looking at around 21 hours for a super detailed 1/200 scale tank. The more expensive SLA printers take just as long.
Mind you once it starts printing you can be doing other things (designing the next part) and you can print out as many copies as you like.
*0.1mm is about the thickness of a piece of printer paper.
Re: The 3D Printer Thread
Given they've come from laser cured resin in the mid-late 90's to something that uses a spool of cable at a nearly affordable price I think in another few years they'll be really good with plastic. I know a company that can print metal chain mail (4mm links) so it's amazing how far they've come.
I work with simulation software and we're seeing:
design -> simulation -> redesign/optimise -> build it -> use (F1 teams) or commissioning tests -> end user
I work with simulation software and we're seeing:
design -> simulation -> redesign/optimise -> build it -> use (F1 teams) or commissioning tests -> end user
-
wibblywobbly
- Major
- Posts: 6396
- Joined: Fri Oct 17, 2008 9:30 am
- Location: South Wales Valley
- Contact:
Re: The 3D Printer Thread
Just to say that I have spent the last few days assembling my Smartrap printer.
Bear in mind that I have never been near a 3D printer in my life, I was a bit apprehensive about it but figured that if I bought a kit then I would learn a bit more about them during assembly.
Ok, what did I buy?
http://www.ebay.co.uk/itm/New-3D-Printe ... 35e575c2cd
Was it a wise choice?
A surprisingly small box arrived, which I opened to reveal a whole load of boxed bits and pieces. I laid them all out and then went to the build manual.
http://build3dparts.com/wp/?page_id=55
I decided to time myself, and it was 12 hours to build the hardware. This could have been shorter, but I decided to tap all M3 holes with M3 thread, just to ensure that everything locked together solidly.
The electrics took another 5 hours. The reason being that the plugs are mini Dupont connectors (same as servo plugs) and they have to be crimped and assembled. Without the specific crimping tool this is a nightmare of a job. I would recommend to anyone that they get the plugs done as part of the package, though I did save myself £50 doing it with needlenose pliers.
The wiring is quite simple, though I spoke to the guy that designed it and pointed out that the Ramps board has the servo pins in a different order to RC kit, he has now updated his Servo Z instructions. He has been extremely helpful during the build, and taken on board a couple of suggestions (the self levelling setup isn't mentioned in the build manual).
Once it was all built, I needed to flash the Arduino board with his modified firmware. That was simple, instructions are on the web.
This takes care of all of the calibration etc, so no need to spend weeks pulling hair out doing it myself.
Once the self levelling had been set up it means that the bed self levels before every print, it is the levelling that messes up a lot of 3D printing.
Getting the filament feed to operate at the required speed was a small matter of trial and error, as was the print head temp, but yet again very easy to do during test runs.
What I had to download:
Marlin Firmware flash upgrade for Arduino.
Pronterface printing software (this has Slicr embedded).
Along the way I was stumbling over bad connections, so had to isolate them and resolve them. I ended up pulling the pins out of the plugs, heatshrinking the ends and then plugging individual pins onto the board. It was way more secure and 100% connections.
Once I had understood what the guy was telling me about Z offsets etc, and figured out how to store settings for every print run, I was good to go.
I have done my first print with everything set up as it should be, and I was mightily impressed. Basically straight out of the box it printed perfect rectangles with perfectly round and very small holes in there, perfectly smooth sides, and verticals all true.
I honestly thought that it was all going to be way more complex than it was, but it really was a straightforward build. Probably comparable to building a Tamiya RC tank?
It didn't cost the earth, and as it is a Reprap, it means that if there are any upgrades I can download them and print them for free. If anything breaks or wears out, I can just buy the component from any of the suppliers.
What does this printer have?
An LCD screen with SD card support. It allows me to put an SDCard with the files on it into the LCD housing and print without needing a pc connected at all.
Self levelling bed. Not many have this, and it is the key to quality printing.
USB connection to PC.
Power supply included.
Prints PLA - No need for a heated bed.
Best way to print:
Mix up a teaspoon of sugar and water in an eggcup. Stick it in the microwave for 20 secs. Stir and store.
Prior to printing, pour a small puddle onto glass. Spread around with sponge and leave to dry. It leaves a tacky surface.
Print, and the first layer sticks perfectly to it.
When printing is complete the part comes away with minimal pressure, or run the glass under a tap, it melts the sugar mix and releases the part from the bed.
Cleaning the glass - Acetone or wipe it with airbrush cleaner and it removes every mark, all ready for the next print.
All in all I am pleased with what I bought, the build experience, what I have been learning along the way. and the quality of the printing. There is a wealth of free info on the Reprap forum, as well as all over the web, so the solution to every problem is never far away.
Cheers
RobG
Tiger 1 Late
Panther G
King Tiger
M36 B1
Panther G
King Tiger
M36 B1
Re: The 3D Printer Thread
Nice, now there's going to be no stopping you.
