LCM6 Build

This section is for all of you who want to talk about RC boats, warships etc.
Post Reply
User avatar
AlwynTurner
2nd Lieutenant
Posts: 2654
Joined: Thu Oct 23, 2014 10:47 am
Location: Chapel-en-le-Frith, Derbyshire

LCM6 Build

Post by AlwynTurner »

Following my experience of building my LCVP, and with the idea that I might in the future aspire to getting a Sherman tank, I decided initially to build an LCM3. This was initially inspired by Crispy with his LCM3 and comments from Panther Ausf G. After subsequent discussion with Panther Ausf G and much advice, encouragement and support from him I changed my mind and opted for an LCM6. After all it's just an extra 4 1/2 inches of extra plywood!.

Anyway I acquired some offcuts of 4mm ply from my friendly DIY shop and after prototyping in cardboard as demonstrated by Crispy, I proceeded to the build.

Anyway this has progressed and the hull is now coming along nicely. Here are a few pic:
Sides and centre base installed along with many of the ribs
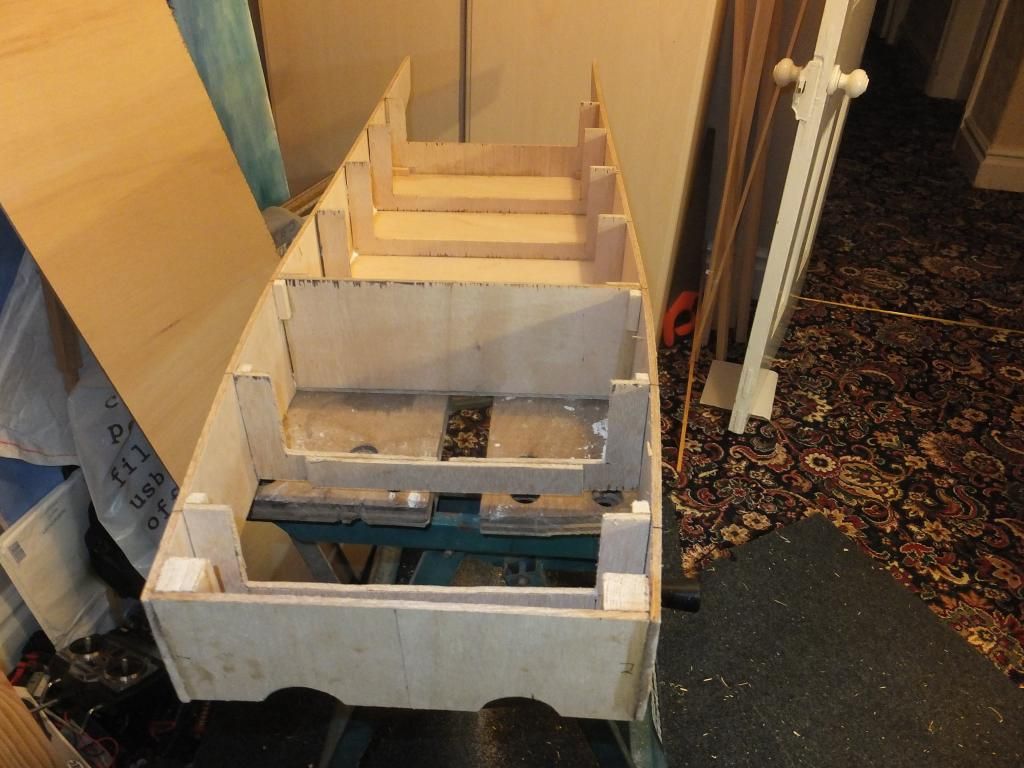
Image
Bow and stern lower hull installed and prop tunnels started. Much help and advice here from Panther Ausf G without which this would have been a disaster build! - Many thanks
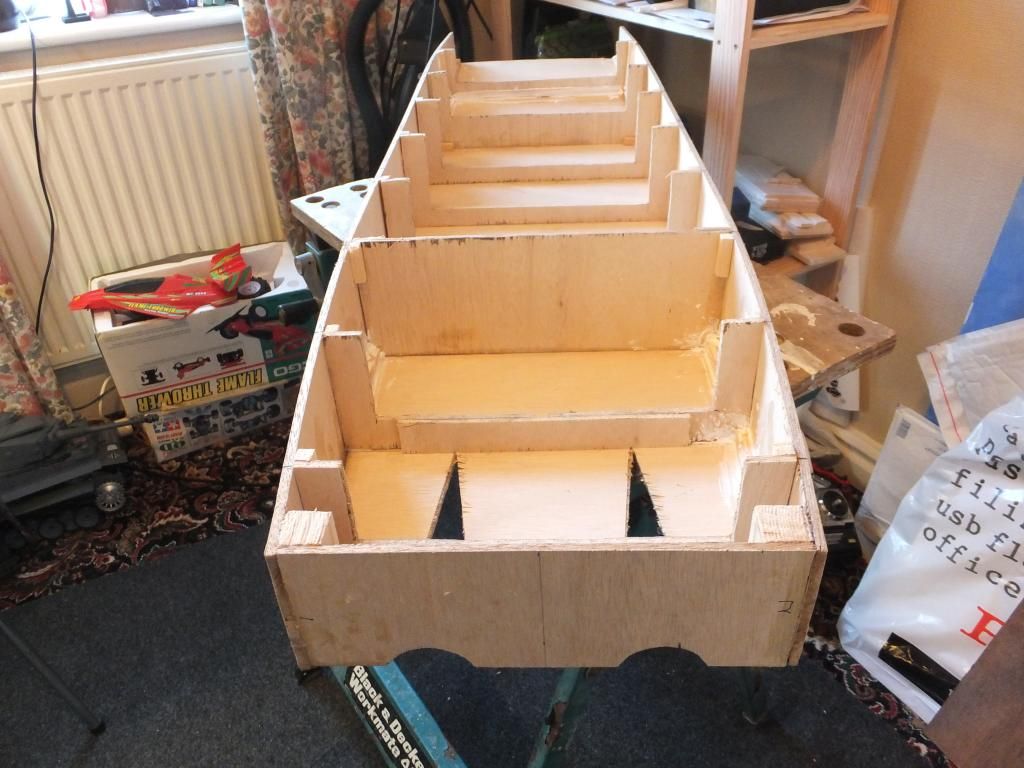
Image
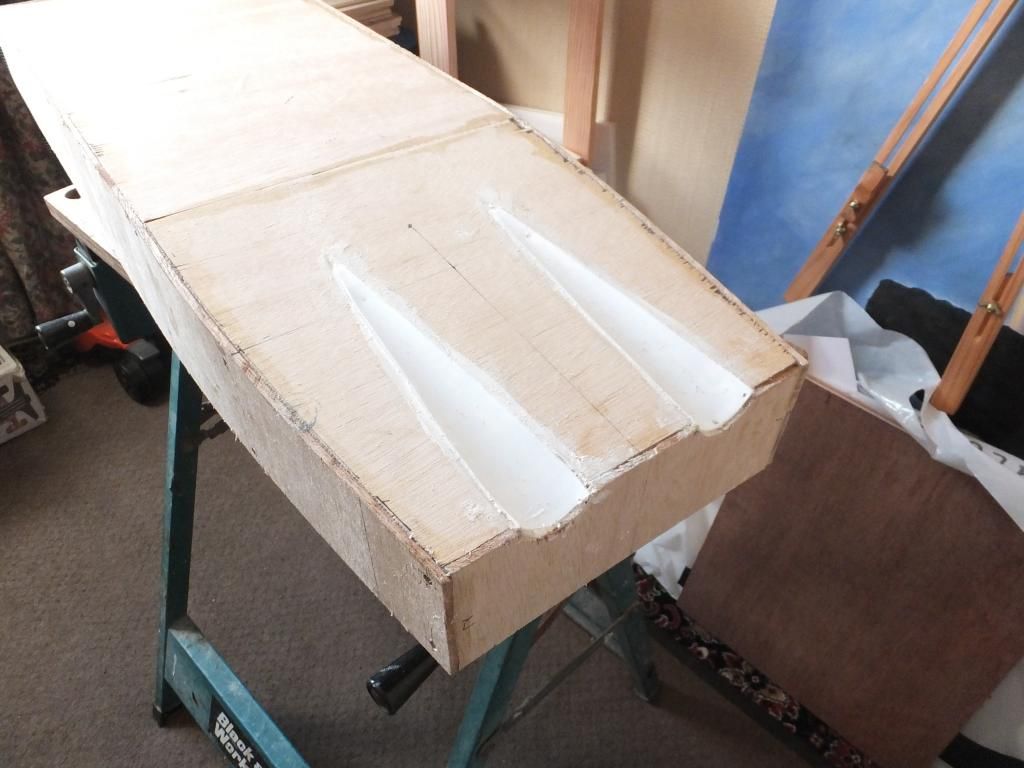
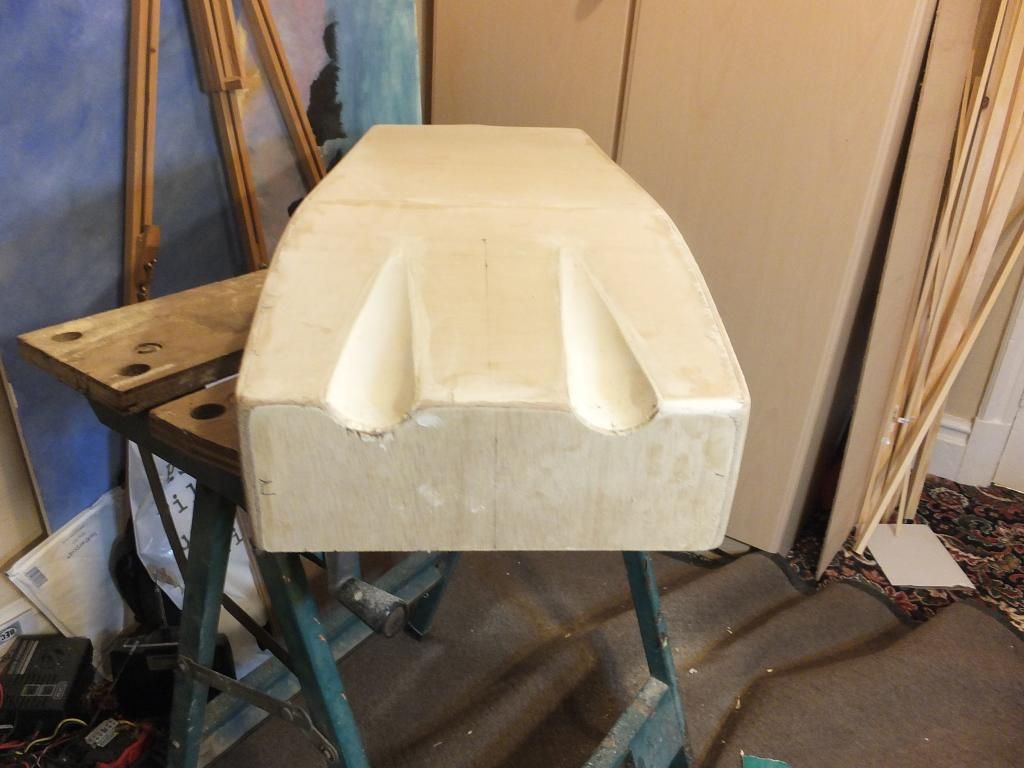
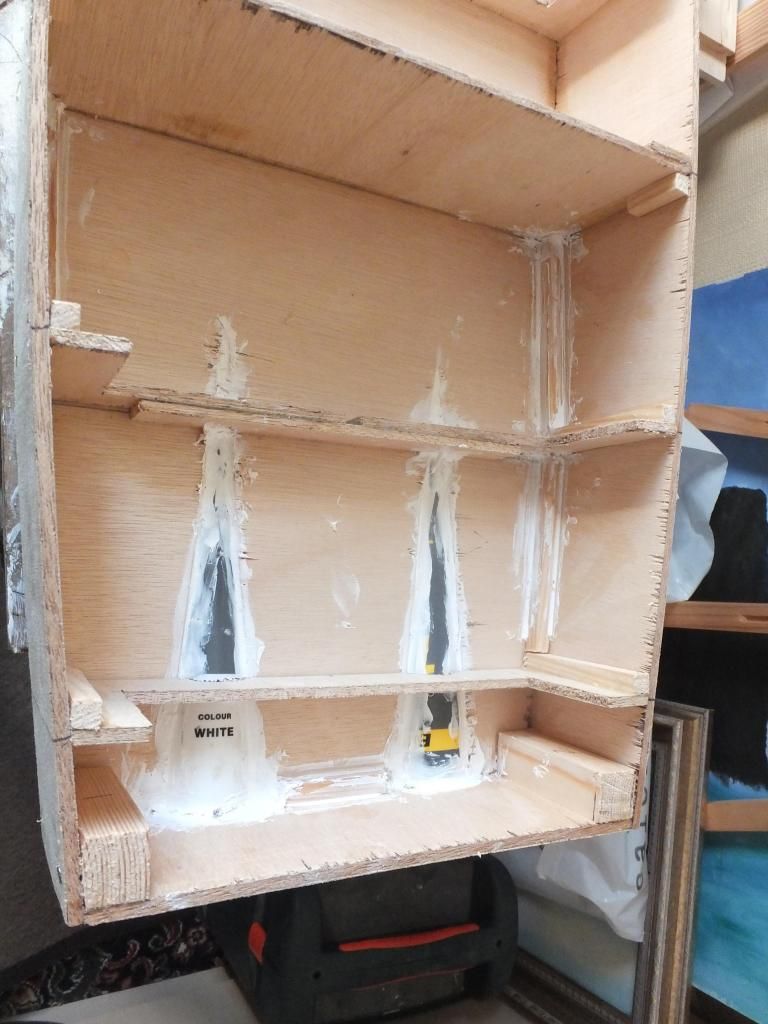
Prop tunnels installed - I cut these from an old silicone tube - although they are a bit flimsy and will need strengthening with epoxy/fibrglass before installing rudders and props
Image
Image
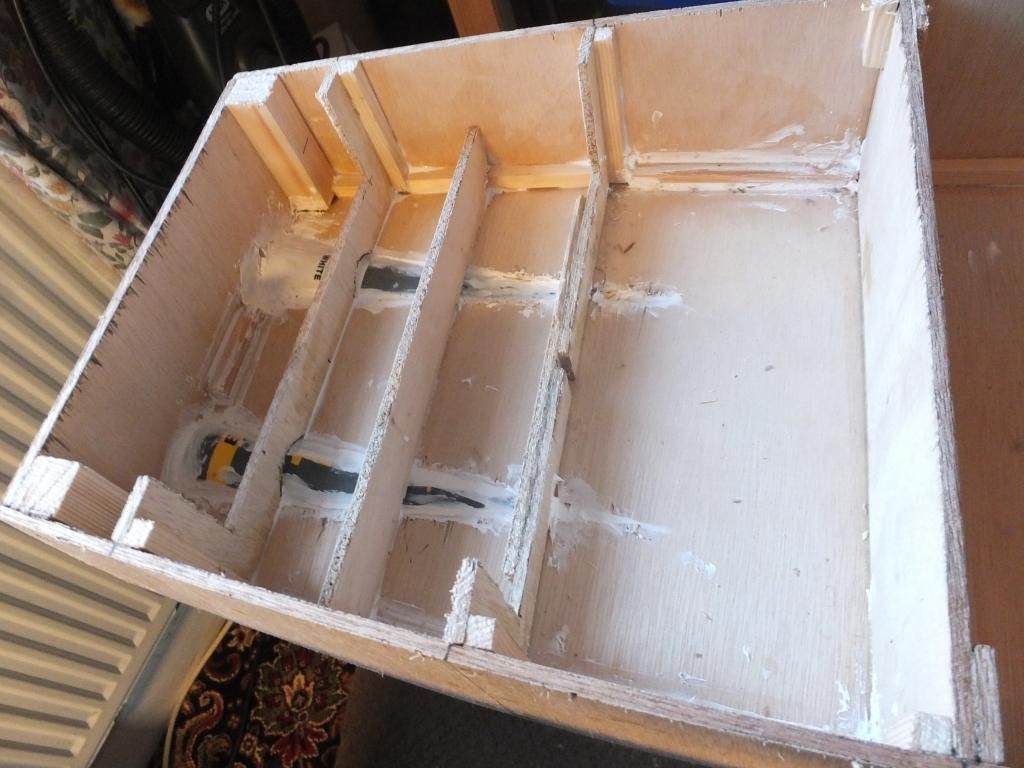
Stern reinforced so that epoxy and reinforcing frames will provide a firm structure for the rudders and props
Image
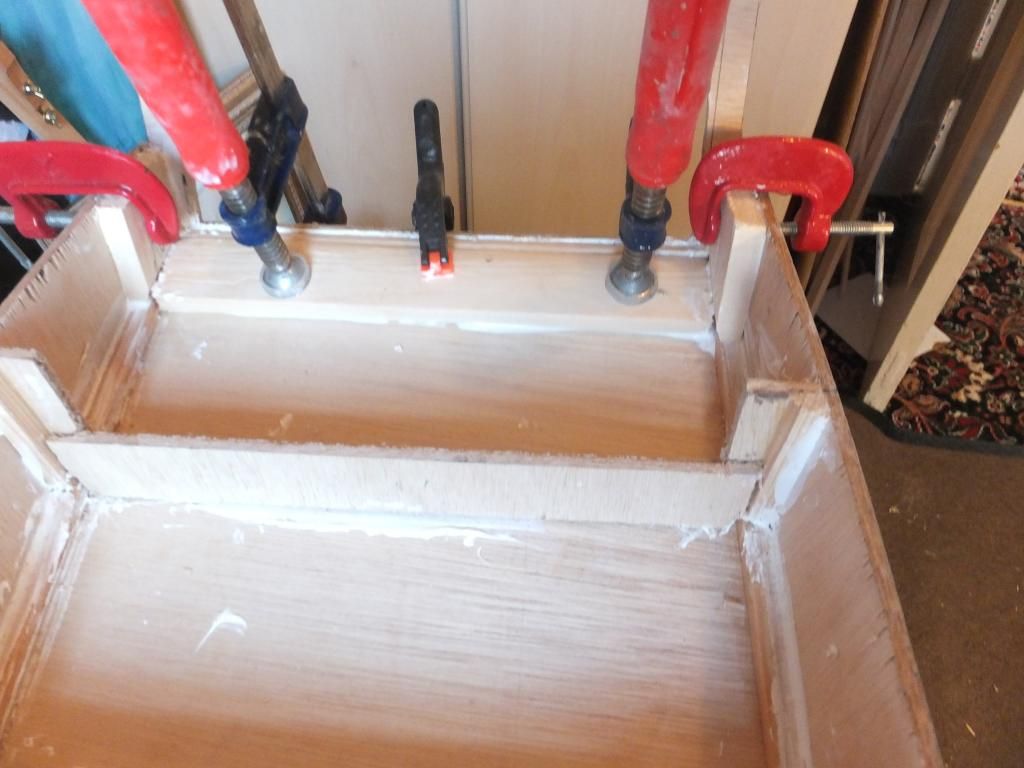
Bow reinforced to be able to support ramp hinges
Image
One lesson learned so far on the build was that the offcut 4mm ply I bought so cheaply has given many headaches as it delaminates at the drop of a hat and isn't terribly strong, so much reinforcing of joints required (probably not a bad thing!).
YOU'RE NEVER TOO OLD TO HAVE A HAPPY CHILDHOOD!

Saladin scratchbuild, Matilda scratchbuild, Churchill scratchbuild, Crusader scratchbuild, M10 Achiĺles scratchbuild, Universal Carrier scratchbuild
ALPHA
Major-General
Posts: 10960
Joined: Thu Oct 03, 2013 1:06 am

Re: LCM6 Build

Post by ALPHA »

Cool build Alwyn :thumbup: ...careful of that plywood...the way they make that stuff nowdays is sketchy at best ...a few coats of thinned out resin (mid to hot mix) should help repel the nasties... ;)

You going to document the whole build?

ALPHA
User avatar
AlwynTurner
2nd Lieutenant
Posts: 2654
Joined: Thu Oct 23, 2014 10:47 am
Location: Chapel-en-le-Frith, Derbyshire

Re: LCM6 Build

Post by AlwynTurner »

Hi Alpha, yes I thought I would, mistakes and all. It could help anyone else thinking of building one. I plan on fibreglassing the entire hull when it's sanded and filled, that way it should mean no leaks. There will also be plenty of expanded polystyrene wherever there is stowage space. Thinking of calling it Titanic :-). Also will welcome advice and suggestions along the way.
Panther Ausf G is corresponding constantly with helpful tips and advice as he has mucho experience and has built these before.
YOU'RE NEVER TOO OLD TO HAVE A HAPPY CHILDHOOD!

Saladin scratchbuild, Matilda scratchbuild, Churchill scratchbuild, Crusader scratchbuild, M10 Achiĺles scratchbuild, Universal Carrier scratchbuild
ALPHA
Major-General
Posts: 10960
Joined: Thu Oct 03, 2013 1:06 am

Re: LCM6 Build

Post by ALPHA »

AlwynTurner wrote:Hi Alpha, yes I thought I would, mistakes and all. It could help anyone else thinking of building one. I plan on fibreglassing the entire hull when it's sanded and filled, that way it should mean no leaks. There will also be plenty of expanded polystyrene wherever there is stowage space. Thinking of calling it Titanic :-). Also will welcome advice and suggestions along the way.
Panther Ausf G is corresponding constantly with helpful tips and advice as he has mucho experience and has built these before.
Glassing the hull is good to do...but what I've found that happens with thin ply available here is...it will debond and the layers separate ...creating "pockets" in the laminated layers of wood ...found brushing on a few coats of resin without the Glass material helped stop that from happening ;)

Glad you are documenting the whole thing...it'll make a fine watch :thumbup:

ALPHA
User avatar
AlwynTurner
2nd Lieutenant
Posts: 2654
Joined: Thu Oct 23, 2014 10:47 am
Location: Chapel-en-le-Frith, Derbyshire

Re: LCM6 Build

Post by AlwynTurner »

Thanks Alpha, that tip should save me a lot of cursing later! Any more tips as we go from anyone will be gratefully received.
YOU'RE NEVER TOO OLD TO HAVE A HAPPY CHILDHOOD!

Saladin scratchbuild, Matilda scratchbuild, Churchill scratchbuild, Crusader scratchbuild, M10 Achiĺles scratchbuild, Universal Carrier scratchbuild
ALPHA
Major-General
Posts: 10960
Joined: Thu Oct 03, 2013 1:06 am

Re: LCM6 Build

Post by ALPHA »

AlwynTurner wrote:Thanks Alpha, that tip should save me a lot of cursing later! Any more tips as we go from anyone will be gratefully received.
I can't tell you Alwyn....there's nothing more frustrating that seeing a "bubble" come to life after you've put glass over wood :S ...more so when you grind off the glass...get all itchy...and find it wasn't the glass but the wood 8O

ALPHA
User avatar
AlwynTurner
2nd Lieutenant
Posts: 2654
Joined: Thu Oct 23, 2014 10:47 am
Location: Chapel-en-le-Frith, Derbyshire

Re: LCM6 Build

Post by AlwynTurner »

Things are progressing steadily:
Hull sanded and bow shape corrected by adding a ply fin and then packing around with balsa and sanding to the required profile
Image
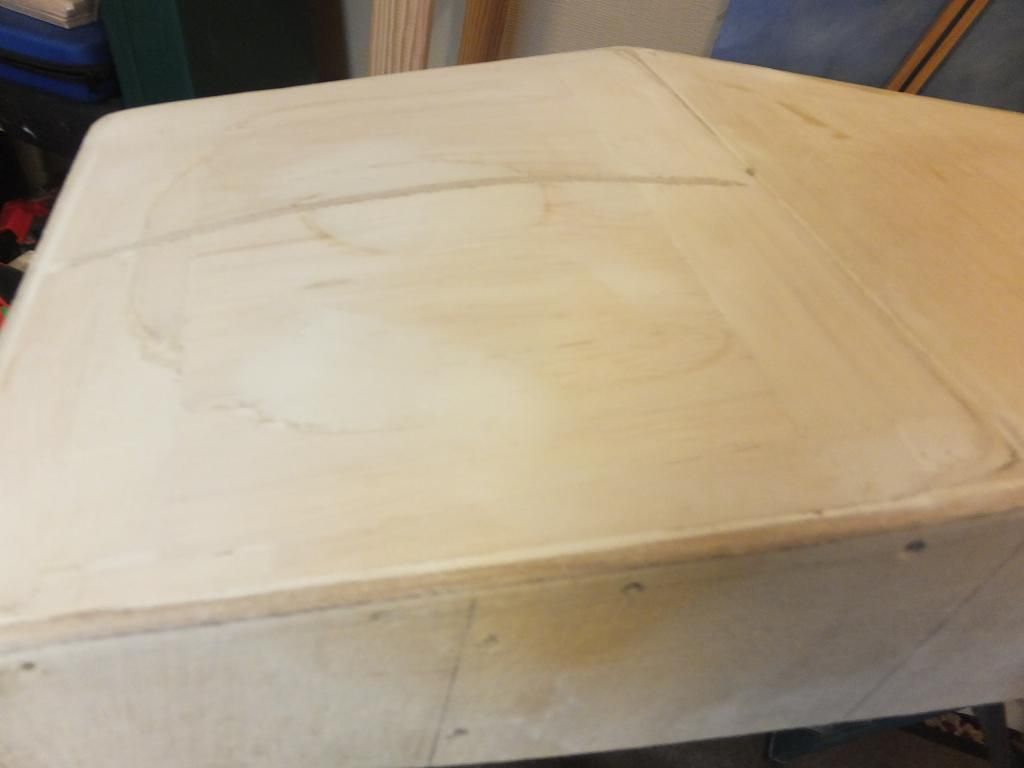
Much sanding and filling later
Image
Stern rounded off and filled/sanded
Image
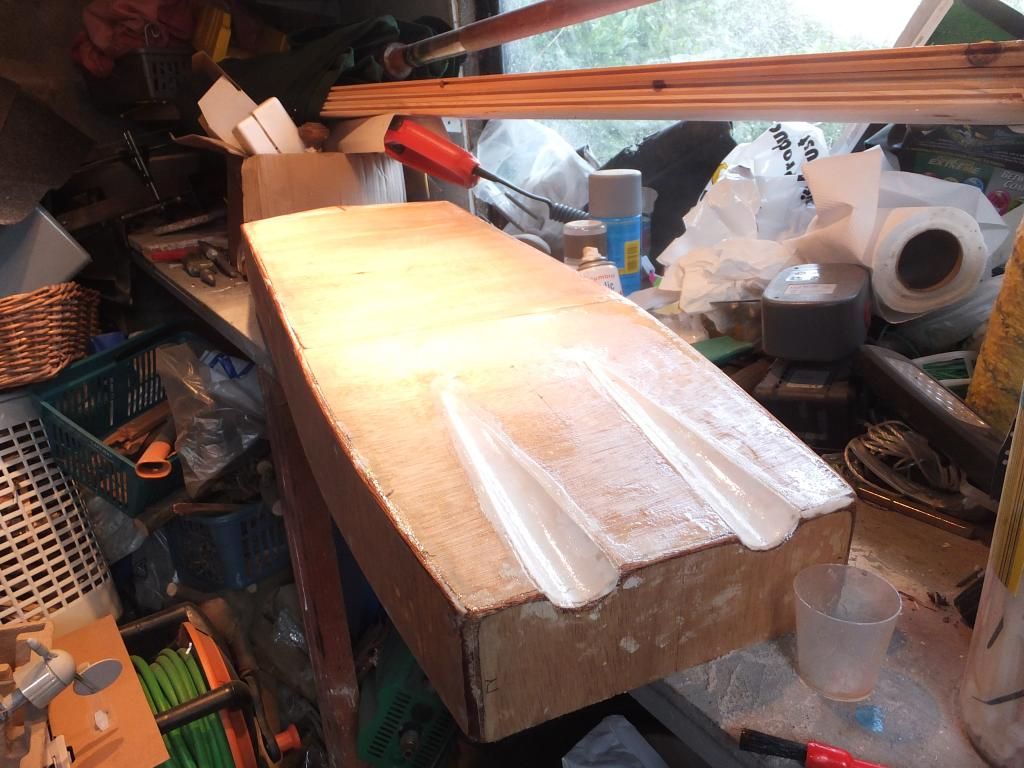
and then to the paint shop (aka garden shed) for the first coat of resin to proof the hull and hopefully avoid the dreaded bubbles
Image
and a view of the bow - the different balsa blocks show up clearly after coating
Image
Next will come another coat of resin and move on to the load bay construction
YOU'RE NEVER TOO OLD TO HAVE A HAPPY CHILDHOOD!

Saladin scratchbuild, Matilda scratchbuild, Churchill scratchbuild, Crusader scratchbuild, M10 Achiĺles scratchbuild, Universal Carrier scratchbuild
User avatar
AlwynTurner
2nd Lieutenant
Posts: 2654
Joined: Thu Oct 23, 2014 10:47 am
Location: Chapel-en-le-Frith, Derbyshire

Re: LCM6 Build

Post by AlwynTurner »

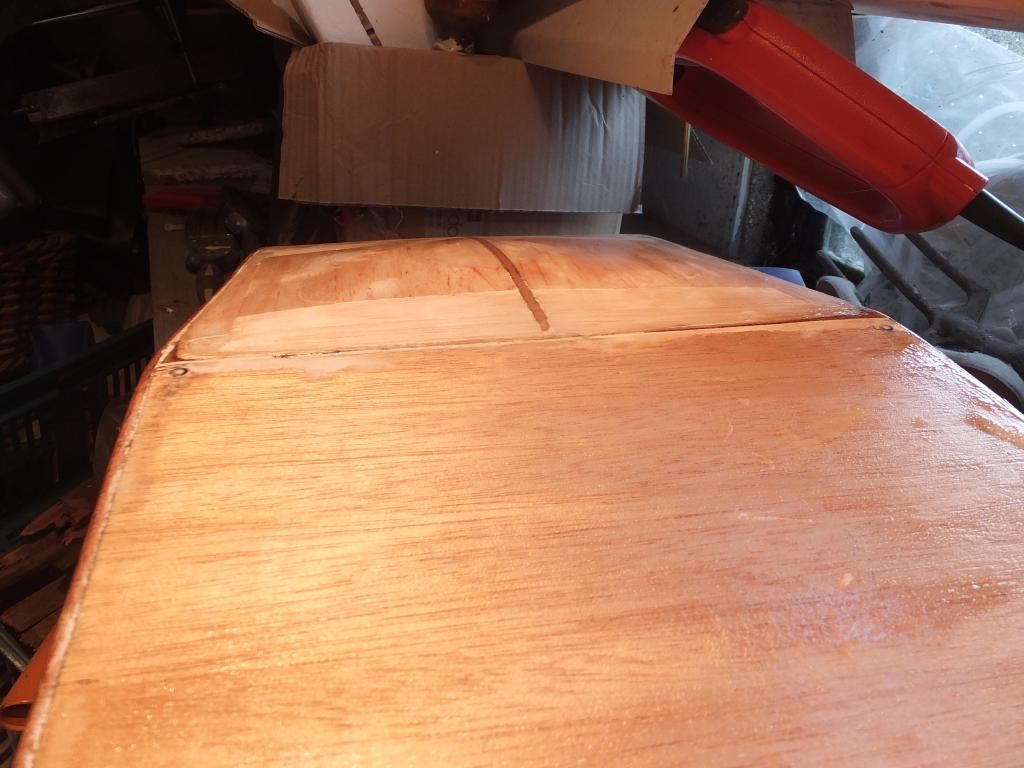
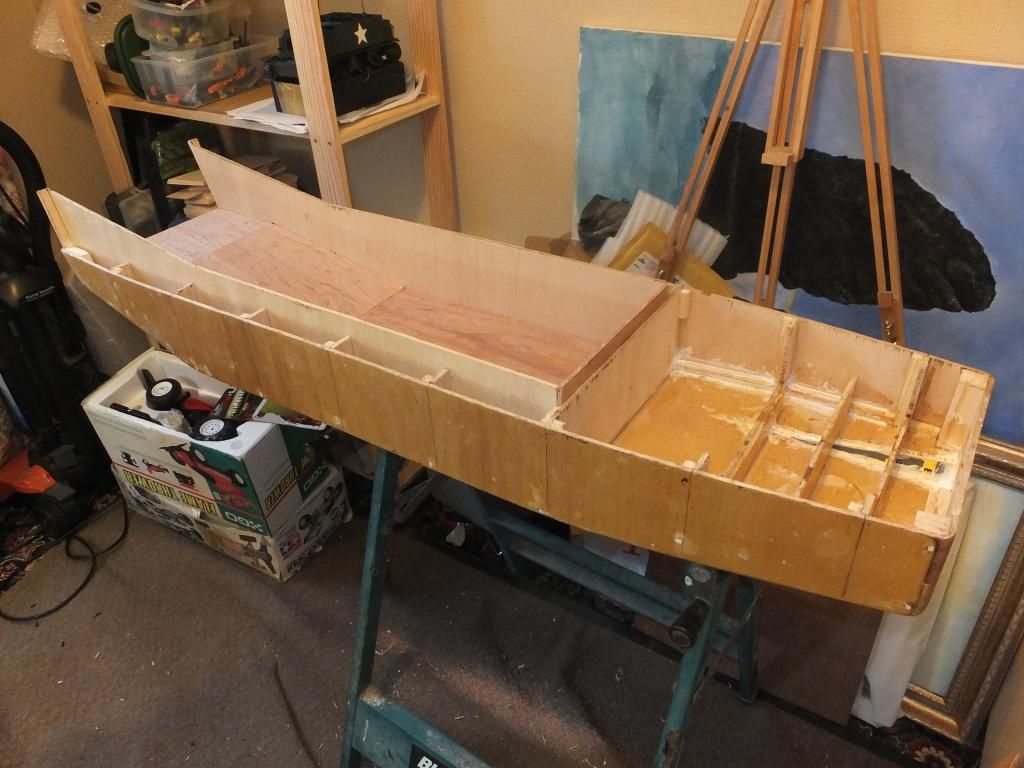
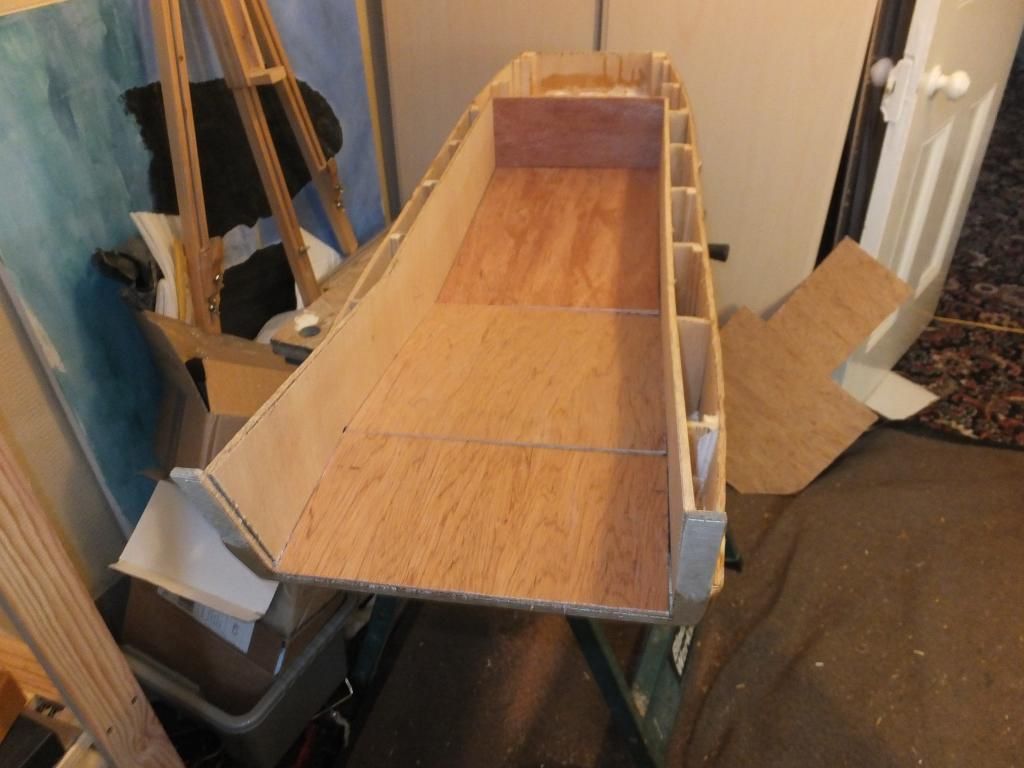
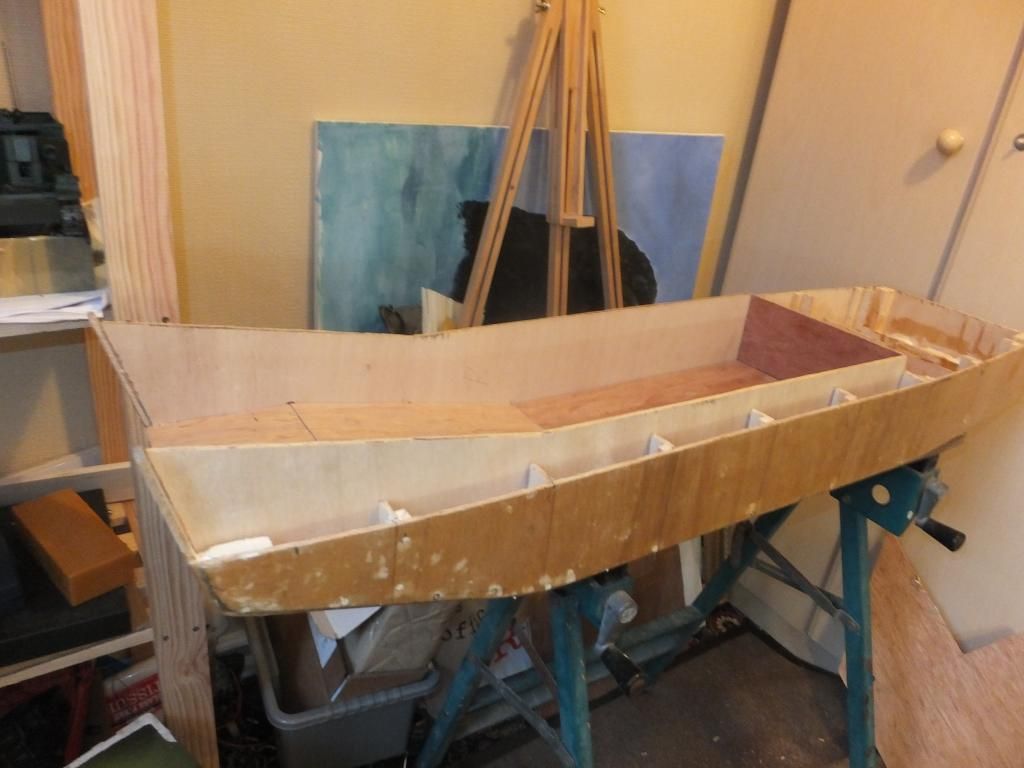
Well the resin took an awful long time to cure thanks to the cold and damp weather but it's now dry enough to work on, even though there is still a little bit of touch tackiness when placing the hull on a surface but nothing serious. Thanks to Alpha's advice there were none of the dreaded 'bubbles'. Managed to cut and dry fit the loading bay sides, floor and back and everything is a snug fit.
Image
Image
Image
Now I just need to pack and reinforce the bow slightly so I can glue the bay sides to it, and then start gluing and packing with expanded polystyrene as I go. All voids will be filled!!
YOU'RE NEVER TOO OLD TO HAVE A HAPPY CHILDHOOD!

Saladin scratchbuild, Matilda scratchbuild, Churchill scratchbuild, Crusader scratchbuild, M10 Achiĺles scratchbuild, Universal Carrier scratchbuild
Post Reply

Return to “RC Boats / Ships”