Bedford MWD 1/16 RC Scratch build
-
AlwynTurner

- 2nd Lieutenant
- Posts: 2656
- Joined: Thu Oct 23, 2014 10:47 am
- Location: Chapel-en-le-Frith, Derbyshire
Re: Bedford MWD 1/16 RC Scratch build
Oh I forgot, I'm looking for a 1/18 driver, rank/nationality not a problem as I will modify, otherwise I will have to manufacture using paperclips/milliputty which is a bit tedious. I have searched high and low on t'internet, anyone know a supplier who doesn't change a small fortune? Thanks Alwyn
YOU'RE NEVER TOO OLD TO HAVE A HAPPY CHILDHOOD!
Saladin scratchbuild, Matilda scratchbuild, Churchill scratchbuild, Crusader scratchbuild, M10 Achiĺles scratchbuild, Universal Carrier scratchbuild
Saladin scratchbuild, Matilda scratchbuild, Churchill scratchbuild, Crusader scratchbuild, M10 Achiĺles scratchbuild, Universal Carrier scratchbuild
Re: Bedford MWD 1/16 RC Scratch build
This one is easy Alwyn... Look for 20th Century soldier on EBAY...the figures are 1/18th scale...and are poseable ...they shouldn't cost too much...and are usually sold in bunches ....PainlessWolf has some on his Shermans...check the Sherman Thread or look him up with the Search feature if you want to see what they look likeAlwynTurner wrote:Oh I forgot, I'm looking for a 1/18 driver, rank/nationality not a problem as I will modify, otherwise I will have to manufacture using paperclips/milliputty which is a bit tedious. I have searched high and low on t'internet, anyone know a supplier who doesn't change a small fortune? Thanks Alwyn
ALPHA
Re: Bedford MWD 1/16 RC Scratch build
Spatter is easier demonstrated than Explained AlwynAlwynTurner wrote:Any advice on mud stains/mud splatter techniques, I am making some progress on getting the truck to look 'tatty' but it needs the mud/various stains?
Thanks Alwyn
ALPHA
-
wibblywobbly

- Major
- Posts: 6396
- Joined: Fri Oct 17, 2008 9:30 am
- Location: South Wales Valley
- Contact:
Re: Bedford MWD 1/16 RC Scratch build
You have done an excellent job on this truck, and its been a really quick build too. Any chance of a pic of it against something of a known size so that we can see it 'in scale'. It looks huge in the pics.
Re the mud, if you haven't done anything like that before I would practice on something scrap a few times before having a go at the model, it would be very easy to get it wrong. One alternative might be weathering powders, they go on so lightly that you aren't in any danger of making a mess. It's just a suggestion, I would hate to see you overdo the mud after all the hard work that you have put into this.
RobG
Tiger 1 Late
Panther G
King Tiger
M36 B1
Panther G
King Tiger
M36 B1
-
Jake79
- Warrant Officer 2nd Class
- Posts: 1062
- Joined: Mon Aug 11, 2014 9:10 pm
- Location: Essex,Colchester, UK
Re: Bedford MWD 1/16 RC Scratch build
Tamiya: 2 King Tigers
H/L,Taigen :Initial Tiger 1, Panzer III, Kv 2, Panther G, Bulldog, Leo 2A6
H/L,Taigen :Initial Tiger 1, Panzer III, Kv 2, Panther G, Bulldog, Leo 2A6
-
PainlessWolf

- Colonel
- Posts: 7975
- Joined: Sun Feb 26, 2012 9:09 pm
- Location: Southern Colorado Rocky Mountains
Re: Bedford MWD 1/16 RC Scratch build
Good Afternoon,
With some minor work, this guy could be modded into a British driver figure. Or left as is.
http://www.ebay.co.uk/itm/1-18-Ultimate ... 25998da899
regards,
Painless
With some minor work, this guy could be modded into a British driver figure. Or left as is.
http://www.ebay.co.uk/itm/1-18-Ultimate ... 25998da899
regards,
Painless
...Money!? What's that!?...
Re: Bedford MWD 1/16 RC Scratch build
Hi Alwyn, soak the tarp in muddy water, then bury it in mud for a couple of days.
When you take it out it will be dry and have the earth stained weathered look you want.
Using paint will look too artificial.
When you take it out it will be dry and have the earth stained weathered look you want.
Using paint will look too artificial.
Razor 1, Intercept Bogies Angels 2 5, Cleared Hot Engage, Fox 2 Fox 2
Semper In Faecibus Sumus Sole Profundum Variat
HL/Tamiya Sherman - Bulldog Turreted
Taigen Tiki Tiger 1
Torro KingTiger
E-25 Tank Destroyer
Semper In Faecibus Sumus Sole Profundum Variat
HL/Tamiya Sherman - Bulldog Turreted
Taigen Tiki Tiger 1
Torro KingTiger
E-25 Tank Destroyer
-
AlwynTurner
- 2nd Lieutenant
- Posts: 2656
- Joined: Thu Oct 23, 2014 10:47 am
- Location: Chapel-en-le-Frith, Derbyshire
Re: Bedford MWD 1/16 RC Scratch build
Guys thanks for all the help and advice. I will follow up on the figures and see what can be sourced. I think I will try some of the techniques on the old jeep body as a practice. I will add some pics of tarp and body progress today with something to show scale.
Cheers Alwyn
Cheers Alwyn
YOU'RE NEVER TOO OLD TO HAVE A HAPPY CHILDHOOD!
Saladin scratchbuild, Matilda scratchbuild, Churchill scratchbuild, Crusader scratchbuild, M10 Achiĺles scratchbuild, Universal Carrier scratchbuild
Saladin scratchbuild, Matilda scratchbuild, Churchill scratchbuild, Crusader scratchbuild, M10 Achiĺles scratchbuild, Universal Carrier scratchbuild
-
AlwynTurner
- 2nd Lieutenant
- Posts: 2656
- Joined: Thu Oct 23, 2014 10:47 am
- Location: Chapel-en-le-Frith, Derbyshire
Re: Bedford MWD 1/16 RC Scratch build
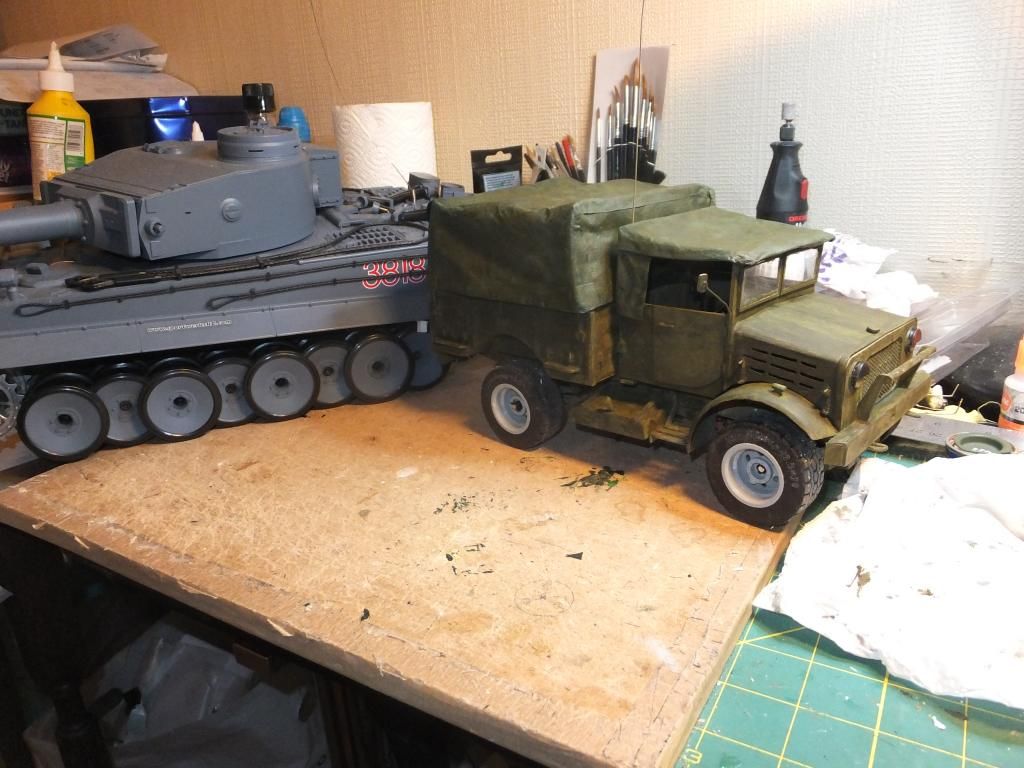
Here are the pics as promised
The bedford is against my poorly HL Tiger 1 which is waiting for its replacement gearboxes. The size should be about right for correct 1/16 scale as I worked fairly closely to the vehicle spec.
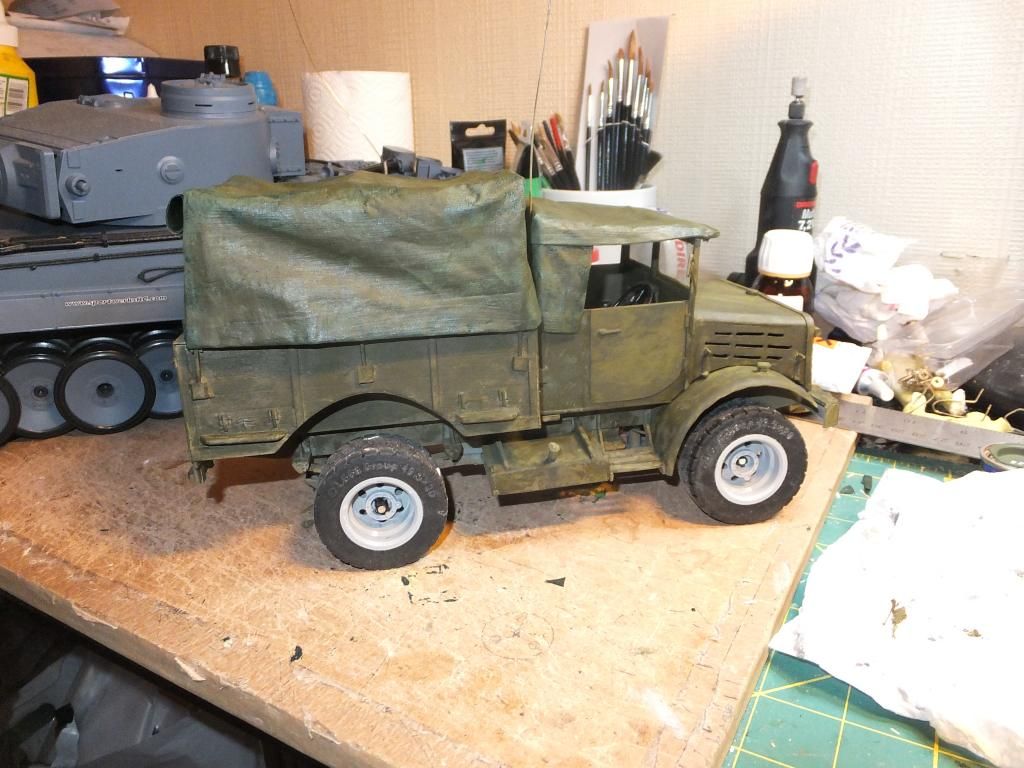
As you can see the paint effects are coming on but I'm not happy with the cab doors and bonnet, instead of looking 'battleworn' it just looks like a bad paint job. What is the best way to dilute/thin tamiya acrylic paint?
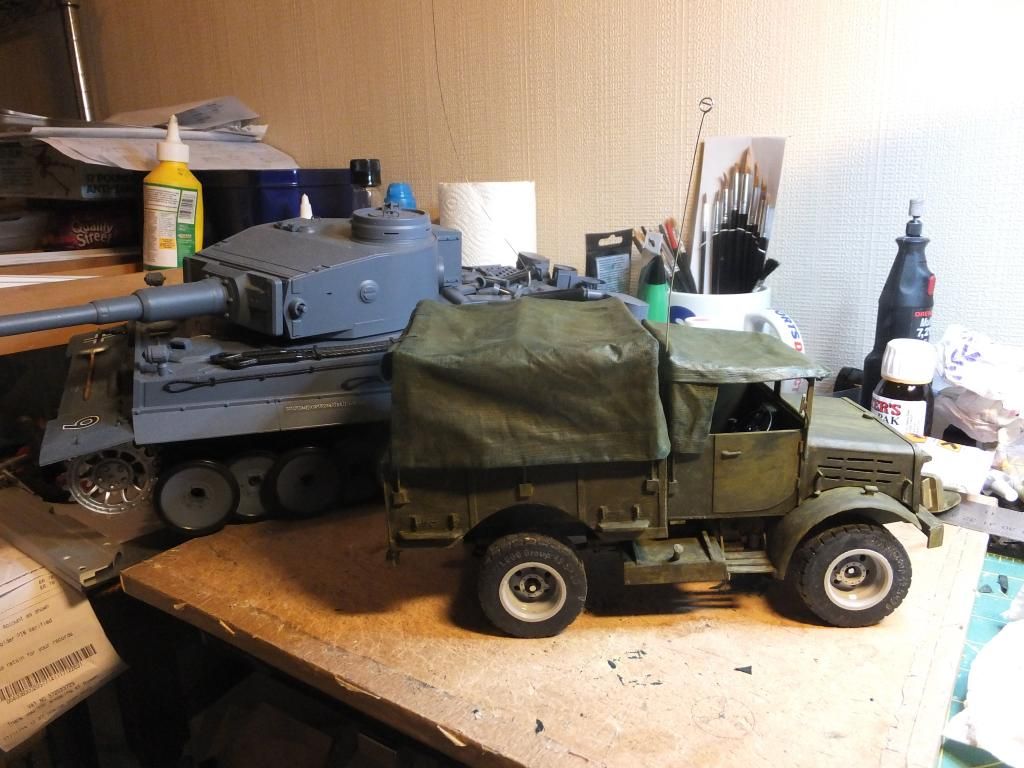
The effect I'm trying for is something that's been on the road around the battlefield getting knocked about and abused. I'm getting happier with the load bed and chassis, but the cab because it is styrene (and because I'm new to this!!!) is giving me headaches. Any advice on how to get the correct look would be greatly appreciated (or point me at the appropriate hints and tips) please? Thanks Alwyn
The bedford is against my poorly HL Tiger 1 which is waiting for its replacement gearboxes. The size should be about right for correct 1/16 scale as I worked fairly closely to the vehicle spec.

As you can see the paint effects are coming on but I'm not happy with the cab doors and bonnet, instead of looking 'battleworn' it just looks like a bad paint job. What is the best way to dilute/thin tamiya acrylic paint?


The effect I'm trying for is something that's been on the road around the battlefield getting knocked about and abused. I'm getting happier with the load bed and chassis, but the cab because it is styrene (and because I'm new to this!!!) is giving me headaches. Any advice on how to get the correct look would be greatly appreciated (or point me at the appropriate hints and tips) please? Thanks Alwyn
YOU'RE NEVER TOO OLD TO HAVE A HAPPY CHILDHOOD!
Saladin scratchbuild, Matilda scratchbuild, Churchill scratchbuild, Crusader scratchbuild, M10 Achiĺles scratchbuild, Universal Carrier scratchbuild
Saladin scratchbuild, Matilda scratchbuild, Churchill scratchbuild, Crusader scratchbuild, M10 Achiĺles scratchbuild, Universal Carrier scratchbuild
-
wibblywobbly
- Major
- Posts: 6396
- Joined: Fri Oct 17, 2008 9:30 am
- Location: South Wales Valley
- Contact:
Re: Bedford MWD 1/16 RC Scratch build
Here's a couple of tips, I use them myself.
Very often a model stays looking like a model because the paint is too uniform. The trick is to put artificial highlights onto edges, and to make plastic look like metal.
There are two very useful tools to achieve this.
1. A standard graphite pencil.
2. Cotton buds.
Matt paint is good, but when you look at a real vehicle the sun still catches edges and panels.
So, using the side of the pencil lightly run it along all edges, around the doorframes, mudguards etc. Now run your finger along those same edges, or use a cotton bud. It will give a metallic look to the model.
What you can also do is gently wipe the matt surface in the middle of large panels, using cotton buds, or paper towels. This will change the texture of the surface very slightly, and give the effect of sunlight.
You can also use an old dry toothbrush to rub the edges of steel to put a slightly scratched sheen on worn metal edges.
For those that don't have an airbrush, and have found that a brush painted model has brush marks in it, there are a couple of ways of dealing with it.
1. Lightly wipe the surface over with those kitchen surface wipes that you get at the supermarket, they will take off a few microns of acrylic paint and flatten the surface down.
2. Use the brush marks to your advantage, and wipe them with weathering powder.
If I have glue residue anywhere, I often leave it, and then stipple rust effects onto it. It gives me a perfect rust texture.
When brush painting with acrylics the paint is touch dry in minutes, however, it takes a few days for all of the moisture to evaporate off. I often find that what I thought were going to unsightly brush marks completely disappear after a week.
I hope this helps, and the pic is excellent, top job!
RobG
Tiger 1 Late
Panther G
King Tiger
M36 B1
Panther G
King Tiger
M36 B1
