Heng Long Pershing Rebuild

ALPHA
Major-General
Posts: 10960
Joined: Thu Oct 03, 2013 1:06 am

Re: Heng Long Pershing Rebuild

Post by ALPHA »

PainlessWolf wrote:Good Morning,
Alpha,
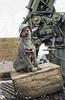
The Barrel fits. ;o) I am working on using the Tamiya mantlet and trunnions with the HL air soft unit. ;o)
regards,
Painless
Whew!!!!!!!!!! that's a relief :haha: :haha:

Does the BUCKET fit????????????? 8O ....... ;) ........ :haha:

ALPHA
User avatar
PainlessWolf
Lieutenant-Colonel
Posts: 7557
Joined: Sun Feb 26, 2012 9:09 pm
Location: Southern Colorado Rocky Mountains

Re: Heng Long Pershing Rebuild

Post by PainlessWolf »

*chuckles* Of course the bucket will work. Spent some time today working the Tamiya mantlet and trunnion into the HL turret and air soft gun. Finally got it to where it will work with the HL elevation. Tomorrow will see the mantlet pinned into place on the mounts and the barrel shimmed into place as well. Pictures:
Attachments
Ready to pin and mount.  Note the new led mount attached directly to the mantlet spade.
Ready to pin and mount. Note the new led mount attached directly to the mantlet spade.
Wire management made from other non used sprue parts
A scratch trunnion and mantlet mount made from a Tamiya cable mount.  Cut it in half and rounded the edges to fit the mantlet interior curvature.
A scratch trunnion and mantlet mount made from a Tamiya cable mount. Cut it in half and rounded the edges to fit the mantlet interior curvature.
A scratch trunnion and mantlet mount made from a Tamiya cable mount. Cut it in half and rounded the edges to fit the mantlet interior curvature..JPG (78.71 KiB) Viewed 3386 times
Used an old Sherman lift hook for a space saving cable router for the mg led
Used an old Sherman lift hook for a space saving cable router for the mg led.JPG (89.81 KiB) Viewed 3386 times
Scratched an led mount for the co-ax mg from a left over Tamiya trunnion part.  It worked great but took up too much space.  Back to the drawing board.
Scratched an led mount for the co-ax mg from a left over Tamiya trunnion part. It worked great but took up too much space. Back to the drawing board.
View from the mantlet exterior.   The Tamiya mantlet has cast info and a much better texture.
View from the mantlet exterior. The Tamiya mantlet has cast info and a much better texture.
View from the mantlet exterior. The Tamiya mantlet has cast info and a much better texture..JPG (89.13 KiB) Viewed 3386 times
Used a piece of clear DS tape to make a lens for the scope mount and a left over HL 'black stick' mg for the co-ax mg mount
Spent about an hour trying to get the Tamiya trunnion system to work after the exterior mantlet frame  was mounted.  There was not enough space to use it with the HL air soft
Spent about an hour trying to get the Tamiya trunnion system to work after the exterior mantlet frame was mounted. There was not enough space to use it with the HL air soft
...Here for the Dawn...
ALPHA
Major-General
Posts: 10960
Joined: Thu Oct 03, 2013 1:06 am

Re: Heng Long Pershing Rebuild

Post by ALPHA »

Nice Clean work Painless...wish mine looked that organized :haha:

ALPHA
User avatar
PainlessWolf
Lieutenant-Colonel
Posts: 7557
Joined: Sun Feb 26, 2012 9:09 pm
Location: Southern Colorado Rocky Mountains

Re: Heng Long Pershing Rebuild

Post by PainlessWolf »

Alpha, With a lot of working hatches and such, space is at a premium in your L70. The Pershing by comparison has a lot of extra space with far fewer wiring knots to work around. Nothing in the Post today so tonight was a mount the main gun night. 1/16 diameter brass pins cut to length mated the spades that were screwed into the airgun box to the Tamiya mantlet. Pretty solid and stable with the rest of the spades' surfaces glued into place as well. Next the HL muzzle brake was detailed with the notches filed into the end ring of it to make the locking nut used on the real tank. The barrel end was roughened slightly with a file then the brake was glued on using the ultragel superglue I like. To mount the barrel to the airgun, I used a strip made out of a vacuum belt that was then cut to fit and glued into place. The strip provides a pressure fit in the mantlet and allows the end of the barrel to seat firmly in the airgun box. Pictures:
Attachments
Combo HL and Tamiya turret is ready to detail.
Barrel mounted with a belt spacer
Correct barrel length and diameter makes a big difference in appearance
Gel glue is cured and the Tamiya mantlet is ready for the barrel.
Mantlet attached with brass pins
...Here for the Dawn...
ALPHA
Major-General
Posts: 10960
Joined: Thu Oct 03, 2013 1:06 am

Re: Heng Long Pershing Rebuild

Post by ALPHA »

The result is pretty good there Painless.... :D ...the Length is really noticeable ....one thing on the muzzle break...the collar where it meets the barrel...you might want to bring that in a little or trim it... I didn't do that part... as I think you would agree...you get a better perspective with it installed... I never installed the barrel on anything..reason I left it to your judgement ;)

Did that sound redundant?????????????????? :think: ............ :haha:

ALPHA
User avatar
PainlessWolf
Lieutenant-Colonel
Posts: 7557
Joined: Sun Feb 26, 2012 9:09 pm
Location: Southern Colorado Rocky Mountains

Re: Heng Long Pershing Rebuild

Post by PainlessWolf »

Alpha, I took care of the edge there by lightly sanding it. ;o) Nothing in the Post today so continued working on the turret tonight. Combining parts from two manufacturers isn't as simple as gluing part 'A' into slot 'B' so a lot of time is spent sanding to fit, making holes or adding posts and then filling other holes where nothing goes. ;o) Some ground was gained but a lot more remains and that's just the turret. Pictures:
Attachments
Drilled out the Commander's vane sight, added detail to the rear of the turret and on it goes.
The track mount for the turret will be really sweet with some scale track in it
The old type rack didn't want to fit the new turret so some adjustments were made and weld marks were added
Really impressed by Tamiya's track jacks.  Real metal threads supplied by a screw.
Really impressed by Tamiya's track jacks. Real metal threads supplied by a screw.
...Here for the Dawn...
User avatar
Jake79
Warrant Officer 2nd Class
Posts: 1058
Joined: Mon Aug 11, 2014 9:10 pm
Location: Essex,Colchester, UK

Re: Heng Long Pershing Rebuild

Post by Jake79 »

Sorry to go back on the build, you used a certain tool to cut off your sand shields, I'm going to sound stupid here , could you tell me what it's called, also could a Dremel be used for this as I'm waiting for one to be Delivered. Fine looking work again Painless. :)
Tamiya: 2 King Tigers
H/L,Taigen :Initial Tiger 1, Panzer III, Kv 2, Panther G, Bulldog, Leo 2A6
User avatar
PainlessWolf
Lieutenant-Colonel
Posts: 7557
Joined: Sun Feb 26, 2012 9:09 pm
Location: Southern Colorado Rocky Mountains

Re: Heng Long Pershing Rebuild

Post by PainlessWolf »

Jake,
Nothing and no one stupid, Sir. I used a set of Art\Hobby knives from a company called General. The blades are called scribing blades. The one used to cut off the sand shields has a drop point which focuses applied pressure on the tip. Keep it sharpened and it does a good job of cutting through plastic, thick or thin. Mind how hard you push down on it while sliding it along tho'. You can break the blade or send it whizzing off on a tangent ( which in my case usually involves fingers or hard to replace parts). A Dremel is certainly a handy tool and can definitely be used to remove excess plastic like sand shields. Good luck! I'm looking forward to pictures of your work.
regards,
Painless
...Here for the Dawn...
ALPHA
Major-General
Posts: 10960
Joined: Thu Oct 03, 2013 1:06 am

Re: Heng Long Pershing Rebuild

Post by ALPHA »

Don't want to interrupt the dialog between you and Jake Panless... not sure a dremel will work well for those skirts.... unless you plan never to use them again lol... if you are a xacto saw would be my recommendation ..... but if you don't care about the skirts ...yeah dremel away :haha:


ALPHA
User avatar
PainlessWolf
Lieutenant-Colonel
Posts: 7557
Joined: Sun Feb 26, 2012 9:09 pm
Location: Southern Colorado Rocky Mountains

Re: Heng Long Pershing Rebuild

Post by PainlessWolf »

I am in agreement, 100 %, Alpha. When the Dremel is used, plastic usually goes away speedily and is non reusable. No pictures from last night since the camera battery was recharging so I added them today. Tonight was more turret work. I want to detail out this Pershing along the lines of 'Maxene' and 'In The Mood' so more is on the way. Pictures:
Attachments
Last bit of work before dinner arrived, filed out the hatch catch mount and drilled and pinned it.  Will start on a working catch tomorrow.
Last bit of work before dinner arrived, filed out the hatch catch mount and drilled and pinned it. Will start on a working catch tomorrow.
Last bit of work before dinner arrived, filed out the hatch catch mount and drilled and pinned it. Will start on a working catch tomorrow..JPG (73.32 KiB) Viewed 3321 times
HL hatch with Tamiya periscope and scratch mirror and pad.
HL hatch with Tamiya periscope and scratch mirror and pad..JPG (94.85 KiB) Viewed 3321 times
Old HL engine crane lift mounts repurposed onto the new turret.  The Glue Monkey was fierce but the round was won.
Old HL engine crane lift mounts repurposed onto the new turret. The Glue Monkey was fierce but the round was won.
Tamiya primary antenna mount put together with a HL spring
Tamiya primary antenna mount put together with a HL spring.JPG (92.05 KiB) Viewed 3321 times
Old Walker secondary antenna mounted and cut then drilled for a wire antenna.
Old Walker secondary antenna mounted and cut then drilled for a wire antenna..JPG (74.52 KiB) Viewed 3321 times
One of the track jacks mounted.
One of the track jacks mounted..JPG (89.25 KiB) Viewed 3321 times
Spot housing and the drilled out Commander's vane sight.  I'm looking forward to using an LED and Tamiya lens to light the spot like on 'Maxene'
Spot housing and the drilled out Commander's vane sight. I'm looking forward to using an LED and Tamiya lens to light the spot like on 'Maxene'
Spot housing and the drilled out Commander's vane sight. I'm looking forward to using an LED and Tamiya lens to light the spot like on 'Maxene'.JPG (76.66 KiB) Viewed 3321 times
Schumo periscope guard bent to fit into the  drilled out bolt locations.
Schumo periscope guard bent to fit into the drilled out bolt locations.
Schumo periscope guard bent to fit into the drilled out bolt locations..JPG (97.29 KiB) Viewed 3321 times
...Here for the Dawn...
Post Reply

Return to “Pershing”