Fun with...the cupola AA mount
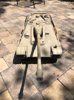
- The complete Schumo AA mount with Hachette MG34 and panzermantel armoured barrel by Aber.jpg (35.65 KiB) Viewed 6271 times
I few posts above I announced my impending joy at the prospect of attaching the anti-aircraft (AA) mount to my cupola.
As the Second World War ground on German tanks increasingly found themselves on the defensive and on the Western Front in particular the loss of Axis air superiority meant that one of the greatest threats to any panzer crew (apart from mechanical breakdown) came from the air - the dreaded 'Jabo'. The term apparently comes from the word 'Jagdbomber', which is German for Fighter-Bomber - although I imagine it came to be used as more of an expletive in the heat of battle.
The answer was to provide tanks with a removable station for an MG34 which could be clamped on a ring around the cupola. The mount was quite a simple design - a V-shaped metal bracket, hinged at its base and attached to the ring by means of a clamp. This meant that it could be placed anywhere on the cupola ring (although not revolved during firing). At the top end was a cradle (or pintle) which attached to the underneath of the gun barrel.
This apparatus allowed any gallant commander to demonstrate sharpshooting skills to his men by standing proud of the cupola and shooting down a fast-moving Allied fighter as it dived the strafe or bomb his tank. Oh yes, and a 'spider web sight' was often provided to help him on his way! One cannot help thinking that this was one of those developments which was designed to provide a moral boost and little more. Interestingly towards the very end of the war the Germans seemed to have recognized the futility, since the AA ring disappeared altogether from Tiger IIs for instance. However, before that happened these AA mounts turned up on later war Tigers, Panthers and Panzer IVs.
So where do we find it in 1/16? Anyone who has a Heng Long Panther will be familiar with the simple plastic version which comes with the tank. Not bad from a distance - but not much like the real thing either.
Ever since I had purchased some parts from the Hachette 'Build Your Own Tiger' I had assumed that their AA mounted MG was the 'bees knees'. Sadly I was wrong. Although the MG34 is nicely cast, it's the wrong type - as we have already established the MG should have the armoured
panzermantel sleeve - because it would have come from inside the tank.
But that is not all. The mount itself is the wrong shape - it doesn't meet at the tip and has a strengthening cross bar which was not part of the real thing. Basically, like much of that Tiger kit, it's a figment of the maker's imagination.
So back to the internet...
The only answer at the time of writing is the Schumo option. Not too expensive and beautifully cast in white metal. But not easy to build...
There are other additions which I have already mentioned above, such as the Aber armoured barrel sleeve and resin cast Gurtsacks (canvas bags holding the ammunition) from David Parker at the AFV Modeller Magazine shop. The only problem will be putting them all together. I have made start...
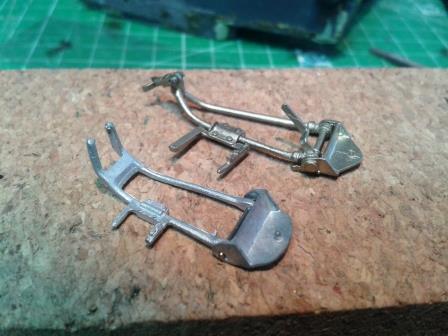
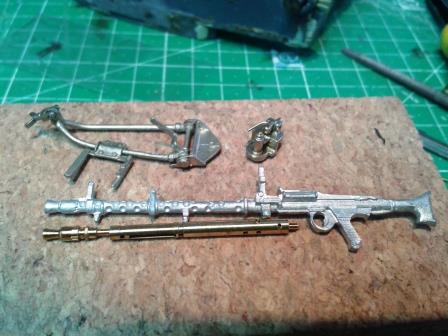
- Schumo (top) and Hachette (bottom) cupola AA mounts compared.jpg (33.14 KiB) Viewed 6271 times
- The correct shape of the Schumo part is clearly apparent.jpg (33.93 KiB) Viewed 6271 times
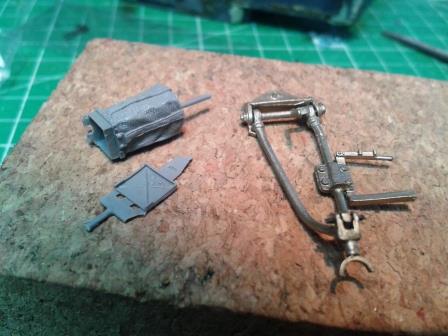
- On the left is the resin Gurtsack by David Parker from the AFV Modeller Magazine shop.jpg (33.58 KiB) Viewed 6271 times
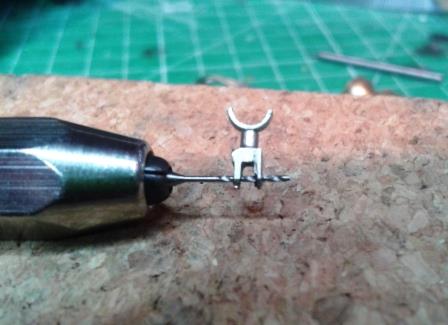
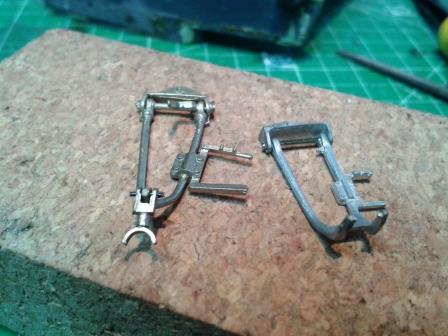
- The Schumo barrel cradle was drilled out with a pin vice - fiddly work!.jpg (28.6 KiB) Viewed 6271 times