7. April 1944
The mantlet had one eye hole deleted.
Sov's Tiger Build
-
DavidByrden

- Corporal
- Posts: 300
- Joined: Wed Sep 08, 2010 6:13 pm
- Contact:
-
DavidByrden
- Corporal
- Posts: 300
- Joined: Wed Sep 08, 2010 6:13 pm
- Contact:
Re: Sov's Tiger Build
8. April 1944
The small muzzle brake was introduced.
The small muzzle brake was introduced.
-
DavidByrden
- Corporal
- Posts: 300
- Joined: Wed Sep 08, 2010 6:13 pm
- Contact:
Re: Sov's Tiger Build
9. May 1944
The turret roof was made from 2 parts now, with a weld line across the middle.
The turret roof was made from 2 parts now, with a weld line across the middle.
-
DavidByrden
- Corporal
- Posts: 300
- Joined: Wed Sep 08, 2010 6:13 pm
- Contact:
Re: Sov's Tiger Build
10. June 1944
Three drainage slots were added to the cupola, and about the same time, three "pilze" sockets were welded on the turret roof.
Three drainage slots were added to the cupola, and about the same time, three "pilze" sockets were welded on the turret roof.
-
SovereignZuul

- Corporal
- Posts: 456
- Joined: Sat Aug 25, 2012 11:50 pm
- Location: Connecticut, USA
Re: Sov's Tiger Build
More changes than I even came close to realizing! Not sure, did you intend to include pics in every post David? The descriptions were clear enough however.
I wonder why the hatch swinging forward was a bad idea? A forward swinging hatch might protect the opener from small arms fire. The cupola change is easy to follow though. Nothing else would scream, "Shoot here!" like a hatch swinging open.
I wonder why the hatch swinging forward was a bad idea? A forward swinging hatch might protect the opener from small arms fire. The cupola change is easy to follow though. Nothing else would scream, "Shoot here!" like a hatch swinging open.
My Build Thread: http://www.rctankwarfare.co.uk/forums/v ... 22&t=10204
-
DavidByrden
- Corporal
- Posts: 300
- Joined: Wed Sep 08, 2010 6:13 pm
- Contact:
Re: Sov's Tiger Build
I don't know what photos you need, so just ask.
David
David
-
SovereignZuul
- Corporal
- Posts: 456
- Joined: Sat Aug 25, 2012 11:50 pm
- Location: Connecticut, USA
Re: Sov's Tiger Build
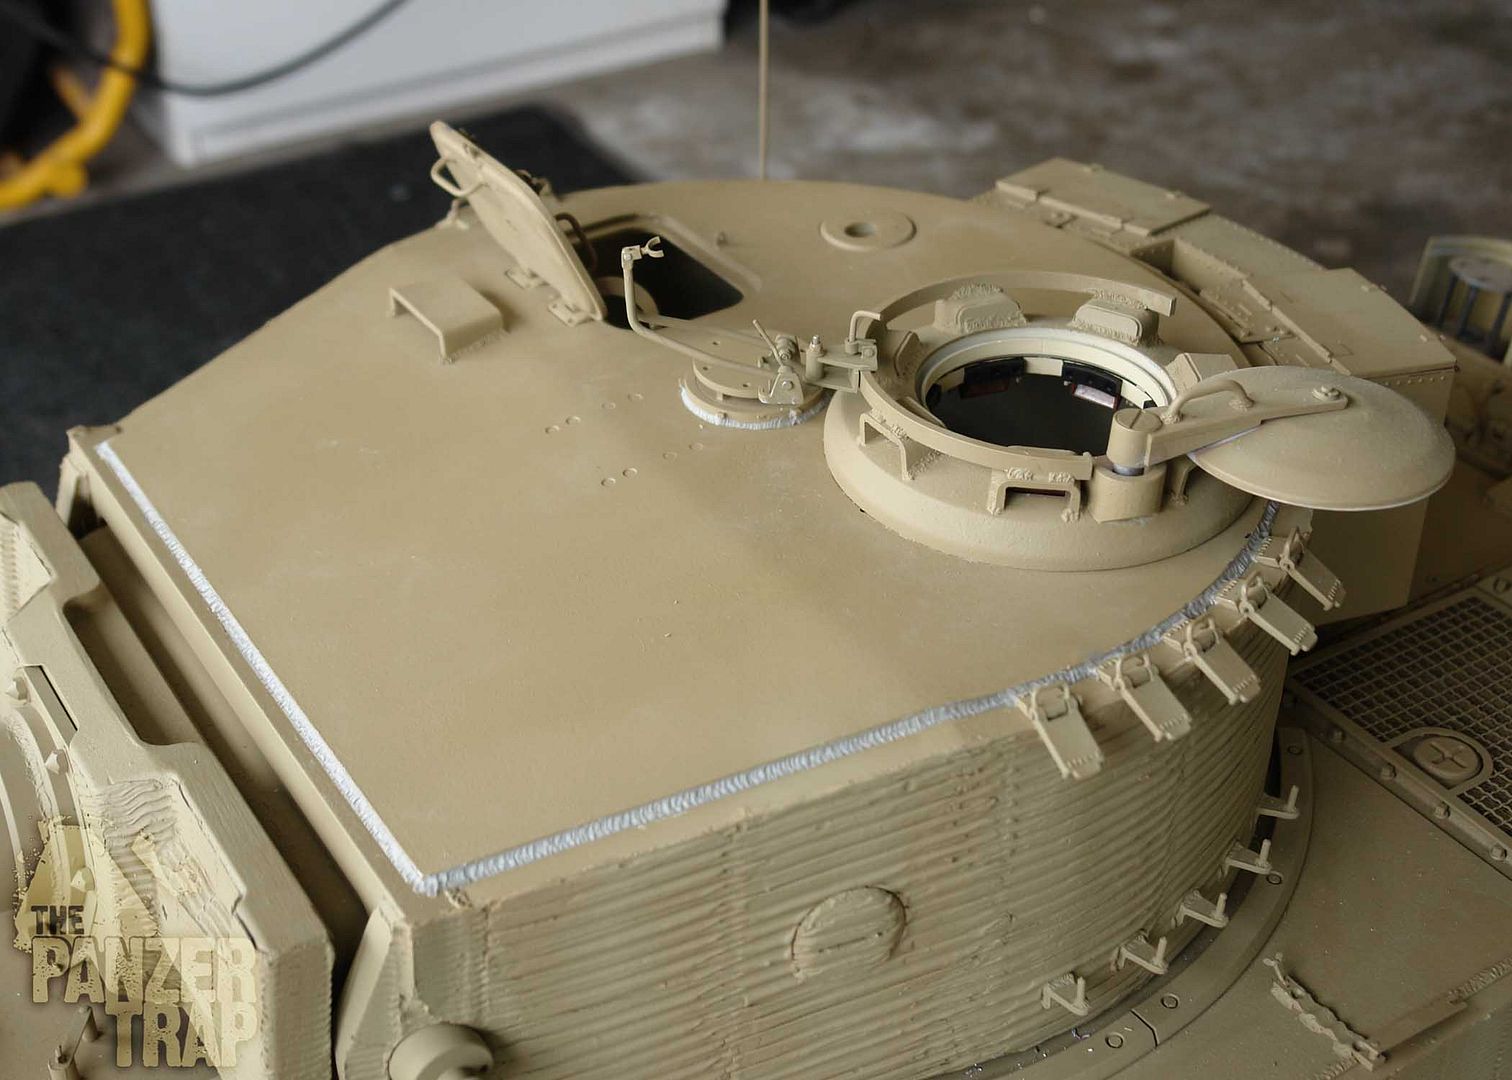
I'm curious about the roof.
Some roof armor plates are one big piece, and others have a small strip separate from the main roof plate.
Why did they do this, or for what reason? (March 1944 change, thicker roof)
Example: One big piece.
http://i203.photobucket.com/albums/aa18 ... ELDS_3.jpg
Two pieces, one large, one small strip near the front.
http://www.rctankhq.com/images/projects ... G_0737.jpg
This is how my turret looks now, supposedly early, not late. I wonder if I should cover up that extra weld line or not for my turret.
You also said that the roof was welded from two pieces started may 1944. Do you have pics of these differences?
My Build Thread: http://www.rctankwarfare.co.uk/forums/v ... 22&t=10204
-
DavidByrden
- Corporal
- Posts: 300
- Joined: Wed Sep 08, 2010 6:13 pm
- Contact:
Re: Sov's Tiger Build
The 25mm roof had a 40mm strip at the front, to make it stronger. You can see that it's thicker if you get inside the tank. Of course this was not needed when the whole roof became 40mm.SovereignZuul wrote:I'm curious about the roof.
Some roof armor plates are one big piece, and others have a small strip separate from the main roof plate.
Why did they do this, or for what reason?
It depends on what date you want to represent! I imagine the most difficult problem. when making an Early turret into a Mid, would be the chin area...SovereignZuul wrote: I wonder if I should cover up that extra weld line or not for my turret.


There's a Tiger monument at Vimoutiers in France, and several websites give you a good look at it. It represents the final model of Tiger so it has the 2-part roof.SovereignZuul wrote: You also said that the roof was welded from two pieces started may 1944. Do you have pics of these differences?
Check out this photo at http://www.militarymodelling.com/news/a ... tiger/4656

David
-
SovereignZuul
- Corporal
- Posts: 456
- Joined: Sat Aug 25, 2012 11:50 pm
- Location: Connecticut, USA
Re: Sov's Tiger Build
Thanks for all the info David!
I see that difference as clear as day now. However, actually getting that "fixed" on my turret would be a lot of work. I'll have to skip it for simplicity sake I think. We'll see....
I see that difference as clear as day now. However, actually getting that "fixed" on my turret would be a lot of work. I'll have to skip it for simplicity sake I think. We'll see....
My Build Thread: http://www.rctankwarfare.co.uk/forums/v ... 22&t=10204
-
SovereignZuul
- Corporal
- Posts: 456
- Joined: Sat Aug 25, 2012 11:50 pm
- Location: Connecticut, USA
Re: Sov's Tiger Build
Every day I'm working an hour or more now, things are really rolling, for once! Frequent updates, hope you don't mind.
Loader's periscope work, coincidentally based off David's work which I found through google image search, the very first result.
http://tiger1.info/pictures/LoadersPeriscope4.gif
Scratch built it very basic.


Cupola 90% done. Needs just a few more welds, and hatch lock ring/bracket. I really like how it looks so far.

Ended the day with more elbow grease, more than I expected to use.
Cutting off the old plastic track guards.

Dremel did nice work with just a few tiny slips, easily repaired. Now sanding...

The sudden horrible realization.... NOOOOOOO!
The section of the side under neath the former track guards is raised higher than the regular body.

So much sanding to correct that... I'm going to use some filler to cover it up a bit as I don't want to bring it too thin.

Now to repeat for the other side.
Loader's periscope work, coincidentally based off David's work which I found through google image search, the very first result.
http://tiger1.info/pictures/LoadersPeriscope4.gif
Scratch built it very basic.
Cupola 90% done. Needs just a few more welds, and hatch lock ring/bracket. I really like how it looks so far.
Ended the day with more elbow grease, more than I expected to use.
Cutting off the old plastic track guards.
Dremel did nice work with just a few tiny slips, easily repaired. Now sanding...
The sudden horrible realization.... NOOOOOOO!
The section of the side under neath the former track guards is raised higher than the regular body.
So much sanding to correct that... I'm going to use some filler to cover it up a bit as I don't want to bring it too thin.
Now to repeat for the other side.
My Build Thread: http://www.rctankwarfare.co.uk/forums/v ... 22&t=10204
