Well, here's another post guys. This one is still work in progress (like the whole build, I know...)
Improving the mid/late cupola
Like a fashion photo from another age, this handsome devil peers out from the cupola of a Tiger
Like everything else with this tank - and especially in this scale - the more you look the more you see. And then there are those up-grades which just keep on coming.
A while back I installed the Taigen mid/late cupola and I fitted some pretty rudimentary periscopes (see above). Don't get me wrong - I was very pleased at the time. Then recently I came across some Schumo periscopes. These are made from resin to fit the Tamiya King Tiger and they also make a set for the Panther - but unlike the cupola on the Panther (which was taller in profile) those on the two Tigers were virtually identical.
Well curiosity soon got the better of me so I ordered a set. They look great and they're not too pricey. The set provides ten in all - seven for the cupola, one for the turret roof and two for the driver and radio operator. Only the top halves are present, and only the ones for the cupola have the detail of the inset glass block (moulded as part of a solid resin casting).
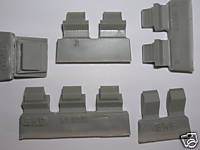
- Schumo resin periscopes for the Tamiya King Tiger.jpg (4.52 KiB) Viewed 5880 times
The problem came when I tried to fit them into a spare Taigen cupola. They
do fit, but only just. It then dawned on me that this was because the Taigen casting, good though it is, is just not quite right. The apertures for the periscopes are too narrow, too tall and too thick.
- They do fit into the Taigen metal cupola - but only just.jpg (25.2 KiB) Viewed 5880 times
So I dug out an old Hachette cupola which I had from Issue 12 of the Build Your Own Tiger magazine (as I have said before, these can be found occasionally on ebay in a job lot from people who have given up on that very expensive and ultimately flawed project).
So what happened when I test fitted the Schumo periscopes? They fitted like the proverbial glove, that's what.
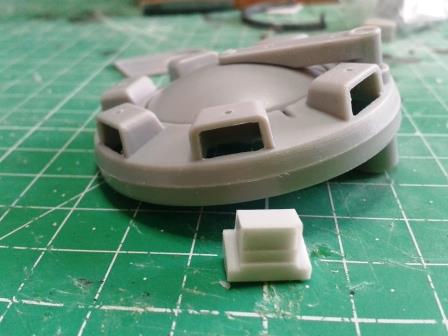
- The Schumo periscope set include seven identical resin castings for the cupola.jpg (28.75 KiB) Viewed 5880 times
- The Schumo periscopes fit perfectly.jpg (26.53 KiB) Viewed 5880 times
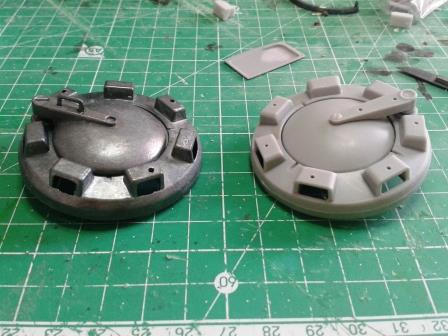
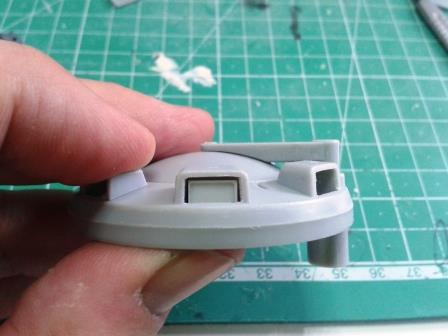
- Taigen cupola on the left, Hachette on the right - note different size of periscope apertures.jpg (36.31 KiB) Viewed 5880 times
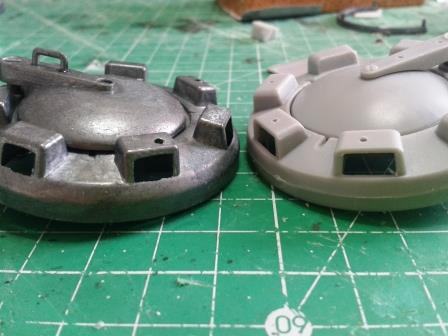
- Here you can see how the Hachette periscope apertures are (correctly) both lower and wider.jpg (30.8 KiB) Viewed 5880 times
So the Hachette cupola is just better all-round than the Taigen equivalent. I especially like the fact that the hatch cover is noticeably separate from the pivot and bracket - this is how it should look (and I have read somewhere that the hatch cover could actually rotate).
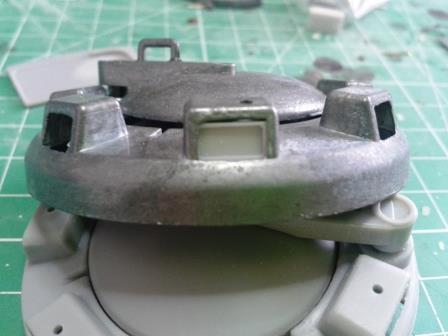
It's far from perfect, however. First of all it's all plastic, so although it's sprung like the metal one I remain a little nervous about how much handling it will take. The anti-aircraft rail around the top is also very unconvincing, being far too thick (it looks a little better on the Taigen metal version). The real thing was actually
quite thick - as you can see in the shot above (I will soon post some more shots of the real thing) but it still needs to look in scale.
Also note that Schumo do make their own cupola up-grade, but this is prohibitively expensive (£34.99) and the hatch cover has to be purchased as a separate part!
There weren't any real issues fitting the new cupola into the Heng Long turret however. I simply prised the old Taigen one off and put a fillet of plastic card around the bottom half of the Hachette piece. I also cut out a circular template to fit to the underside of the turret roof which was slightly smaller than the hole I had left in the turret roof (something I should have done before) so that the cupola simply sits in the aperture.
So what next?
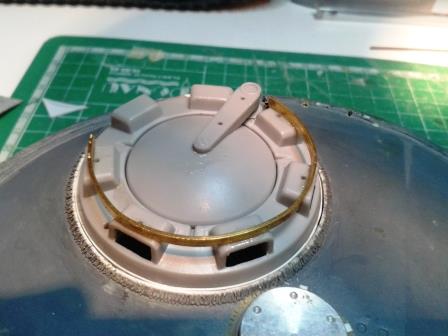
First off I have replaced the AA ring with a better looking rail made from bent brass strip. This I carefully bent around a suitably sized item - actually the handle of my drilling tool - making sure that the circle was regular without kinks. I actually bent it to a slightly smaller circumference so that I would take out some of the 'spring' before opening it out to the correct width. It was then glued it in place with strong five minute epoxy glue. I will have to add small weld beads.
- The Hachette cupola is very slightly smaller than the Taigen version.jpg (28.1 KiB) Viewed 5880 times
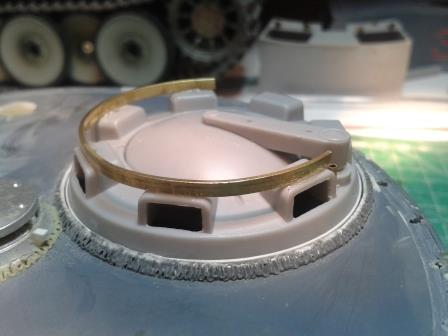
- The anti-aircraft rail replaced by bent brass strip.jpg (24.76 KiB) Viewed 5880 times
Well, as I said, the more you look the more you start to see. There are the locking attachments on the cupola lid (you can see part of one in the photo of the real thing above), the two tubular supports for the turret rain shield (a sort of rectangular umbrella which you occasionally see in pictures), the armoured shield for the hatch pivot... all still to come!


