Some time ago I had ever tried to convert a 3:1 steel gear to brushless , but the result was not acceptable and always quickly led to transmission damage .
After a little discussion with my friend Bashir me but a few thoughts have come to so I currently developing a conversion kit for Brushless Steel Gear then the Bashir will soon be testing is .
This post can be seen for this time publicly only here and in the internal area of our tanks community of " Ingelheimer Instandsetzung" in Germany
One of the problems with these gears , the pinion gear . They have only 10 teeth , are comparatively soft brass and pressed on a 2.3mm shaft. Thus, these sprockets are not suitable for Brushless .
So I'm going but steel pinion with 15 teeth which use the old fortifications because of the larger spacing effects are no longer usable.
Reason, and also to reduce the incurred on the first try vibrations of the steel cheeks through which the pinion gear was destroyed very quickly , I have milled from 1.5 mm aluminum plates, new motor mounts .
Still, these are not perfect and need to be refinished , but the backlash is correct. Later they are sucking fit on the shelf and you can customize his gear itself .
After I used the new brackets as a template and mark the supernatants with a Filzstifft I can edit the steel cheeks with a file.
The new and the old essays I splicing with UHU 300 final strength . To this end, I have everything well roughen and degrease .
So I can pocket the top panels with glue evenly and put on the stock. Even well pressed and wait for the curing of the adhesive.
Once I have the Aluminum cheeks glued to the steel cheeks yesterday I use this now as a template for the new mounting holes to drill through the steel cheeks.
The gear stick , I break and let the gears in the outer cheek. So I do not take care of it like I have everything back together later stuck . The overflowing glue and the burrs I sand off easily .
Likewise, I still inexpensive shaft bore in the steel edges made by the pinion should fit .
Thus, the pinion at the correct distance is to the motor bearings and the rotor holds I put 4 washers under , sliding the pinion loose on the other hand and pull the screw.
So I can now mount the motor on the cheek. As a counter bearing I use the old engine mounts of the brush motors and secure the screws with contact adhesive.
The second gear by the drive gear , it is not necessary to install a washer , so that it can move only by about 0.1 mm. Thus, a faster Gertiebe would be inevitable wear .
For the left gear with the underlying engine it is necessary to leave the peg on the engine montert because you after assembly of the engine this something is covered .
So I can now assemble the gear again .
At lower engine you should shorten the screw underneath something even as these bask the motor is damaged .
And so then I could make a first test run.
The cracking of the transmission is caused by the still existing good game in gear . Also , one could , albeit with a clear effort still off , but then it would almost make sense to build new cheeks with ball bearings.
The gear I have now slowly designed with a lot of power from below. I also can not recommend the axes should be noted as this may be a shear Painful matter. Until it can be loaded but the adhesive must be at least 4 days left are warm and I 'm waiting for the appointed regulator .
Ah yes, the Wanngen I also corrects and now they fit absorbent.
After I had finished the transmission , I could send this to my friend Bashir in the Netherlands. This has now been installed in his Tiger and wrote a first post to do so. With his friendly permission is obtained later I may copy him with the pictures and videos and show here .
As you know Pursuing
so Brushless - to install motors in my tank scale 1:16 .
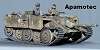
And , since the supply of gearboxes which are for use with BL motors are still very clear about is I've gewannt me apamotec .
Edwin has compiled after some talks with me this test gear .
My requirements were as follows :
The built- in HL- tanks standart steel gear must can be used.
The rebuilding effort has to be as low as possible.
As motors I want can use Brushless motors.
The tank should be reached in around a full-scale speed (1:16) .
Yesterday I was with the test of a test gear for Brushless - start engines apamotec .
The package opened ... and what I have seen has surprised me very positively .
This should be HL- gear ? YES , there are HL- gear .
Only in this steel gears , the gears are perfectly aligned.
So I would my HL- gear eigenlich wish Optional equipment .
Conforms to the standard of quality apamotec adapter brackets attached for the BL motors to gearboxes of steel gears .
This adapter mounts prevent a swing where the Stahlgetriebegehaeuse could be damaged by the transmission through the gears and ensure a good transmission of power from BL motor to the gearbox.
On the motor shaft from the BL motor sits another gear as I could see.
Unfortunately, I forgot in my joy at the photo gear to make ' before I installed it .
But it also looks so very good as the test gear with the BL motor is built.
And now the pictures.
The tank ... a Tiger I
The inner workings of the Tiger I.
The test gear with the BL motors of apamotec is good to see on the left.
As a control board , the newly developed by TWM -box tank Drive BL was used.
To the right you can see the IR Battelplatine and below that is the sound module of Benedini .
The test transmission with adapter and BL motor from the inside
View from the test transmission from the outside
Front view of the tank
Controller used with the test gear
A look at the used tank Drive BL.
The board has two Steckplätzte for the controller .
The used battery 's
I use T connector.
This has two reasons . First of all connectors that have the least resistance and secondly the small footprint .
On this video spins are seen on carpet.
And this rug has it all . My King Tiger still orginal HL with steel gears and brush motors has all efforts to drive him to a curve.
The oblique has about 40 degrees.
The tank comes slip into the smooth surface at 40 degrees .
Can I would have a surface with better adhesion use he could have run a larger pitch problems. So the smooth packaging film has set the limits.
So far I am weather permitting only driven Indoor.
However, I have very heavy load , the transmission also indoor .
The videos are just a small sample of the test 's I've made .
Drove a few hours a piece and can detect up to now no damages or wear on the gears by the BL- drive and the extreme use .
When the weather gets better , I make photos and movies also out of driving. However, I do not expect any surprises at the outdoor driving.
I am very satisfied!
No comparison with Buerstenmotoren .
The gear with the BL motors are simply better.
The tank drives with this test gear very realistic and powerful.
The somewhat jerky start on the video comes from the fact that I had to shoot , the tank had hit and was a bit nervous . Otherwise, the approach is very uniform . Next time I try to make it better.
Here I'm just going to build something new. A steel gear which is slightly flatter and the motors are equipped with flywheels.
To this end, I first cut new mounting plates with whom I continue publishing the engines to the rear. Here I have everything well sanded and glued already. The mounting plates I now firmly clamp with a screw clamp jeweil and let the glue cure overnight.
By the way I have done with the engines. To be able to mount motors with flywheels here it must be very short, but for that I've found that and so I have to mount slightly offset only in height.