Marc780 Tiger 1 Part 2 Paint

Post Reply
Marc780
Corporal
Posts: 496
Joined: Wed Mar 05, 2014 1:34 pm

Marc780 Tiger 1 Part 2 Paint

Post by Marc780 »

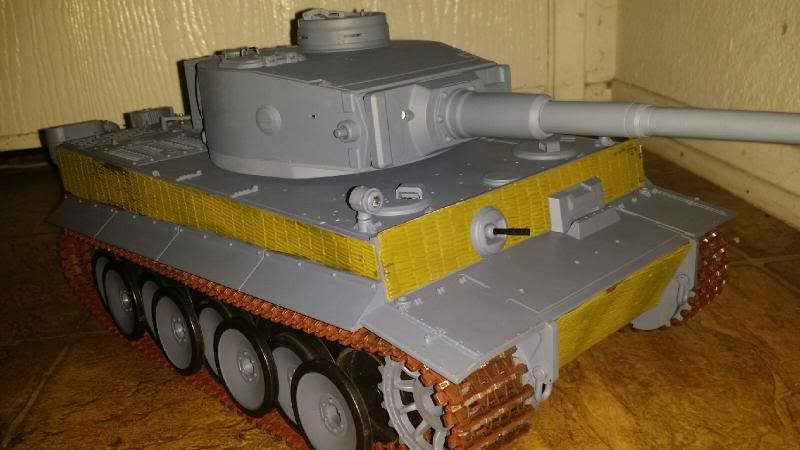
My Tiger 1 Yesterday
Image

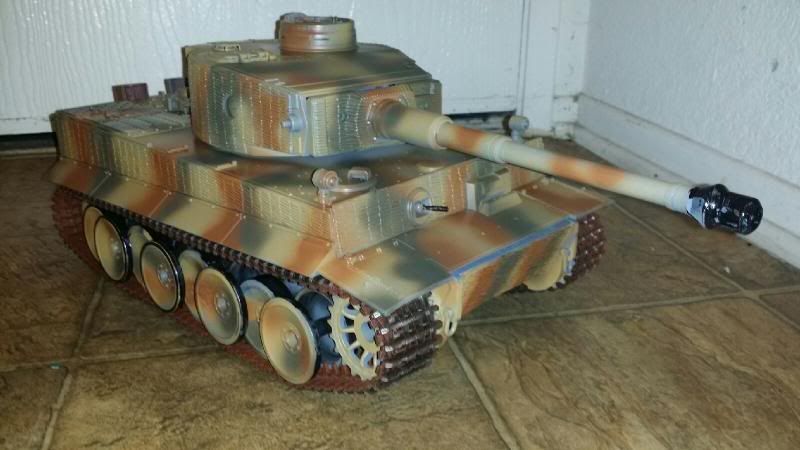
Today after painting
Image

I used "Desert Gelb" as the base, olive drab green and dark brown. Unfortunately I missed a few spots and they're highly visible! ARGGG.
Image

Still not sure what i am going to do about those grey areas. The time to spray them was the first time round...because it is pretty close to perfect and any more is probably going to mess it up. I will let the paint harden while I figure it out.
Last edited by Marc780 on Tue May 13, 2014 4:23 am, edited 1 time in total.
User avatar
PainlessWolf
Lieutenant-Colonel
Posts: 7563
Joined: Sun Feb 26, 2012 9:09 pm
Location: Southern Colorado Rocky Mountains

Re: Marc780 Tiger 1 Part 2 Paint

Post by PainlessWolf »

Good Evening,
Spray a little of your base color in the cap or a disposable cup and get a brush. A little careful application and some patience will see your areas corrected. Repeat with the camo colors to blend.
regards,
Painless
...Here for the Dawn...
Marc780
Corporal
Posts: 496
Joined: Wed Mar 05, 2014 1:34 pm

Re: Marc780 Tiger 1 Part 2 Paint

Post by Marc780 »

thanks painless! I guess a little drybrushing is the answer.
scalawag

Re: Marc780 Tiger 1 Part 2 Paint

Post by scalawag »

Nice looking camo scheme Marc780. Painless suggestion is a good one for the grey areas. Applying a filter across the whole tank once the grey is covered and you have added any decals will also help to blend in the overall effect of the colours. Applying a filter is a bit of a leap of faith, as when you first apply it there seems to be very little change as it only needs a very thin coat. The temptation is to try and see more change in the colour too quickly and apply the filter too thickly. A few very thin coats is always best, you can always add a little more but you can't take it off again. I always stop before I think it is finished and give myself a few days to look at it. I often find by doing this that I don't need to add more. I finish the whole thing off with a matt clear coat, again with several thin coats.

Hope this helps :D

Paul
User avatar
HERMAN BIX
Major-General
Posts: 11196
Joined: Sun Jan 12, 2014 12:15 am
Location: Gold Coast,Australia

Re: Marc780 Tiger 1 Part 2 Paint

Post by HERMAN BIX »

with a combination of carefull drybrushing & the sealer, then weathering Im sure the missed bits can be blended in.
My airbrush puts out a tiny thin line with the nozzle removed............yours may do the same, try it on a bit of scrap with some paint you have in abundance.
HL JAGDPANTHER,HL TIGER 1,HL PzIII MUNITIONSCHLEPPER, HL KT OCTOPUS,HL PANTHER ZU-FUSS,HL STuG III,HL T34/85 BEDSPRING,
HL PZIV MALTA,MATORRO JAGDTIGER,HL F05 TIGER,TAMIYA KT,HL PANTHERDOZER,HL EARLY PANTHER G,TAIGEN/RAMINATOR T34/76,
HL AN-BRI-RAM SU-85
ALPHA
Major-General
Posts: 10960
Joined: Thu Oct 03, 2013 1:06 am

Re: Marc780 Tiger 1 Part 2 Paint

Post by ALPHA »

Hello Mark... I would say you did a good job with the pattern of camo... the gray can easily be taken care of by just using a brush ...and chasing the areas you missed... then perhaps if you are confident enough...do a few washes and add a little weathering...personally I see nothing you have to worry about ...the foundation is there all you need to do is just go through a few more steps and she'll be great

I also noticed you painted the black on the wheels... you really didn't need to...the stock paint is usually pretty resilient ... if I get run over on the black... I usually just scrape it off with my fingernails ...but since you did paint them... what I would recommend is chasing the inner surface of the wheels with a brush using the base color of the tank...take the tracks off...and just spin the wheel with one hand ...and just hold the brush in one place ;)

Enjoy the adventure :thumbup:

ALPHA
Post Reply

Return to “Tiger I”