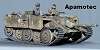
A Bergepanzer Standart gets new muscle
-
Dietrich

- Staff Sergeant
- Posts: 973
- Joined: Thu Aug 13, 2009 10:29 am
- Location: England and Aquitaine,France
Re: A Bergepanzer Standart gets new muscle
Great work here Edwin..... I love watching your models grow.. 
Never Forget......
The Propaganda of the Victors....... becomes the History of the Vanquished
The Propaganda of the Victors....... becomes the History of the Vanquished
-
Edwin
- Corporal
- Posts: 394
- Joined: Tue Jun 11, 2013 8:34 pm
- Location: Rheinland Pfalz Germany
- Contact:
Re: A Bergepanzer Standart gets new muscle
And it comes with the gear installation more .
Since the tub is because about very soft I have to think me a little .
First determining the correct position and in particular the amount of the transmission.


Then I have to first remove the transmission axis and the outside turned down to 6mm , so that fits the drive wheel .

In the power axis are used shoring necessary, but I have to use special , small warehouse and a particularly narrow bracket. This I turn me from an aluminum rod .


As it touches still the driving wheel on the support which is why I get a little stage from this .

So I can now slide the drive into place and the axle is as far as it is feasible supported at this .
Since the tub is because about very soft I have to think me a little .
First determining the correct position and in particular the amount of the transmission.
Then I have to first remove the transmission axis and the outside turned down to 6mm , so that fits the drive wheel .
In the power axis are used shoring necessary, but I have to use special , small warehouse and a particularly narrow bracket. This I turn me from an aluminum rod .
As it touches still the driving wheel on the support which is why I get a little stage from this .
So I can now slide the drive into place and the axle is as far as it is feasible supported at this .
APAMOTEC Model technology in detail
-
Edwin
- Corporal
- Posts: 394
- Joined: Tue Jun 11, 2013 8:34 pm
- Location: Rheinland Pfalz Germany
- Contact:
Re: A Bergepanzer Standart gets new muscle
The gear I have now put together after editing the axes again and glued the gears to the axles . The only way to get these engine performance a sufficient connection.

The nights step is to build a support and attachment for the gear . In addition, I would like to stiffen so that the very soft tub. That's why I use this two aluminum rods that I adjust and some milled to set the transmission to the correct height .


The transmission pads I now screw with two screws to the floor.

So I can now mount the gear fixed and the axis shoring stick to the hull sides .


Here , the adhesive must now first re- harden, then I 'll take care of the inertias of the motors.
The nights step is to build a support and attachment for the gear . In addition, I would like to stiffen so that the very soft tub. That's why I use this two aluminum rods that I adjust and some milled to set the transmission to the correct height .
The transmission pads I now screw with two screws to the floor.
So I can now mount the gear fixed and the axis shoring stick to the hull sides .
Here , the adhesive must now first re- harden, then I 'll take care of the inertias of the motors.
APAMOTEC Model technology in detail
-
Edwin
- Corporal
- Posts: 394
- Joined: Tue Jun 11, 2013 8:34 pm
- Location: Rheinland Pfalz Germany
- Contact:
Re: A Bergepanzer Standart gets new muscle
So slowly I will come back also to build something and Leo is supposed to be done once .
So it went a little today with the flywheels on. To this end, I cut two pieces of steel rod.

This I surfaced and provided with a grated 9mm hole.

To be able to unscrew the middle better , I had the hole on one side to 14mm depth 12mm boring . This works best with a 12mm cutter .

So I can facilitate the inertia of weight where it does not make sense and they unscrew so .


On ässeren edge I turn to yet a paragraph. So I have not tilt the gearbox and can more stable mount for the clearing tasks and inertia adjust the suspension over.


That was again for today. The mounting and balancing are the next time your turn.
So it went a little today with the flywheels on. To this end, I cut two pieces of steel rod.
This I surfaced and provided with a grated 9mm hole.
To be able to unscrew the middle better , I had the hole on one side to 14mm depth 12mm boring . This works best with a 12mm cutter .
So I can facilitate the inertia of weight where it does not make sense and they unscrew so .
On ässeren edge I turn to yet a paragraph. So I have not tilt the gearbox and can more stable mount for the clearing tasks and inertia adjust the suspension over.
That was again for today. The mounting and balancing are the next time your turn.
APAMOTEC Model technology in detail
-
Edwin
- Corporal
- Posts: 394
- Joined: Tue Jun 11, 2013 8:34 pm
- Location: Rheinland Pfalz Germany
- Contact:
Re: A Bergepanzer Standart gets new muscle
Today I make the flywheels done.
I should mention drill the mounting holes in the steel.
I do this on a small and very simple turntable which is sufficiently accurate for such work .
This I can easily clamp in my vise and find with the help of a motor and a suitable drill bit in the chuck the proper drilling position on the pitch circle .

So I can now drill every 120 ° , a 2.1 mm hole in each flywheel.


So I can now mount the flywheel with three M2 screws each on the engines. To secure the screws for easier contact adhesive has been proven .

In the next step I must inertia balancing . In addition I have screwed the motors in the cheek of an old gear and connected to the battery and controller. With a servo tester so I can leave the engine running while I hold the gear cheek with the engine between the fingers. So you spührt even the finest vibrations. The imbalance I am like a simple 2-component modeling clay from the I press the Innneseite the flywheels . With a little practice, you have a quick and good result in this way.


After balancing , I can now finally mount the gear in the tub.


Now I must first deal with it as with the original , the chain tensioner looks. The Tamyia solution is not a solution for me.
I should mention drill the mounting holes in the steel.
I do this on a small and very simple turntable which is sufficiently accurate for such work .
This I can easily clamp in my vise and find with the help of a motor and a suitable drill bit in the chuck the proper drilling position on the pitch circle .
So I can now drill every 120 ° , a 2.1 mm hole in each flywheel.
So I can now mount the flywheel with three M2 screws each on the engines. To secure the screws for easier contact adhesive has been proven .
In the next step I must inertia balancing . In addition I have screwed the motors in the cheek of an old gear and connected to the battery and controller. With a servo tester so I can leave the engine running while I hold the gear cheek with the engine between the fingers. So you spührt even the finest vibrations. The imbalance I am like a simple 2-component modeling clay from the I press the Innneseite the flywheels . With a little practice, you have a quick and good result in this way.
After balancing , I can now finally mount the gear in the tub.
Now I must first deal with it as with the original , the chain tensioner looks. The Tamyia solution is not a solution for me.
APAMOTEC Model technology in detail
-
Edwin
- Corporal
- Posts: 394
- Joined: Tue Jun 11, 2013 8:34 pm
- Location: Rheinland Pfalz Germany
- Contact:
Re: A Bergepanzer Standart gets new muscle
And on it goes with the chain tensioner.
Today I am building the supports for the eccentric and the dozer blade . In addition, I stiffen so that the hull front , but first I cut out a 28mm aluminum round bar from two pieces .

The metal pieces I turn plan , bring them to the same length and drill a 6mm central hole for the Exenterachse .


One side I milled from something .

Just so that they fit on the sides to the overlap of the tub.

Then I drill a second hole to 8mm offset in the two brackets by the later the axis for the dozer blade is inserted . In addition, I use this to align the brackets in the tub.


To clamp the eccentric I drill nich in each mount an M4 thread.

After I 've installed in the sides of the pan , the 6mm holes for the eccentric , the inside abgschliffen and degreased , I can glue the brackets. For alignment I use a 5 and 6mm silver steel rod that were previously lightly greased . How can I get them after the adhesive has cured out again.

Today I am building the supports for the eccentric and the dozer blade . In addition, I stiffen so that the hull front , but first I cut out a 28mm aluminum round bar from two pieces .
The metal pieces I turn plan , bring them to the same length and drill a 6mm central hole for the Exenterachse .
One side I milled from something .
Just so that they fit on the sides to the overlap of the tub.
Then I drill a second hole to 8mm offset in the two brackets by the later the axis for the dozer blade is inserted . In addition, I use this to align the brackets in the tub.
To clamp the eccentric I drill nich in each mount an M4 thread.
After I 've installed in the sides of the pan , the 6mm holes for the eccentric , the inside abgschliffen and degreased , I can glue the brackets. For alignment I use a 5 and 6mm silver steel rod that were previously lightly greased . How can I get them after the adhesive has cured out again.
APAMOTEC Model technology in detail
-
Edwin
- Corporal
- Posts: 394
- Joined: Tue Jun 11, 2013 8:34 pm
- Location: Rheinland Pfalz Germany
- Contact:
Re: A Bergepanzer Standart gets new muscle
Today I had to pull the steel rods from the brackets. I had greased thin before gluing and now I turn it with a screwdriver out. How it works quite easily and also glue residues are ignored.

First, I now have the suspension of the shield, which also tried the pan amplified and it works great. Since one should consider to build the shield made ??of aluminum. Now the dozer blade is the weakest link.

The eccentric now find their place.


And so now the page looks with roller.

On the other side of me, the roller remains a problem, but I'll still get.
First, I now have the suspension of the shield, which also tried the pan amplified and it works great. Since one should consider to build the shield made ??of aluminum. Now the dozer blade is the weakest link.
The eccentric now find their place.
And so now the page looks with roller.
On the other side of me, the roller remains a problem, but I'll still get.
APAMOTEC Model technology in detail
-
Edwin
- Corporal
- Posts: 394
- Joined: Tue Jun 11, 2013 8:34 pm
- Location: Rheinland Pfalz Germany
- Contact:
Re: A Bergepanzer Standart gets new muscle
so piecemeal it goes on.
Now I have the idlers properly installed and aligned to the chain track.

Of course, again the gears and sprockets montert, which I've donated a second screw for fastening.

The assembly of the tracks was then just a matter of form when it has been like mans does best, but now the tub is back on their soles.


However, the tracks are really not very stable and almost a little too short, after I have now psition the idlers in scale, but it still goes.
Here I have now set the servo times in the tub, but let's see if I should install it at all.
Now I have the idlers properly installed and aligned to the chain track.
Of course, again the gears and sprockets montert, which I've donated a second screw for fastening.
The assembly of the tracks was then just a matter of form when it has been like mans does best, but now the tub is back on their soles.
However, the tracks are really not very stable and almost a little too short, after I have now psition the idlers in scale, but it still goes.
Here I have now set the servo times in the tub, but let's see if I should install it at all.
APAMOTEC Model technology in detail
-
Edwin
- Corporal
- Posts: 394
- Joined: Tue Jun 11, 2013 8:34 pm
- Location: Rheinland Pfalz Germany
- Contact:
Re: A Bergepanzer Standart gets new muscle
This time must drive the Leo , but first I have to install the servo for the plow blade and adjust the regulator .
The servo I just sit on a plastic plate I screw on two feet with the tub.

The servo I can now easily stick to the plastic plate.

Next, I have my battery and the receiver for test drives set in the tub and the control is set with the programming card .

For the test drive, I have a general program on my transmitter . Therefore, I have the dozer blade , although controlled , but not as it should be later. Also, the regulator get so no fine tuning , but that is for test drives also not necessary , as I have a precise adjustment of the suspension can not do because I do not know the later weight distribution.

The design of the drive is adapted in this Leo not on speed, but to such a workhorse fits to torque and sensitive reaction.
What has somewhat bothered me was the low grip of the tracks , but that might be even better after a precise adjustment of the suspension and more weight.
So my work is complete except for a few small adjustments and settings.
The servo I just sit on a plastic plate I screw on two feet with the tub.
The servo I can now easily stick to the plastic plate.
Next, I have my battery and the receiver for test drives set in the tub and the control is set with the programming card .
For the test drive, I have a general program on my transmitter . Therefore, I have the dozer blade , although controlled , but not as it should be later. Also, the regulator get so no fine tuning , but that is for test drives also not necessary , as I have a precise adjustment of the suspension can not do because I do not know the later weight distribution.
The design of the drive is adapted in this Leo not on speed, but to such a workhorse fits to torque and sensitive reaction.
What has somewhat bothered me was the low grip of the tracks , but that might be even better after a precise adjustment of the suspension and more weight.
So my work is complete except for a few small adjustments and settings.
APAMOTEC Model technology in detail
-
Tankkiller308
- Recruit
- Posts: 1
- Joined: Sun Feb 16, 2014 3:47 pm
Re: A Bergepanzer Standart gets new muscle
This is really cool you did a good job on this
I want I build my own Bergepanzer do you have a original form of your build I would love to see how you did your original so I can get an idea how to build one myself I was asking around if anyone had built one on rc universe they said you were building one your work is great can't wait to see more progress
I want I build my own Bergepanzer do you have a original form of your build I would love to see how you did your original so I can get an idea how to build one myself I was asking around if anyone had built one on rc universe they said you were building one your work is great can't wait to see more progress
