1/8 jagdpanther re-build.
Re: 1/8 jagdpanther re-build.
Just the back end to finish off then its primer time at last!
Re: 1/8 jagdpanther re-build.
Thanks Eastern Front, appreciated!.
Its been a long project. Longer than I expected for my first venture. But Ive enjoyed having to scratch build everything (the joy of 1/8). Looking around now for inspiration for the paint scheme.
cheers mate.
Its been a long project. Longer than I expected for my first venture. But Ive enjoyed having to scratch build everything (the joy of 1/8). Looking around now for inspiration for the paint scheme.
cheers mate.
Re: 1/8 jagdpanther re-build.
Hi all,
Some more progress on the rear. Not sure what the exact descriptive term for this part is but I'm sure you'll recognise it and enlighten me.
Some more progress on the rear. Not sure what the exact descriptive term for this part is but I'm sure you'll recognise it and enlighten me.
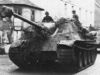
- The original item
- DSC00431.JPG (86.1 KiB) Viewed 5999 times
- Attachments
-
- Since no model is complete without one, the beginings of the mandatory bucket!
-
- the new and improved version.
Re: 1/8 jagdpanther re-build.
I decided I wasn't happy with my jack so did a it of rework and added a bit more detail. Should look ok with some paint on. Got a few more its and pieces ready to go on the rear. I'll be fitting evrything to the rear over the weekend and trying to come up with a way of hiding the join between upper and lower hull as best as possible. Will upload more photos when completed.
- Attachments
-
-
-
Re: 1/8 jagdpanther re-build.
After looking at the gearbox I decided to give a little attention as the grease it was packed with looked and smelled as though it was overdue a refresh. The gearbox lid that came with it was a bit of a lash up at best. It had consisted of poorly formed very thin aluminium which was a poor fit and held in place with duct tape and zip ties. Into the bin with that. I then extracted the old grease and got the gears spotless for inspection. To my relief all gears and bearings were in excellent condition.
I made a new lid from a more robust aluminium sheet and made rebate with a soft rubber gasket which gave a nice snug fit on the gearbox. After repacking with fresh grease and installing the new lid I set about degreasing the whole interior ready for painting.
I made a new lid from a more robust aluminium sheet and made rebate with a soft rubber gasket which gave a nice snug fit on the gearbox. After repacking with fresh grease and installing the new lid I set about degreasing the whole interior ready for painting.
- Attachments
-
-
- Used 2 coats of primer then three coats of automotive satin black
-
- New sturdy gearbox lid installed
-
- Virtually all the old grease gone.It had been full to the brim with old stuff. Did a final rinse with a motorcycle chain cleaner aersol which worked a treat.
Last edited by JP 233 on Fri Feb 07, 2014 12:18 pm, edited 1 time in total.
-
PainlessWolf

- Colonel
- Posts: 7913
- Joined: Sun Feb 26, 2012 9:09 pm
- Location: Southern Colorado Rocky Mountains
Re: 1/8 jagdpanther re-build.
Good Afternoon,
This build just gets better and better. You have taken one of the large scale Jagdpanthers in serious need of attention and brought it up to the next level of detail and usefulness. Both thumbs up, Sir.
regards,
Painless
This build just gets better and better. You have taken one of the large scale Jagdpanthers in serious need of attention and brought it up to the next level of detail and usefulness. Both thumbs up, Sir.
regards,
Painless
...Money!? What's that!?...
Re: 1/8 jagdpanther re-build.
Thanks alot Painless, much appreciated. Some more photos on the way over the weekend. I'll be looking at making a new gun elevation mechanism and planning a full rewire including a new pyrotechnic firing circuit.
-
dgsselkirk

- Warrant Officer 1st Class
- Posts: 1510
- Joined: Tue Oct 16, 2012 1:57 am
- Location: Kitchener, Ontario, Canada
- Contact:
Re: 1/8 jagdpanther re-build.
I too have been watching this one with interest. Love this scale but $$$! 
Great job on this rebuild...
Great job on this rebuild...
"There are things in Russia which are not as they seem..."
Georgy Konstantinovich Zhukov
Georgy Konstantinovich Zhukov
Re: 1/8 jagdpanther re-build.
Thanks dgsselkirk.
More progress with aluminium sheet. I decided to make a deck plate to hold quick disconnecting points (to facilitate easy removal of the upper hull) for the gun elevation motor and pyrotechnics, and also a voltmeter which can be seen through the commanders hatch.
More progress with aluminium sheet. I decided to make a deck plate to hold quick disconnecting points (to facilitate easy removal of the upper hull) for the gun elevation motor and pyrotechnics, and also a voltmeter which can be seen through the commanders hatch.
- Attachments
-
- The first switches go on the control panel. Decided on toggle switches as theyre more robust.
-
-
- the new deck plate finshed
-
- Looking forward to sorting this lot. Should tidy up nicely once Ive worked out new routings.
-
- Batteries in position and distribution points. Now I can make a start on the rewire.
-
- a test fit of the alminium version before riveting
-
- I decided to add a cover to hide all the wiring etc coming out of the rear of the control panel. It would also add strength to both the control panel and the new deck plate. You see the cereal packet template taking shape.
-
Re: 1/8 jagdpanther re-build.
Its a runner again! All the wiring done and dusted. Brand new battery pack installed. Everthing functioned correctly first time. Phew. I fitted a new volume control as the old potentiometer had died. Certainly sounds better with the cut outs in the engine deck. The new pyro circuit is in aswell. I just need some slightly warmer weather to start the paint job.
- Attachments
-
- Voltmeter nice and bright through the hatch.
-
- Control panel finished. yellow stripes for the arming switch, charging point, refill hose for smoker, and volume knob. Dzus fastener holds upper hull to the chassis.
-
