NO!!, No you dontRaminator wrote: ↑Sat Jul 29, 2023 3:44 am Coming together really nicely Baldrick, it looks like it'll be a really solid runner.
I think 1:10 is a really good compromise for larger-scale stuff. Not so over-the-top as 1:6, but bigger and more impressive than 1:16. I might need to reconsider my priorities...
1/10th Brummbar
-
HERMAN BIX

- Brigadier
- Posts: 10411
- Joined: Sun Jan 12, 2014 12:15 am
- Location: Gold Coast,Australia
Re: 1/10th Brummbar
HL JAGDPANTHER,HL TIGER 1,HL PzIII MUNITIONSCHLEPPER, HL KT OCTOPUS,HL PANTHER ZU-FUSS,HL STuG III,HL T34/85 BEDSPRING,
HL PZIV MALTA,MATORRO JAGDTIGER,HL F05 TIGER,TAMIYA KT,HL PANTHERDOZER,HL EARLY PANTHER G,TAIGEN/RAMINATOR T34/76,
HL AN-BRI-RAM SU-85
HL PZIV MALTA,MATORRO JAGDTIGER,HL F05 TIGER,TAMIYA KT,HL PANTHERDOZER,HL EARLY PANTHER G,TAIGEN/RAMINATOR T34/76,
HL AN-BRI-RAM SU-85
-
baldrick131
- Lance Corporal
- Posts: 140
- Joined: Fri Oct 04, 2019 8:46 pm
- Location: March cambridgeshire
- Contact:
Re: 1/10th Brummbar
I started building this to see how easy it is to do but I also think it's the way to go once you start adding finer details which should be easier at a larger scale.Raminator wrote: ↑Sat Jul 29, 2023 3:44 am Coming together really nicely Baldrick, it looks like it'll be a really solid runner.
I think 1:10 is a really good compromise for larger-scale stuff. Not so over-the-top as 1:6, but bigger and more impressive than 1:16. I might need to reconsider my priorities...
The only downside for most people I suppose is the lack of off the shelf parts or kits as not everyone has a 3d printer or access to one.
And I'm going to need a bigger shelf to keep it on
But one day I may have a go at building a 1/6th scale tank just to see if I can.
-
tankme

- Warrant Officer 1st Class
- Posts: 2016
- Joined: Tue Oct 31, 2017 3:51 pm
- Location: Elgin, TX
- Contact:
Re: 1/10th Brummbar
I agree with the 1/6th thing. I have the files to print an IS-3 in 1/6th. That will be a major project.
Derek
Too many project builds to list...
Too many project builds to list...
-
baldrick131
- Lance Corporal
- Posts: 140
- Joined: Fri Oct 04, 2019 8:46 pm
- Location: March cambridgeshire
- Contact:
Re: 1/10th Brummbar
I've always wanted to build a 1/6th scale tank but the cost has always been a prohibitive factor for me so that's why I had a go at the smaller ones but after watching some builtbywikander YouTube video's I'm more inspired to have a go so I might have a crack when I've finished this one although my wife might object
-
baldrick131
- Lance Corporal
- Posts: 140
- Joined: Fri Oct 04, 2019 8:46 pm
- Location: March cambridgeshire
- Contact:
Re: 1/10th Brummbar
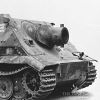
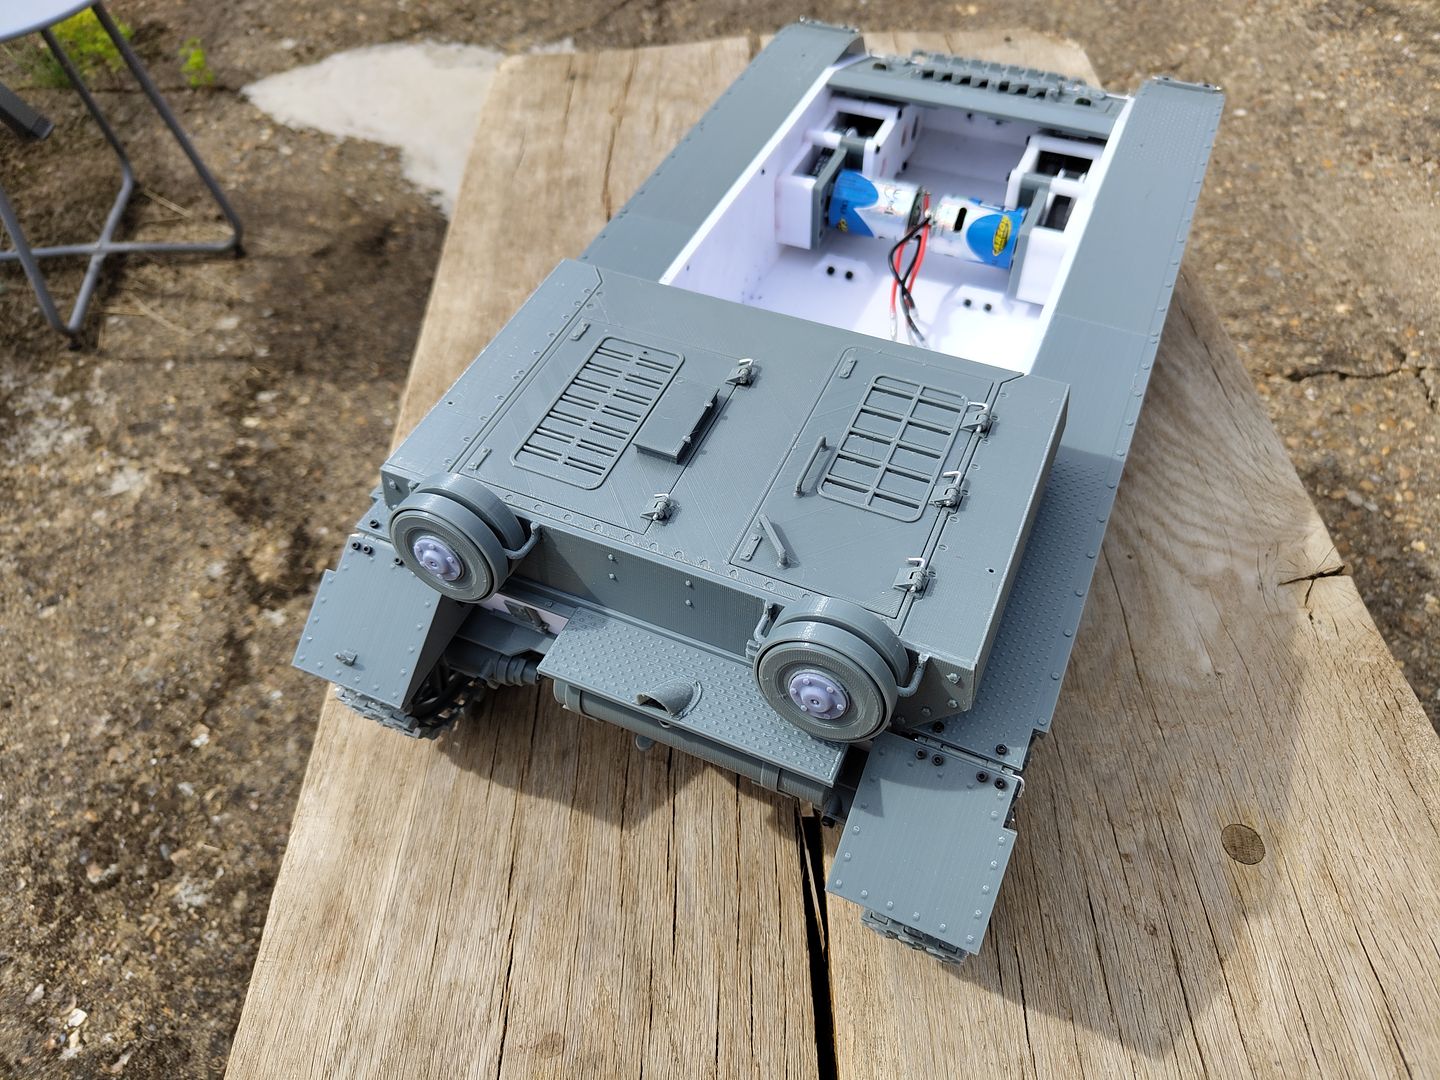
I've done some rework on the gearboxes as I wasn't happy with the wobble on one of the motor pulleys because the motor shaft is quite short.
I re designed the pulley with a D shaped hole that was a better fit for the shaft and moved the grub screw closed to the motor end so it's not gripping so close to the end of the shaft and causing it to distort the pulley and make it wobble.
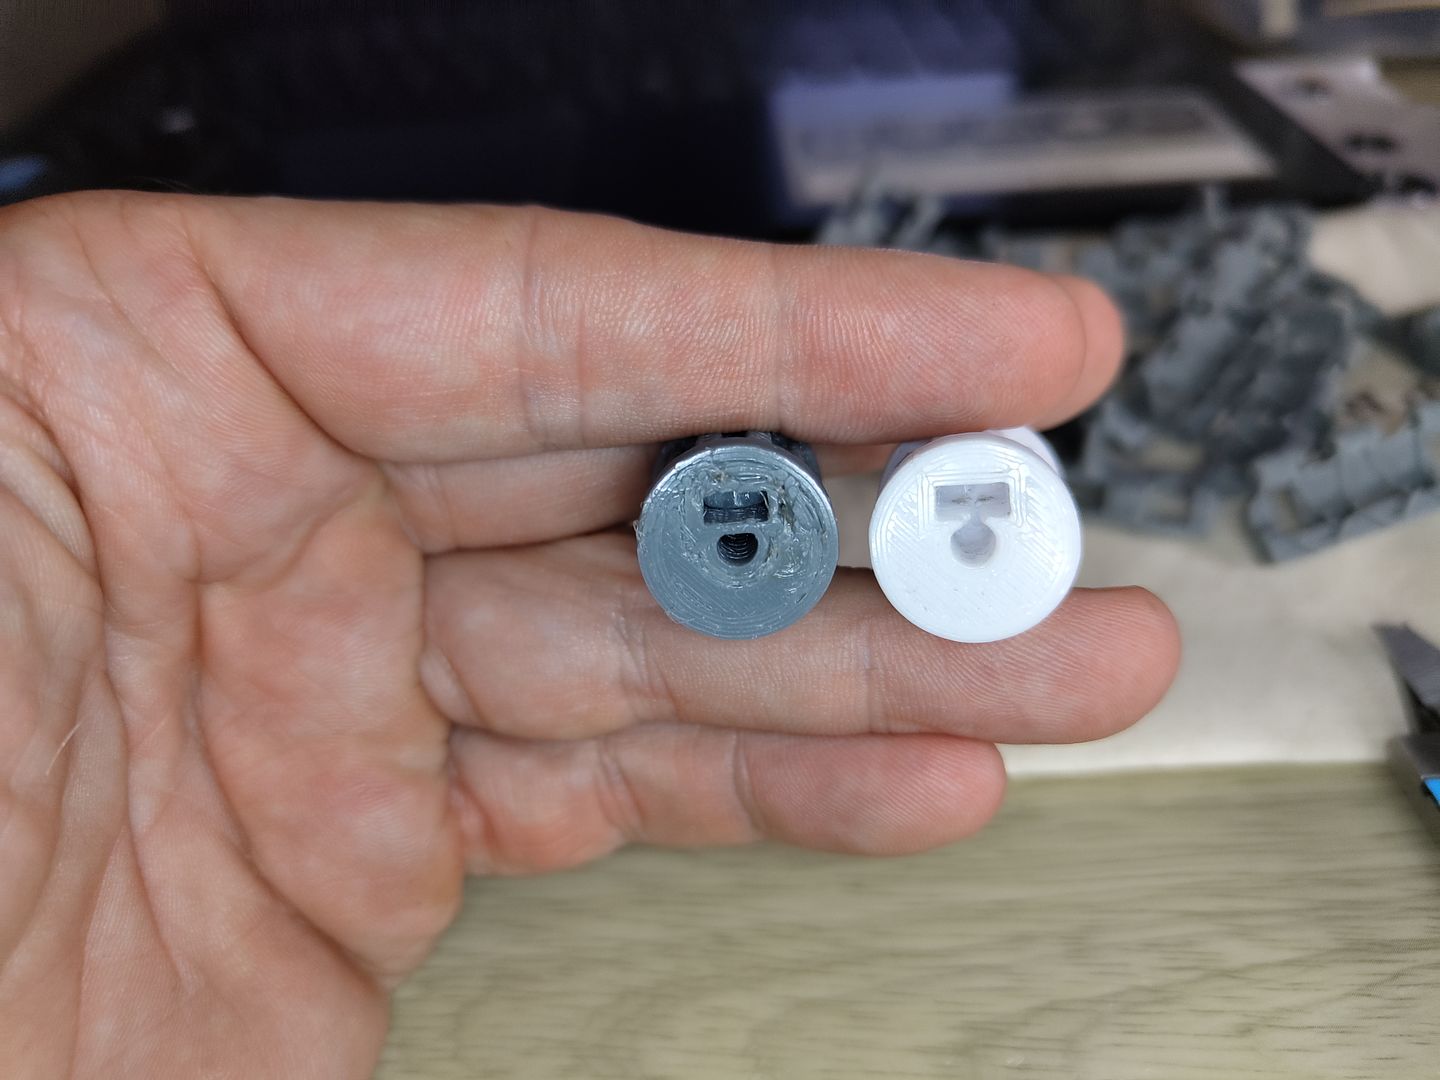
The grey one is my reworked pulley.
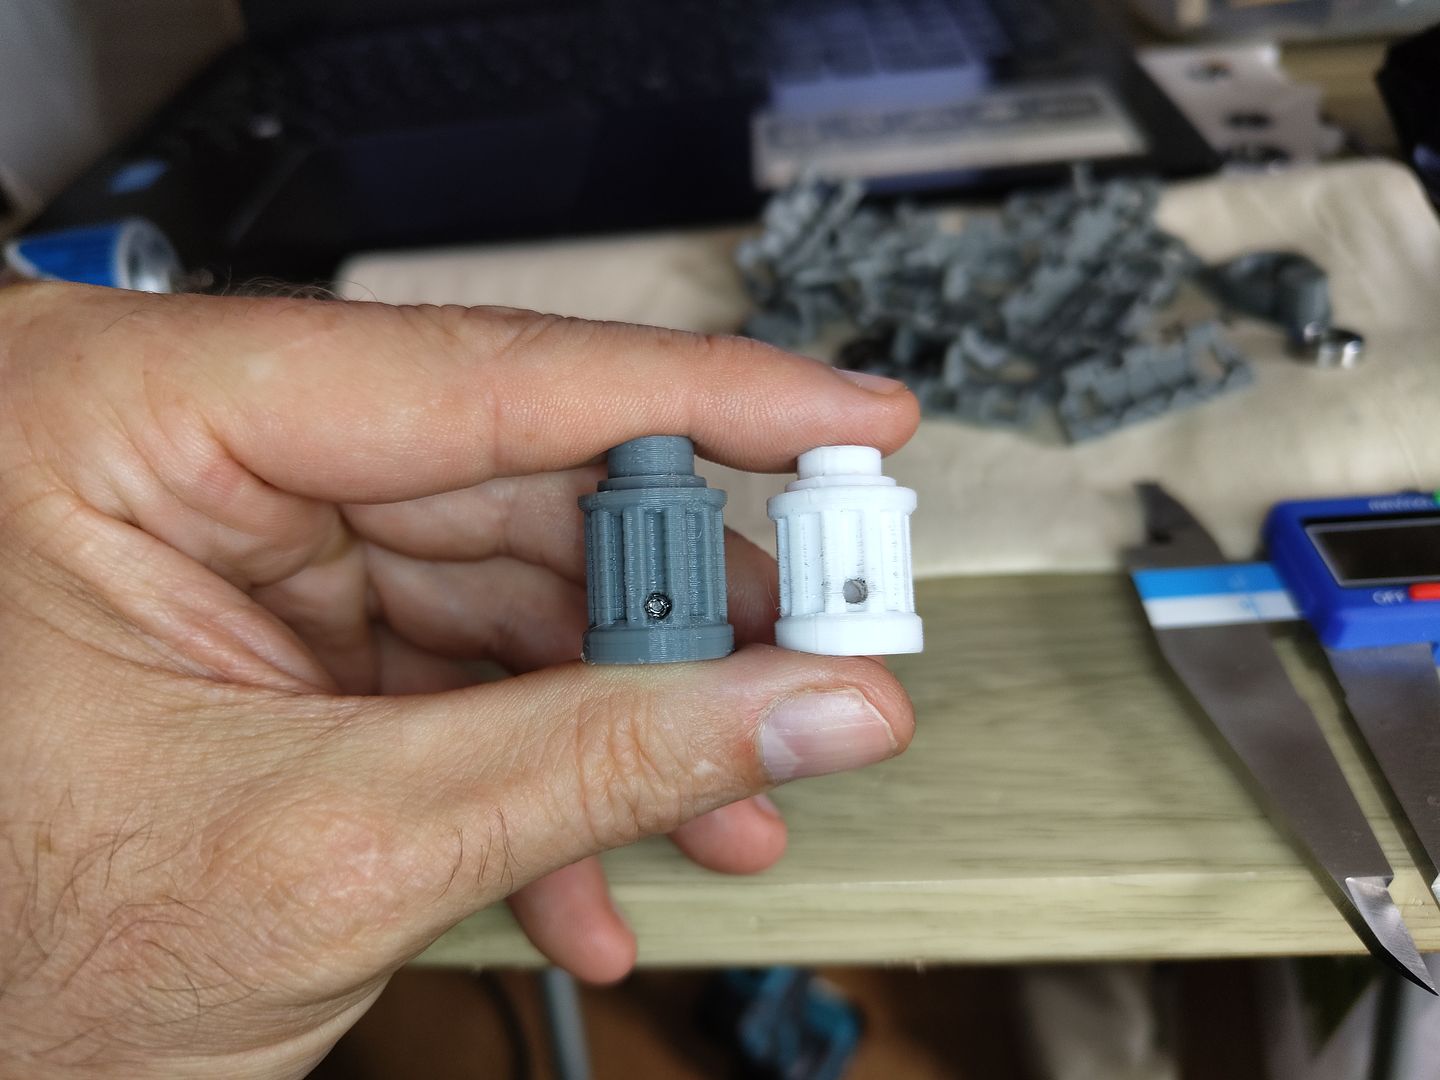
To also improve the situation I re designed the motor mounting part of the gearboxes to do away with the spacer that is a petg heat break as the whole tank is in petg I made it one piece and a bit slimmer to allow the motor shaft to sit in the pulley further.
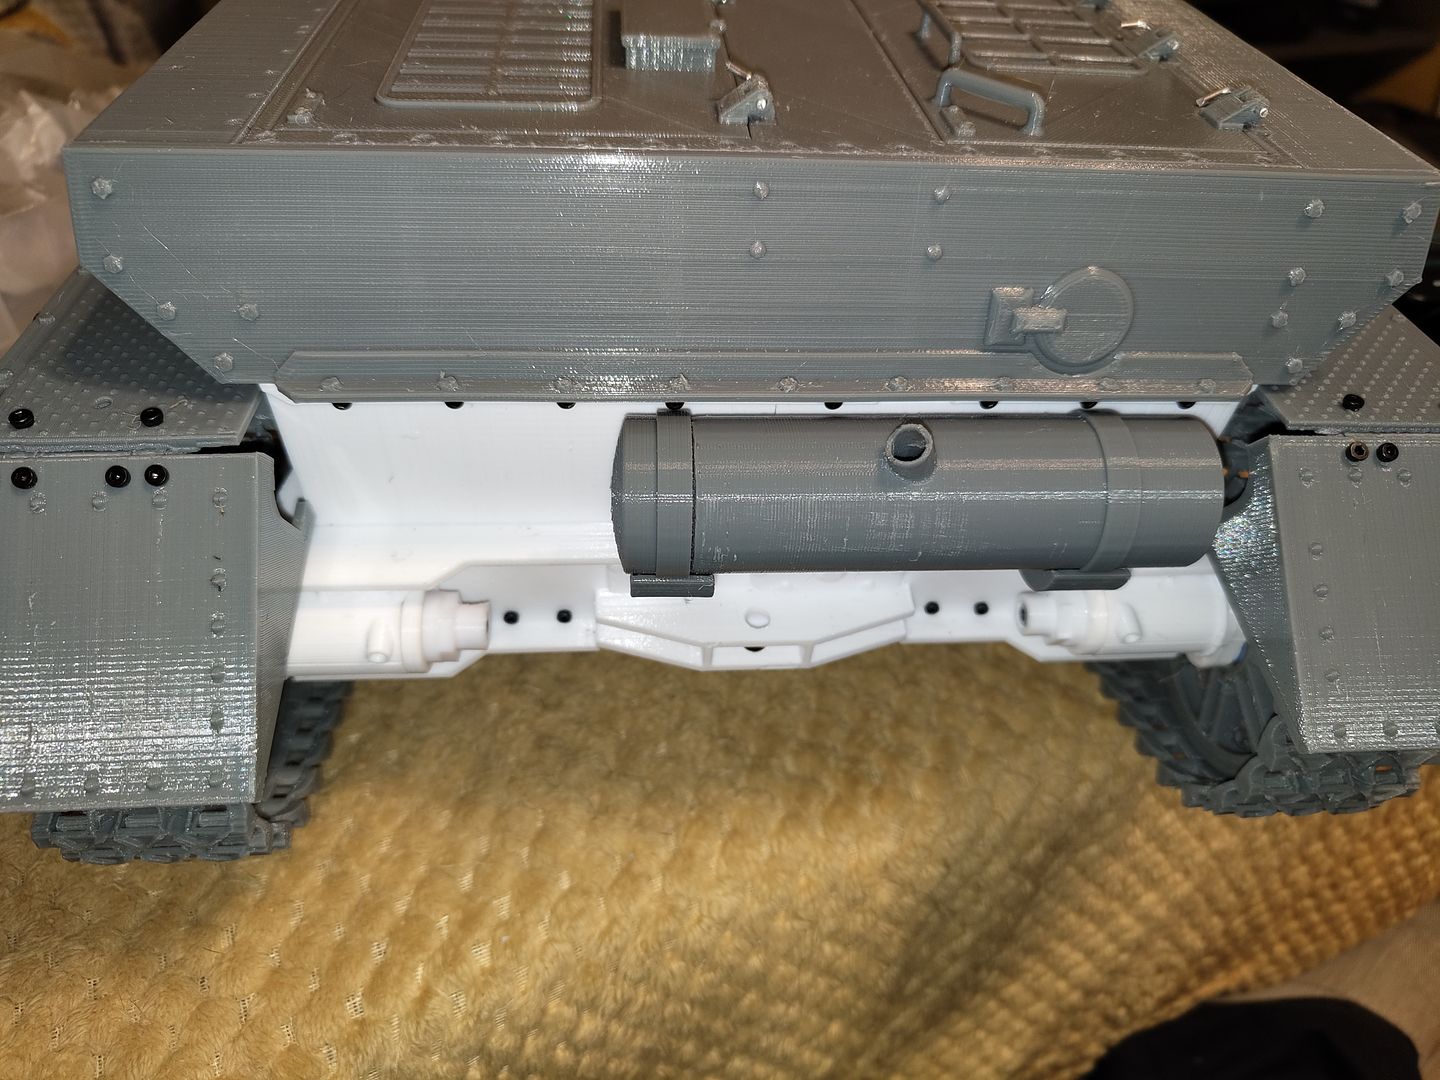
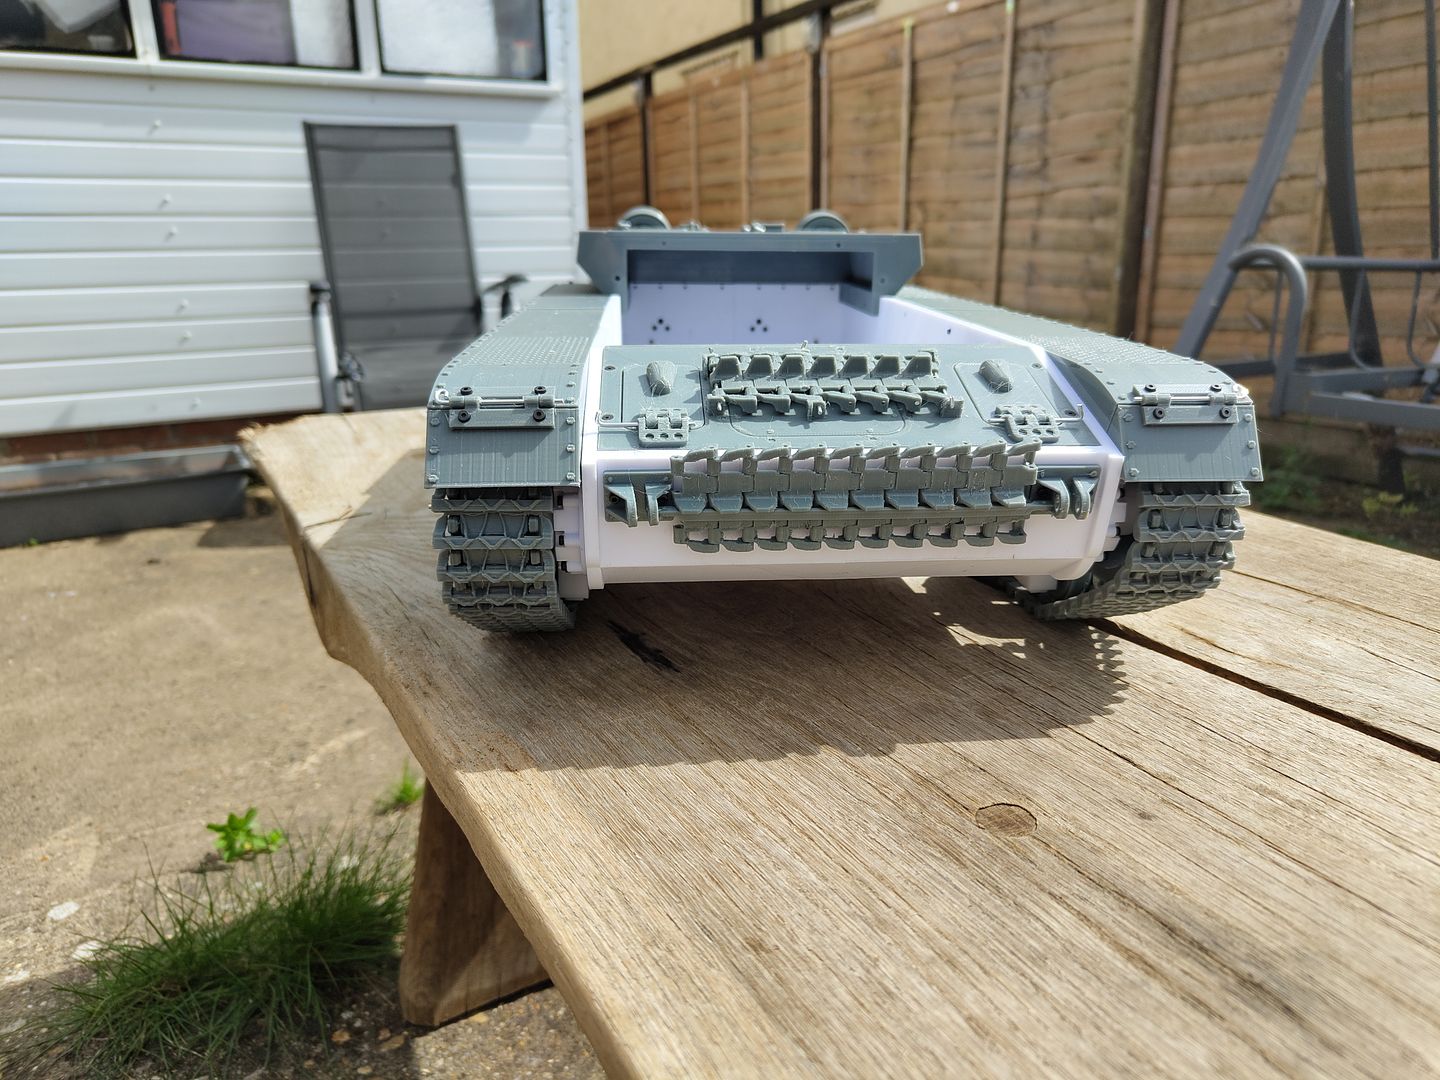
My next adventure is making the rear end resemble a Brummbar and that will mean changing the exhaust from the one in the files to the big muffler type.
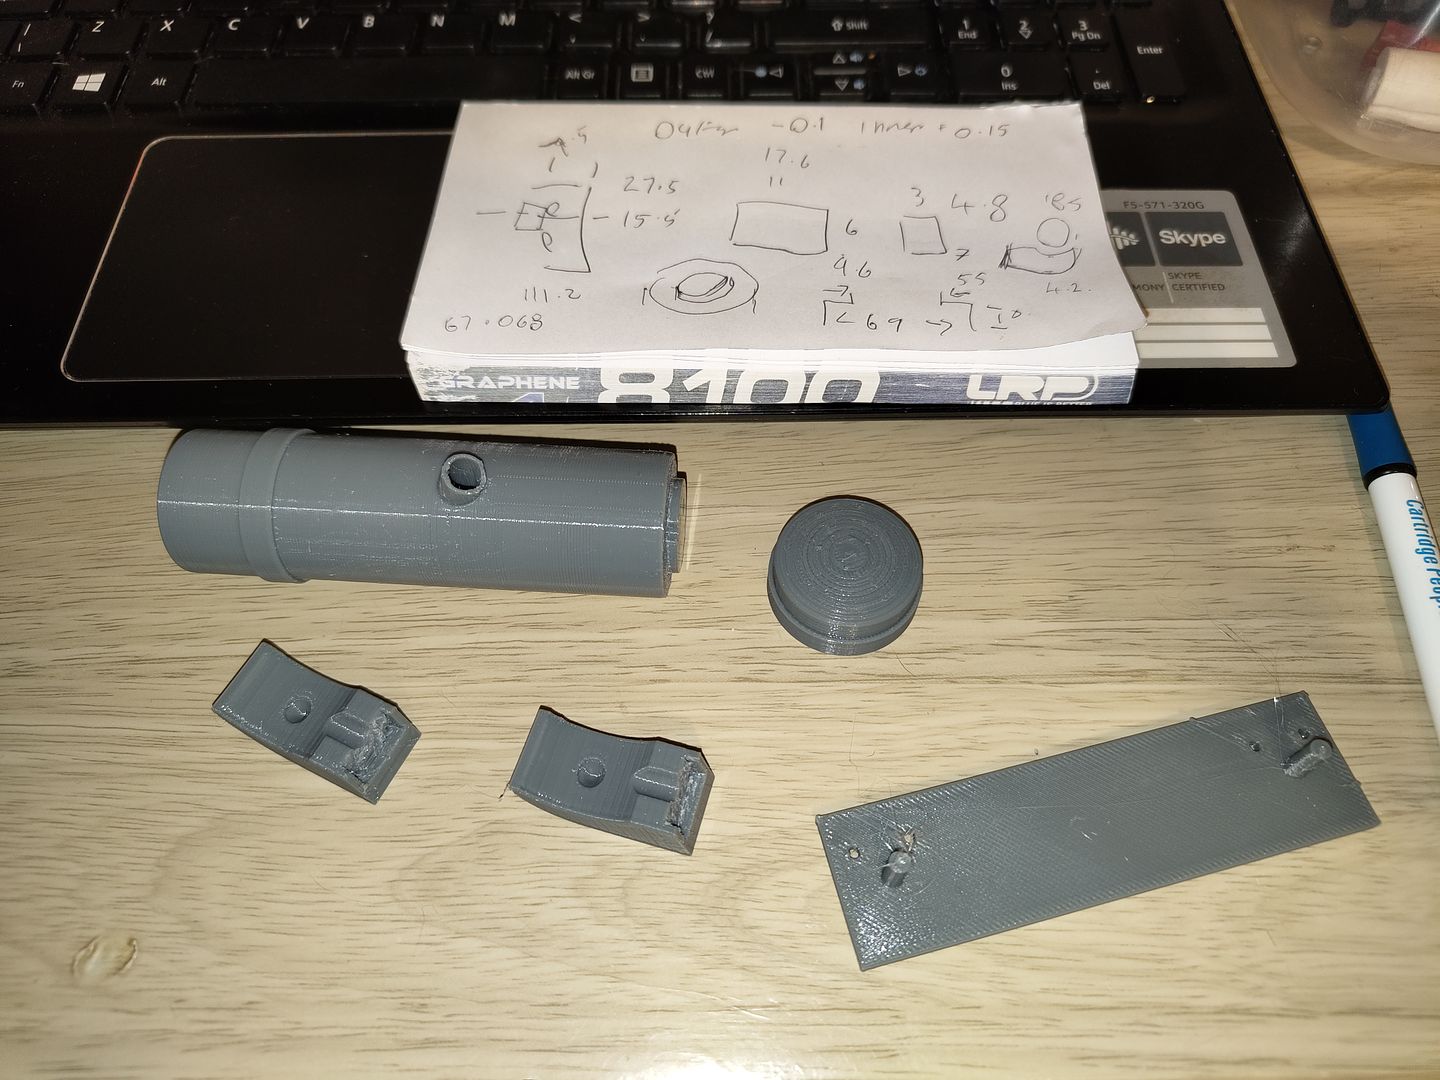
I modelled up the parts and a template for drilling the screw holes.
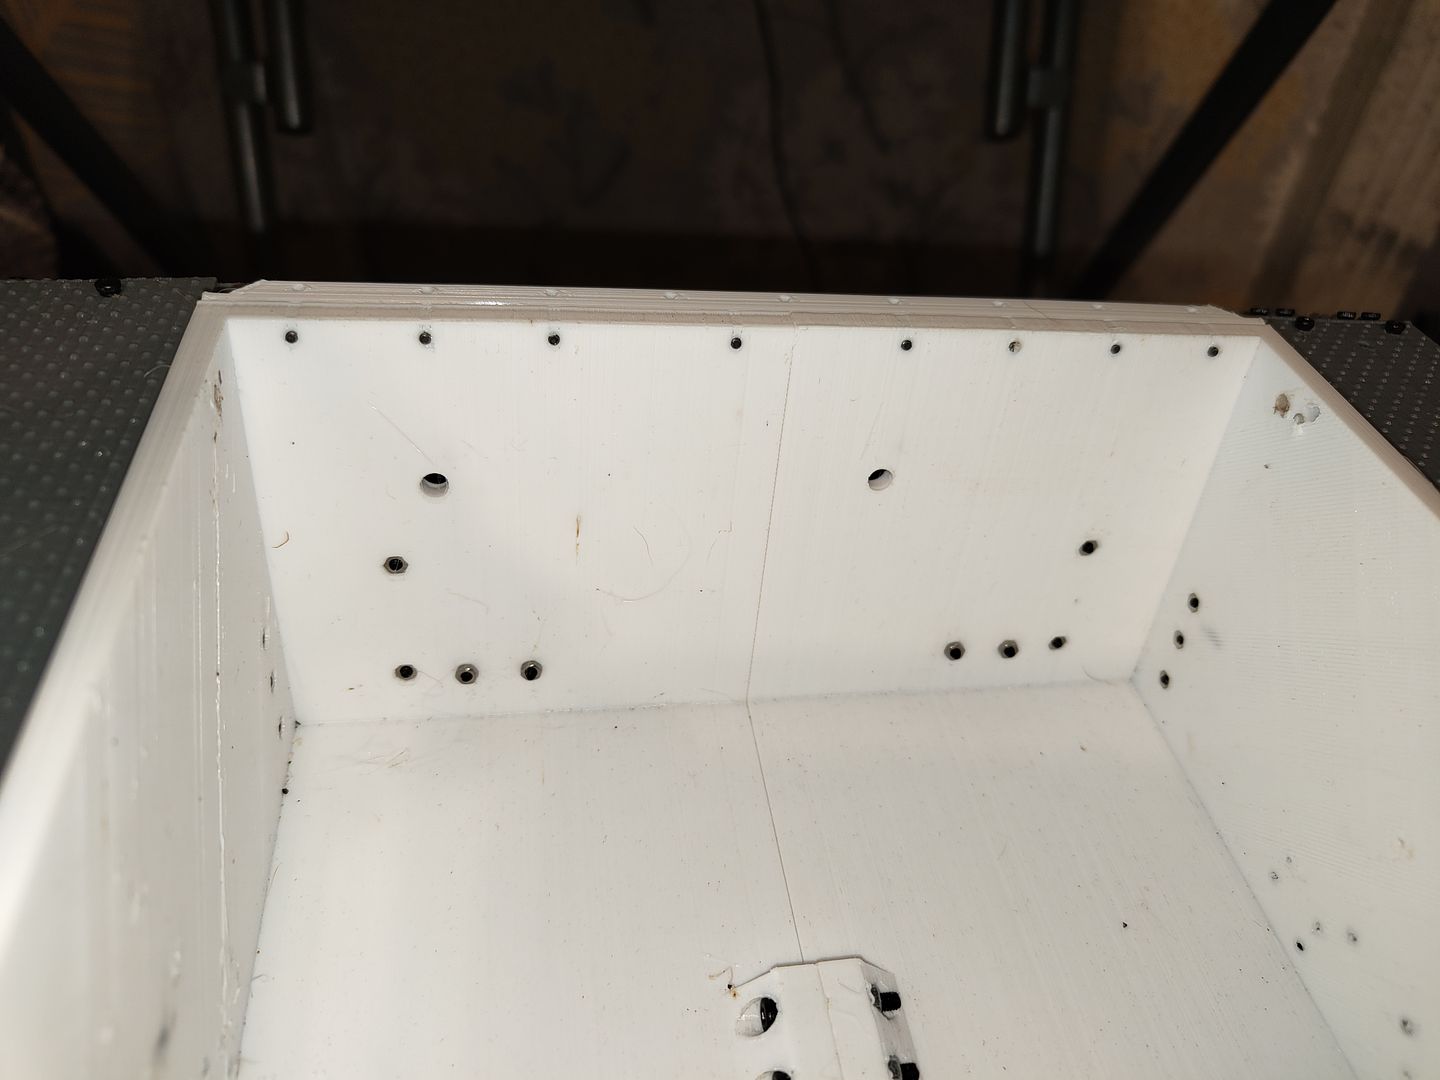
This is how the model is printed with just a couple of holes for the exhaust and I need to put some small holes to mount the exhaust.
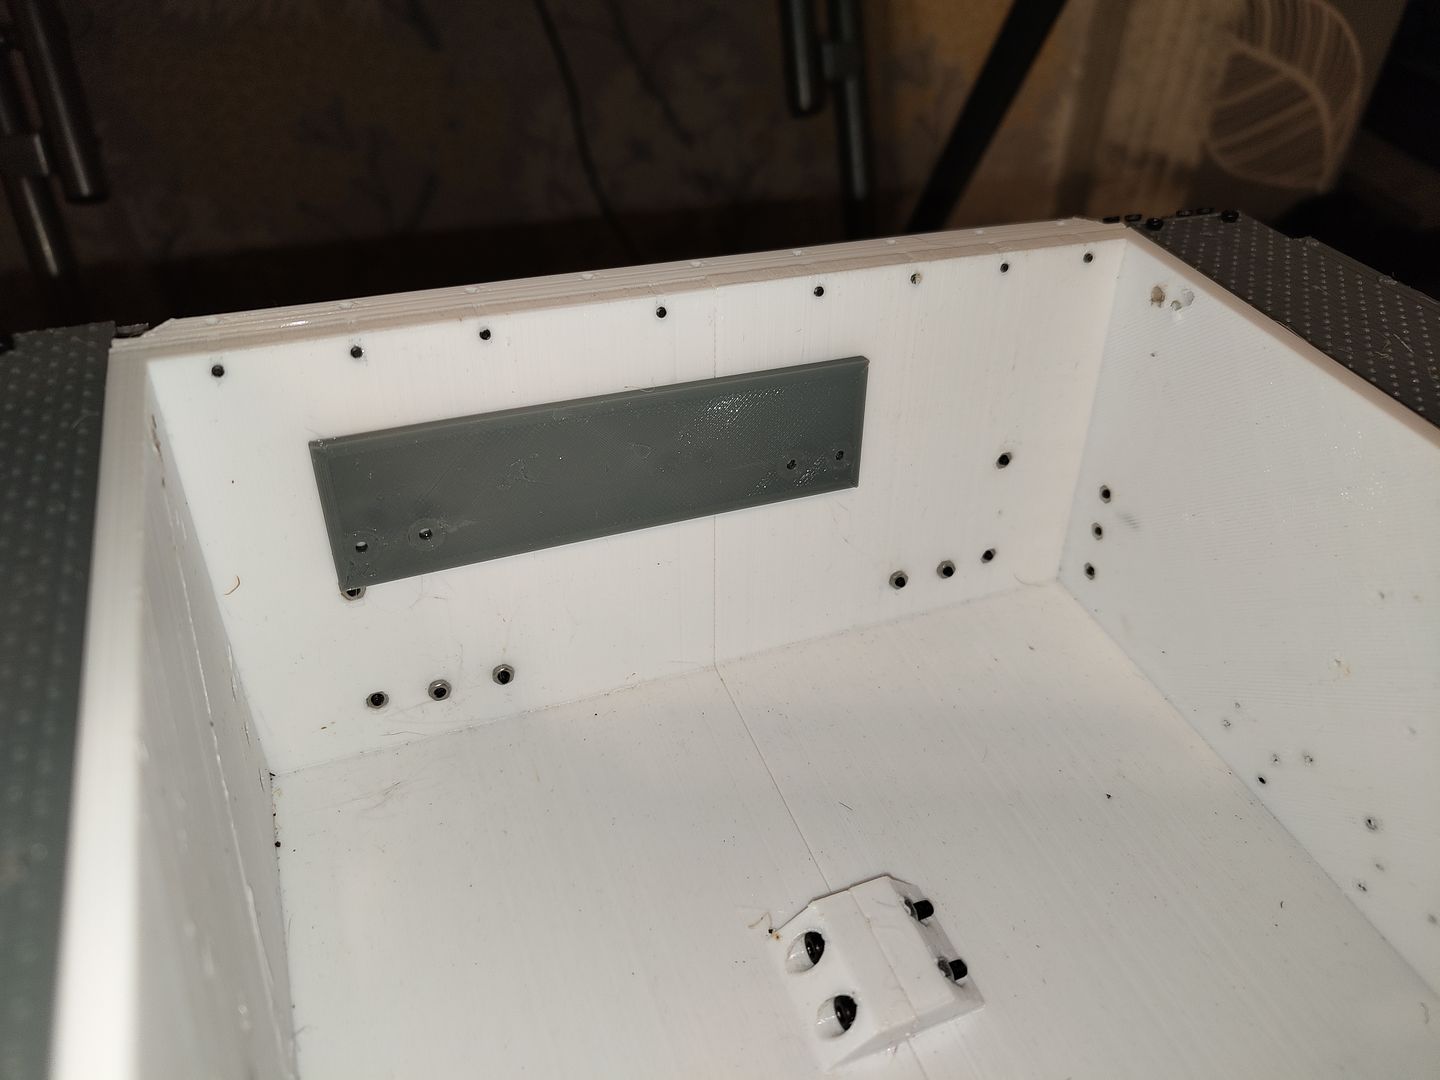
So just pop the template posts in the holes and drill through the guide holes and job done.

A bit of glue and a few screws and it has an exhaust
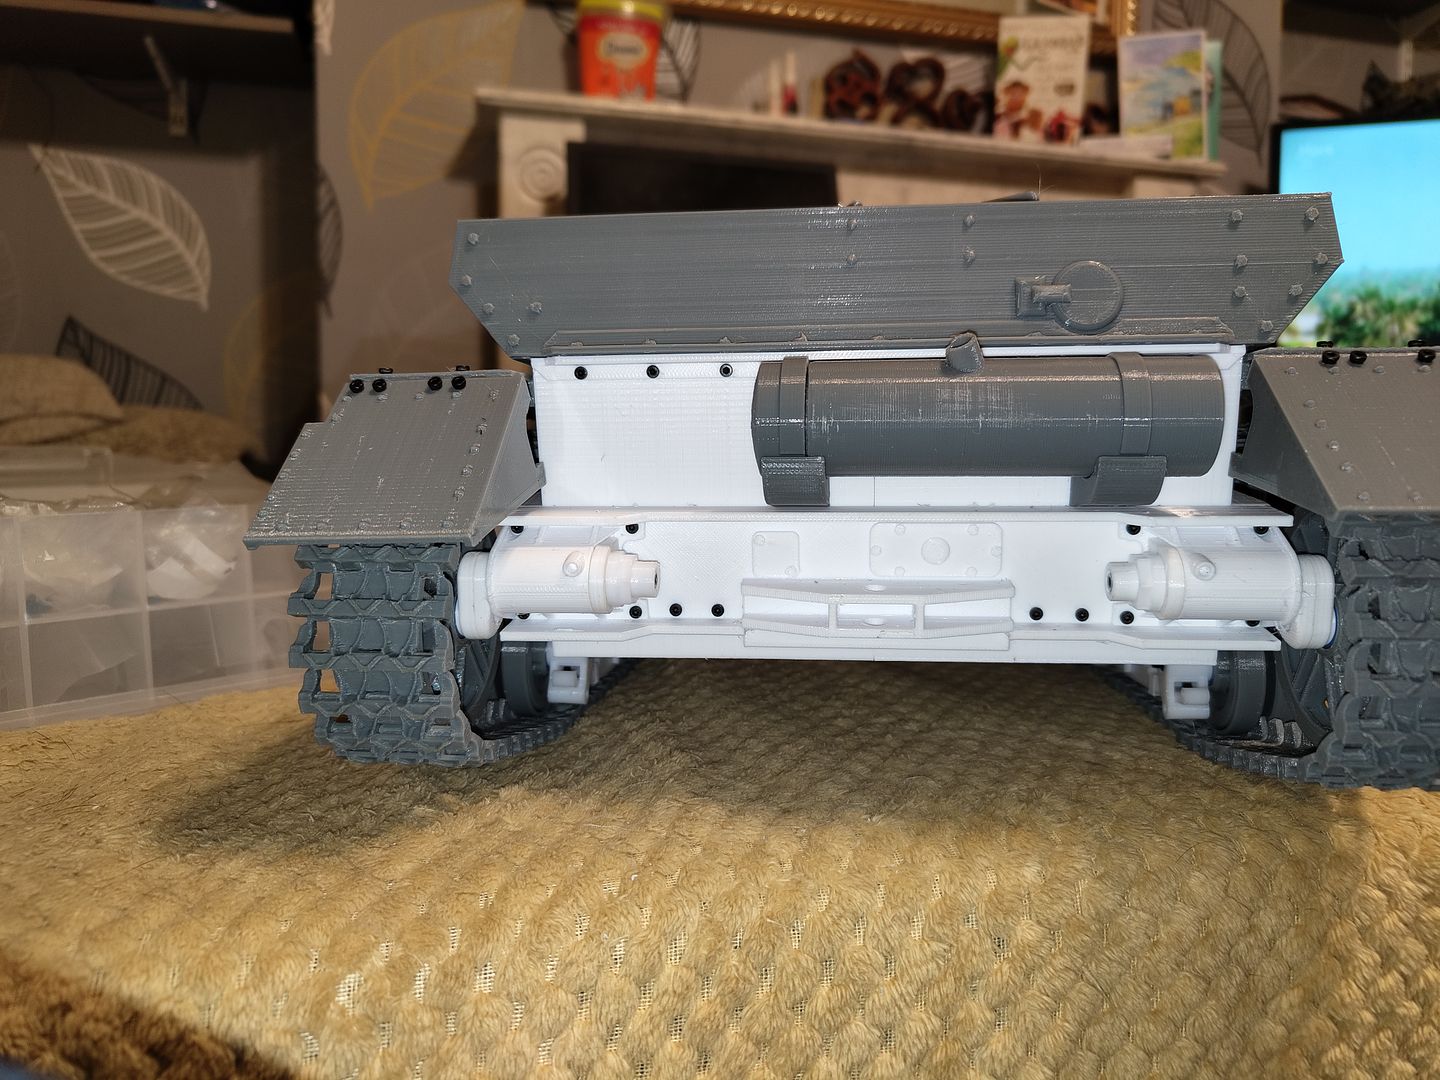
Next job is to make the tread plate section above the exhaust and a couple of mounts for the spare road wheels I tried to make the parts separate and fit them but it was easier to remove the rear panel off of the engine deck and make it a one piece part.
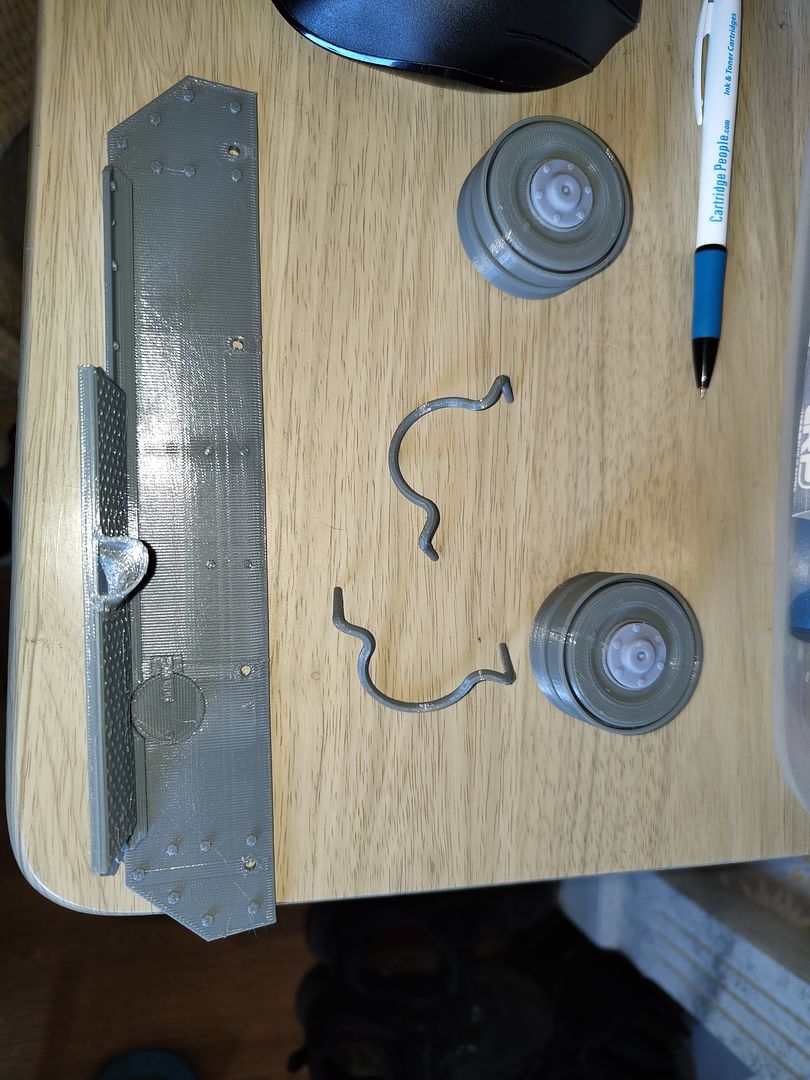
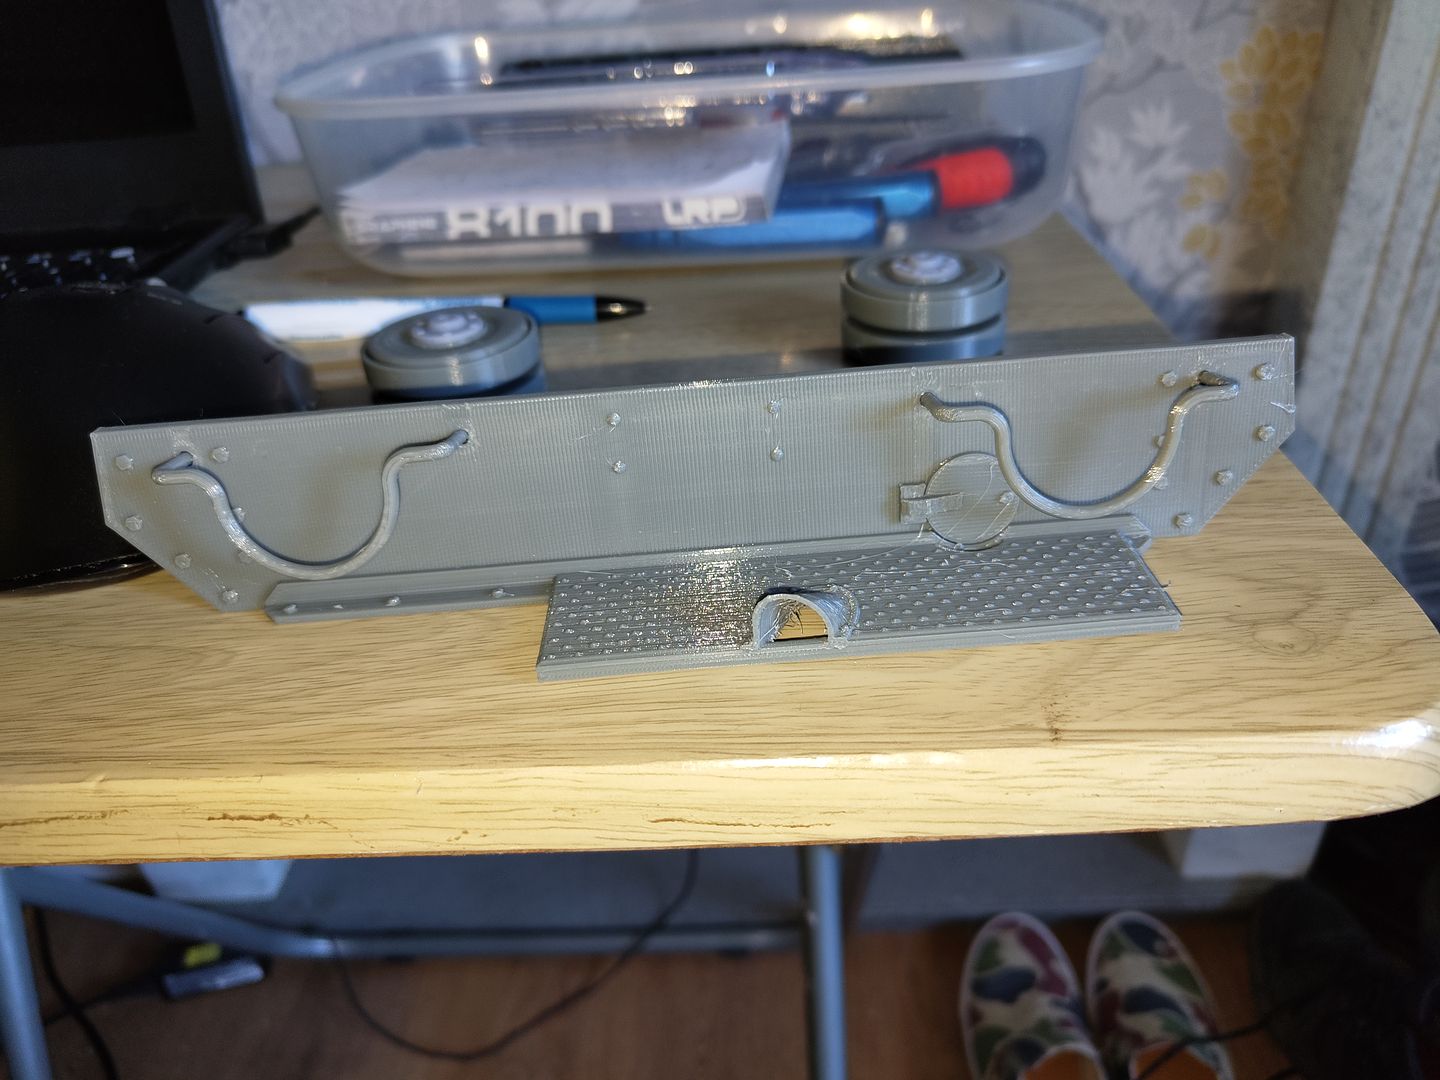
This is the first version just to make sure everything lines up.
After a few tweaks it now looks like this.
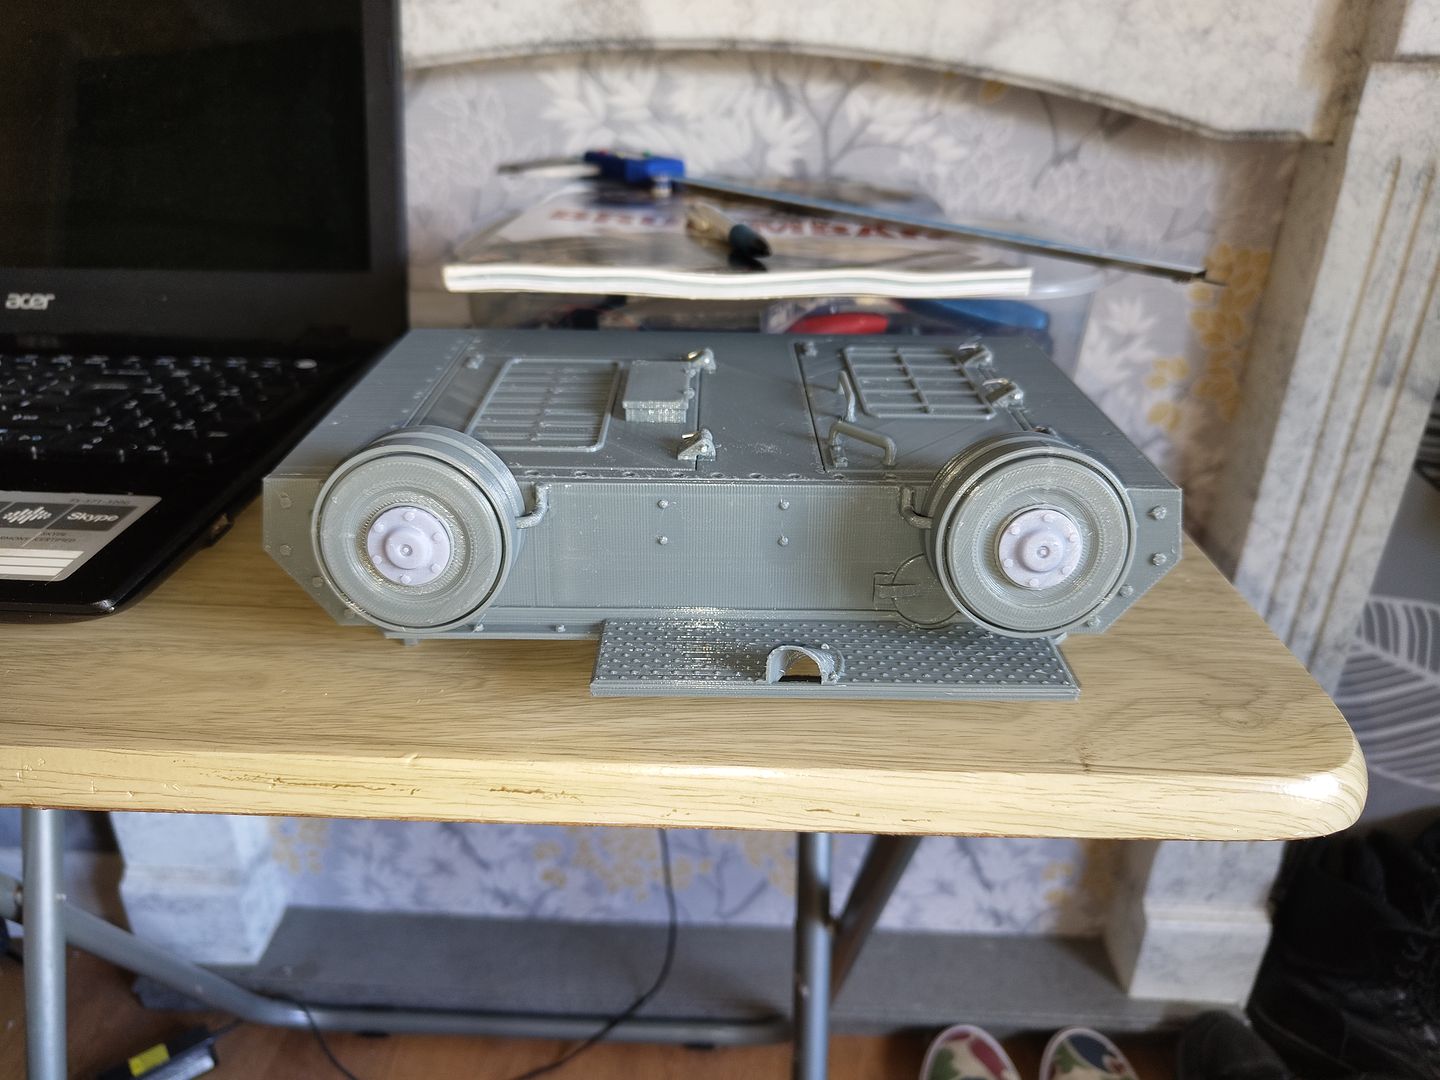
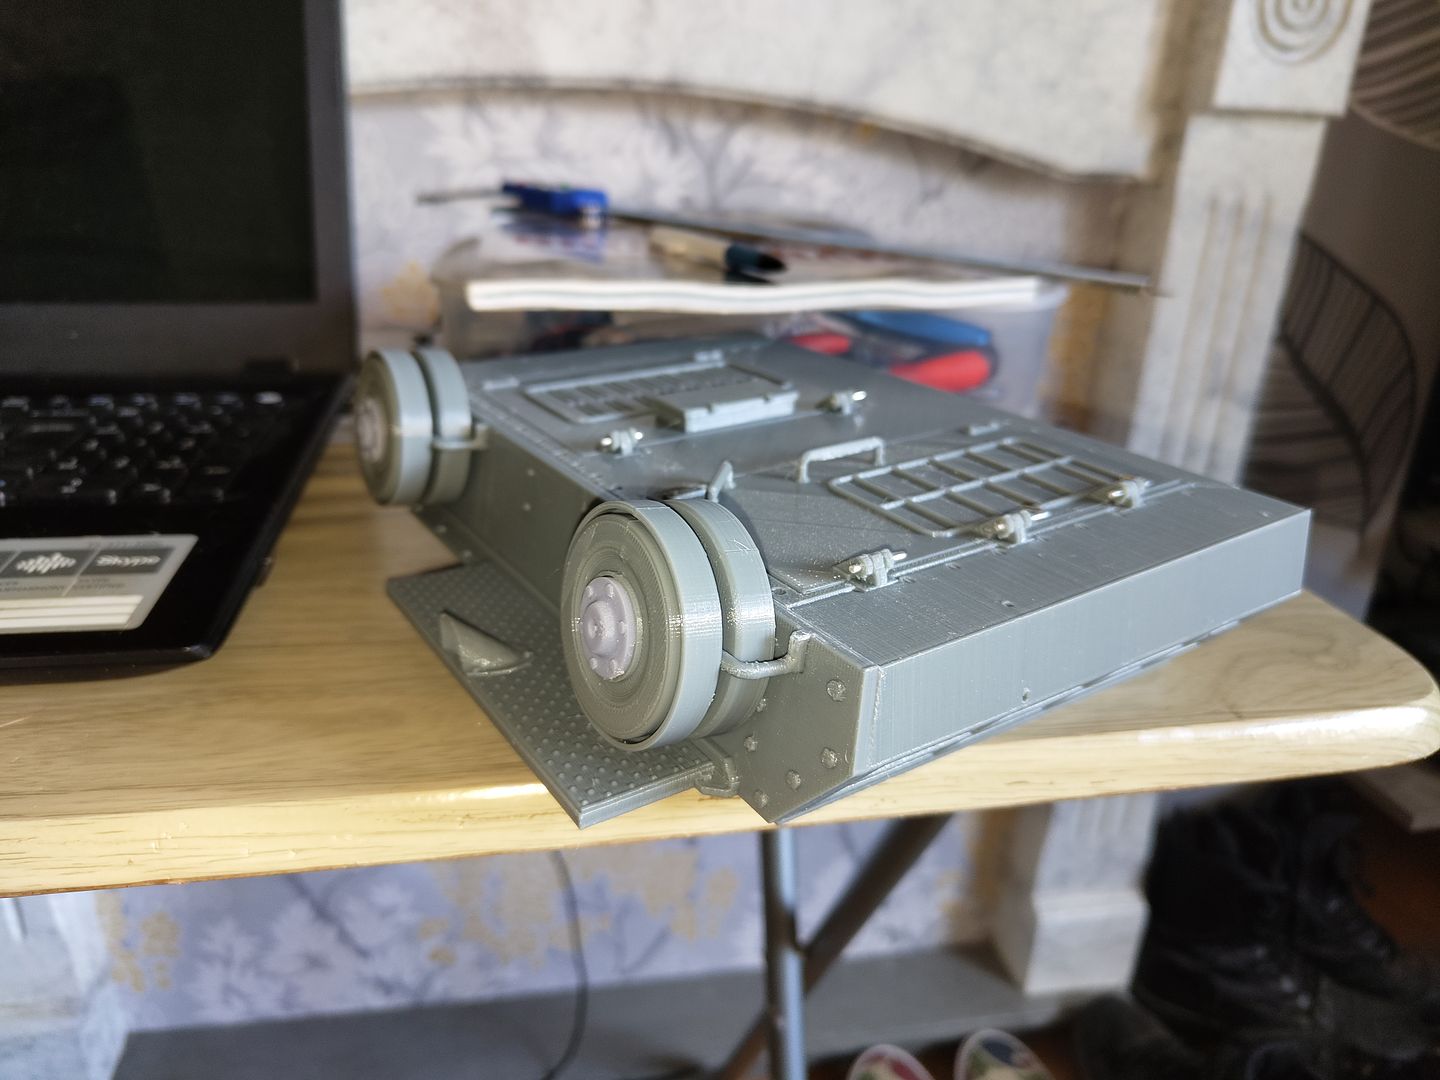
And now it's starting to look like a Brummbar
I re designed the pulley with a D shaped hole that was a better fit for the shaft and moved the grub screw closed to the motor end so it's not gripping so close to the end of the shaft and causing it to distort the pulley and make it wobble.
The grey one is my reworked pulley.
To also improve the situation I re designed the motor mounting part of the gearboxes to do away with the spacer that is a petg heat break as the whole tank is in petg I made it one piece and a bit slimmer to allow the motor shaft to sit in the pulley further.
My next adventure is making the rear end resemble a Brummbar and that will mean changing the exhaust from the one in the files to the big muffler type.
I modelled up the parts and a template for drilling the screw holes.
This is how the model is printed with just a couple of holes for the exhaust and I need to put some small holes to mount the exhaust.
So just pop the template posts in the holes and drill through the guide holes and job done.
A bit of glue and a few screws and it has an exhaust
Next job is to make the tread plate section above the exhaust and a couple of mounts for the spare road wheels I tried to make the parts separate and fit them but it was easier to remove the rear panel off of the engine deck and make it a one piece part.
This is the first version just to make sure everything lines up.
After a few tweaks it now looks like this.
And now it's starting to look like a Brummbar
-
baldrick131
- Lance Corporal
- Posts: 140
- Joined: Fri Oct 04, 2019 8:46 pm
- Location: March cambridgeshire
- Contact:
Re: 1/10th Brummbar
I got a small bottle of MEK and can confirm it does a good job of sticking petg together especially if you have 2 flat surfaces slightly scuffed up first and parts with a good fit before gluing.
-
tankme
- Warrant Officer 1st Class
- Posts: 2016
- Joined: Tue Oct 31, 2017 3:51 pm
- Location: Elgin, TX
- Contact:
Re: 1/10th Brummbar
MEK wicks into crevasses very well also. Clamping for a few minutes will also cause it to squish some.
Derek
Too many project builds to list...
Too many project builds to list...
-
baldrick131
- Lance Corporal
- Posts: 140
- Joined: Fri Oct 04, 2019 8:46 pm
- Location: March cambridgeshire
- Contact:
-
baldrick131
- Lance Corporal
- Posts: 140
- Joined: Fri Oct 04, 2019 8:46 pm
- Location: March cambridgeshire
- Contact:
Re: 1/10th Brummbar
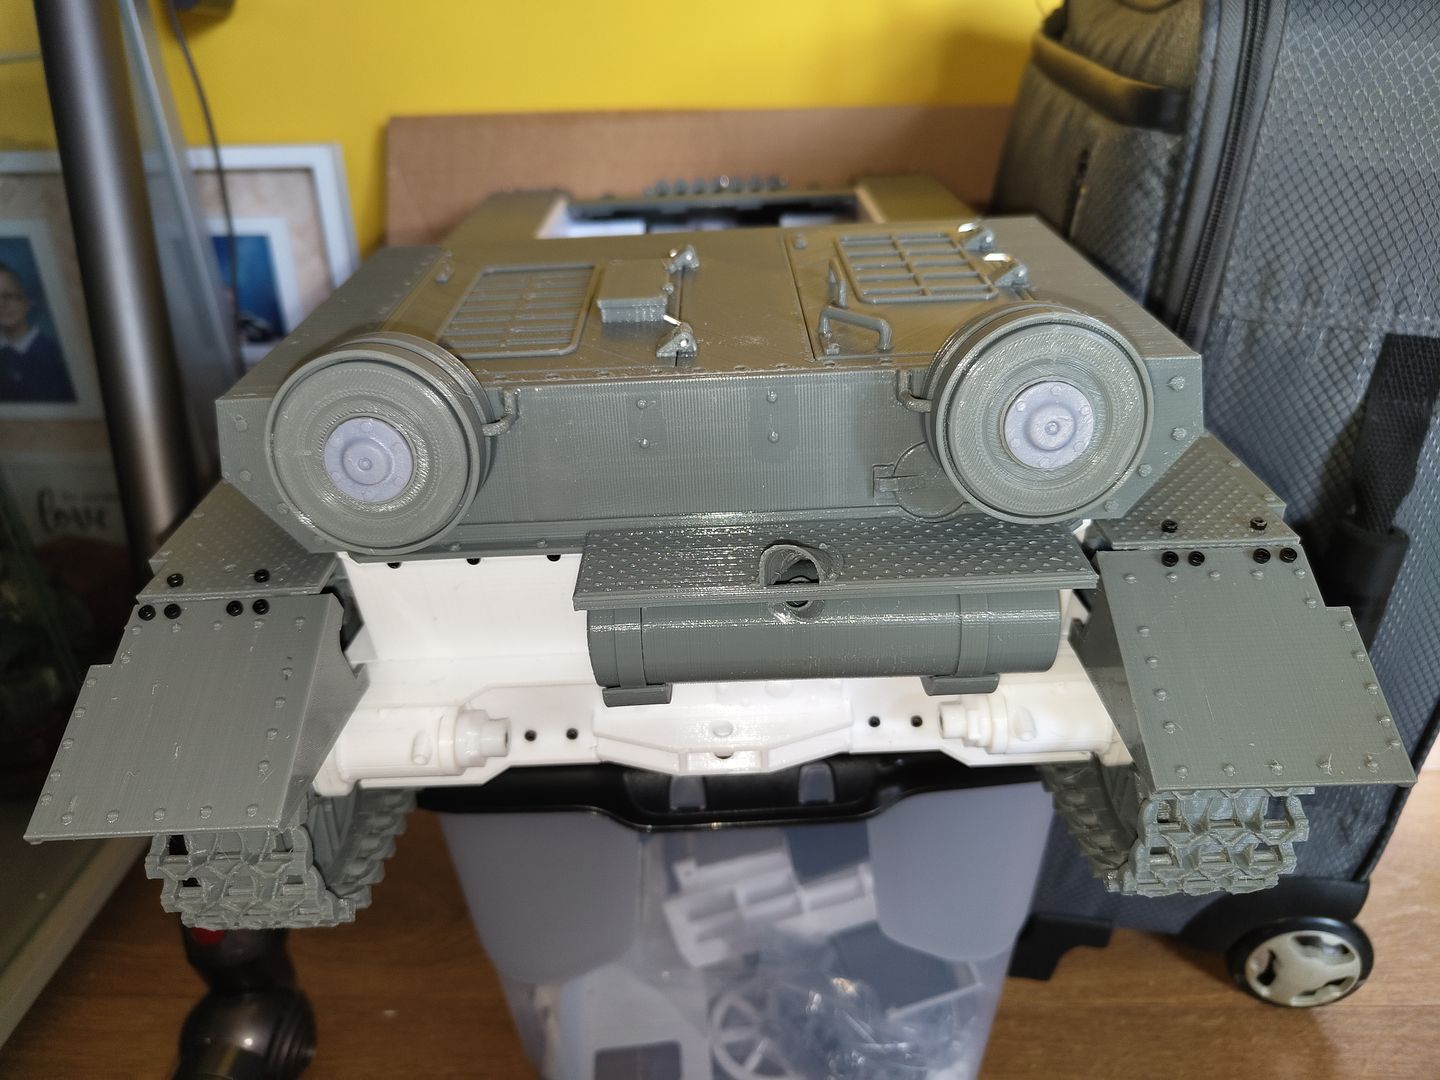
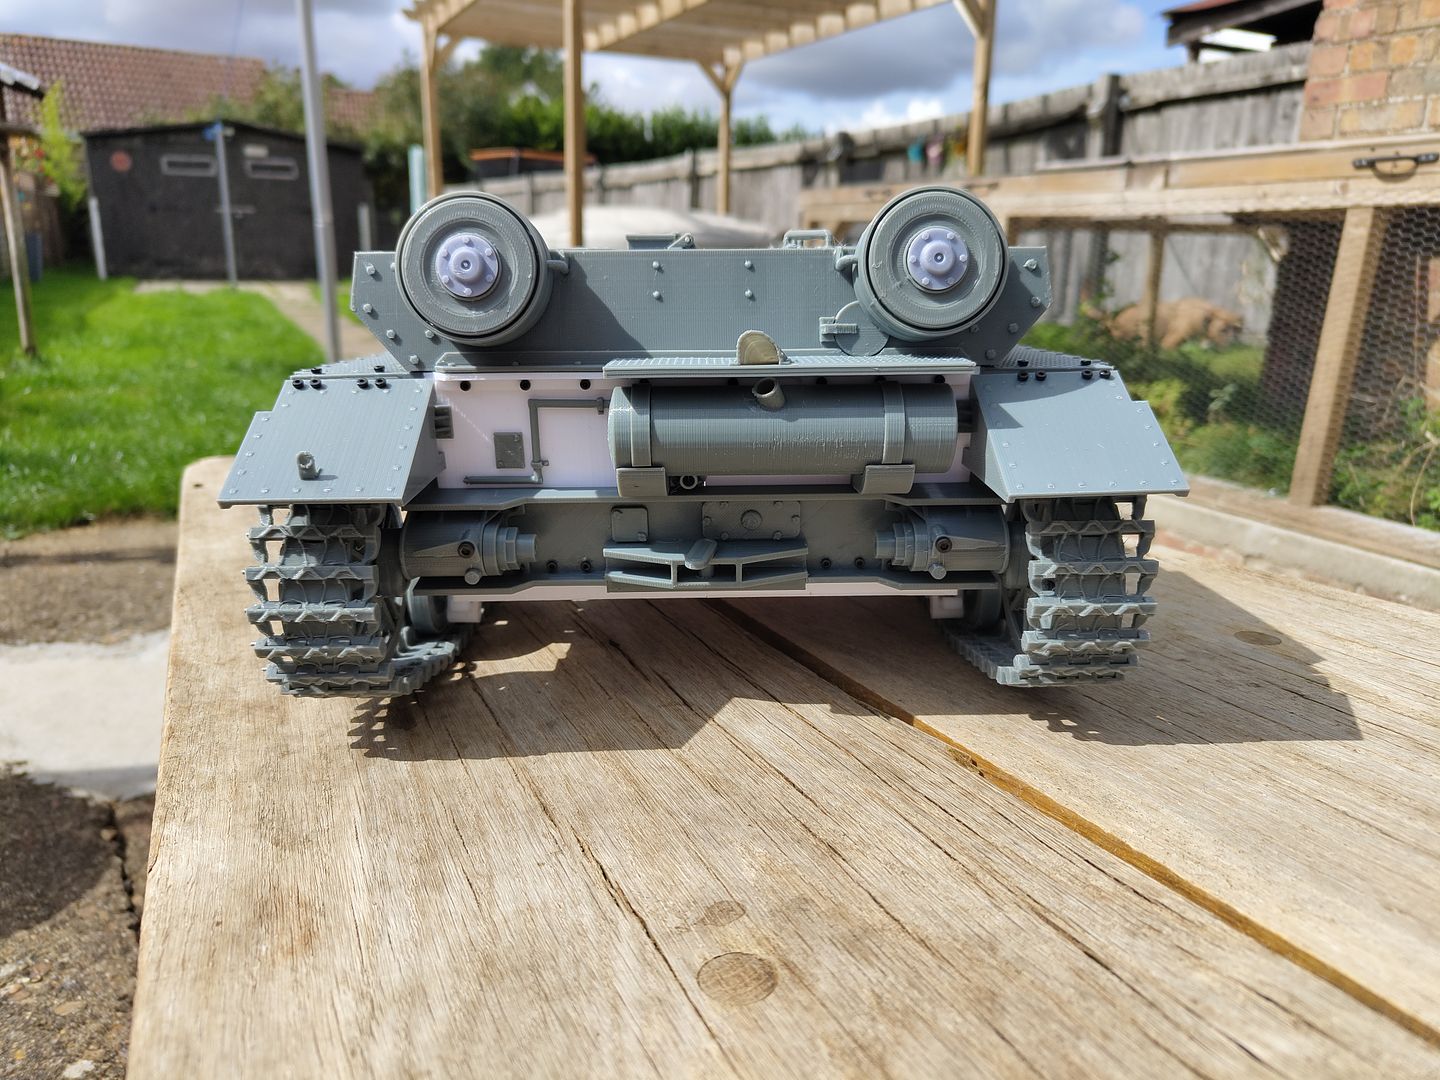
Here's the lower hull damn near finished on the outside at least just wheel center caps required but they will be fitted when it gets painted.
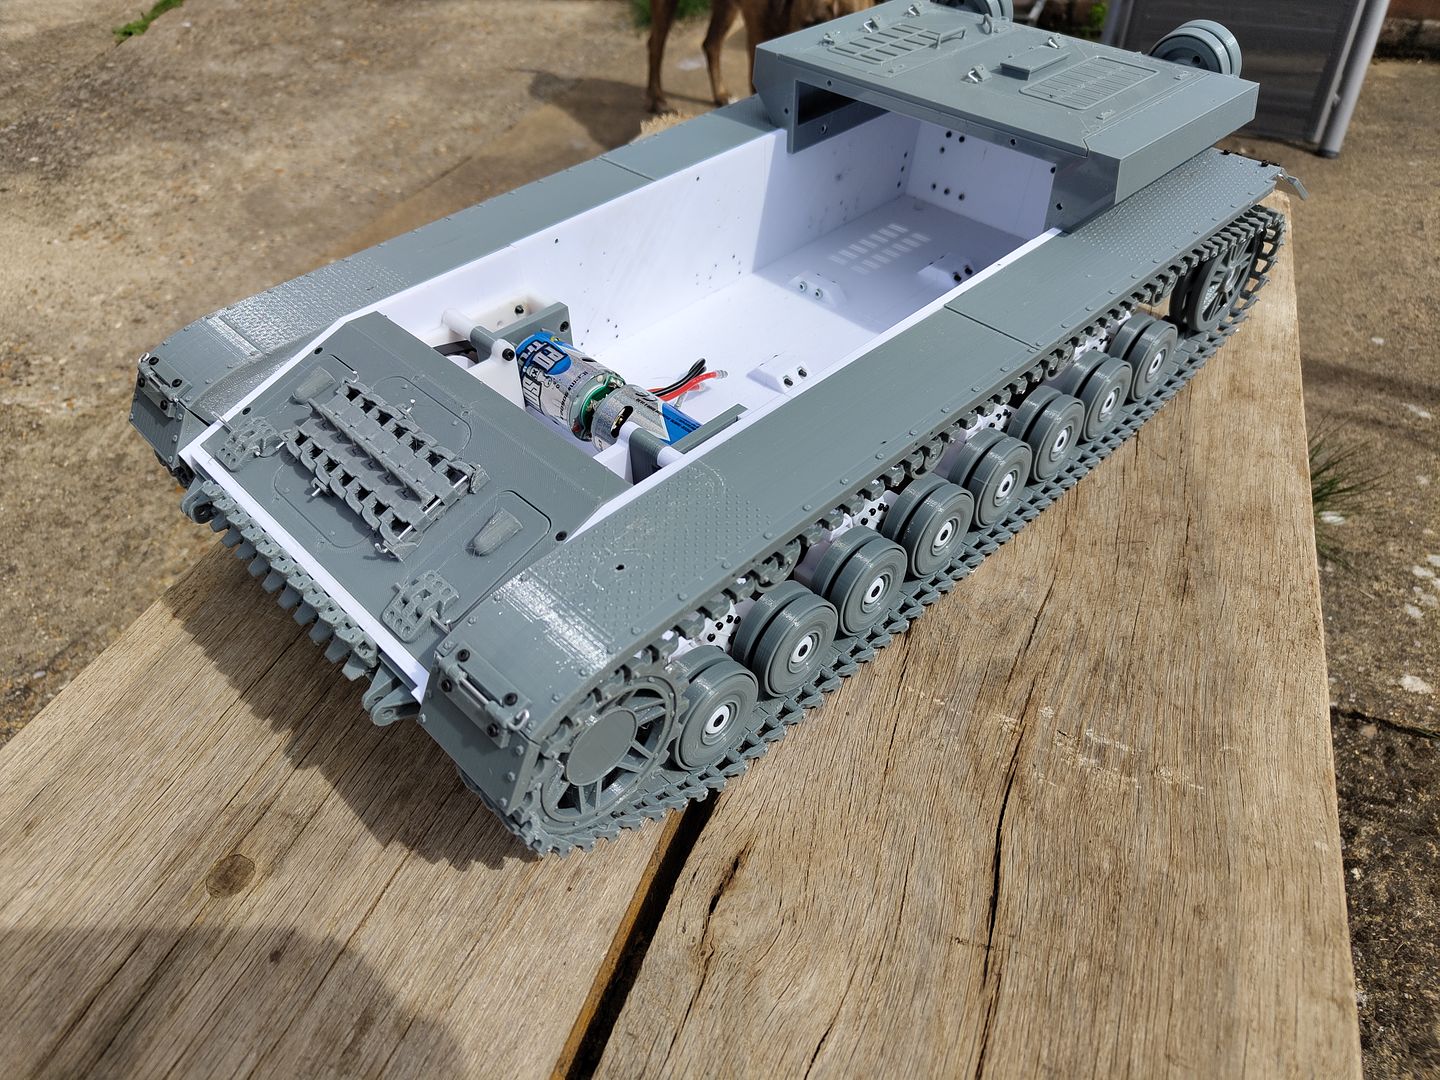
I have re designed the towing brackets to be one piece with the bar for the spare track added I thought the track looks too high but it's not far off from some original photos of Pz4's.
I re designed the mudguards so they have raised dots for tread best I could come up with using the printer and included cutouts underneath to run wires for the headlight and convoy light.
The front mudflaps are now movable.
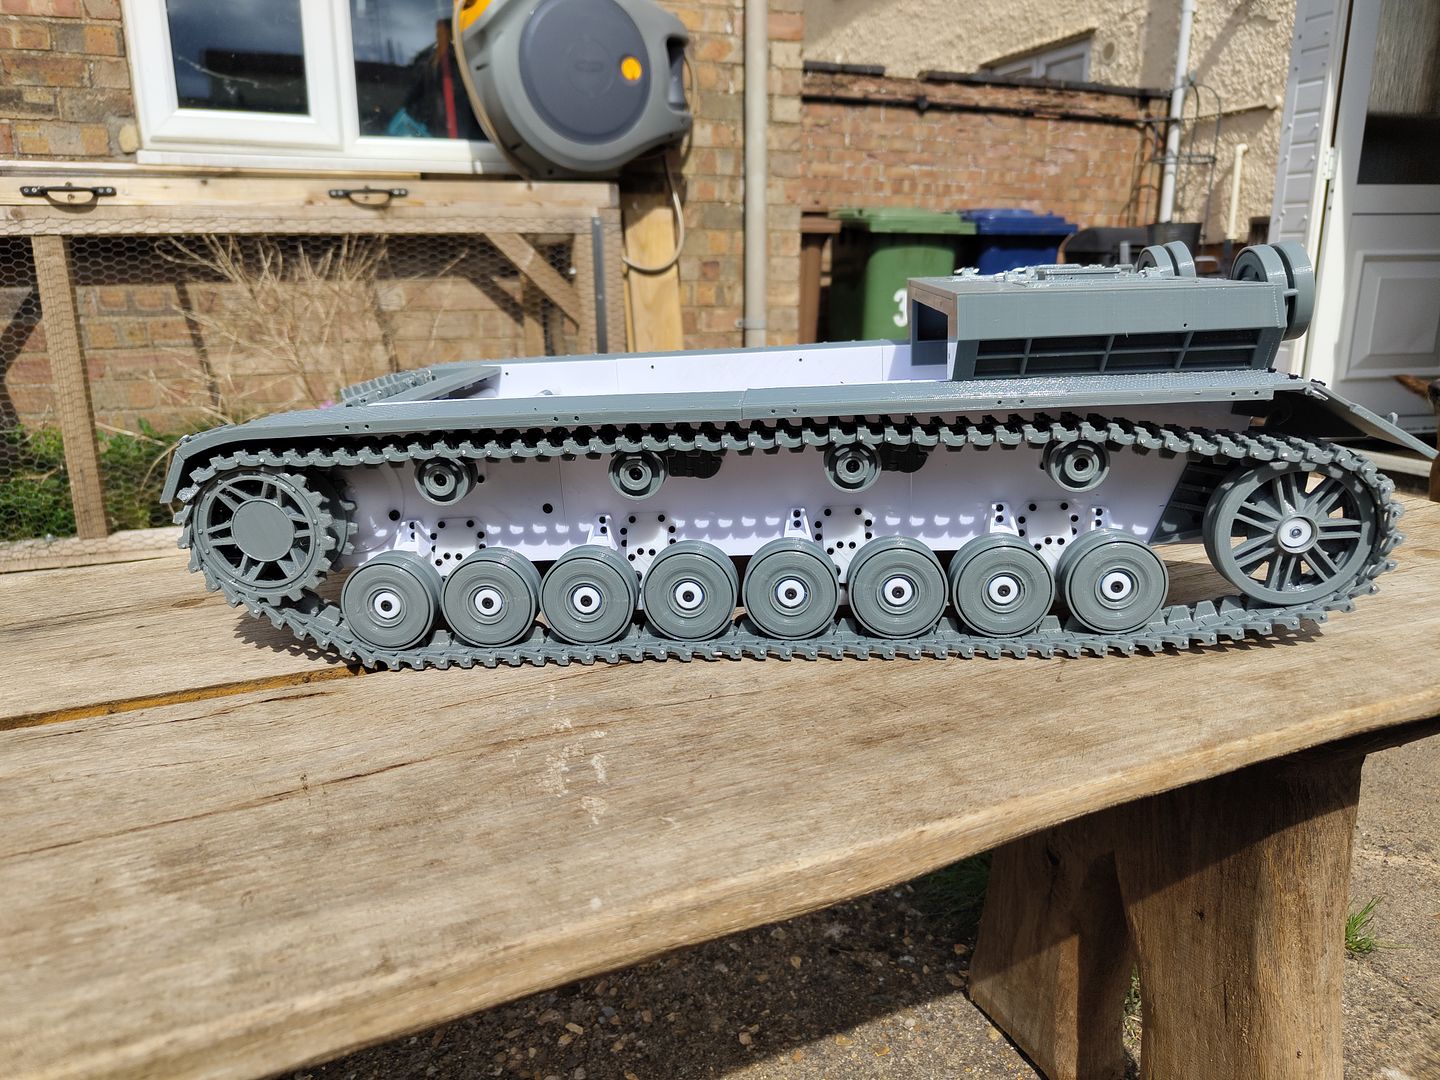
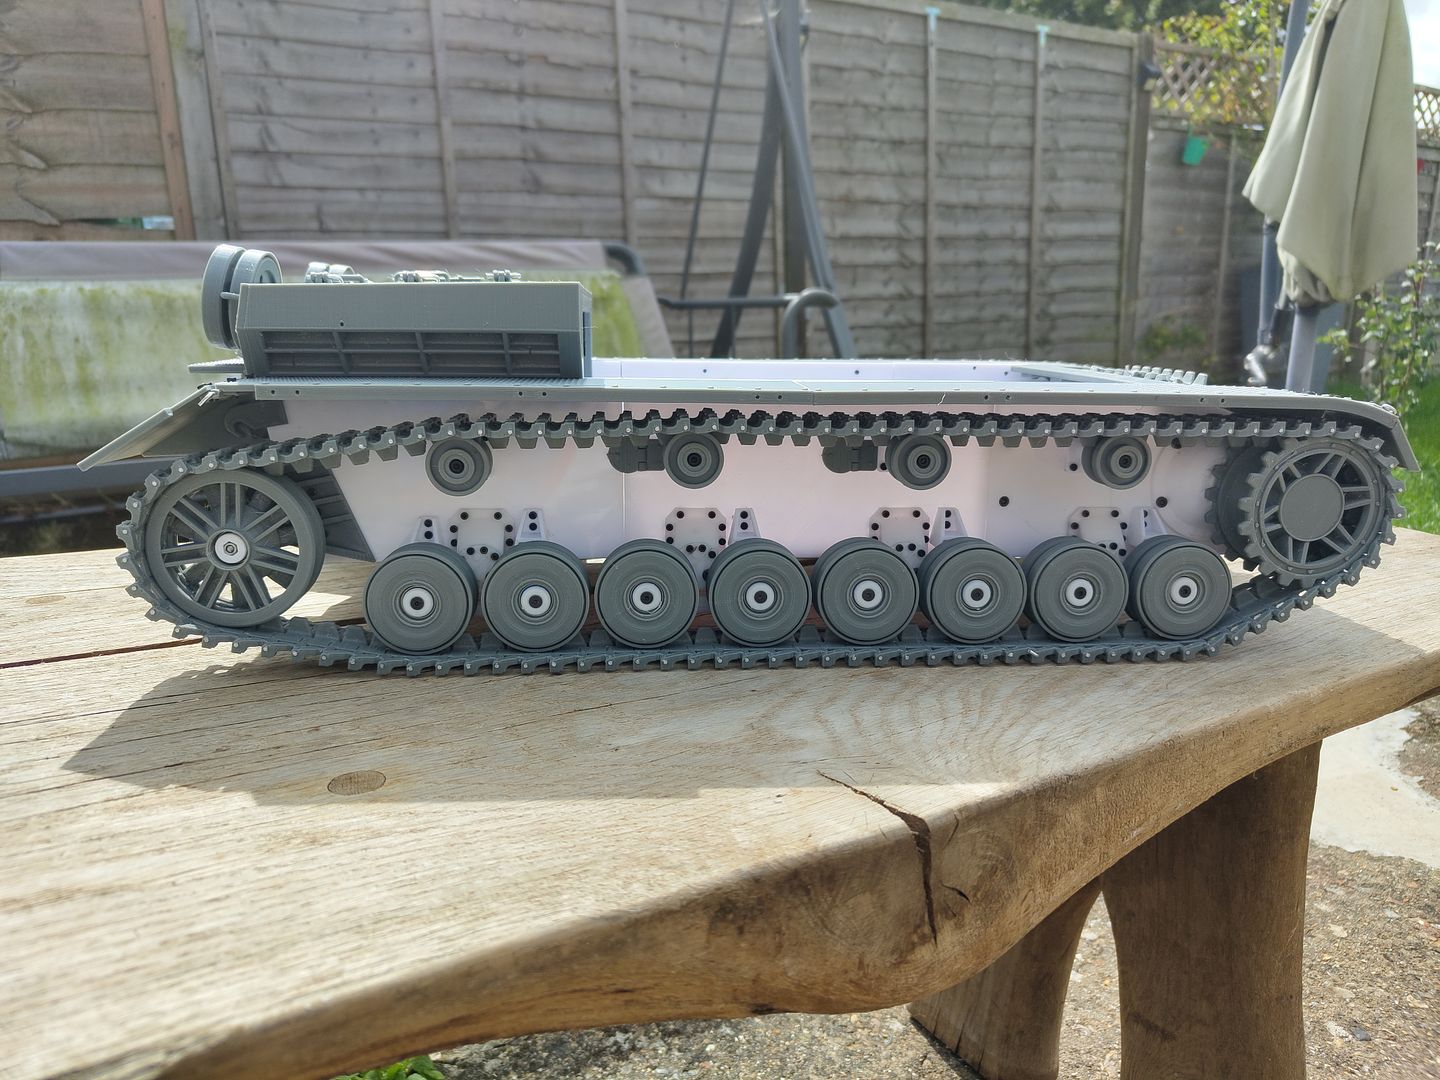
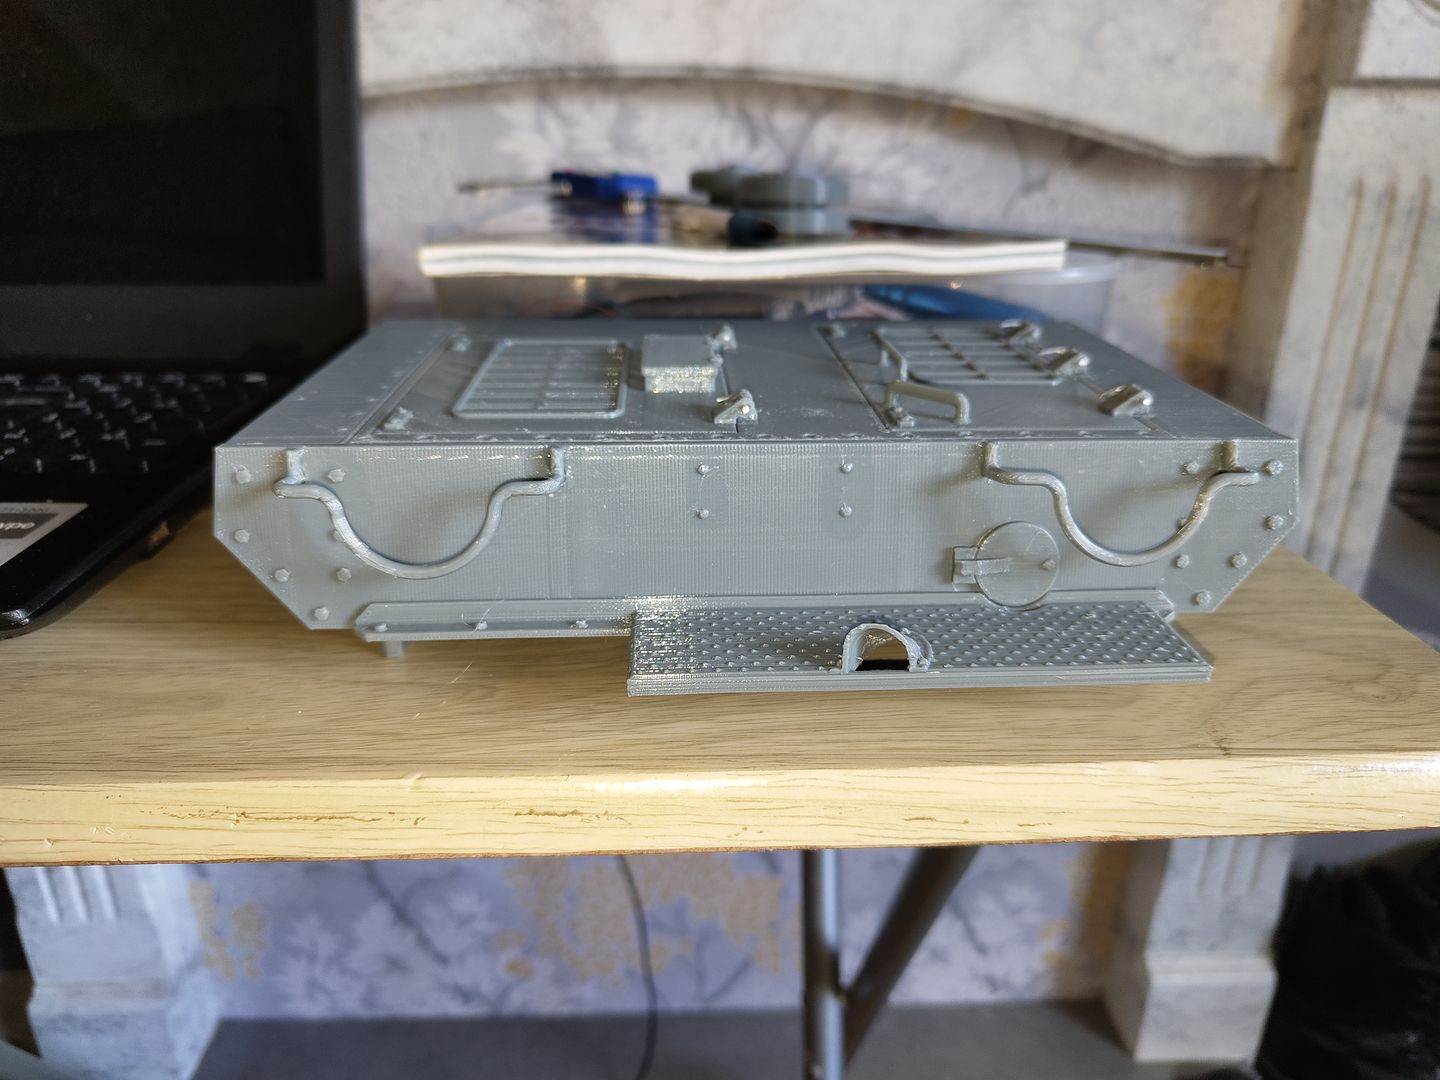
I drew up some simple covers for the fuel tank inspection ports and glued them on both sides and some rear towing hooks.
This is the part I'm most happy with the extra detail on the rear panel (the auxiliary exhaust blanking plate may be not as accurate as possible it was late I was tired and the glue is set so it's staying like it ) the starting handle I drew up turned out nice and the reworked mudflaps with the reflector incorporated also better than I hoped.
The rear idler mounts have also been re done and the handles have been fitted.
So now I will be glued to the computer drawing up the upper hull and gun to get the rest of it done.
I have re designed the towing brackets to be one piece with the bar for the spare track added I thought the track looks too high but it's not far off from some original photos of Pz4's.
I re designed the mudguards so they have raised dots for tread best I could come up with using the printer and included cutouts underneath to run wires for the headlight and convoy light.
The front mudflaps are now movable.
I drew up some simple covers for the fuel tank inspection ports and glued them on both sides and some rear towing hooks.
This is the part I'm most happy with the extra detail on the rear panel (the auxiliary exhaust blanking plate may be not as accurate as possible it was late I was tired and the glue is set so it's staying like it
The rear idler mounts have also been re done and the handles have been fitted.
So now I will be glued to the computer drawing up the upper hull and gun to get the rest of it done.
-
Herr Dr. Professor

- Lieutenant
- Posts: 3830
- Joined: Mon Apr 22, 2019 10:48 pm
- Location: Southern Wisconsin USA
Re: 1/10th Brummbar
A tad off topic from your great work: who's in the hutch behind that great wood table? ...bunnies...? tortoises...? your budget...?
