Leopard 1A4

User avatar
sparks
Warrant Officer 2nd Class
Posts: 1152
Joined: Thu Sep 23, 2010 10:57 pm

Re: Leopard 1A4

Post by sparks »

Thanks for the nice comments guys.

Fitted the K11 kit (from 35RCtank.com) motor and gear box assemblies.
Image
Again, replaced the Tamiya supplied screws with hex bolts. Also used a Schumo Kits blanking pieces to stop up the unused holes in the chasis.
Image
Image
Also fitted an ali gear tray.
Image
Hey man....I just ride 'em, I dunno what makes 'em work.
Woof woof woof !
User avatar
sparks
Warrant Officer 2nd Class
Posts: 1152
Joined: Thu Sep 23, 2010 10:57 pm

Re: Leopard 1A4

Post by sparks »

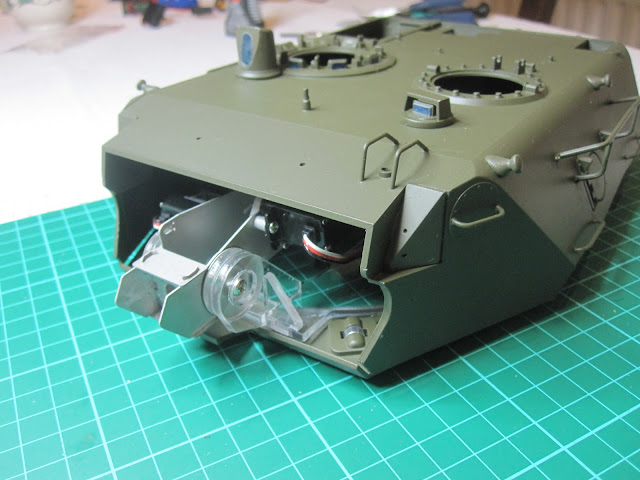
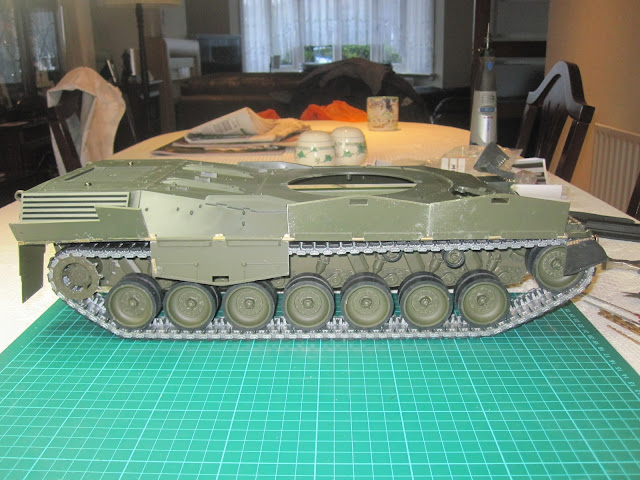
Just for a change of scenary I turned my attention to the next major alteration, fully hinged side skirts.
Searching the net I found JT-scale military models, another German outlet that had some really good accesories for the Leopard 1, among them, these resin formed skirts with drilled through top section to allow hinging.
Image
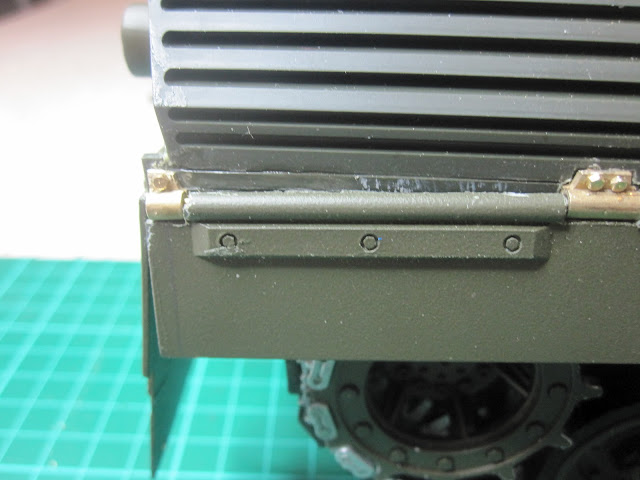
They also did a set of hinges that, unlike the AFV ones just had holes in them to allow use of your own bolts(I found that made them easier to mark out), and also included single holed end hinges not availible with the AFV set.
Image
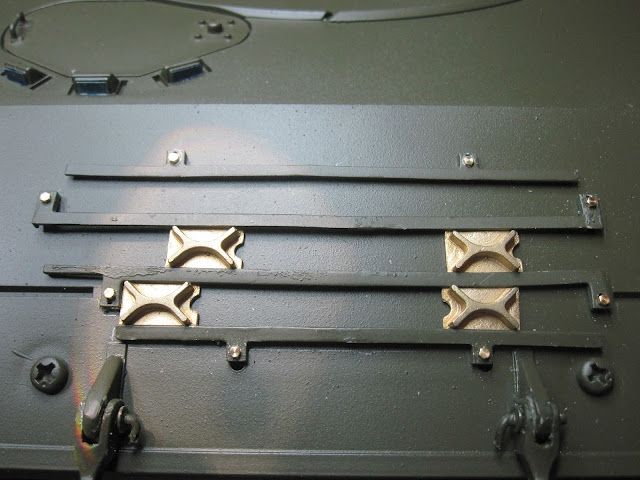
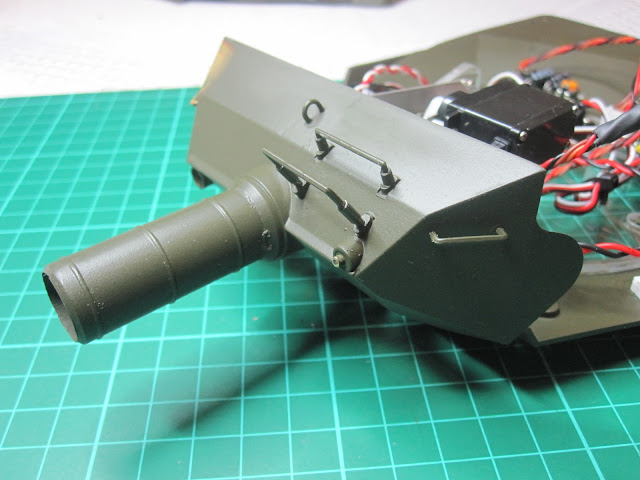
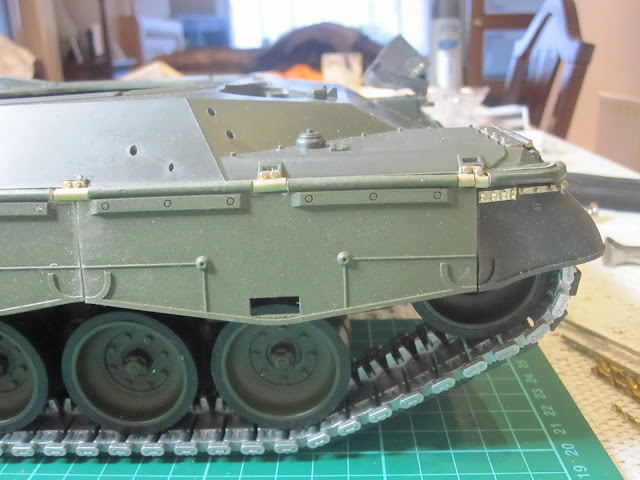
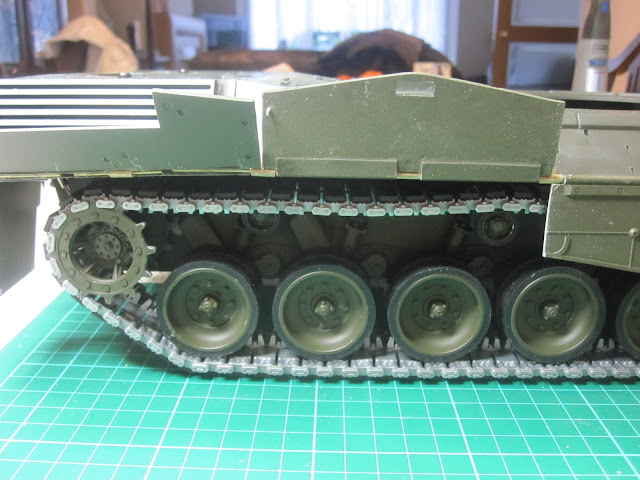
Started at the front by the already fitted hinged rubber fenders, made some alteration to the kit hinge section and inserted an adapted AFV hinge, to get the correct look, then fitted the first single hinge using 1mm bolts and nuts.
Image
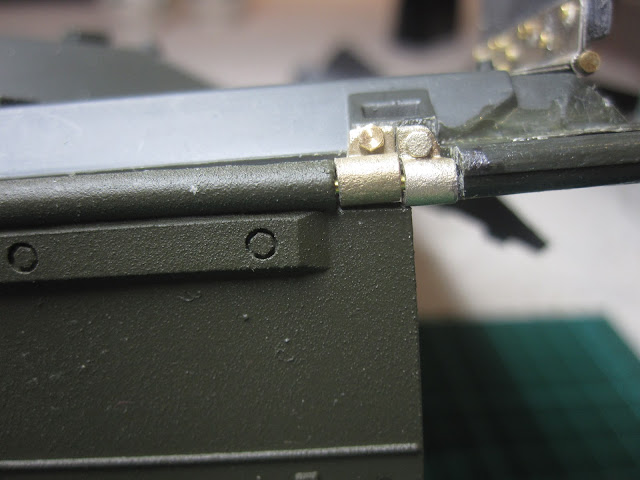
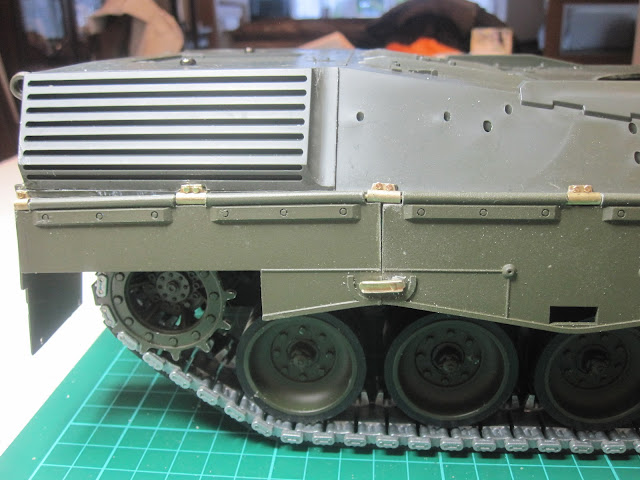
Using 1mm brass rod, I started working my way along, fitting hinges as I went.
Image
Image
I found I had to file the ends of the skirts to shorten them a bit or the hinges didn't line up with the fixing brackets moulded in the side of the Tamiya hull.
I wondered why they didn't make the reduced height rear skirt, and it only recently dawned on me that I could have bought two extra side skirts and cut them to shape,
DOH, :{ 
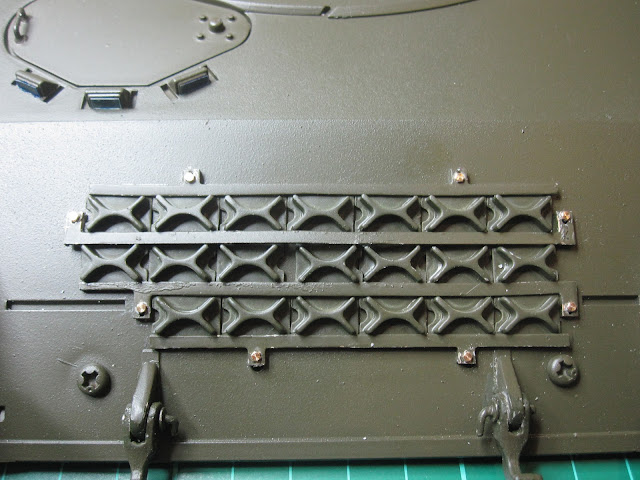
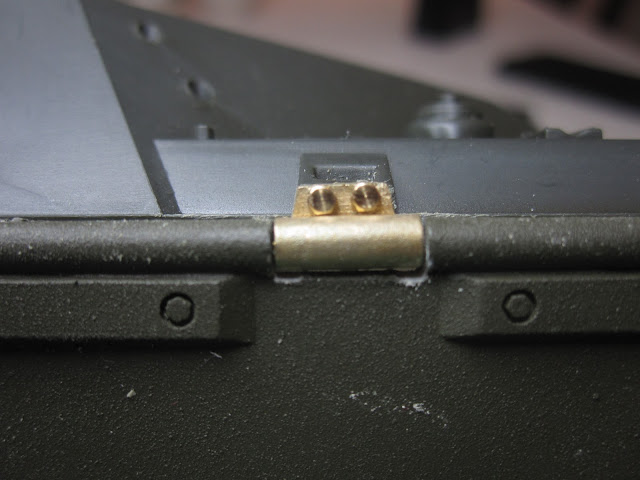
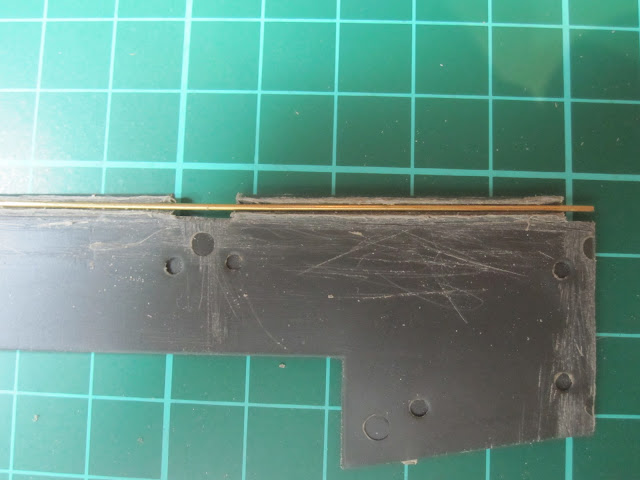
, and by the time I realised it , JT-scale had shut down, and I can't find the skirts elsewhere. But hey, why do things the easy way, my method was to remove the rear section from the Tamiya kit skirt, file off some detail and cut out the top section to take the hinges.
Image
Drilling out through the top section proved impossible, even trying to centre mark it with a bradle resulted in a nasty puncture to my left 1st figer :'(
So I decided to groove out the back to take the brass rod.
Image
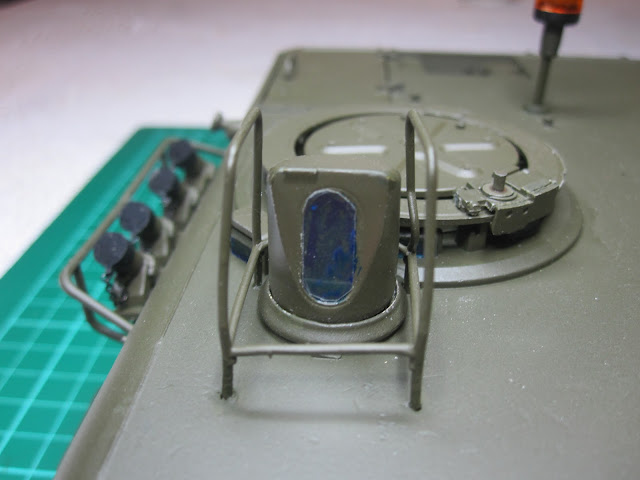
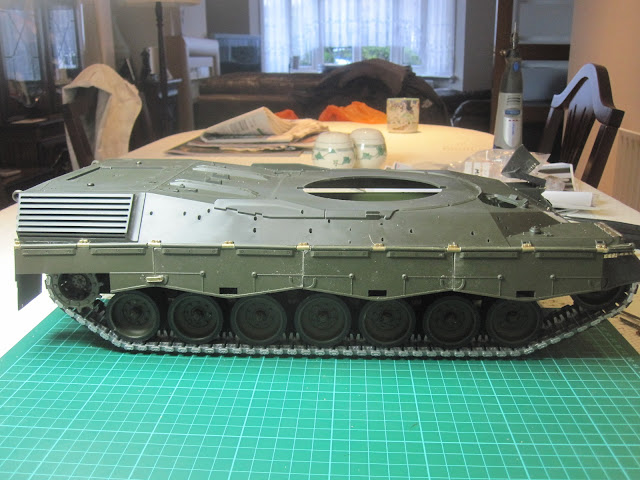
Completed one side (apart from the locking bars) and decided to have a break and post some pics , don't worry, I won't do another post when I finish the other side :haha:
Image
Image
Image
Image
Image
Image
Imagebfn.
Hey man....I just ride 'em, I dunno what makes 'em work.
Woof woof woof !
User avatar
Andy in Cheltenham
Corporal
Posts: 427
Joined: Mon Sep 21, 2009 12:54 pm
Location: Tewkesbury

Re: Leopard 1A4

Post by Andy in Cheltenham »

Coming along nicely mate. sort of jealous..
User avatar
sparks
Warrant Officer 2nd Class
Posts: 1152
Joined: Thu Sep 23, 2010 10:57 pm

Re: Leopard 1A4

Post by sparks »

Hi all,
Sorry for lack of activity here , been away and since returning have been trying to do the PE tool clamps and side boxes :crazy:
I think its a job for a younger man with better eyes and more patience :D I will persivere and do the side boxes but as for the tool clamps, think I'll give them a miss,I mean, how many times will you unclamp the tools :haha: I have some metal upgraded tools so will probably use them and some of the Tamiya kit ones.
In the meantime, to keep myself sane , I've been fiddling with the searchlight to make it functional.
Image
Image
Image
When fittted in the finished tank it will be switchable by RC
Hey man....I just ride 'em, I dunno what makes 'em work.
Woof woof woof !
User avatar
sparks
Warrant Officer 2nd Class
Posts: 1152
Joined: Thu Sep 23, 2010 10:57 pm

Re: Leopard 1A4

Post by sparks »

Fitted the K11 kit turret M.G in place.
Image
Then drilled out the opening on the other side of the mantlet to take some 6mm OD brass tube.
Image
This is to fit the IR immiter for the battle system, fixed in place with silicone rubber cement.
Image
Image
Hey man....I just ride 'em, I dunno what makes 'em work.
Woof woof woof !
User avatar
sparks
Warrant Officer 2nd Class
Posts: 1152
Joined: Thu Sep 23, 2010 10:57 pm

Re: Leopard 1A4

Post by sparks »

Fitted the grouser (snow hook) brackets in place using M1 nuts and bolts.
Image
Only have 4 snow hooks at the moment (still waiting fot the other 16 :/ ) , so the bottom three brackets are only fitted temporary.
Hey man....I just ride 'em, I dunno what makes 'em work.
Woof woof woof !
User avatar
sparks
Warrant Officer 2nd Class
Posts: 1152
Joined: Thu Sep 23, 2010 10:57 pm

Re: Leopard 1A4

Post by sparks »

MORE OPEN WALLET SURGERY :haha:
Image
Have purchaced SGS's TVC-TRF10 MT1 module so that I can have working indicators, brake lights etc, and also alows me to add a Whaler battle unit to it that will take the Tamiya IR immiter and reciever.
Originally I was going to get another Futaba 7 channel reciever and link it to my 7C for operation of added extras, but as the build has progressed, I have so many things I have added, and want to control that I've just spashed out on a Futaba 10CG :/
Image
I just hope I won't want any more switching effects on the next build :crazy:
Hey man....I just ride 'em, I dunno what makes 'em work.
Woof woof woof !
User avatar
sparks
Warrant Officer 2nd Class
Posts: 1152
Joined: Thu Sep 23, 2010 10:57 pm

Re: Leopard 1A4

Post by sparks »

The rest of the snow hooks turned up the other day, so got them prepared, painted and fitted.
Image
Also fitted the upgraded metal headlights, horn and tow shackles.
Image
The headlights will, of course :/ , be functional and RC switched. Routed the cable through the backboard and into hull, once painted I don't think it will show too much.
Image
Hey man....I just ride 'em, I dunno what makes 'em work.
Woof woof woof !
User avatar
sparks
Warrant Officer 2nd Class
Posts: 1152
Joined: Thu Sep 23, 2010 10:57 pm

Re: Leopard 1A4

Post by sparks »

Fitted the K11 kit electronics into the lower turret, note the white plastic squares that have to be fitted and drilled through the base.
Image
These line up with the blocks that have to be fitted into the upper turret.
Image
to allow the halves of the turret to be removable for access to equipment.
Image
They also supply metal turret rollers to replace the Tam plastic ones.
Image
Then fitted mantlet to front of K11 kit moulding.
Image
Hey man....I just ride 'em, I dunno what makes 'em work.
Woof woof woof !
User avatar
sparks
Warrant Officer 2nd Class
Posts: 1152
Joined: Thu Sep 23, 2010 10:57 pm

Re: Leopard 1A4

Post by sparks »

Working on the turret top, fitted metal periscopes and guard rail.
Image
Image
and made the commanders periscope functional by fitting micro servo.
Image
Also fitted the TBU socket below the commanders hatch.
Image
Hey man....I just ride 'em, I dunno what makes 'em work.
Woof woof woof !
Post Reply

Return to “Modern Builds”