Mid hull clamps for towing cable and gun cleaning rods
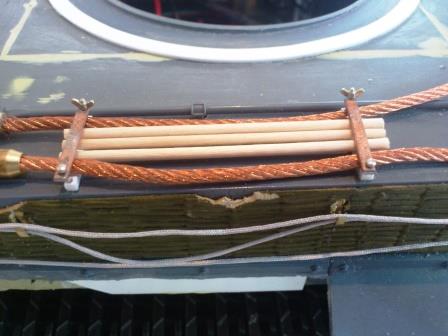
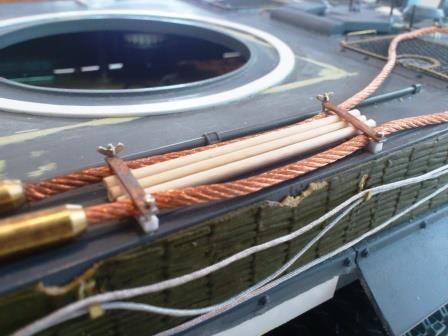
- The central cable and gun barrel cleaning rod brackets installed with Schumo butterfly nuts and temporary rods from toothpicks.jpg (30.55 KiB) Viewed 7384 times
The final part of the towing cable brackets present another challenge. With typical German ingenuity / complexity these also doubled up as clamps for the gun cleaning rods. The latter, consisting of six wooden rods connected by brass screw threads, were stored three on each side of the upper hull. Presumably the brush itself was one of the things stored in the rear turret stowage bin. Since, like the other brackets, I have designed these to be workable, I can leave the rods themselves to a later stage of the build.
Mañana, mañana...
The lower part of the brackets was welded to the hull roof. This consisted of a thick strip of metal with five semi-circular depressions cut into it. The larger two on each side were to cradle the cables themselves, the middle three (slightly smaller) the rods. These were all clamped in place by a simple metal bar pivoted on the outer edge of the hull and secured by a trusty butterfly nut on the inside (see photos above).
On the HL (and Tamiya) TIgers the lower parts of the brackets come moulded to the hull roof. I wasn't sure they were in the right place (they certainly don't line up with the HL plastic combined tow ropes and cleaning rods) and they weren't very crisp - so off they came.
I then thought I would be terribly clever and make new ones using my trusty punch and die set. This is how I did it:
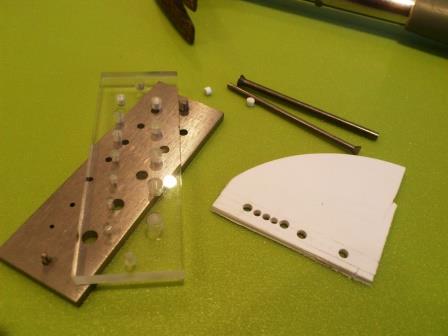
- First I punched holes of the correct diameter - two big and three small - into a thick piece of plastic card.jpg (22.88 KiB) Viewed 7384 times
First I punched holes of the correct diameter - two big and three small - into a thick piece of plastic card. This was hard work for this thickness - and as an added bonus I managed to hit my thumb with the hammer. I seem to remember my dad doing this once back in the 70s (no he wasn't using a punch and die set to make clamps for a Tiger) - it was the first time I heard him swear. So I followed suit...
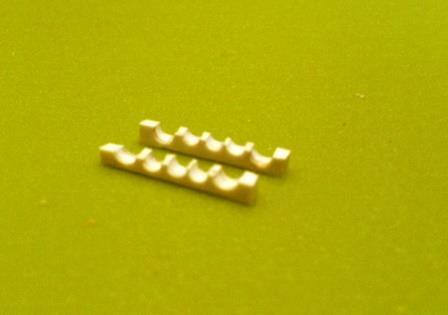
Next I used a chisel blade to separate each into two halves. That way you get two for the price (a sore thumb) of one. Note that the one on the left was a bit wonky so I had to do it again.

- Next I used a chisel blade to separate each into two halves.jpg (20.47 KiB) Viewed 7384 times
- A bit rough and ready - and blurry - I know but they will be mostly hidden when everything is in place.jpg (17.51 KiB) Viewed 7384 times
To make myself feel better I test fitted them against a Tamiya hull...

- I test fitted them against a Tamiya hull.jpg (24.03 KiB) Viewed 7384 times
As you can see from the shot above the clamps should actually overlap the weld bead which runs around the upper hull, although mine clearly needed a little more trimming. Having looked again at the photos of the original Tigers above I have noticed that the gun cleaning rods must have had a larger diameter than the towing cables - it's the
inner grooves in the lower bracket that are larger, not the
outer ones. Oh well...
The rest, which followed my procedure for the rear clamps, was relatively simple. Holes were drilled through either end and into the hull after they had been glued in position. The outer hole accommodated a cut-down dress-making pin, the inner hole a Schumo screw and butterfly nut. Meanwhile the upper bracket was made by trimming a postage staple to length, drilling a hole in one end for the pin and cutting a slot in the other (using a fine rotary blade) for the screw. As I have already said, the Taigen ropes are a little too thick - so I expect them to sit better with the Schumo ones.
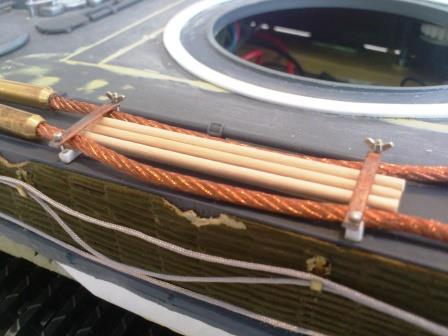
- The central cable and gun barrel cleaning rod brackets installed with Taigen cables.jpg (31.83 KiB) Viewed 7384 times
- Another view - again the dress making pins come in handy. The missing mudguard beneath is work-in-progress battle damage.jpg (33.1 KiB) Viewed 7384 times

- The view from the other side.jpg (22.5 KiB) Viewed 7384 times
So did I do it right?
Well, to be honest, having made the rear clamps since I think I could have saved myself a bit of trouble (and a lot of pain) by just using a round file (and a good eye) to carve the semi-circles into the lower bracket rather than using the punch and die set.
Mais, c'est la vie!
News Flash!
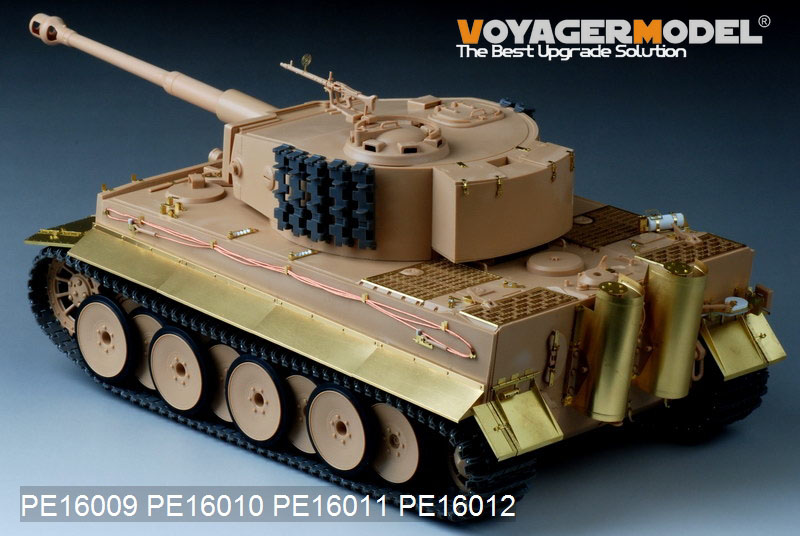
- Voyager PE16009_03.jpg (97.6 KiB) Viewed 7283 times
Just when I have finished most of the up-grades to my HL Tiger 1 - along comes this very nice looking photo etch up-grade package from Voyager.
Slightly bizarrely they say this is for the Trumpeter Tiger 1 - in fact it is clearly the Hobbyboss (Hobby Boss?) 1/16 Tiger - perhaps they are the same company. Of course it will do for HL Tigers just as well. It looks absolutely fantastic and, since it is by Voyager, I am hoping that it will be a lot cheaper than Aber as well as easier to put together (that is certainly true of their clamps).
It's not a complete up-grade answer of course - the turret spare track holders are not included (what you see are those which come with the Hobbyboss kit, which are barely adequate). Also, because the Hobbyboss kit has non-opening front and loader's hatches there is nothing to detail them. That's a particular problem for the loader's hatch because the Tamiya parts won't fit (the hatch is smaller) - so it looks as if the only source (for now) is the excellent PE detailing that comes with the Hachette Build Your Own Tiger (issue 4).
[Correction: having now purchased the Voyager sets I am glad to confirm that they DO come with the internal locking mechanism for the front hatches and loader's hatch - but you will still need to source the hand wheel and curved 'slam stop' bracket for the latter from somewhere else...]
The Voyager sets can be bought separately as well - e.g. the side fenders.
Can't wait to see the prices.
See
http://www.voyagermodel.com/productdeta ... id=PE16009 for more...
Coming next: new wheels, new tracks, re-think on the zimmerit... but the summer hols loom large.