March Update: More Turret Modifications
Thanks for the encouraging words gentlemen. I needed a light kick up the
derrier after the distractions of Christmas, tax returns and other delights.
Actually I haven’t been idle.
First off here’s a few pictures of the remaining work on the turret ring, etc.

- Close up of inside of turret showing lower and upper sides attached.JPG (14.17 KiB) Viewed 23049 times
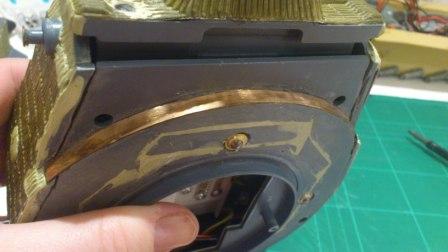
- Brass strip covering joins between upper and lower turret.JPG (18.98 KiB) Viewed 23049 times
Taking my lead from other postings on this site I decided that the turret needed some extra stabilising where it sits on the hull. This is especially necessary if, like me, you are replacing the bb gun with the Asiatam recoil unit because the metal barrel makes the turret rather nose heavy. I was also keen to try and disguise the fact that the (relocated) turret ring is still far too small.
First I acquired some of those sprung ball catches which are used to keep cupboard doors shut. I drilled four holes in my turret base and then glued them in place with copious amounts of glue and short lengths of brass tubing used as sleeves where they protruded above. In the end I decided that the rear one wasn’t needed.
- Three ball catches in place - they are placed so that they will run inside the new ring on the upper hull.JPG (12.32 KiB) Viewed 23049 times

- Side view of ball catches on underside of turret floor.JPG (21.68 KiB) Viewed 23049 times
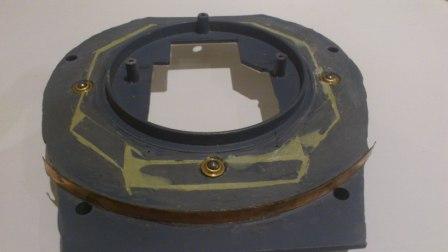
These were placed so that as the turret revolved they would run around the hull top. I order to hide them – and to give the illusion of a wider turret ring when the turret was viewed from the side – I then cut out a plastic ring of the right diameter which I glued to the hull top. Note that this is
not supposed to be the turret ring splash guard which was fitted to late model Tigers.

- False turret ring cut from plasticard and glued to hull top.JPG (17.65 KiB) Viewed 23049 times
Incidentally, I found an excellent and cheap compass cutter for this purpose made by Jakar – the same people who made my cutting mat. For us Brits it’s £4.25 including postage on Amazon:
It is a little light to cut into thick plasticard, but the trick is to use the blade to score deep enough so that you can then separate by gently bending the card.
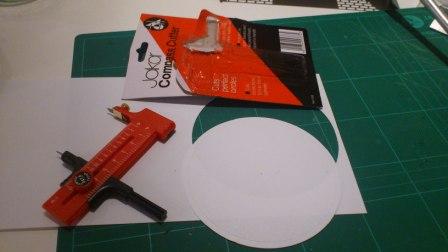
- This compass cutter is made by Jakar (who also made my cutting mat). It's very cheap and, with a bit of patience, can cut very neat circles.JPG (16.18 KiB) Viewed 23049 times
NOTE: Later on I found that, although the plasticard ring made he turret revolve smoothly, it also made it sit too high. So I removed it and all of the ball catches apart from the one at the front. The turret revolves fine...
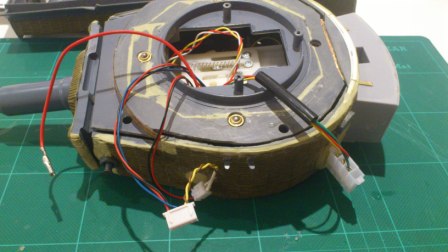
Now I needed to make two structural alterations to the inside of the turret. Again these were for the installation of the recoil unit. I will deal with the actual wiring of this in due course – having only just mastered it myself!
Because I had removed the old commander’s cupola I had also lost one of the internal mounts for the old bb hopper. This is supposed to be one of the anchor points for the Asiatam recoil unit. Here I improvised by bending a thick piece of brass strip into a rough ‘S’ shape, gluing one end to the turret roof and drilling a suitable hole in the other. I then used a small nut and bolt to attach the recoil unit.

- Inside turret showing brass strip bent to replace the missing mount for the recoil unit.JPG (14.37 KiB) Viewed 23049 times

- Recoil unit now attached with nut and bolt.JPG (17.01 KiB) Viewed 23049 times
Another unforeseen issue was what I suppose I should call ‘Tiger’s droop’. The metal barrel is so heavy that it naturally sits on the bottom of the barrel sleeve attached to the mantlet. My solution was to glue a thick brass strip inside the bottom to keep the barrel properly centred where it protrudes from this sleeve.

- Brass strip inserted at inside bottom of barrel sleeve to stop metal barrel drooping.JPG (24.74 KiB) Viewed 23049 times
Incidentally, I have also just discovered the joys of adhesive Velcro strip. This is very useful for keeping things from sliding about inside the tank whilst also allowing them to be easily removed when needed. So, for example I, I Velcro-ed the gun flash battery onto the inside rear of the turret.
Eventually I was able to reattach my turret floor and get ready to turn it the right way, mount it back onto the hull – and pray that it all worked..!
- Turret bottom loosely in place. Note rear undercut to turret infilled with strips of plasticard.JPG (35.59 KiB) Viewed 23049 times
More coming soon...
