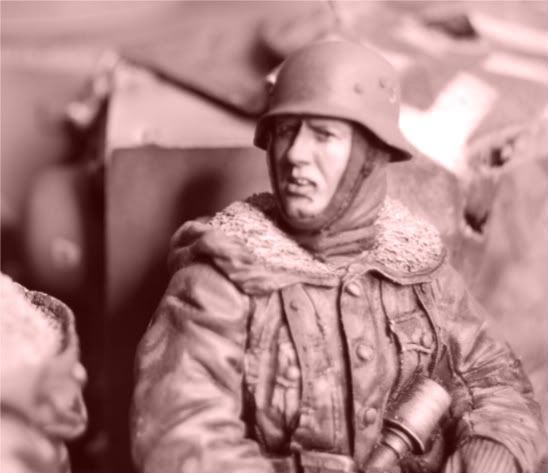
Painting faces step by step
Posted: Sun Oct 17, 2010 12:53 am
Hi,
I'm going to go through painting some faces step by step. I am using Citadel/gamesworkshop paints for this.
I'm using one standard size Gamesworkshop brush for the whole process. I'm not a fan of Gamesworkshop but their brushes are good quality. Vallego brushes suck, waste of money as too soft.
I have primed the resin model with matt grey primer.
Paints used for flesh tones as follows :
Dark Flesh
Tanned flesh Base coat
Dwarf flesh 1st highlight
Dwarf flesh/Elf Flesh 1:1 mix
Elf Flesh
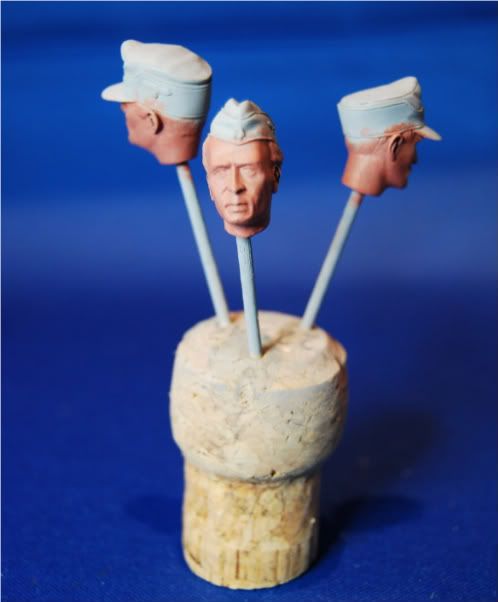
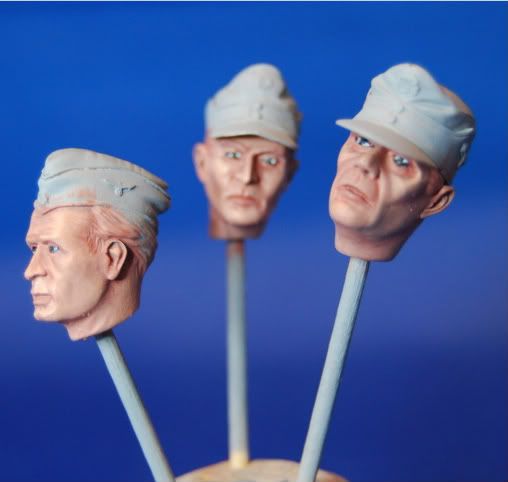
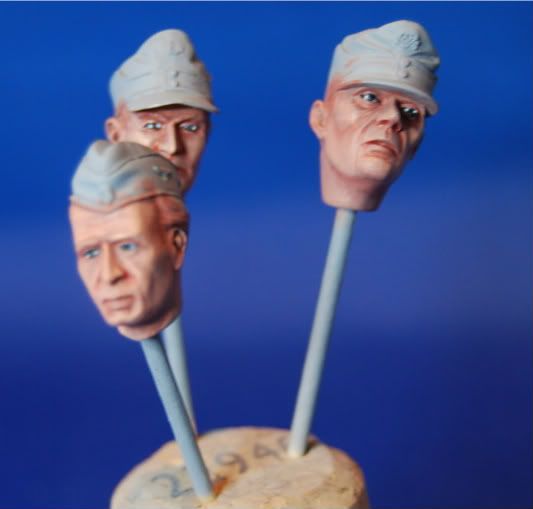
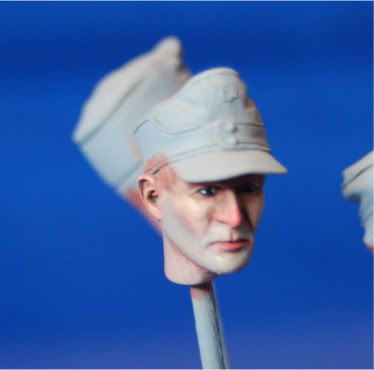
I like to drill up through neck, insert half a coctail stick,(blunt end), and stick pointy end in a champagne cork. (MUST BE A GOOD VINTAGE)
Clean water to wash your brush essential.
Start with a base of tanned flesh. Thin your paint. Two or even three coats of thinned paint. Get a nice even base. If I want to work faster I use a hairdryer on light heat. (It's the only use I have for a hairdryer).
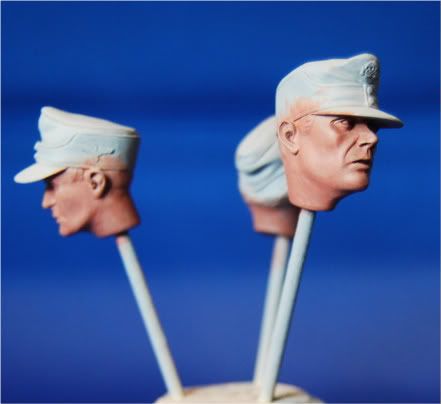
Apply stage 1 highlight of dwarf flesh. I start with the nose, forehead, jawline chin upper lip ears neck. Leave some shade in in wrinkles around mouth and under eyes and upper neck below chin.
Slight shading of extremely thinned Dark flesh. Just in the cracks or wherever you think you need shading.
Next highlight is a 50/50 mix dwarf flesh elf flesh.
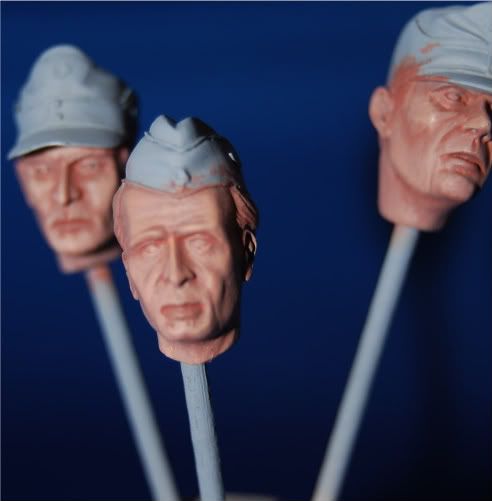
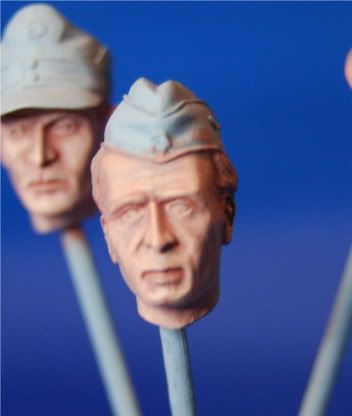
Next elf flesh and if you want to give your figures a tired unhealthy complexion a further highlight, small amount 50/50 mix of elf flesh and bleached bone.
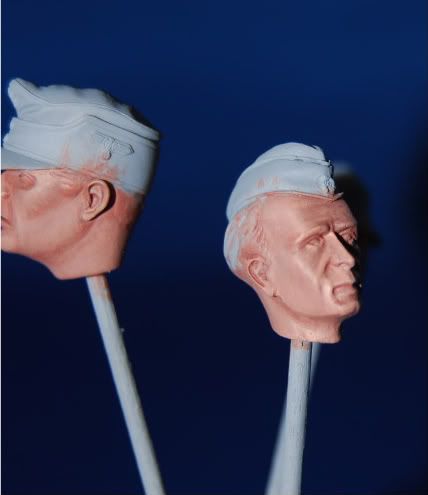
EYES
Paint full eye black.
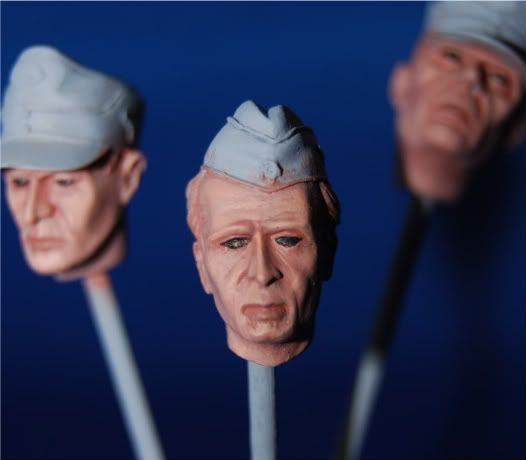
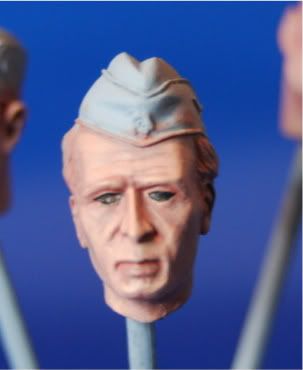
A white dot either corner of the eye.
LIPS (or should I say lip)
Important! ONLY PAINT LOWER LIP. Mix a little red shade with dark flesh or dwarf flesh. Not too red. Look at your own lips.
ONLY PAINT LOWER LIP
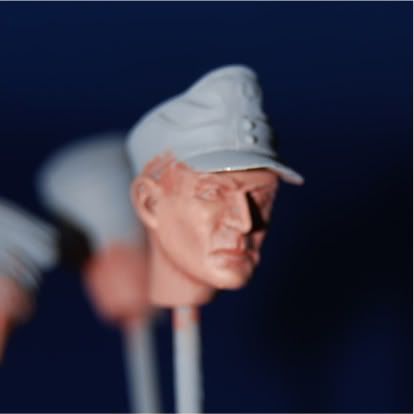
I do not do eye brows unless subject has extremely prominent eyebrows. You really do not need them.
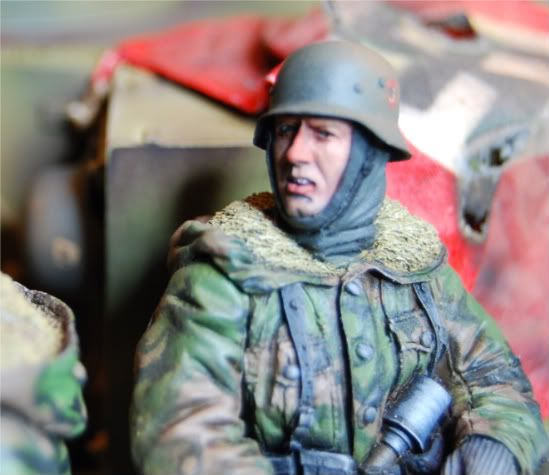
Painting figures for winter? Give him a slightly red nose as if he has a cold. Similar to lips but well thinned. Not like a clown.
Unshaven
Thinned wash of dwarf flesh with some grey or black.
Hope this helps.
I'm going to go through painting some faces step by step. I am using Citadel/gamesworkshop paints for this.
I'm using one standard size Gamesworkshop brush for the whole process. I'm not a fan of Gamesworkshop but their brushes are good quality. Vallego brushes suck, waste of money as too soft.
I have primed the resin model with matt grey primer.
Paints used for flesh tones as follows :
Dark Flesh
Tanned flesh Base coat
Dwarf flesh 1st highlight
Dwarf flesh/Elf Flesh 1:1 mix
Elf Flesh
I like to drill up through neck, insert half a coctail stick,(blunt end), and stick pointy end in a champagne cork. (MUST BE A GOOD VINTAGE)
Clean water to wash your brush essential.
Start with a base of tanned flesh. Thin your paint. Two or even three coats of thinned paint. Get a nice even base. If I want to work faster I use a hairdryer on light heat. (It's the only use I have for a hairdryer).
Apply stage 1 highlight of dwarf flesh. I start with the nose, forehead, jawline chin upper lip ears neck. Leave some shade in in wrinkles around mouth and under eyes and upper neck below chin.
Slight shading of extremely thinned Dark flesh. Just in the cracks or wherever you think you need shading.
Next highlight is a 50/50 mix dwarf flesh elf flesh.
Next elf flesh and if you want to give your figures a tired unhealthy complexion a further highlight, small amount 50/50 mix of elf flesh and bleached bone.
EYES
Paint full eye black.
A white dot either corner of the eye.
LIPS (or should I say lip)
Important! ONLY PAINT LOWER LIP. Mix a little red shade with dark flesh or dwarf flesh. Not too red. Look at your own lips.
ONLY PAINT LOWER LIP
I do not do eye brows unless subject has extremely prominent eyebrows. You really do not need them.
Painting figures for winter? Give him a slightly red nose as if he has a cold. Similar to lips but well thinned. Not like a clown.
Unshaven
Thinned wash of dwarf flesh with some grey or black.
Hope this helps.