Page 1 of 1
panther first go
Posted: Thu Oct 07, 2010 1:52 am
by vonsepp
Hi all just a few pic's of my panther g I changed the gearboxe's and put on metal tracks and spocket's and rear wheel's,have'it tried too do to much
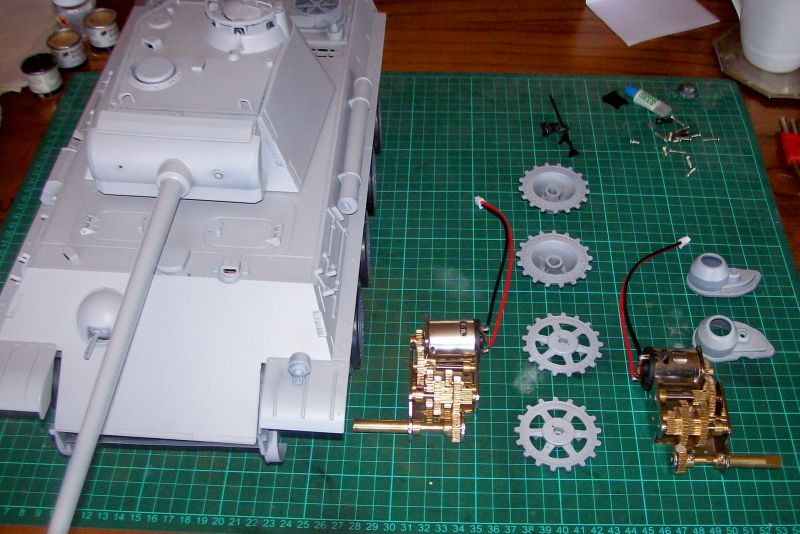
- primed and ready too put gearbox's in
- 100_0234.jpg (100.34 KiB) Viewed 2229 times
Re: panther first go
Posted: Thu Oct 07, 2010 2:37 am
by Saxondog
Looks good, did you use the floor polish as a sealer before the Matte Varnish was applied? Seems like a good bit of work has been done,tools look to be painted and detail like the cleaning rod container and tow cables.
Keep the pictures coming, I'm sure many will enjoy your build.
Sax
Re: panther first go
Posted: Thu Oct 07, 2010 10:43 am
by combatsmurf
Vonsepp, nice colour modulation and weathering job. Top shelf for a first attempt mate.
Re: panther first go
Posted: Thu Oct 07, 2010 12:27 pm
by vonsepp
hi guy's thank's for reply,
I havn't had a chance to try the floor polish sax ,I'll have too try it on my next one have more or less finshed all the add on parts ,am interested in doing the side armor ,have some plastic card that would work well,if anyone could help with a size or templet,I would appreciate it, I've been lookin' and can't find any size's,this is my first try at this scale combatsmurf,I have done a few 1/35 ,I find this is a great scale too work with ,a few pic's of the build again
Re: panther first go
Posted: Thu Oct 07, 2010 8:11 pm
by oldfeller
Hi
Like it Mate, especially the detail on the tools and wire.
Did you make the ear phones on the figure.
Gerwyn
Re: panther first go
Posted: Thu Oct 07, 2010 8:33 pm
by Johnf
HI,Like the paint scheme. I'm new to this scale also. Whats all this about floor polish? Did'nt hear about that before.
John
Re: panther first go
Posted: Fri Oct 08, 2010 1:49 am
by Saxondog
Hi, I just made the side Schurzen on my Jagdpanther, the size and spacing I followed from Picture in the reference section, also from the Tamiya instructions for the Jagdpanther, the tamiya does not have the Schurzen but does have the brackets which demonstrate the mounting as the panels overlap at these points. I chose to glue in plastic strips at the joints behind the panels.
Also the sizes are different, but once you know the mounting you can figure the size, or if need be I will measure mine. cheers Sax
Re: panther first go
Posted: Fri Oct 08, 2010 1:53 am
by Saxondog
I forgot in the picture my panels are to far back, if you look at the Panthers in the reference section the first panel begins at the center of the front drive sprocket, but you can see the panel joints. My panels are not perfect Schurzen but does convey the right look. Hope this helps, Sax
In the painting and weathering section floor polish is demonstrated, check out this post. This is part of the sub-forum under Tips and Tricks.
http://www.rctankwarfare.co.uk/forums/v ... 151&t=2429" onclick="window.open(this.href);return false;
Re: panther first go
Posted: Fri Oct 08, 2010 2:32 am
by vonsepp
Hi guy's
had ago at making a stencil for the turrent side number's and rear turrent number's ,I've sort of gone for a camo that was on the panther g' of the panzer lehr division ,around about the time of the ardenne 1944,save's me in away having to worry tomuch about zimmerite,which i would like too have ago on a tiger,thank's sax's I see what you mean about the floor polish,I'll give it ago next time round,hi Gerwyn the head phone's come with the figure just added some cable's.John sax's left a link to have a look at ,thank's sax's ;like the paint job on your jag,it look's hot.
http://www.rctankwarfare.co.uk/forums/v ... 151&t=2429" onclick="window.open(this.href);return false;
Re: panther first go
Posted: Fri Oct 08, 2010 2:57 am
by Saxondog
This is a good link for the Panther and Jagdpanther,
http://www.panther1944.de/en.html" onclick="window.open(this.href);return false;
This site has free downloads of the tank manuals Tamiya, Heng Long, and mato. The panther and Jagdpanther instructions will detail the side SCHURZEN mounting positions.
Sax