Page 1 of 1
Painting Tools Fixed to the Hull
Posted: Sun Dec 01, 2024 1:50 am
by TouchConnors
Hello.
I love my RC tanks, but they really need better paint. I'm not really a modeler but have found a decent amount of general methods/tips online. I also got a decent air brush set-up.
As for painting the tools, I've seen them painted off the hull, but on at least some of my tanks* they're glued or otherwise secured.
What the best way to remove the tools or the best technique for paint the tools while secured to the tank?
Thanks!
*I've got Taigen, Heng Long and Hooben.
Re: Painting Tools Fixed to the Hull
Posted: Sun Dec 01, 2024 9:18 am
by jarndice
If you have Heng Long Tanks then you will have noticed that unlike Taigen/Torro the tools and other fittings are on a sprue to be fitted at your disgression whereas the Taigen/Torro tools and fittings are moulded onto the Tank,
This is just one more reason why I buy Heng Long Tank Bodies and Turrets and Taigen/Torro Metal Hulls,
I have a choice of using aftermarket tools and fittings and in either case I can detail these bits and pieces off the Tank only fitting them when I have finished work on the rest of the vehicle PLUS with the Taigen/Torro metal hull I get a quick release and decent Torsion bar suspension.
Re: Painting Tools Fixed to the Hull
Posted: Sun Dec 01, 2024 3:54 pm
by PainlessWolf
Good Morning,
Jarndice has the right of it, especially if your Armor is new and being assembled piecemeal like most of us hereabouts prefer. If you have an upper which is older and has tools attached or one of the mentioned types like Taigen, first look and see if the tools are molded on or glued. If glued, they may be careful removed by use of products that de-cure Super Glue ( or whatever the factories are using ). If molded on, they can either be removed by sanding or a razor saw and new after market tools painted and mounted or you can spend some time ( as I have done on several builds ) and give the tools a 3D appearance by undercutting with scribing blades and other tools used for working with resin and plastic. After this step is done, careful painting yields a very satisfactory result. Whatever route you take, post Pics of your progress for the Forum to follow along on.
regards,
Painless
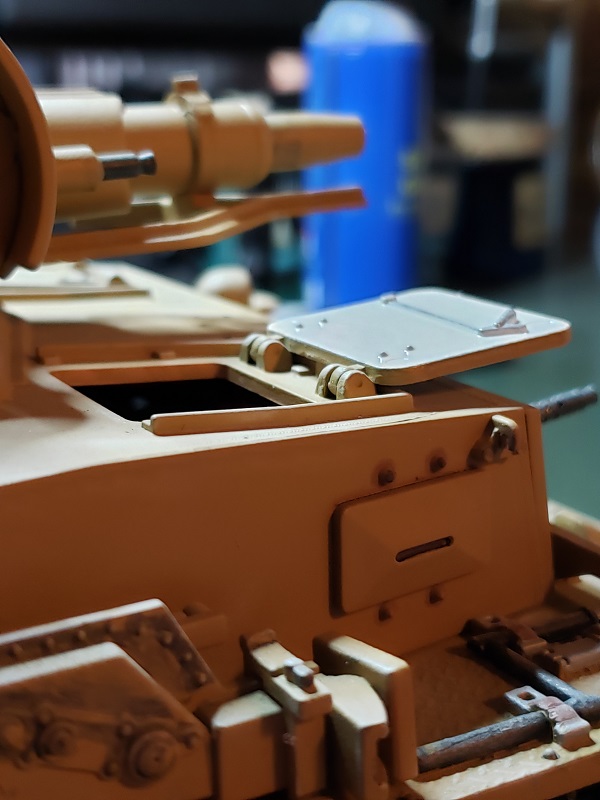
- An example of cleaning up and painting molded on tools and gear
- Funker Operator catching the breeze from 22 tons in motion.jpg (113.46 KiB) Viewed 766 times
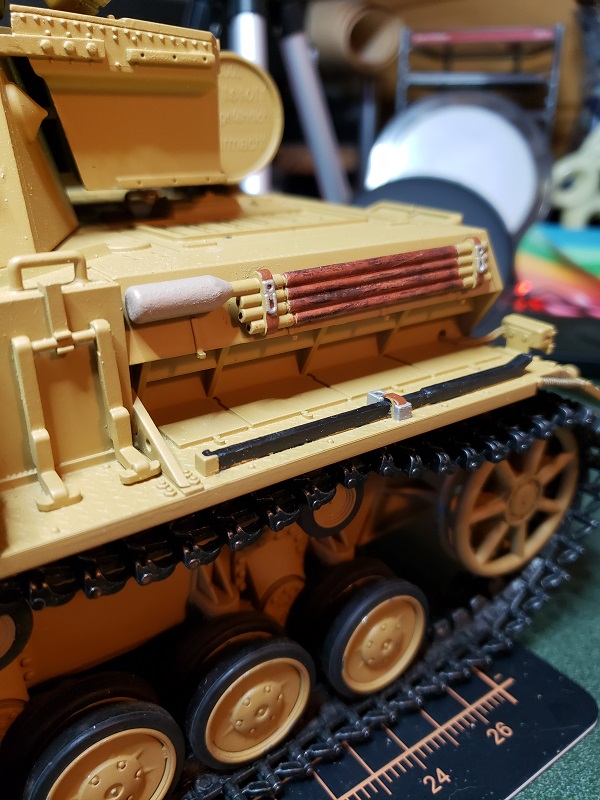
- Another example from the same Build
- Woodgrain on plastic.jpg (171.37 KiB) Viewed 766 times
Re: Painting Tools Fixed to the Hull
Posted: Sun Dec 01, 2024 4:54 pm
by Herr Dr. Professor
I have a number of Taigen tanks on which, for no apparent reason, some of the tools are relief cast. I use Painless's method for those, with seven-power magnifying lenses of the sort that strap around my noggin. Five power may be enough for you. These are available from hobby stores, online hobby stores, and online shooping sites.
Re: Painting Tools Fixed to the Hull
Posted: Mon Dec 02, 2024 11:14 pm
by TouchConnors
Thanks for the tips, that's definitely helpful.

