Page 1 of 5
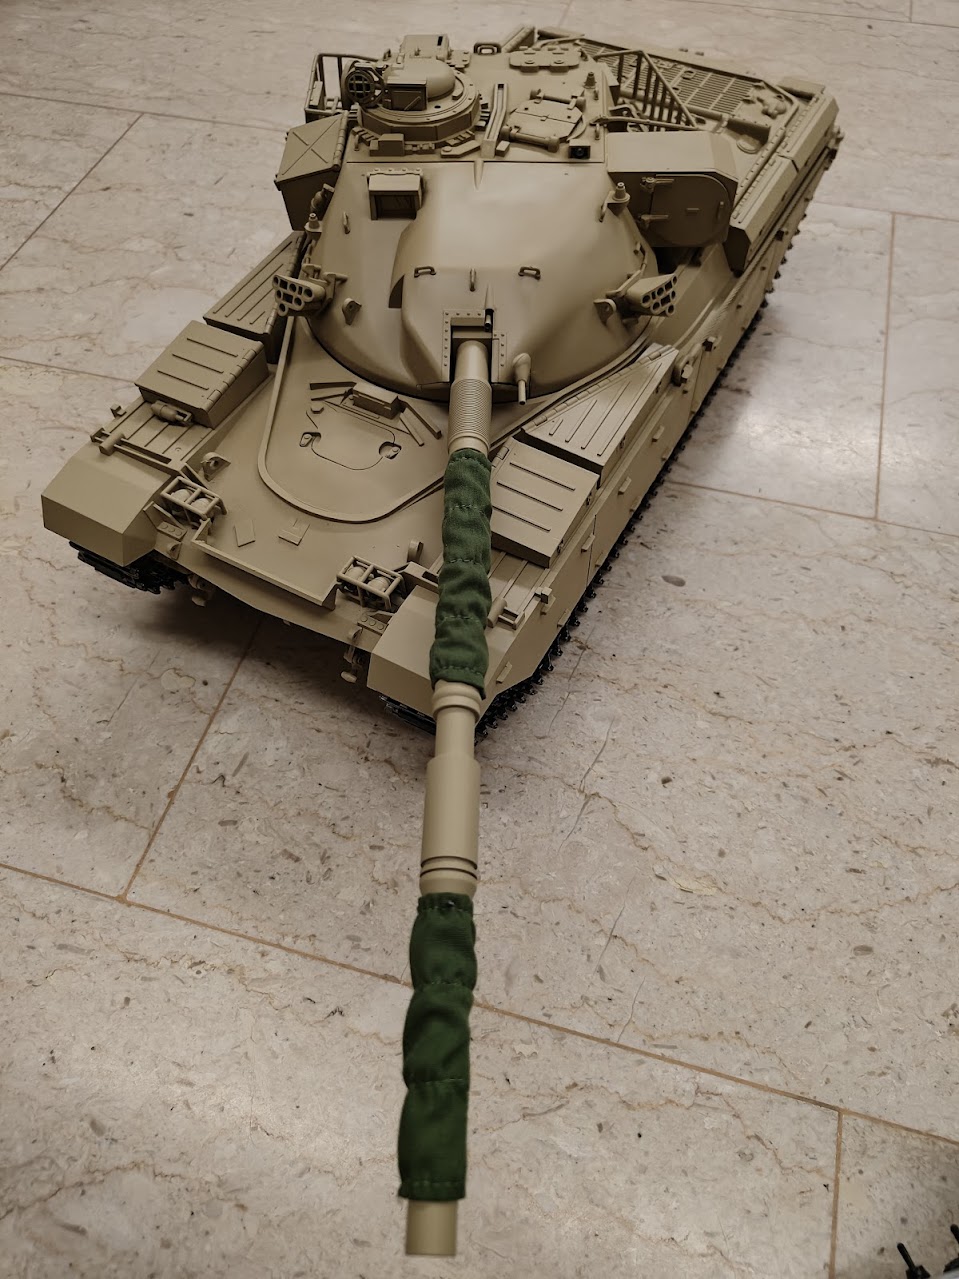
Haya Chieftain desert trial version
Posted: Sun May 05, 2024 2:22 pm
by ongbenghui
Hi folks,
Though it is fun to start a topic on my WIP Haya Chieftain desert trial version (kind of), and highlight all the little updates/modifications that I did to the chieftain.
My specific version has BB disabled, with intent to fit the Tamiya Battle Unit, along with gun flash.
Smoke unit has been removed. I don't see the need for this and really don't like smoke.
Certainly hope it can be useful for most.
This started as a Haya Chieftain Mk3 with metal track with rubber pad, and upgraded with Centurion wheels with ball bearings.
Electronics of choice is a Clark TK50ESP with a Challenger 1 soundset at the moment, possibly the closest I can get. The original plan was to use an Elmod but a few self-inflicted problems caused a change of plan.
Speaker was the rctank.de Viston M loudspeaker. This is rather nice sounding for it's size.
Radio was a Radiomaster Zorro with a Matek R24-P6 receiver. Might change to something else later.
This was primed with Mr Colour Surfacer 1500 gray, painted with Mr Color C528. This is my first time printing a 1/16 tanks. Used up 2 cans of surfacers and 10 bottles of paint Lots of paint.
- IMG20240409222203.jpg (234.56 KiB) Viewed 3224 times
Re: Haya Chieftain desert trial version
Posted: Sun May 05, 2024 2:33 pm
by ongbenghui
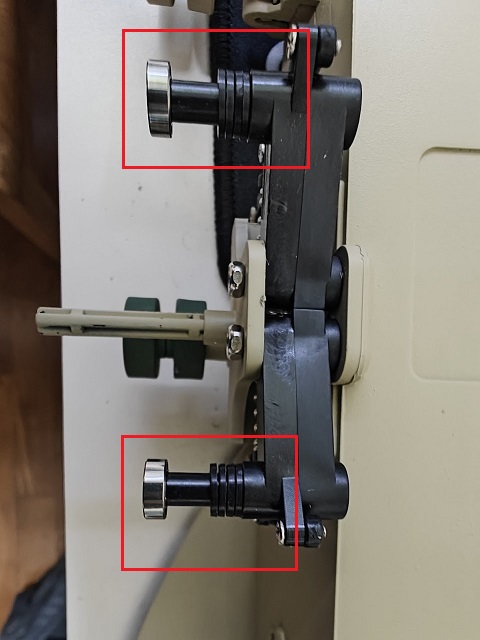
One of the initial modifications I have done is to replace all the spacers that come with the tank with a proper M5 plastic washer. I found a specific one that has 8mm external diameter and 1 mm thickness to ensure it fits well to the plastic spindle.
4mm spacing is required, hence, 4 of those on the spindle will create a nice spacing between the wheels and the support screws.
I think that two screws supporting the spindle should have been replaced with countersunk head instead, this prevents any possible vibration from rubbing the rubber wheel with those screw heads.
I reckon at some point, I might replace the suspension arm totally with 3D printed ones, possibly with the right dimension or with aluminum spindle instead.
- IMG20240325222924.jpg (65.91 KiB) Viewed 3207 times
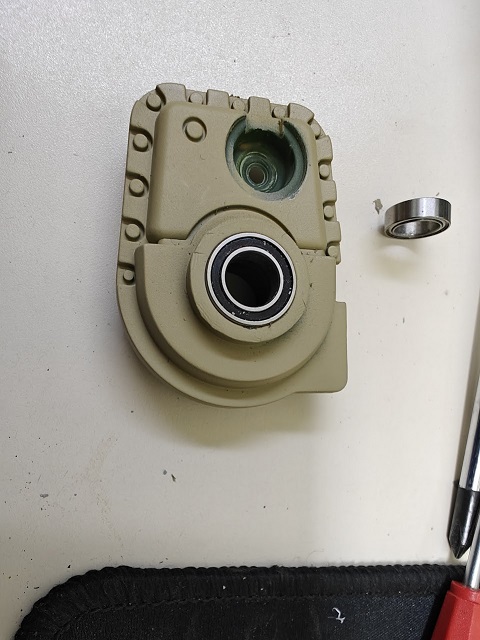
The original bearings for the drive shaft has been removed and replaced with the larger external bearing from rctanklegion.
See
https://www.rctanklegion.com/products/r ... -bearings-
- IMG20240325221828.jpg (92.26 KiB) Viewed 3215 times
I do warn you to take extra care to remove the section of Drive Axle Support because it is quite a tight fit, and remove the cover cap and the screw properly. Else, you risk damaging that plastic section.
I reckon you can get the bearing of the right size and have it fitted. But Stanley is such a nice guy to deal with.
Re: Haya Chieftain desert trial version
Posted: Sun May 05, 2024 2:40 pm
by ongbenghui
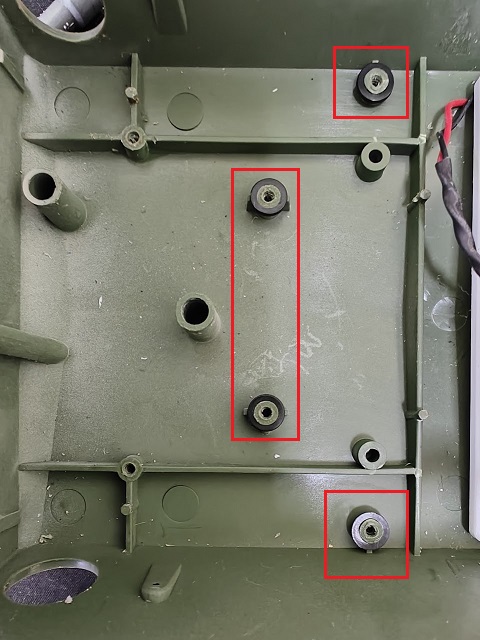
A good news for me is that the plastic spacer that I got can be used to reinforce the gearbox holder as it is just the right size.
I hope this will prevent any possible stripping of the screw threads for those mounting holes.
- IMG20240429154858.jpg (102.14 KiB) Viewed 3216 times
Re: Haya Chieftain desert trial version
Posted: Sun May 05, 2024 2:57 pm
by ongbenghui
Because of my choice of speaker, and I am trying to learn 3D design and printing, I decided to replace the controller board holder with something custom.
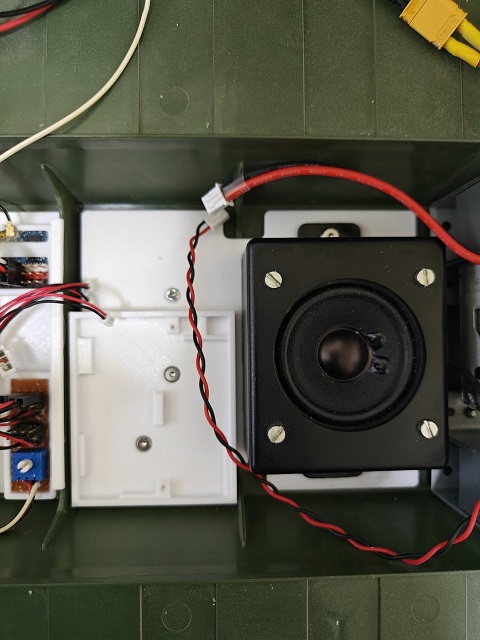
- IMG20240413202218.jpg (90.17 KiB) Viewed 3208 times
- IMG20240413202840.jpg (119.53 KiB) Viewed 3208 times
I made a custom controller board with a specific mounting hole for the rctank.de speaker, along with a special base board to TK50. This allows me to have solid mounting of the electronics, and because they are all screwed on, I can remove the parts for any potential servicing.
The controller board also seems to make the chassis slighter stiffer.
There is also a small specific 3d printed tray that sits on that little section beside the battery bay. That section is not flat, hence, a 3d printed tray is made to make use of that space. There, I placed my receiver, and a small board of connector converters for TK50, and a variable pot for volume control.
All these 3d printed parts are available of here.
Seperate tray ->
https://cults3d.com/en/3d-model/game/tr ... -tank-1-16
Controller board ->
https://cults3d.com/en/3d-model/game/ha ... ller-board
TK50 mount board ->
https://cults3d.com/en/3d-model/game/cl ... ongbenghui
Hope these can be useful.
Re: Haya Chieftain desert trial version
Posted: Sun May 05, 2024 3:06 pm
by ongbenghui
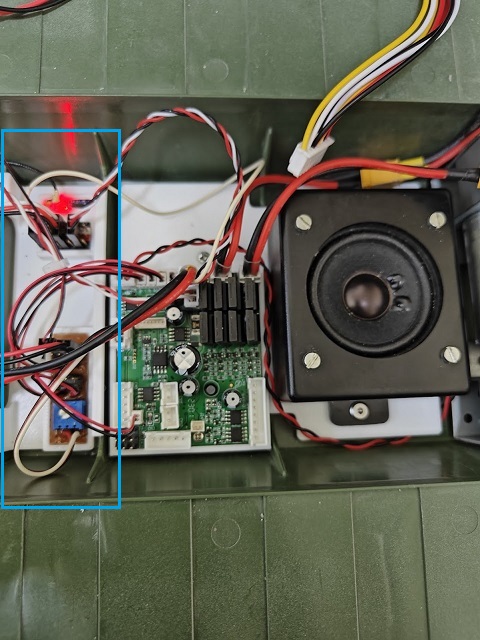
I love the hengleng breakout board that works well with the TK50, but I originally can't decide to place it on the hull (like Haya Centurion) (In Blue), or part of the turret (In Red).
I guess I will settle for Red at the moment. That helps to organize the wiring from the TK50 board to the turret wiring.

- IMG20240505170627.jpg (223.69 KiB) Viewed 3205 times
The ranging gun (sort of) can be fitted with a 3mm red LED added with connection to the TK50 as MG2.
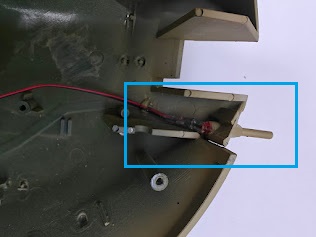
- IMG20240505163442.jpg (19.05 KiB) Viewed 3205 times
Re: Haya Chieftain desert trial version
Posted: Sun May 05, 2024 6:35 pm
by Herr Dr. Professor
Congratulations on a fine build started here with excellent photos, too! Even if silently, I am watching along.
Re: Haya Chieftain desert trial version
Posted: Mon May 06, 2024 5:36 am
by ongbenghui
Oh dear, i reckon this should be better in the "Modern Builds" section of this forum. Anyway to move this ?
Re: Haya Chieftain desert trial version
Posted: Mon May 06, 2024 8:50 am
by HERMAN BIX
I reckon it should be in OTHER-Modern so I will move it there now.
Re: Haya Chieftain desert trial version
Posted: Mon May 06, 2024 3:58 pm
by ongbenghui
HERMAN BIX wrote: ↑Mon May 06, 2024 8:50 am
I reckon it should be in OTHER-Modern so I will move it there now.
Many thanks. Will continue to update on progress.
Re: Haya Chieftain desert trial version
Posted: Thu May 09, 2024 2:59 pm
by ongbenghui
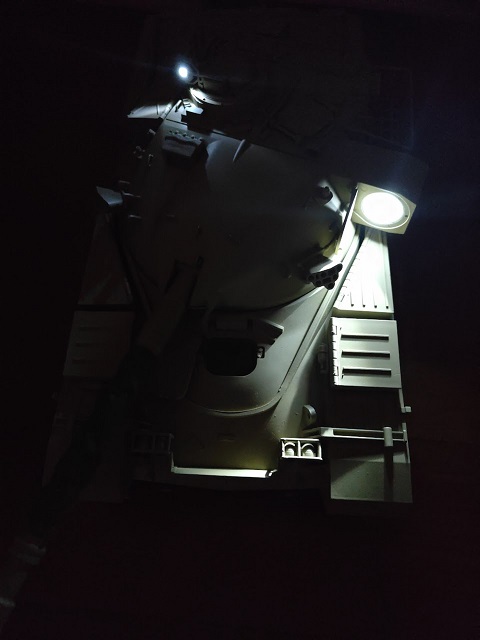
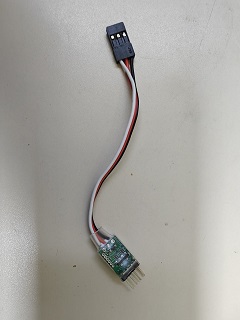
The Chieftain commander light and searchlight are such nice features of the tank. The commander light is a 5mm LED and the search light is a 10mm LED.
I used a rc car 2 LED light controller and hooked up a spare unused channel on the receiver to control the light.
However, I will strongly recommend soldering a 200~300ohms resistor inline with the LED light to protect over-current to the LED.
I burned out two LED lights when connecting directly to some light controllers.
- IMG20240509214720.jpg (44.64 KiB) Viewed 3095 times
Example of such controller.
- IMG20240509221108.jpg (17.85 KiB) Viewed 3093 times