Haya Australian Centurion Mk5/1
-
Estnische

- Warrant Officer 2nd Class
- Posts: 1065
- Joined: Tue Jun 07, 2016 11:52 pm
- Location: Wollongong, Australia
Re: Haya Australian Centurion Mk5/1
Thanks for the heads-up guys. It’s a shame Adam - did you change your mind?

-
Estnische
- Warrant Officer 2nd Class
- Posts: 1065
- Joined: Tue Jun 07, 2016 11:52 pm
- Location: Wollongong, Australia
Re: Haya Australian Centurion Mk5/1
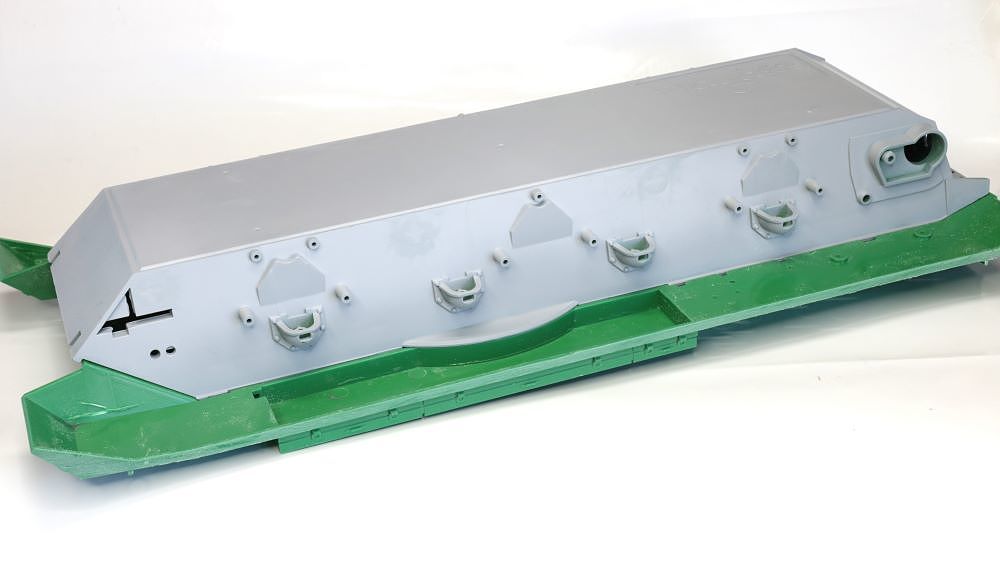
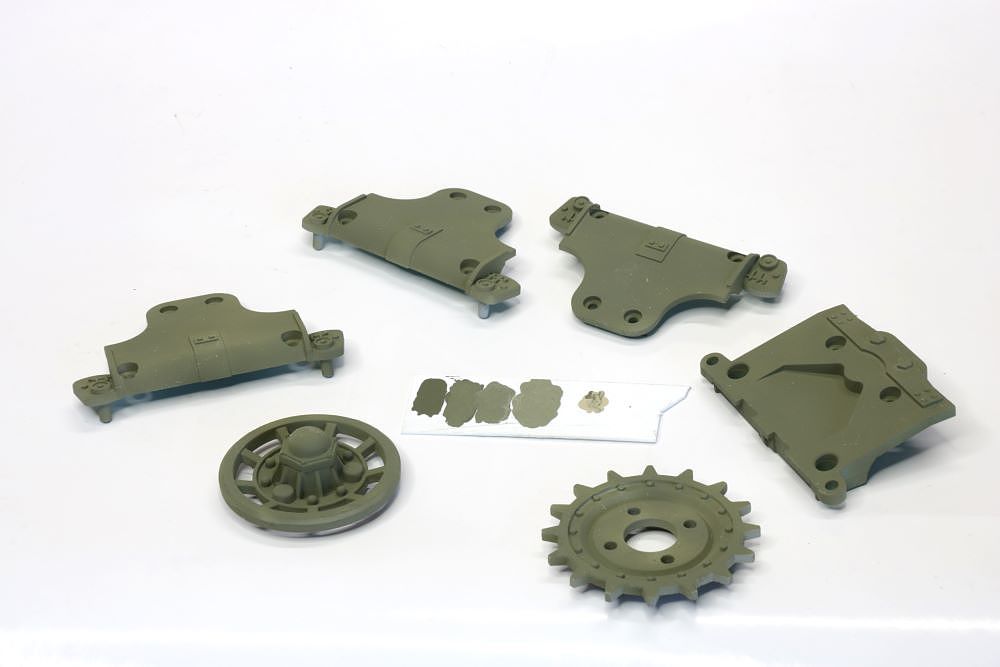
Thinking ahead of the assembly process, I need to add some texture to some of the castings and prepaint them before beginning to assemble the suspension on the lower hull.
The texture was added to the smooth finished parts of the turret (but not the top plate), final drive housings and other small pieces. The suspension stations appear to be rolled and welded plate with minimal castings so they stay as they are.
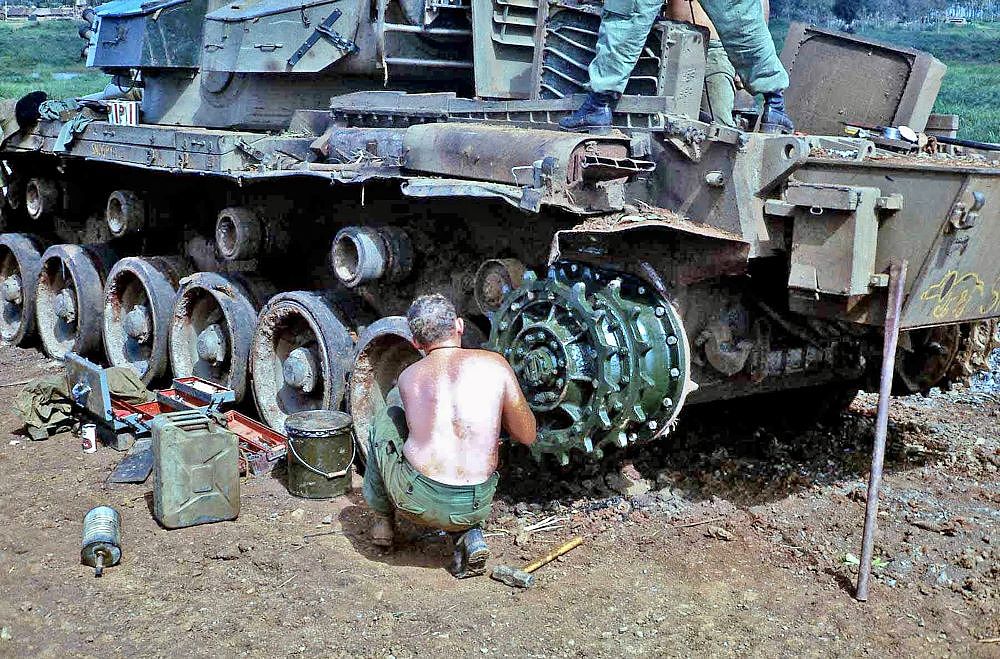
It is interesting to look at this image of the Centurions during their initial unloading from landing craft in Vietnam, with full track guards and light fittings.
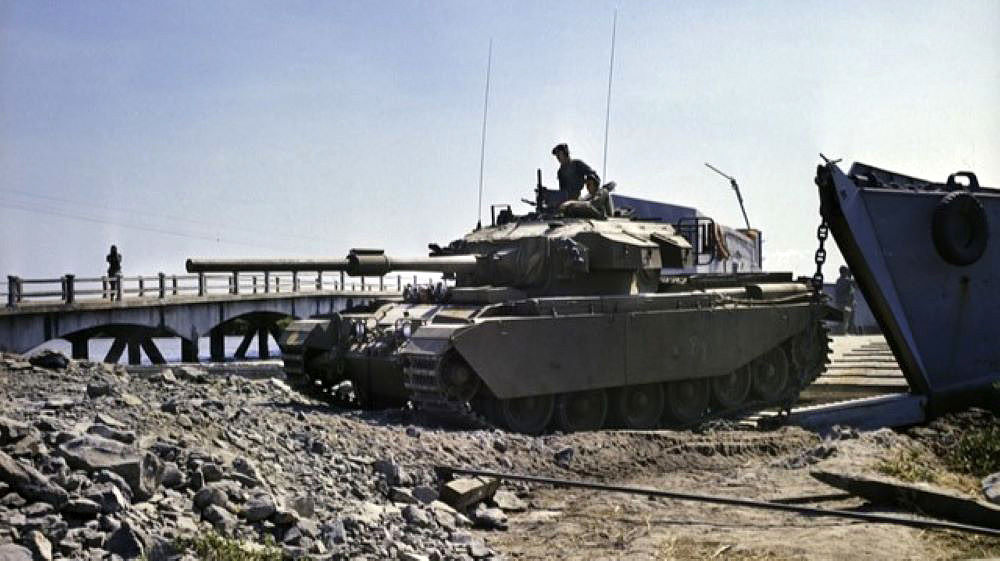
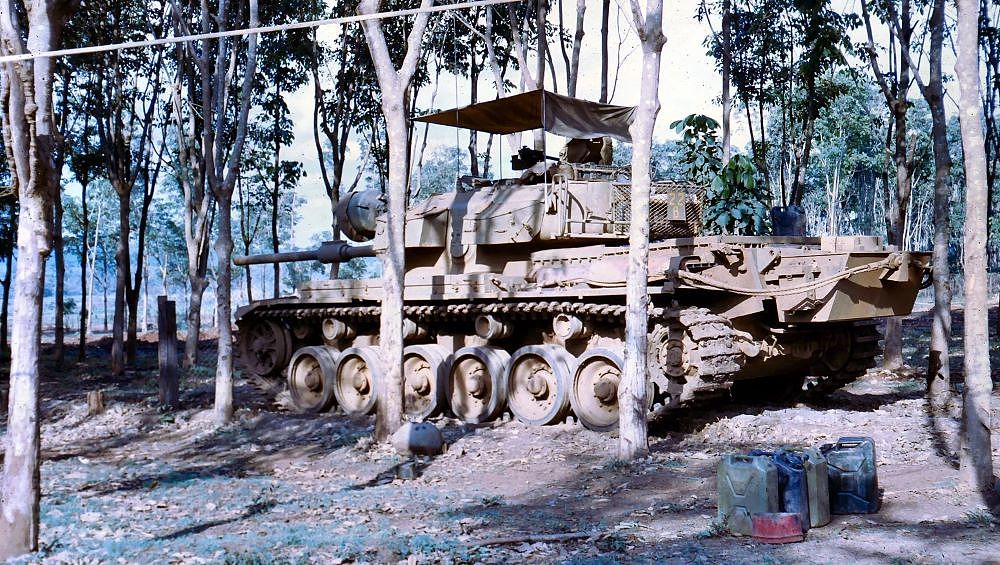
Although it demonstrates there are many modelling possibilities, I will stick with the classic modified look. This is another photo from Stephen White’s fantastic collection of C/S 22B. The tan colour here is interesting – it looks to me like dry season conditions. It is not the full-on Vietnam red mud colour, more like an ochre/desert dust colour. Underneath all that it is olive drab!
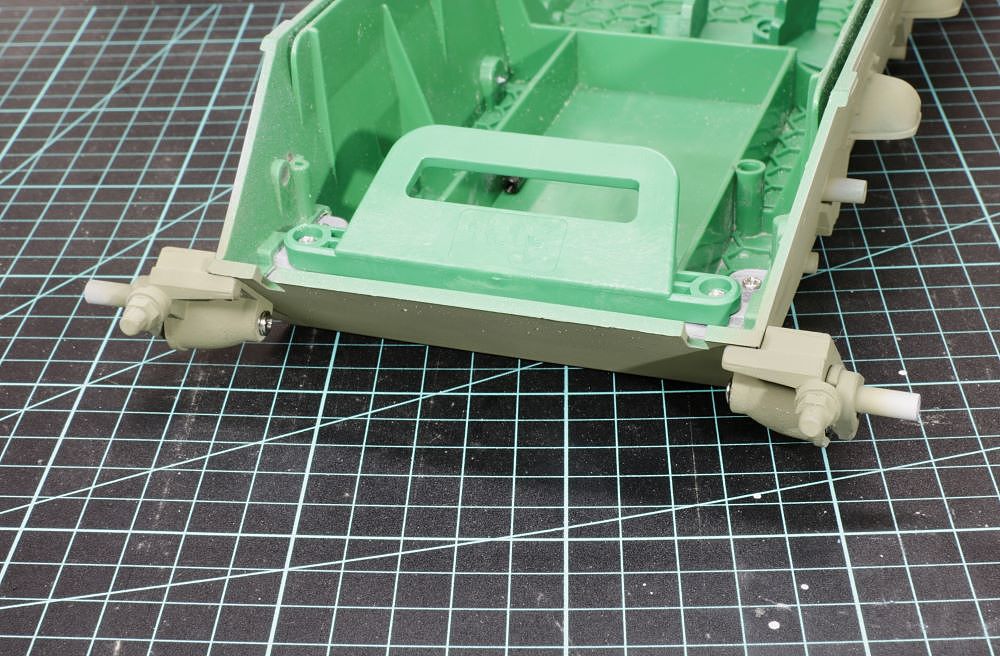
Haya solidly moulded the side skirts to the upper hull to stop them falling off while driving around. So a nice few hours with a razor saw were required to carefully trim them back to the base track guards as moulded by Haya.
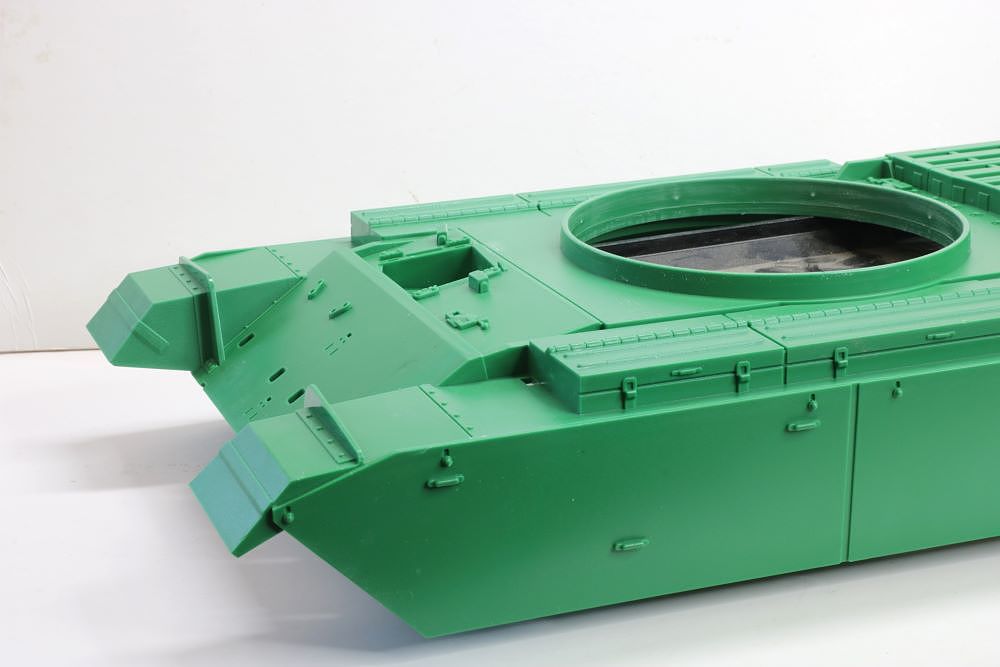
That also means the side skirt support posts will not be used, so I need to cut and fill the post bosses.
Here it is with all the hacking done and tidied up with filler.
With the skirts off, you can see Haya did a reasonably accurate moulding job as the result has left the turret ring poking out like the real one. However, the track guard tool boxes will need bases added once I separate the one-piece mouldings or daylight will show through.
The texture was added to the smooth finished parts of the turret (but not the top plate), final drive housings and other small pieces. The suspension stations appear to be rolled and welded plate with minimal castings so they stay as they are.
It is interesting to look at this image of the Centurions during their initial unloading from landing craft in Vietnam, with full track guards and light fittings.
Although it demonstrates there are many modelling possibilities, I will stick with the classic modified look. This is another photo from Stephen White’s fantastic collection of C/S 22B. The tan colour here is interesting – it looks to me like dry season conditions. It is not the full-on Vietnam red mud colour, more like an ochre/desert dust colour. Underneath all that it is olive drab!
Haya solidly moulded the side skirts to the upper hull to stop them falling off while driving around. So a nice few hours with a razor saw were required to carefully trim them back to the base track guards as moulded by Haya.
That also means the side skirt support posts will not be used, so I need to cut and fill the post bosses.
Here it is with all the hacking done and tidied up with filler.
With the skirts off, you can see Haya did a reasonably accurate moulding job as the result has left the turret ring poking out like the real one. However, the track guard tool boxes will need bases added once I separate the one-piece mouldings or daylight will show through.
-
tankme

- Warrant Officer 1st Class
- Posts: 1987
- Joined: Tue Oct 31, 2017 3:51 pm
- Location: Elgin, TX
- Contact:
Re: Haya Australian Centurion Mk5/1
Nice. I'll be watching this build as I recently acquired a Haya Cent.
Derek
Too many project builds to list...
Too many project builds to list...
-
tankme
- Warrant Officer 1st Class
- Posts: 1987
- Joined: Tue Oct 31, 2017 3:51 pm
- Location: Elgin, TX
- Contact:
Re: Haya Australian Centurion Mk5/1
Kit. It came with the 3 turret tops so I have some decisions to make as to which model I want to build.
Derek
Too many project builds to list...
Too many project builds to list...
-
Estnische
- Warrant Officer 2nd Class
- Posts: 1065
- Joined: Tue Jun 07, 2016 11:52 pm
- Location: Wollongong, Australia
Re: Haya Australian Centurion Mk5/1
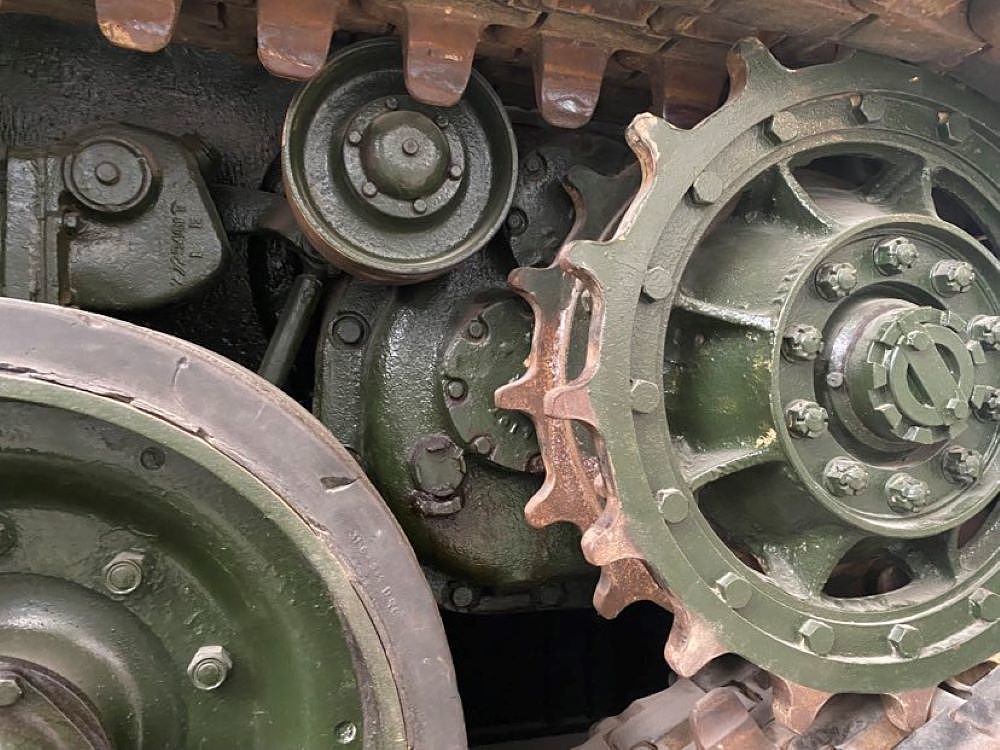
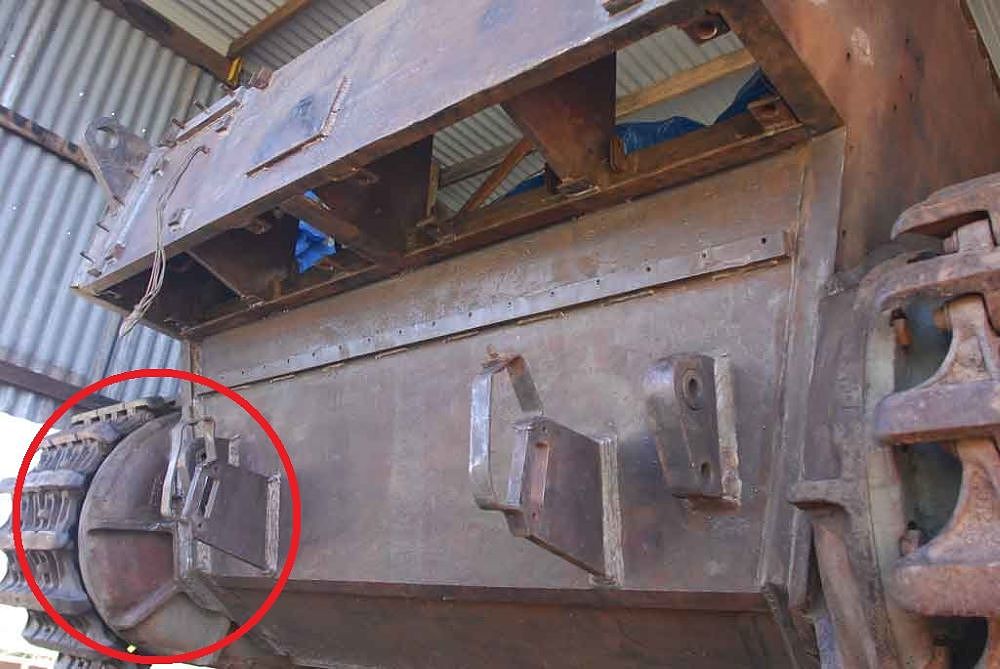
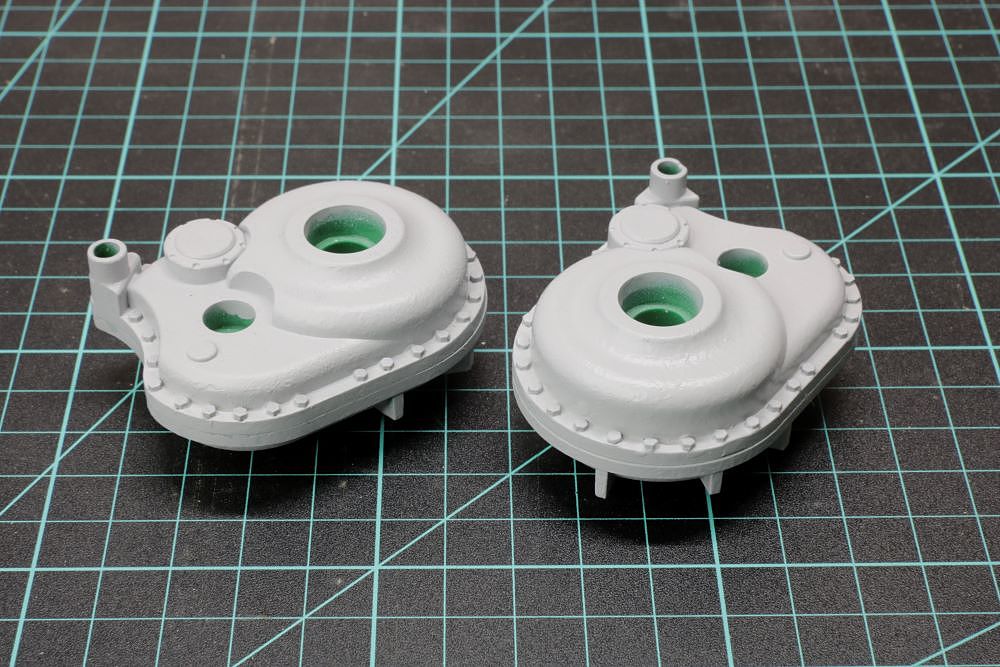
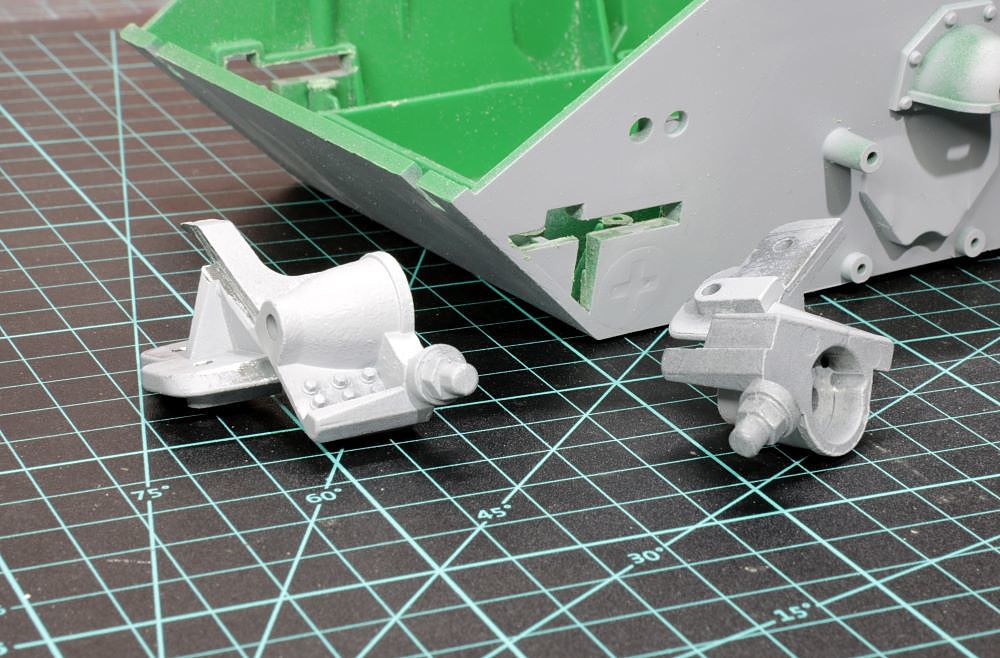
After taking another look at reference photos I realised that the final drive outer cases should also have visible bolt details added. Also note that this Vietnam field repair is using parts still in Deep Bronze Green in contrast to the Australian paint.
The inner cases have little lumps, rather than exposed nuts, which are not easy to model consistently, so I didn’t bother. Some of these photos are from the ones Paul Scott posted of his restoration work of 169091 C/S 0D, here : https://hmvf.co.uk/topic/16359-australi ... on-169091/
I used Meng 2.2mm plastic bolts.
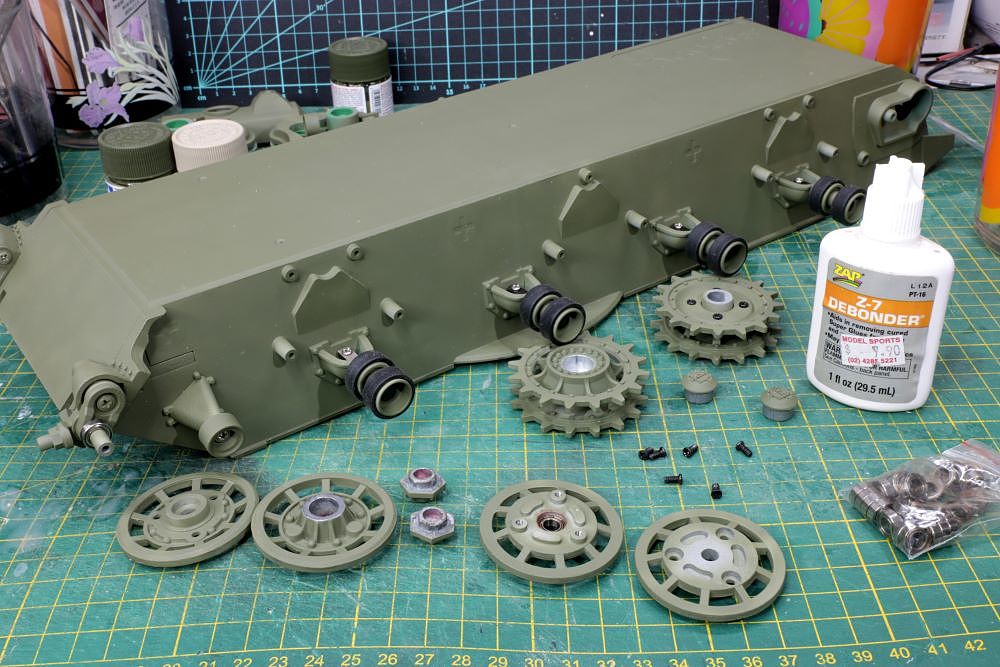
With that done, I worked towards getting the lower hull rolling on the return rollers and road wheels. In order to save rework, more parts were primed and also prepainted in body colour.
Australian Army vehicles of the time were coloured Olive Drab Lustreless, not US Olive Drab, and is a subject of much discussion amongst modellers as to the formula. From photos it is significantly lighter than Tamiya’s Olive Drab.
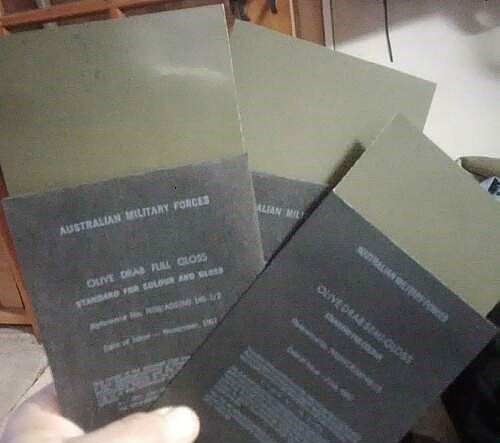
I found Tamiya’s Dark Green 2 XF89 was similar in tone to historic photos, so I mixed it with Tamiya Buff to lighten it. Here is a small test I did on plasticard – the darkest is straight XF89. As a base coat I am going with a 3:1 mix for lower hull areas, and will go lighter side pieces and lighter again for horizontal surfaces. All the painted pieces were also given a coat of clear matt to protect them, that ended up making them darker.
According to the Haya instruction video, it is advisable to fit the gearboxes and return rollers first. Then come the final drive casings, sprockets and idlers. I am particularly impressed with Haya’s idler mount keying system – much sturdier than the Tongde ones Louis found to be problematic.
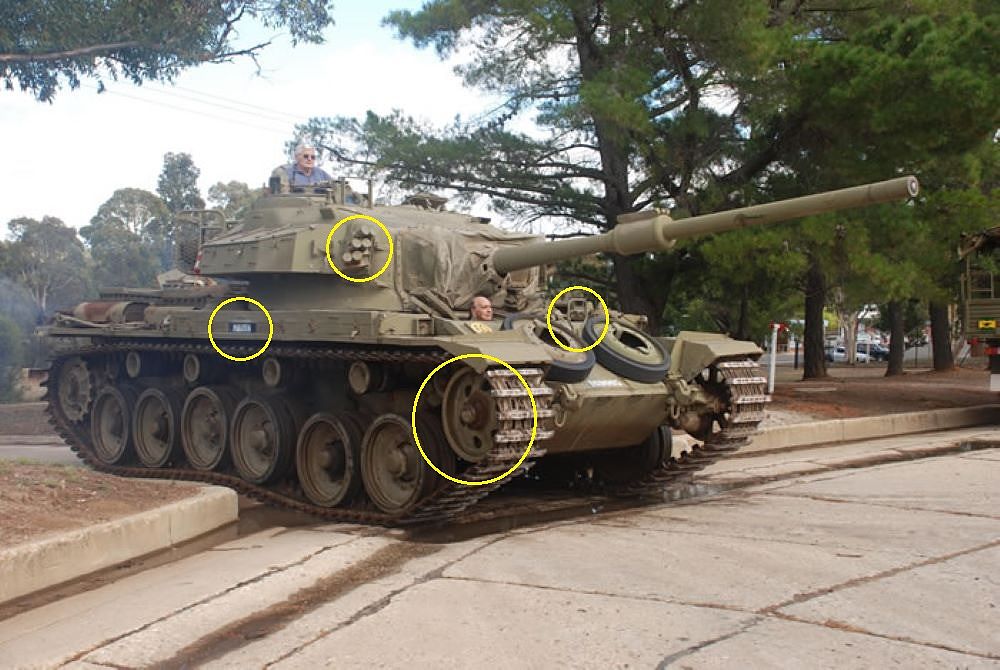
Speaking of idlers, Centurions apparently had three different iterations during their service life. This photo shows why modern photos of gate guards should be viewed with suspicion as they may show fittings as circled, not usually seen in the Vietnam era. Check out this Australian Centurion with some more modern hardware, being presented at the Australian Army armour museum at Puckapunyal.
The inner cases have little lumps, rather than exposed nuts, which are not easy to model consistently, so I didn’t bother. Some of these photos are from the ones Paul Scott posted of his restoration work of 169091 C/S 0D, here : https://hmvf.co.uk/topic/16359-australi ... on-169091/
I used Meng 2.2mm plastic bolts.
With that done, I worked towards getting the lower hull rolling on the return rollers and road wheels. In order to save rework, more parts were primed and also prepainted in body colour.
Australian Army vehicles of the time were coloured Olive Drab Lustreless, not US Olive Drab, and is a subject of much discussion amongst modellers as to the formula. From photos it is significantly lighter than Tamiya’s Olive Drab.
I found Tamiya’s Dark Green 2 XF89 was similar in tone to historic photos, so I mixed it with Tamiya Buff to lighten it. Here is a small test I did on plasticard – the darkest is straight XF89. As a base coat I am going with a 3:1 mix for lower hull areas, and will go lighter side pieces and lighter again for horizontal surfaces. All the painted pieces were also given a coat of clear matt to protect them, that ended up making them darker.
According to the Haya instruction video, it is advisable to fit the gearboxes and return rollers first. Then come the final drive casings, sprockets and idlers. I am particularly impressed with Haya’s idler mount keying system – much sturdier than the Tongde ones Louis found to be problematic.
Speaking of idlers, Centurions apparently had three different iterations during their service life. This photo shows why modern photos of gate guards should be viewed with suspicion as they may show fittings as circled, not usually seen in the Vietnam era. Check out this Australian Centurion with some more modern hardware, being presented at the Australian Army armour museum at Puckapunyal.
-
Estnische
- Warrant Officer 2nd Class
- Posts: 1065
- Joined: Tue Jun 07, 2016 11:52 pm
- Location: Wollongong, Australia
Re: Haya Australian Centurion Mk5/1
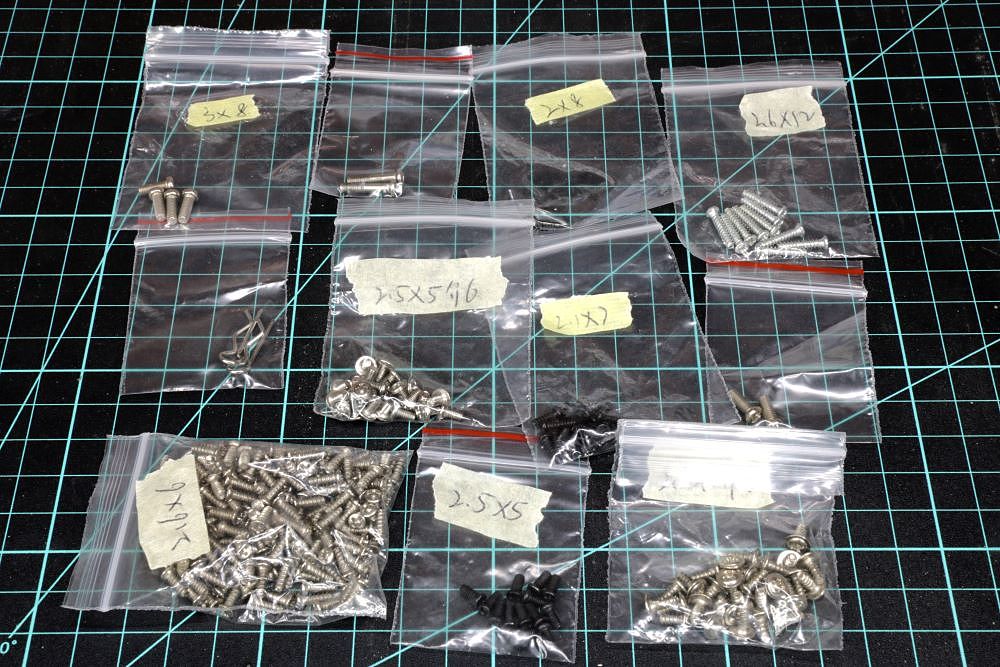
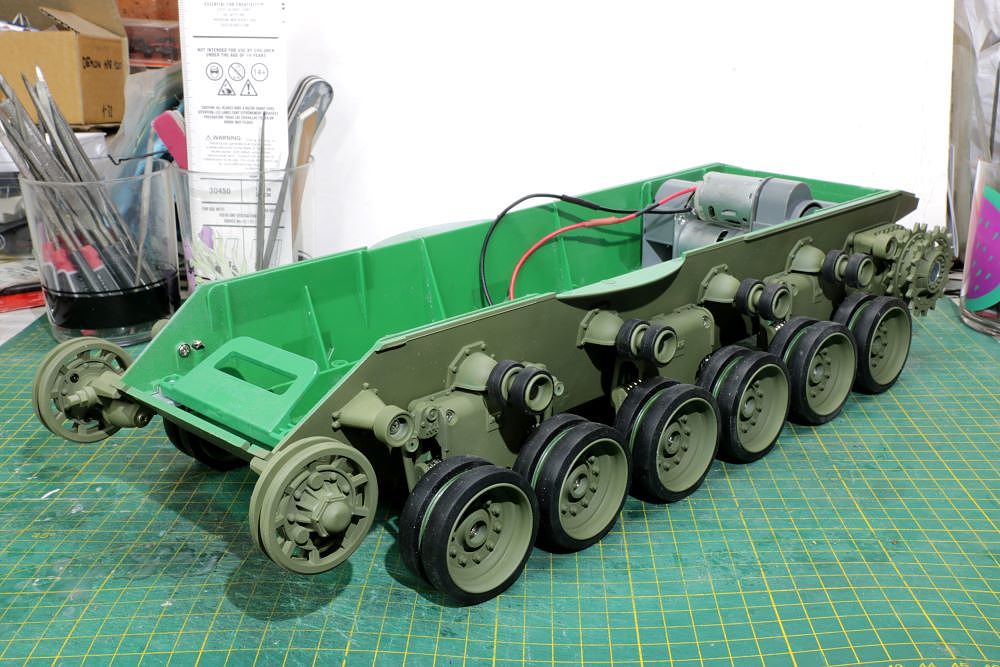
With paint on the lower hull and suspension components, I set about assembling the lower hull to get it rolling. It took some careful scrutiny of the videos to sort out which screws might go where as there are no directions, even then there was a bit of guesswork as the videos don't focus on some of the critical places.
Most of you won’t have any problem with this, but if you are new to RC tank building, here are some tips I can offer:
- Don’t make the Haya kit your very first tank. Get experience with Heng Long RTR tanks as to what types of screws go where.
- Coarse thread screws go into plastic, fine thread screws go into metal.
- Small head screws retain metal, large hat screws retain plastic.
- Small numbers of a screw type indicates special usage, large numbers of screw type are usually plastic assembly screws.
- Rehearse assembling different parts and don’t over tighten on the first go – these materials will chew out if screws are tightened too often.
Here are the screws as they come in the kit.
The idler mounts took some fettling of both the plastic hull slots and the metal mounts to get them to seat properly. I think the concept is for it to be an interference fit so that it is nice and solid. The idlers have a spring arm, like a suspension arm, and the spring can be clocked via the various holes. The springs are left and right sided with the arms having positions at 4 o’clock or 8 o’clock and the idler will be loose if not on the correct side.
As mentioned in the video, the return rollers need to be installed before the suspension stations so as not to block access to the screws. I then went to install the idlers and their bearings, but somebody had CA glued the screw caps in place. I figure it was a mistake as the drive sprocket caps were just pressed in. I dabbed some CA Debonder from the inside, but it still took some nervous hits with a steel drift to knock them free.
Also as mentioned in the video, the central suspension station is different to the fronts and rears. Also the suspension arms are left and right sided for each station. I found that both left and right arms had casting flashings that needed to be filed off to make them fit cleanly.
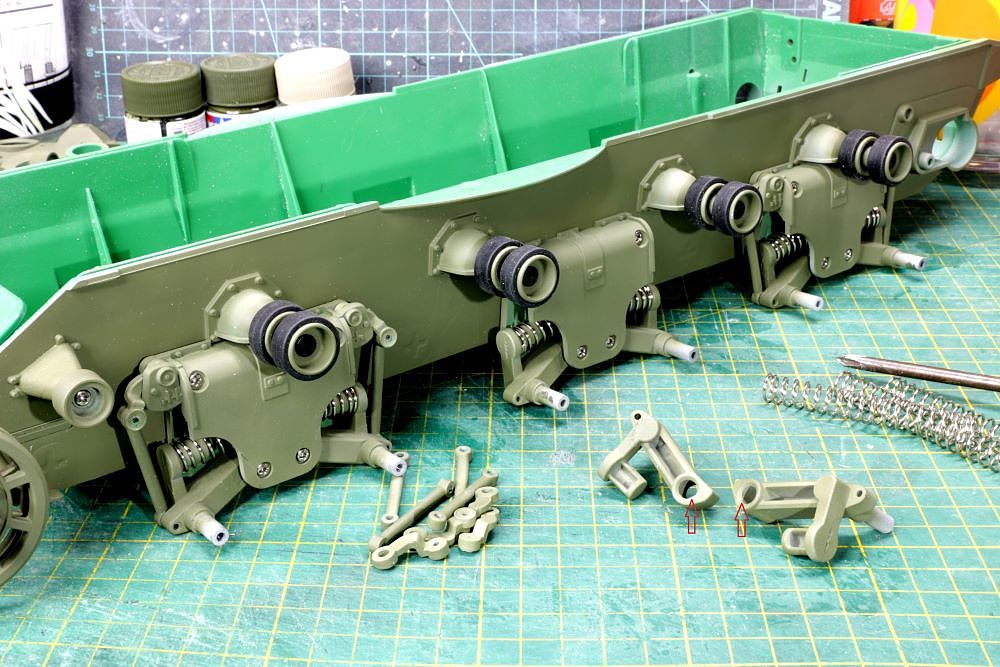
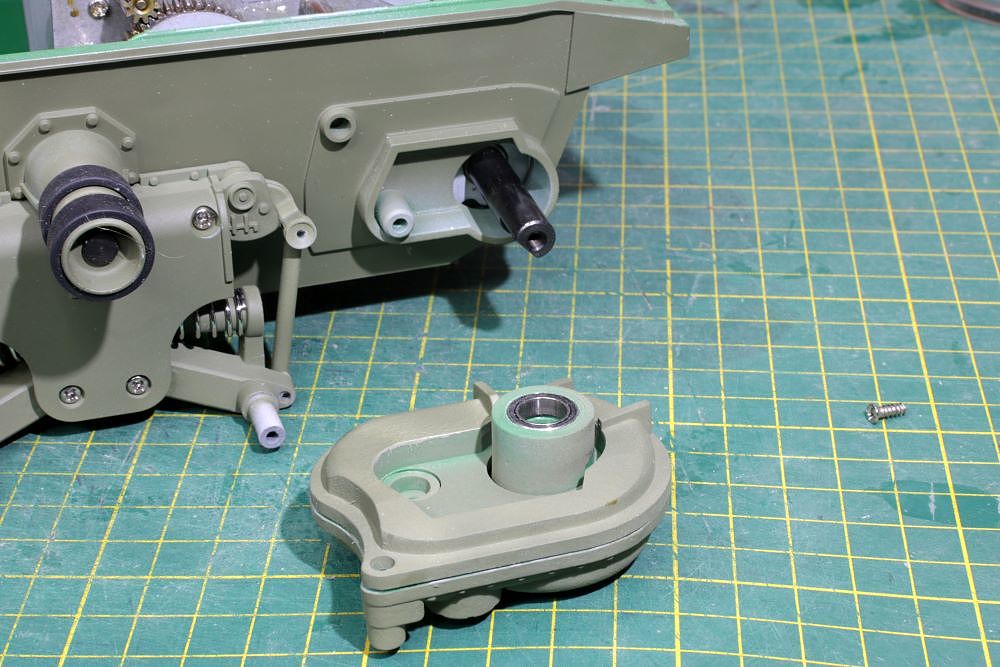
The rear drive casings have bearings to support the shafts.
She is a roller and the gearboxes are now in.
Most of you won’t have any problem with this, but if you are new to RC tank building, here are some tips I can offer:
- Don’t make the Haya kit your very first tank. Get experience with Heng Long RTR tanks as to what types of screws go where.
- Coarse thread screws go into plastic, fine thread screws go into metal.
- Small head screws retain metal, large hat screws retain plastic.
- Small numbers of a screw type indicates special usage, large numbers of screw type are usually plastic assembly screws.
- Rehearse assembling different parts and don’t over tighten on the first go – these materials will chew out if screws are tightened too often.
Here are the screws as they come in the kit.
The idler mounts took some fettling of both the plastic hull slots and the metal mounts to get them to seat properly. I think the concept is for it to be an interference fit so that it is nice and solid. The idlers have a spring arm, like a suspension arm, and the spring can be clocked via the various holes. The springs are left and right sided with the arms having positions at 4 o’clock or 8 o’clock and the idler will be loose if not on the correct side.
As mentioned in the video, the return rollers need to be installed before the suspension stations so as not to block access to the screws. I then went to install the idlers and their bearings, but somebody had CA glued the screw caps in place. I figure it was a mistake as the drive sprocket caps were just pressed in. I dabbed some CA Debonder from the inside, but it still took some nervous hits with a steel drift to knock them free.
Also as mentioned in the video, the central suspension station is different to the fronts and rears. Also the suspension arms are left and right sided for each station. I found that both left and right arms had casting flashings that needed to be filed off to make them fit cleanly.
The rear drive casings have bearings to support the shafts.
She is a roller and the gearboxes are now in.
-
tankme
- Warrant Officer 1st Class
- Posts: 1987
- Joined: Tue Oct 31, 2017 3:51 pm
- Location: Elgin, TX
- Contact:
Re: Haya Australian Centurion Mk5/1
Looking good. It seems you haven't had the issues with mine with missing a bunch of parts. Have to get that taken care of before finishing building one.
Derek
Too many project builds to list...
Too many project builds to list...
-
ongbenghui
- Recruit
- Posts: 20
- Joined: Sun Jun 18, 2023 6:43 pm
Re: Haya Australian Centurion Mk5/1
I got the Haya Centurion as my first tank. It is a really good model based on design, and construction.
But just some minor modification.
Hence, I removed the Inner bearing to give it some slack, and leaving the outer bearing supporting the shafts, with that, I think the drive train runs more freely.
Watch out for the suspension of the 1st road wheel. There is a chance of the suspension arms rubbing with the side panel. I filed and remove some material for the suspension arms to make the movement more free.

But just some minor modification.
i am not sure if having dual bearings to support is a good idea. I find that it is not easy for the gearbox to be accurately aligned with the rear drive casing.
Hence, I removed the Inner bearing to give it some slack, and leaving the outer bearing supporting the shafts, with that, I think the drive train runs more freely.
Watch out for the suspension of the 1st road wheel. There is a chance of the suspension arms rubbing with the side panel. I filed and remove some material for the suspension arms to make the movement more free.
