M3A3 Bradley US Cavalry Fighting Vehicle - RC 1/16 Build

User avatar
BarryC
2nd Lieutenant
Posts: 2473
Joined: Sun Jan 03, 2016 11:43 am
Location: Savannah, GA. USA

Re: M3A3 Bradley US Cavalry Fighting Vehicle - RC 1/16 Build

Post by BarryC »

Nicely done Louis! :clap:

The hatch looks great. :thumbup: :thumbup:

Barry
"Details make perfection, and perfection is not a detail."
Leonardo Da Vinci
User avatar
lmcq11
2nd Lieutenant
Posts: 2610
Joined: Mon Dec 19, 2016 7:42 pm
Location: Quebec, Canada

Re: M3A3 Bradley US Cavalry Fighting Vehicle - RC 1/16 Build

Post by lmcq11 »

Thank you Kaczor, Painlesswolf and Barry !!!

Finally, the moment of truth. The installation and connection of all the electronics, and testing. There is a Youtube video of the electronics in action at the end of the two posts.


Turret top interior showing the 25mm chain gun recoil motorized system with flash, and the LED for the Coax machine gun. The elevation servo is attached to the bottom section of the turret and operates the wheel. As mentioned in a earlier post, the recoil motor is connected to the smoker port on the Elmod board. When shooting, i need to start the smoker first and then synchronized the shooting of the auxiliary machine gun flash and sound. These two are independent. The chain gun can be fired without the recoil of course but its less impressive.

M3A3 Bradley US Cavalry Fighting Vehicle - RC 1/16 Build
Capture.JPG (145.39 KiB) Viewed 823 times

In order to limit the number of cables going down the turret basket, i did not plug the servo that swivel the TOW launcher, i did not find the associated action to be entertaining. But i kept the servo that raises the TOW launcher and i connected it to an independent channel assigned to the VRB wheel on the remote. The connection of the servo arm needed to be redone because the installation coming with the kit simply disappeared somewhere after a couple of test. It must have been a simple screw or something like that.

M3A3 Bradley US Cavalry Fighting Vehicle - RC 1/16 Build
Capture2.JPG (122.04 KiB) Viewed 823 times

Views of the turret and basket after some independent tests and before its final mounting on the chassis. It is deposited here on a roll of black electric tape for display purposes. Carson did come back to me about the missing right grenade discharger part but it will take some time to get it.

M3A3 Bradley US Cavalry Fighting Vehicle - RC 1/16 Build
Capture3.JPG (155.69 KiB) Viewed 823 times

The wiring for the servos coming down on the basket right side and other wires through the tube have been laid out like the wiring seen on the real thing.

M3A3 Bradley US Cavalry Fighting Vehicle - RC 1/16 Build
Capture4.JPG (170.68 KiB) Viewed 823 times

The connections of the flexible arms with the Chain gun mount have been done with M1 brass bolts, washers and nuts. Be aware that all the hardware coming with the kit, which are mainly small screws, were not used because they are not authentic looking. You need to purchase yourself all the brass M0.8, M1 and M1.2 hex bolts (length x4, x6 and x8) that you see on this build.

M3A3 Bradley US Cavalry Fighting Vehicle - RC 1/16 Build
Capture5.JPG (113.5 KiB) Viewed 823 times
M3A3 Bradley US Cavalry Fighting Vehicle - RC 1/16 Build
Capture6.JPG (124.6 KiB) Viewed 823 times
M3A3 Bradley US Cavalry Fighting Vehicle - RC 1/16 Build
Capture7.JPG (194.33 KiB) Viewed 823 times
M3A3 Bradley US Cavalry Fighting Vehicle - RC 1/16 Build
Capture8.JPG (149.3 KiB) Viewed 823 times

Preparing the raised mount for the Elmod board in front of the turret cage, leaving space for the turret wiring to coil inside the turret cage and under the Elmod board, allowing for a minimum of 180 degree of turret rotation on both side without creating any issues. I have avoided doing 360s to avoid any trouble because it can be avoided but it is likely doable.

M3A3 Bradley US Cavalry Fighting Vehicle - RC 1/16 Build
Capture9.JPG (166.44 KiB) Viewed 823 times

The Elmod board is mounted. It was configured with the M-113 as the base for the vehicle sound. It was the closest.

M3A3 Bradley US Cavalry Fighting Vehicle - RC 1/16 Build
Capture10.JPG (223.77 KiB) Viewed 823 times

Continuing on following post
Last edited by lmcq11 on Wed Jan 04, 2023 3:27 am, edited 5 times in total.
User avatar
lmcq11
2nd Lieutenant
Posts: 2610
Joined: Mon Dec 19, 2016 7:42 pm
Location: Quebec, Canada

Re: M3A3 Bradley US Cavalry Fighting Vehicle - RC 1/16 Build

Post by lmcq11 »

All available rear estate has to be used and optimized on this build.

A good quality Heng Long speaker has been installed on the right side of the turret cage, without its box. It is ideally positioned where the exhaust is located on the real vehicle.

M3A3 Bradley US Cavalry Fighting Vehicle - RC 1/16 Build
Capture11.JPG (207.15 KiB) Viewed 821 times

A raised stand for the battery has been created above the board wiring.

M3A3 Bradley US Cavalry Fighting Vehicle - RC 1/16 Build
Capture12.JPG (180.58 KiB) Viewed 821 times

The short battery will be laid out like this, next to the switch that will be connected under the driver's hatch.

M3A3 Bradley US Cavalry Fighting Vehicle - RC 1/16 Build
Capture13.JPG (193.52 KiB) Viewed 821 times

Final view of the layout of the electronics before closing the upper hull. Notice all the connections for the interior lighting at the front of the rotation unit. Those tiny wires are fragile and were protected with black tape in key places and at the connections. The turret wiring coming down at the bottom of the turret cage are loosely grouped and positioned with a twist in a single direction. It is important to minimize any obstacle or resistance point for the wiring to twist and turn as the turret rotates. Some plasticard shields were installed between the wiring and the gearbox to prevent any chance of a wire going loose between gears. The volume control for the speaker is located under the front engine hatch.

M3A3 Bradley US Cavalry Fighting Vehicle - RC 1/16 Build
Capture14.JPG (240.53 KiB) Viewed 821 times

The turret rotation unit is a high torque Mato metal unit, absolutely required on such build with turret baskets and wiring.

M3A3 Bradley US Cavalry Fighting Vehicle - RC 1/16 Build
Capture15.JPG (184.15 KiB) Viewed 821 times

The power switch is ideally positioned under the large driver's hatch, allowing the battery itself to be easily and securely plugged or unplugged by manually raising the hatch.

M3A3 Bradley US Cavalry Fighting Vehicle - RC 1/16 Build
Capture16.JPG (106.83 KiB) Viewed 821 times

Opening driver's hatch is permanently installed.

M3A3 Bradley US Cavalry Fighting Vehicle - RC 1/16 Build
Capture16a.JPG (108.43 KiB) Viewed 821 times

Rear small hatch manually opens. I am noticing i must be missing a interior handle on the door. i'll look into it.

M3A3 Bradley US Cavalry Fighting Vehicle - RC 1/16 Build
Capture18.JPG (130.71 KiB) Viewed 821 times

Main ramp is connected to an independent channel assigned to the VRA knob on the remote control.

M3A3 Bradley US Cavalry Fighting Vehicle - RC 1/16 Build
Capture19.JPG (132.53 KiB) Viewed 821 times

The model as it stands today. Next step is to install the side skirts.

M3A3 Bradley US Cavalry Fighting Vehicle - RC 1/16 Build
Capture17.JPG (238.12 KiB) Viewed 821 times

Short YOUTUBE video of all the electronics in action.


phpBB [video]


Regards, Louis
User avatar
BarryC
2nd Lieutenant
Posts: 2473
Joined: Sun Jan 03, 2016 11:43 am
Location: Savannah, GA. USA

Re: M3A3 Bradley US Cavalry Fighting Vehicle - RC 1/16 Build

Post by BarryC »

:clap: :clap: :clap: :clap:

Barry
"Details make perfection, and perfection is not a detail."
Leonardo Da Vinci
User avatar
RiskyR
Lance Corporal
Posts: 148
Joined: Thu Dec 09, 2021 8:31 pm
Location: Netherlands

Re: M3A3 Bradley US Cavalry Fighting Vehicle - RC 1/16 Build

Post by RiskyR »

The attention to detail is absolutely amazing. What makes it even better is that everything works as well! Superb! :clap:
In progress:
M4A1(75)
M4A1(76)W HVSS
M4A2 Fisher
User avatar
lmcq11
2nd Lieutenant
Posts: 2610
Joined: Mon Dec 19, 2016 7:42 pm
Location: Quebec, Canada

Re: M3A3 Bradley US Cavalry Fighting Vehicle - RC 1/16 Build

Post by lmcq11 »

Thanks Barry,
RiskyR wrote: Wed Jan 04, 2023 6:37 pm The attention to detail is absolutely amazing. What makes it even better is that everything works as well! Superb! :clap:
Thanks, yes, this build was stressful, i never know exactly how its going to turn out. Potential mistakes can be made at every construction steps. I do have a lot of experience with building AFV with interiors (four M-113, Marder 1A1, BMP-1) but the rotating basket is always a challenge, and the limited space left for the electronics is also very restricted. Thankfully, the Bradley is a large vehicle. The satisfaction was high when i saw that turret basket rotating...


I am in the final stages of construction

Next are the side skirts.


As seen in the Sabot book on M2A3, the side skirts are covered with attachment points for crew and soldiers personal equipment. There are 4 types of attachments (1 to 4 points). I used the graph below for instructions as to which ones go where. But i have a feeling it is up to the crew to decide which ones they want to put on their tanks and at what location.

M3A3 Bradley US Cavalry Fighting Vehicle - RC 1/16 Build
Capture.JPG (176.38 KiB) Viewed 747 times

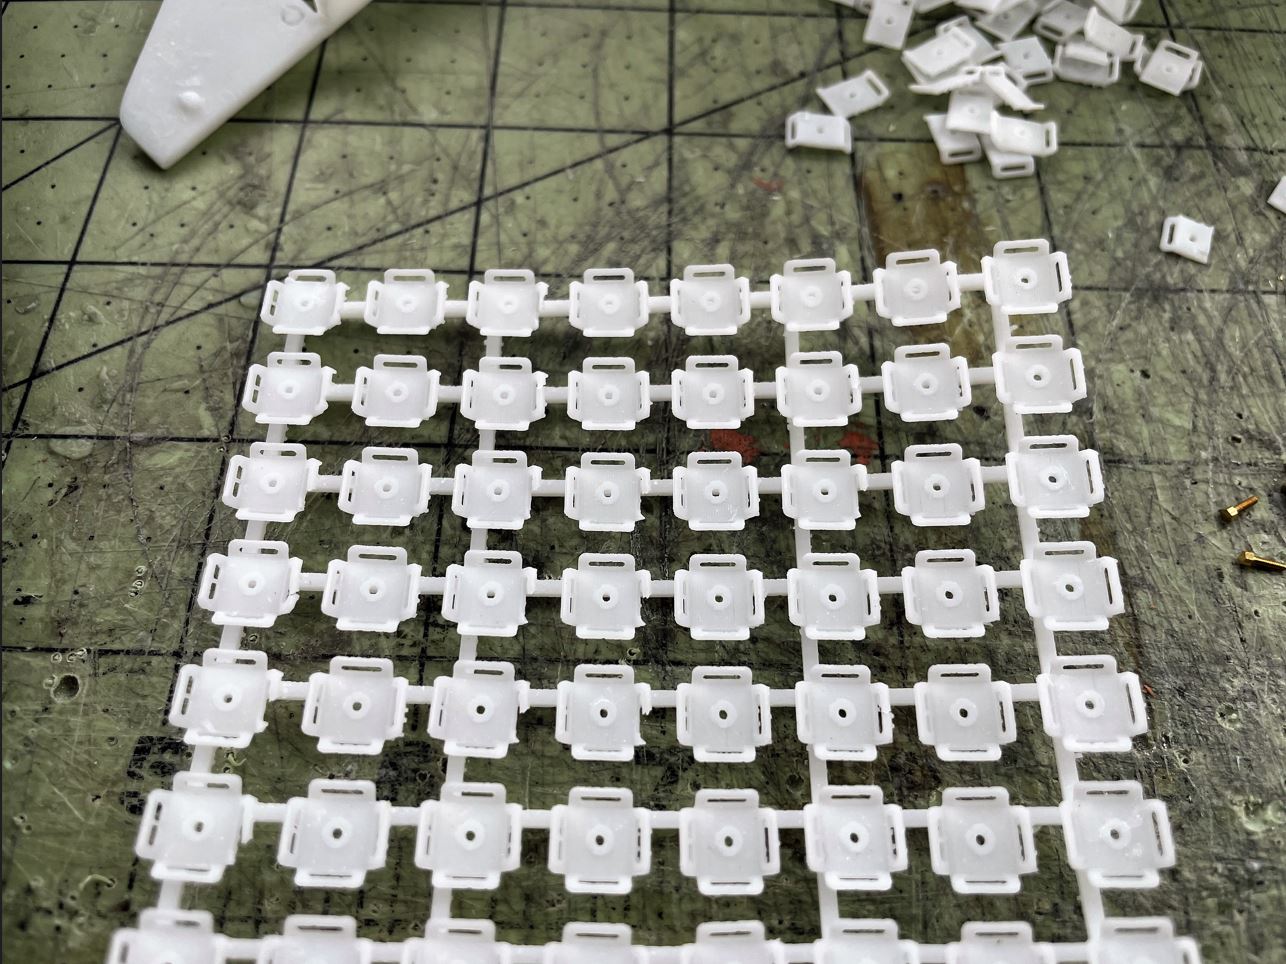
The kit provides more than enough attachments of each types for any configuration. Below is the sprue with the 4 points. A few are defective but it does not matter because about only half are used.
M3A3 Bradley US Cavalry Fighting Vehicle - RC 1/16 Build
Capture0.JPG (233.76 KiB) Viewed 747 times

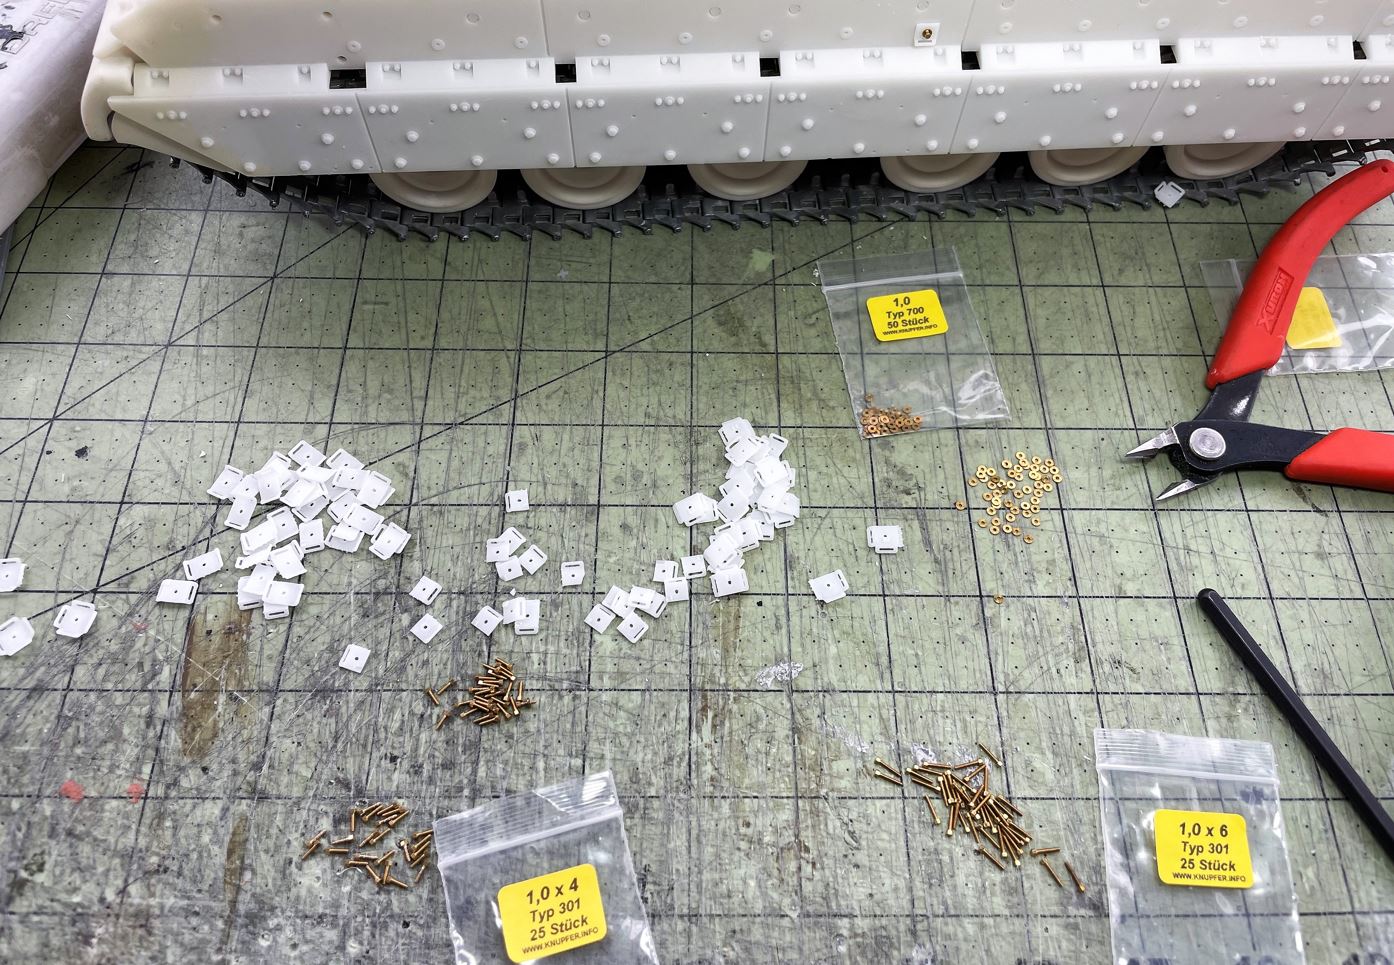
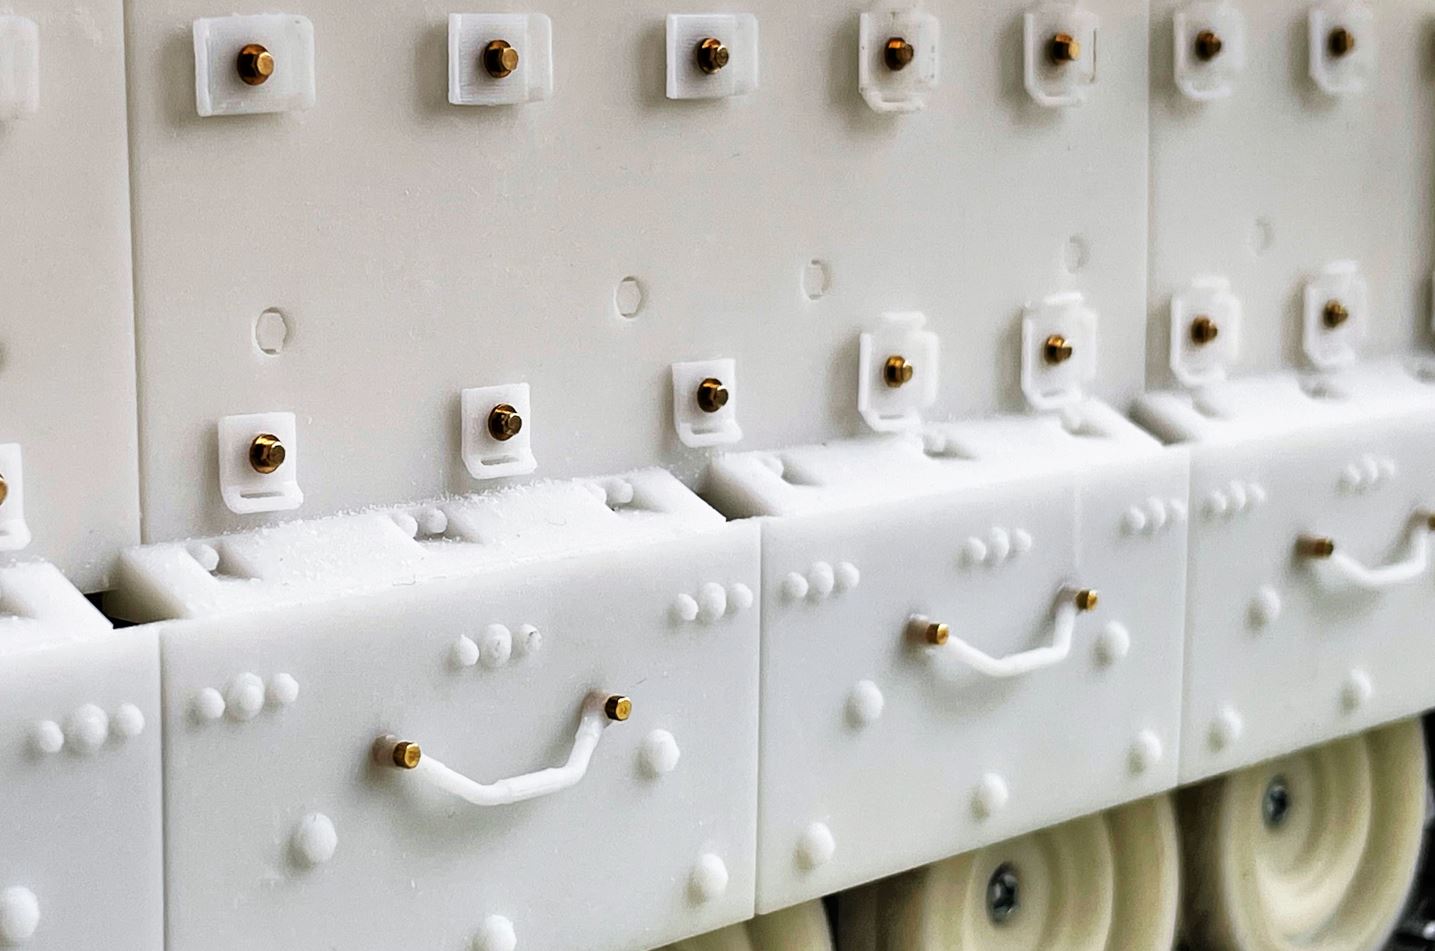
I decided to attach them with M1 x 4 and M1 x 6 brass bolts with washers. I had hundreds of these bolts on inventory when i started the build and it used all of them, i just barely had enough.
M3A3 Bradley US Cavalry Fighting Vehicle - RC 1/16 Build
Capture1.JPG (310.16 KiB) Viewed 747 times

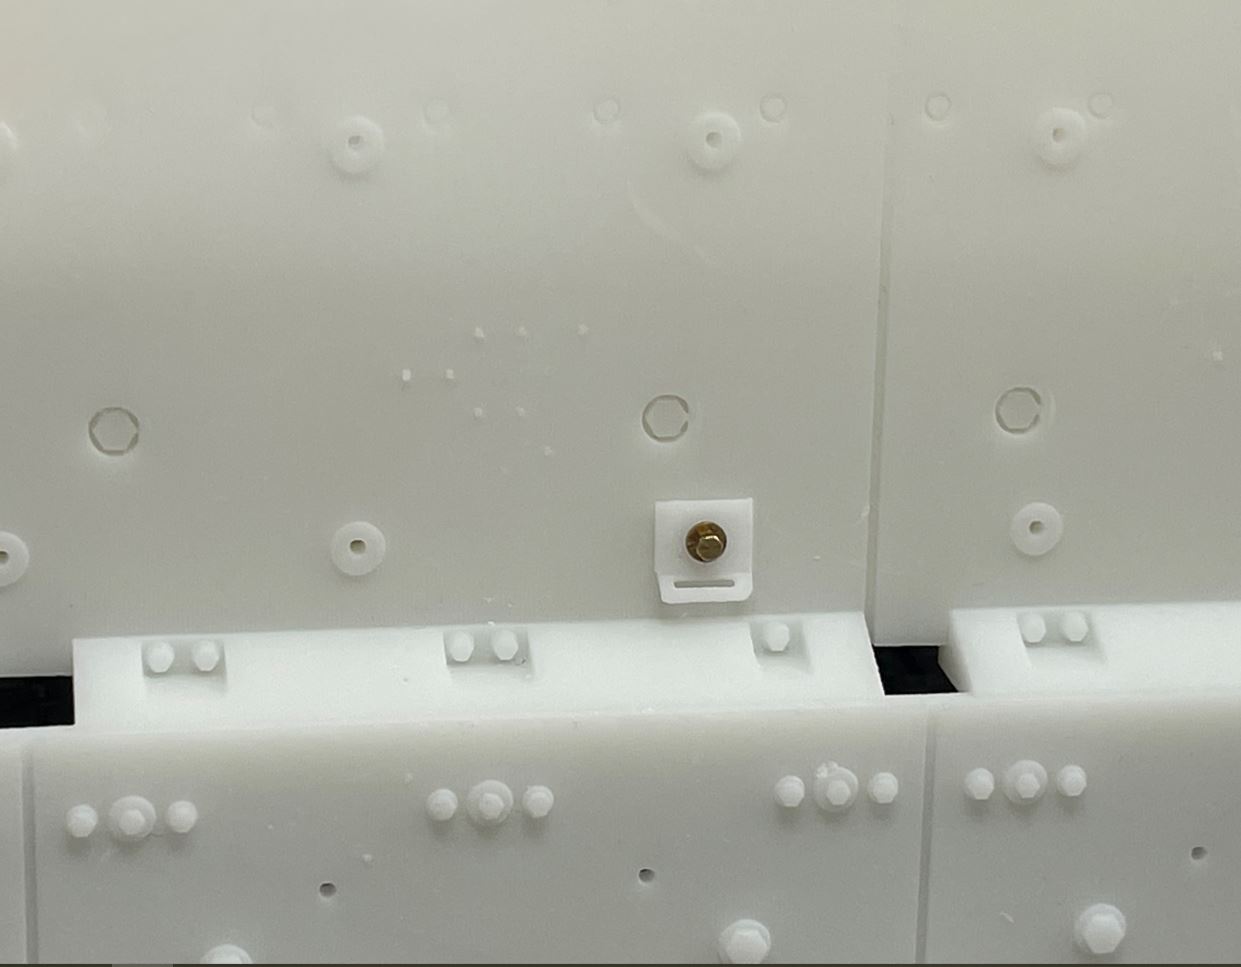
The attachments on the bottom row we given a 6mm long bolt because they are the ones holding the skirts against the upper hull. I small hole was drilled all the way through the upper hull cover in order for the bolts to screw into the hull and keep the skirts solidly in place. If needed, the skirts are removable. Not sure what kind of glue could have been used to glue the 3D printed skirts against the hull but i determined i did not have any glue that could have done the job. There is something about 3D SLA part that sometimes is impossible to glue, no matter how much or how long you take.
M3A3 Bradley US Cavalry Fighting Vehicle - RC 1/16 Build
Capture2.JPG (71.52 KiB) Viewed 747 times

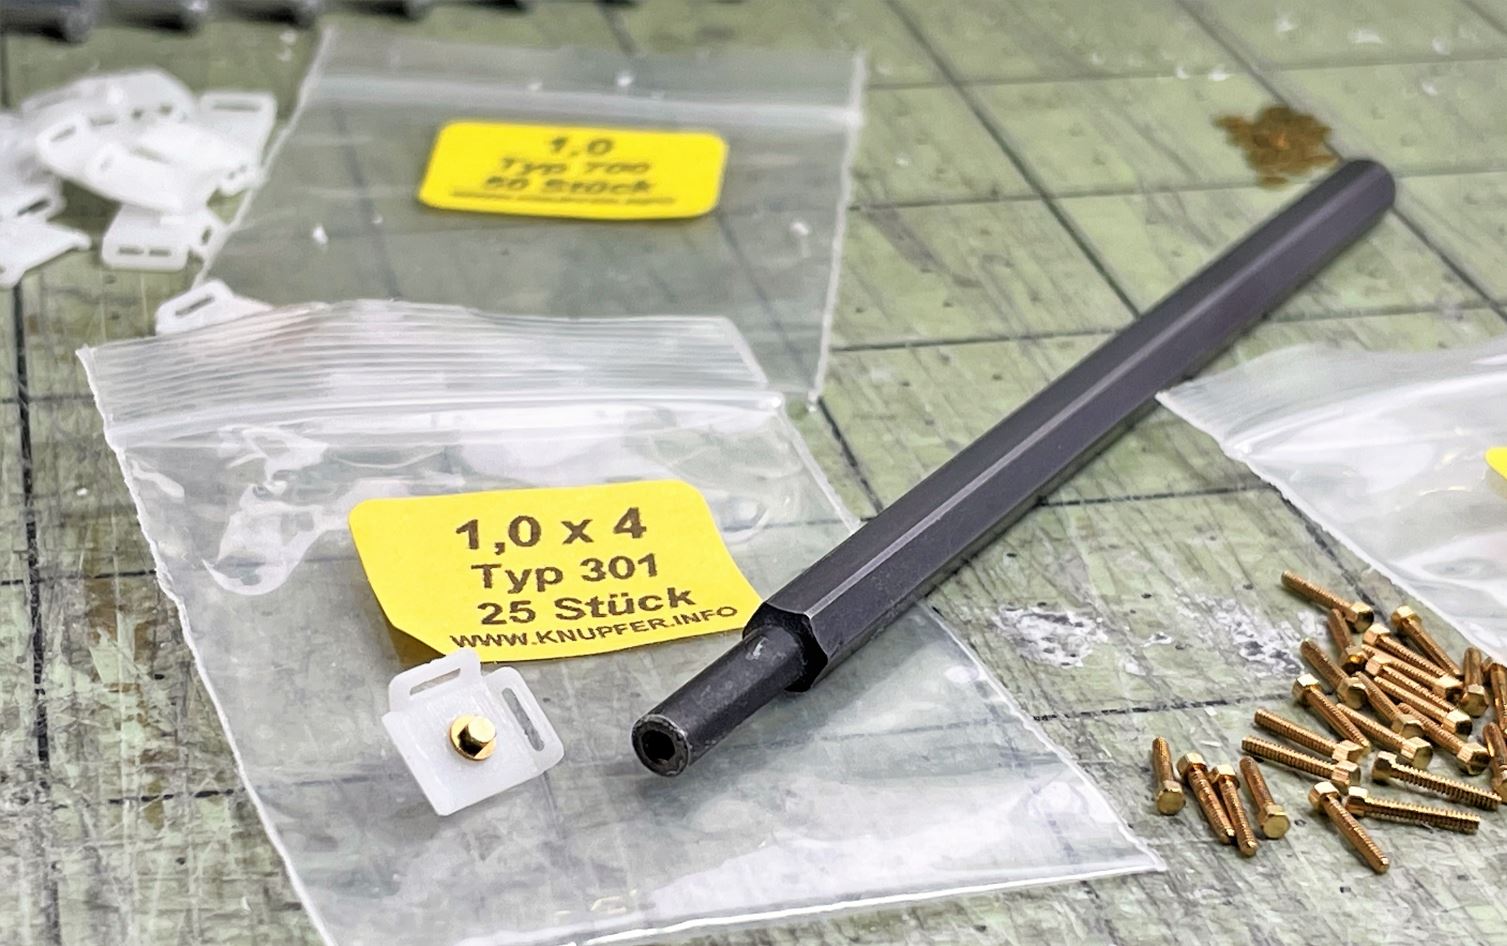
Of course, any one using hex brass bolts need the screwdriver that goes with each bolt head size. Knupfer of Germany is my preferred seller.
M3A3 Bradley US Cavalry Fighting Vehicle - RC 1/16 Build
Capture3.JPG (204.88 KiB) Viewed 747 times

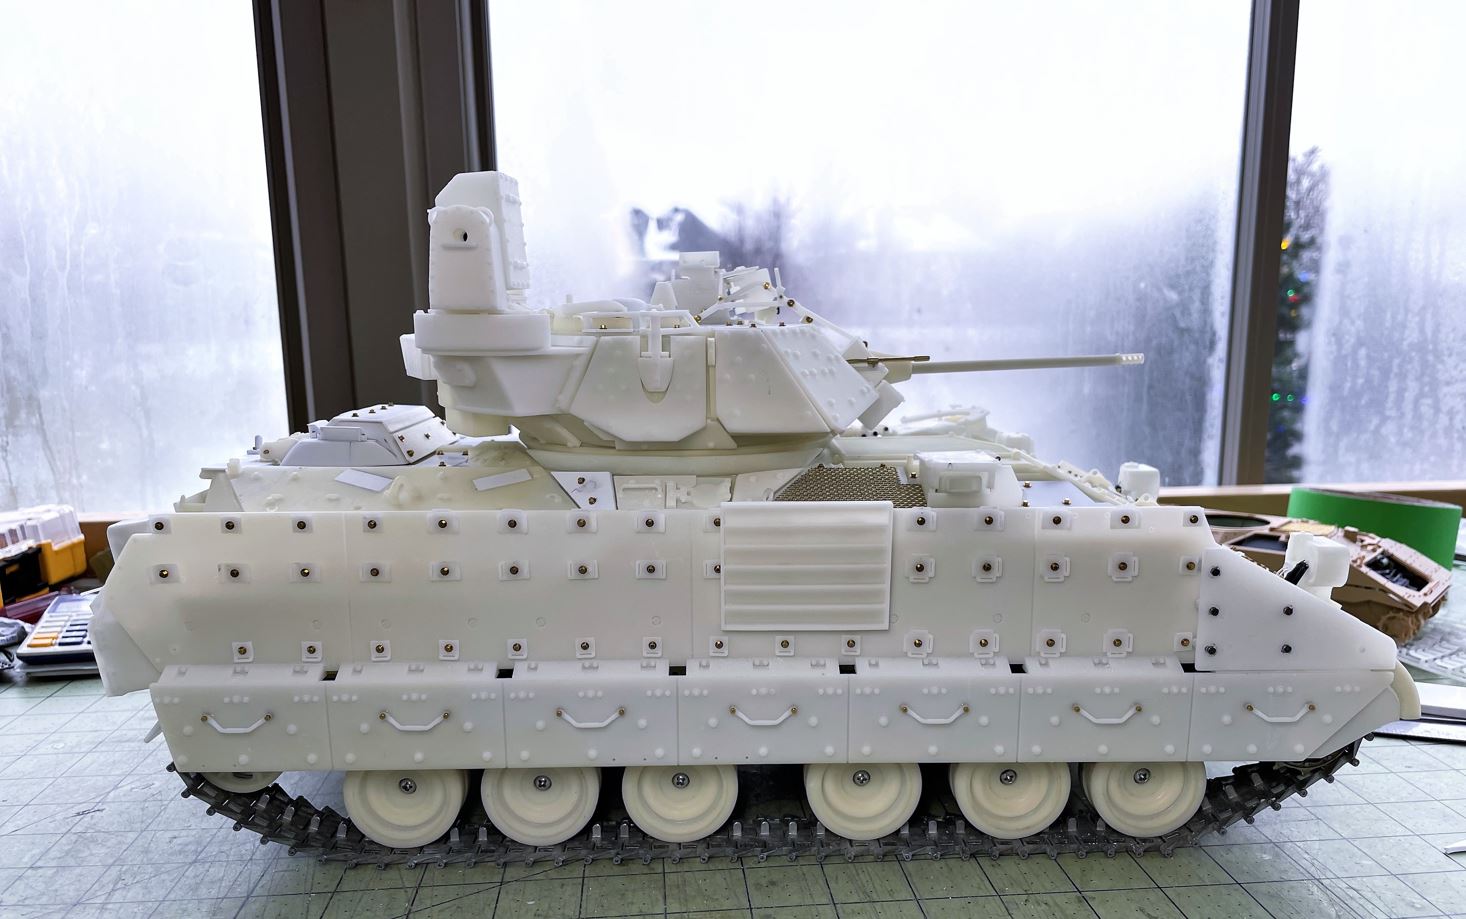
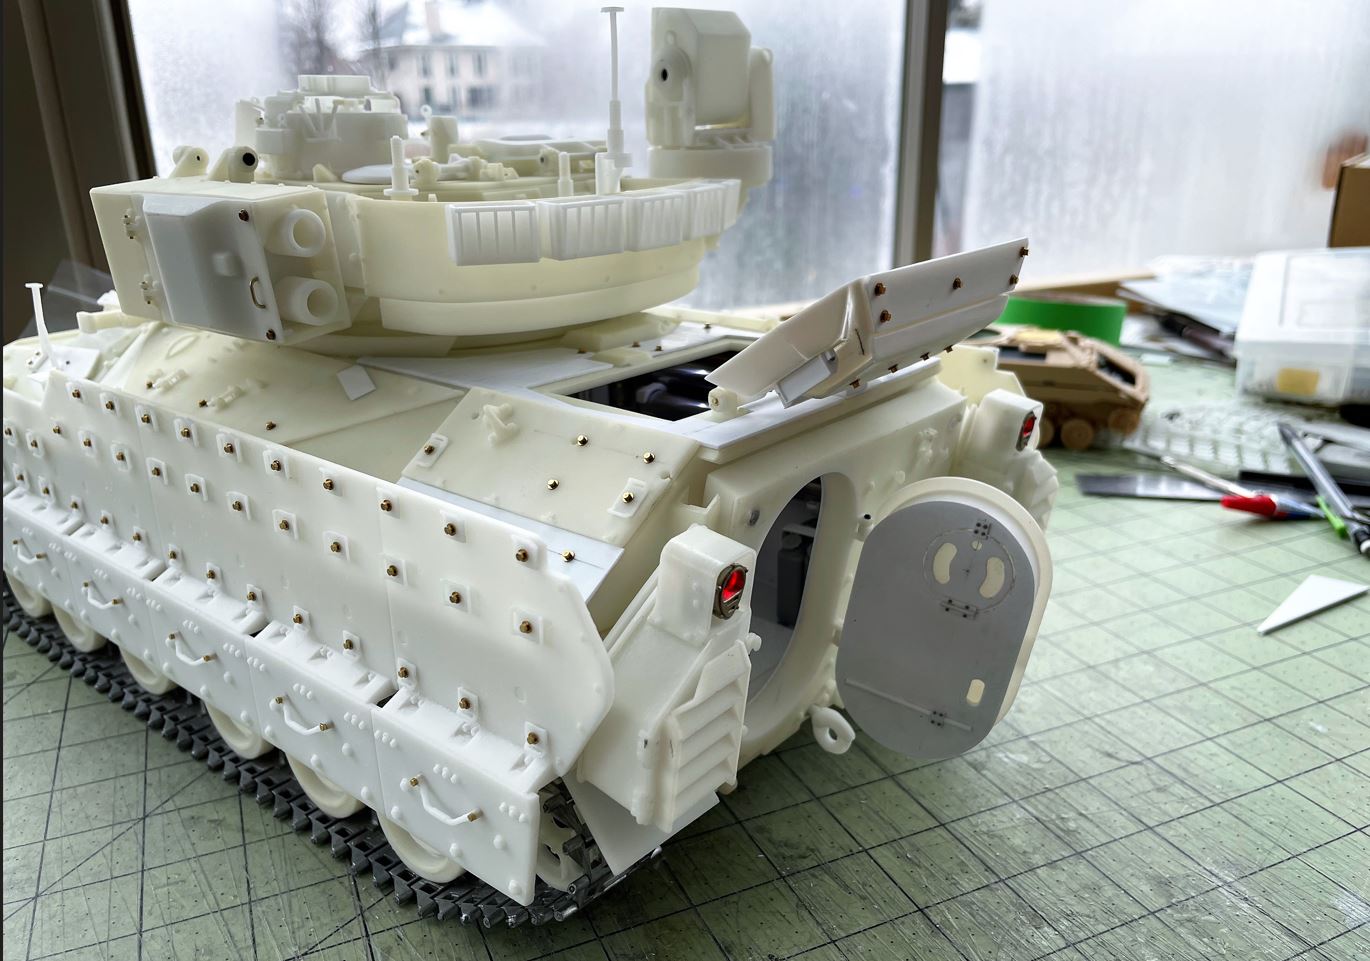
The completed side skirts are installed. The Combat Identification Panel (CIP) is hanged there just for display purposes. They are not installed yet.

The model is very heavy, currently at 9.5 pounds fully loaded. Its not just the metal tracks, all that extra armor adds up like the real thing. I am noticing the suspension is having a hard time despite augmenting the size of the torsion bars on 3 rows. I will have to change the torsion bar on the remaining two middle rows of wheels, and maybe give more torques on the others. Looks like the model could be 3mm too low right now. In any cases, the torsion bars that came with the kit were way too weak, even without any mods.
M3A3 Bradley US Cavalry Fighting Vehicle - RC 1/16 Build
Capture4.JPG (158.67 KiB) Viewed 747 times

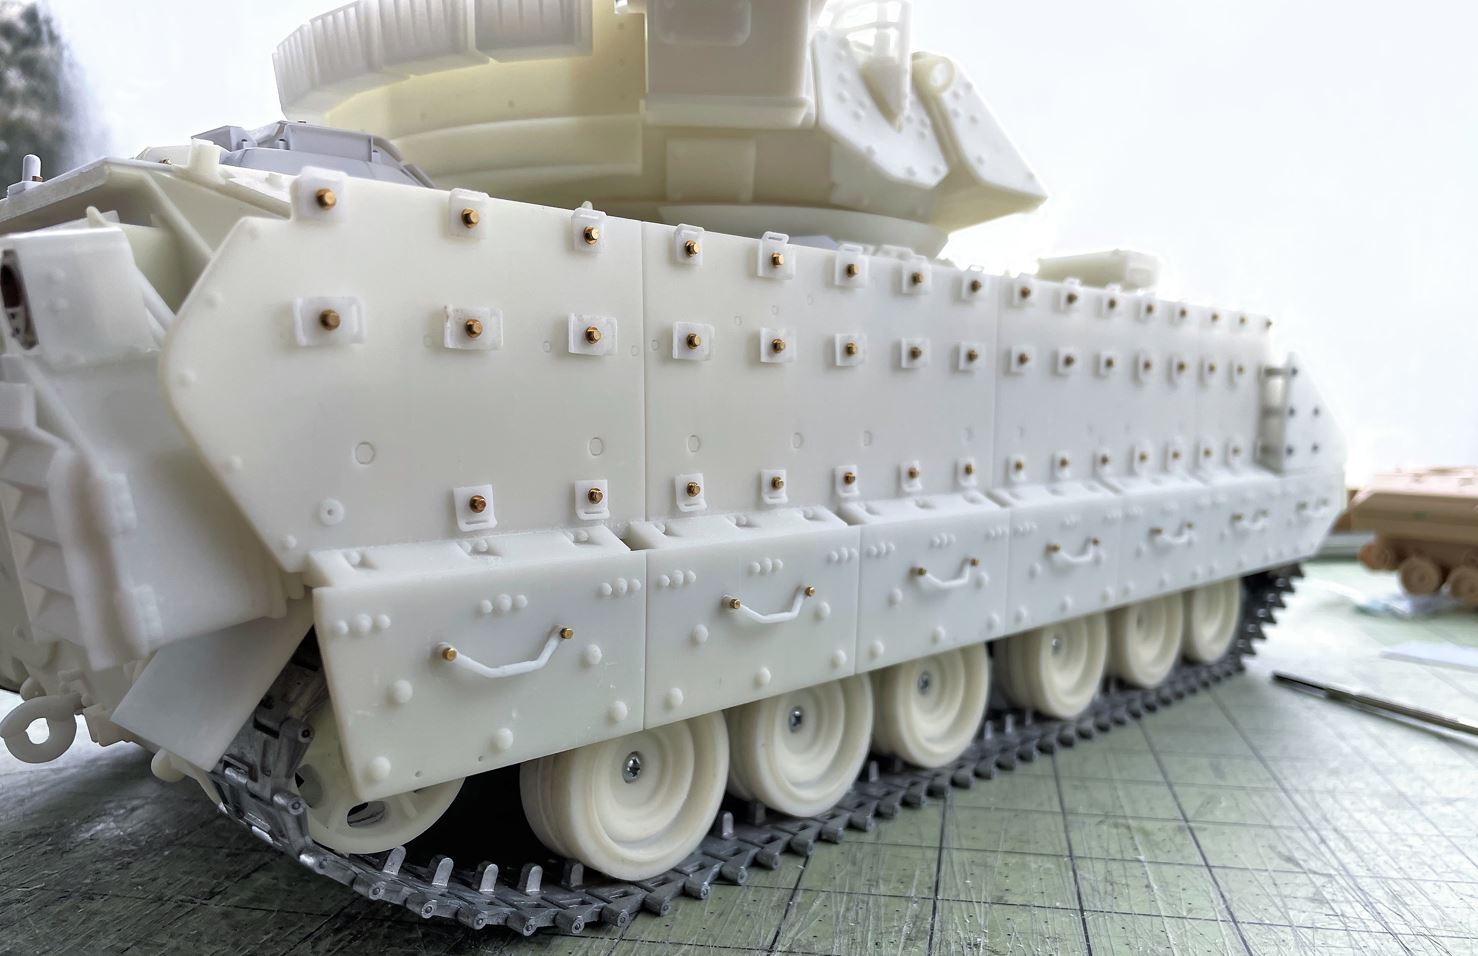
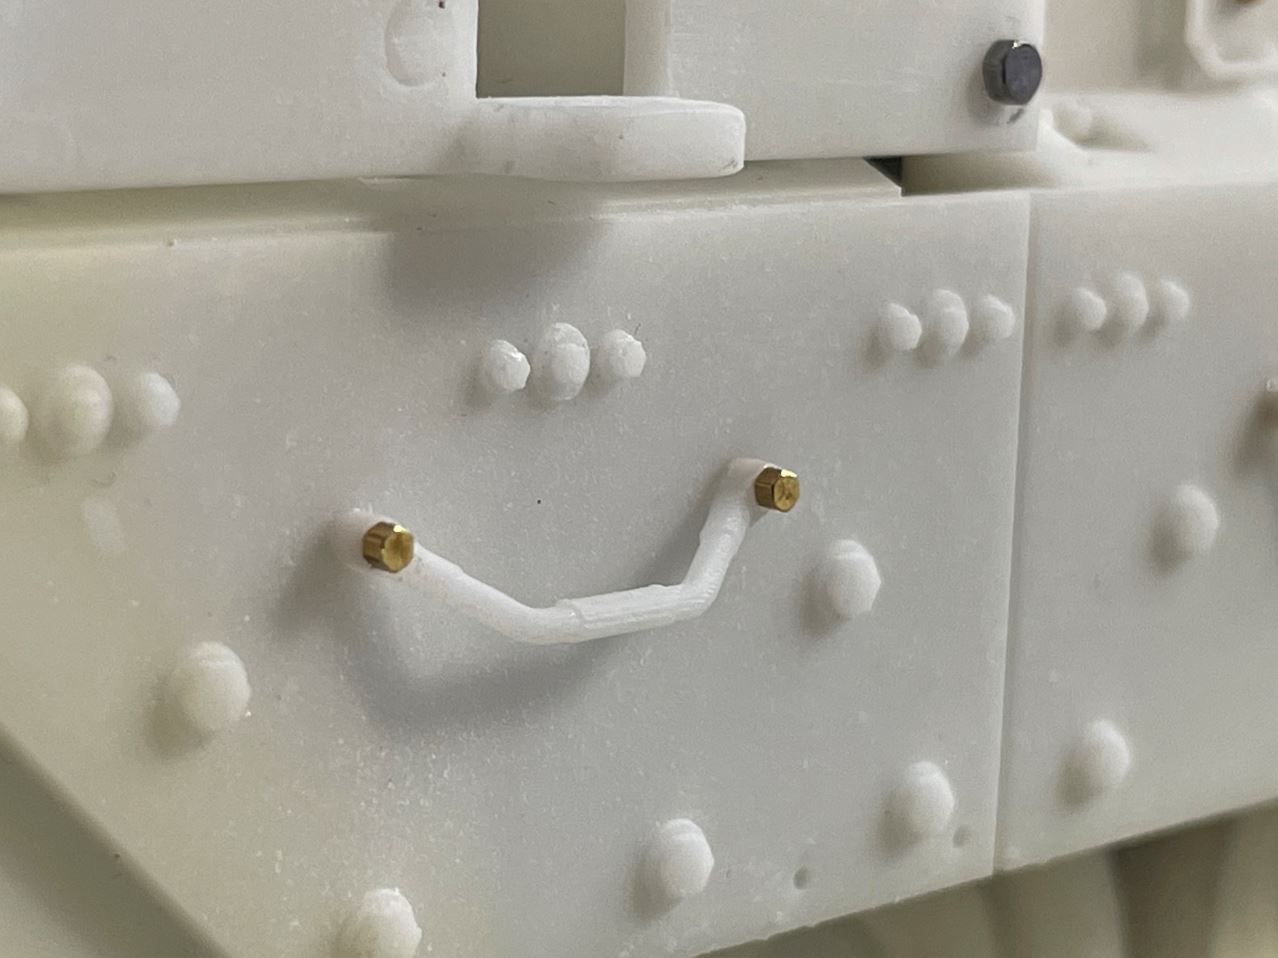
The vehicle construction is mostly completed. Here is a walking around with some close ups, notice it is dusty. And i am noticing i missed one attachment at the bottom left.
M3A3 Bradley US Cavalry Fighting Vehicle - RC 1/16 Build
Capture5.JPG (141.05 KiB) Viewed 747 times
M3A3 Bradley US Cavalry Fighting Vehicle - RC 1/16 Build
Capture6.JPG (141.62 KiB) Viewed 747 times
M3A3 Bradley US Cavalry Fighting Vehicle - RC 1/16 Build
Capture6b.JPG (111.37 KiB) Viewed 747 times
M3A3 Bradley US Cavalry Fighting Vehicle - RC 1/16 Build
Capture7.JPG (182.57 KiB) Viewed 747 times

Continuing on following post
Last edited by lmcq11 on Thu Jan 05, 2023 11:50 pm, edited 3 times in total.
User avatar
lmcq11
2nd Lieutenant
Posts: 2610
Joined: Mon Dec 19, 2016 7:42 pm
Location: Quebec, Canada

Re: M3A3 Bradley US Cavalry Fighting Vehicle - RC 1/16 Build

Post by lmcq11 »

View of the interior ramp on the real Bradley

M3A3 Bradley US Cavalry Fighting Vehicle - RC 1/16 Build
Capture7b.JPG (81.79 KiB) Viewed 744 times

I added missing details that i could. Some adaptation was required in order to fit the base model.

M3A3 Bradley US Cavalry Fighting Vehicle - RC 1/16 Build
Capture7c.JPG (187.68 KiB) Viewed 744 times

Continuing with the walk around

M3A3 Bradley US Cavalry Fighting Vehicle - RC 1/16 Build
Capture8.JPG (160.66 KiB) Viewed 744 times

Added bar on the side of the driver.

M3A3 Bradley US Cavalry Fighting Vehicle - RC 1/16 Build
Capture9.JPG (114.88 KiB) Viewed 744 times

On both sides of the skirts at the front, there is a small armored plate that is going on top of the skirts. There was no way to glue these bitches no matter what i tried. I had to remove the fake screws and bolt the plates using 12mm long steel bolts all the way into the hull.

M3A3 Bradley US Cavalry Fighting Vehicle - RC 1/16 Build
Capture10.JPG (96.97 KiB) Viewed 744 times
M3A3 Bradley US Cavalry Fighting Vehicle - RC 1/16 Build
Capture11.JPG (199.67 KiB) Viewed 744 times
M3A3 Bradley US Cavalry Fighting Vehicle - RC 1/16 Build
Capture12.JPG (179.38 KiB) Viewed 744 times
M3A3 Bradley US Cavalry Fighting Vehicle - RC 1/16 Build
Capture13.JPG (169.97 KiB) Viewed 744 times
M3A3 Bradley US Cavalry Fighting Vehicle - RC 1/16 Build
Capture14.JPG (204.7 KiB) Viewed 744 times
M3A3 Bradley US Cavalry Fighting Vehicle - RC 1/16 Build
Capture15.JPG (146.13 KiB) Viewed 744 times

Continuing with the following post
Last edited by lmcq11 on Thu Jan 05, 2023 11:53 pm, edited 3 times in total.
User avatar
lmcq11
2nd Lieutenant
Posts: 2610
Joined: Mon Dec 19, 2016 7:42 pm
Location: Quebec, Canada

Re: M3A3 Bradley US Cavalry Fighting Vehicle - RC 1/16 Build

Post by lmcq11 »

Ammo box holders and antenna bases added to the turret.

M3A3 Bradley US Cavalry Fighting Vehicle - RC 1/16 Build
Capture16.JPG (145.57 KiB) Viewed 744 times

There was no way to glue the tow hook. The pin was too small for the corresponding hole on the ramp. I had to redo the attachment, and used a screw to solidify the hook as far into it as possible.

M3A3 Bradley US Cavalry Fighting Vehicle - RC 1/16 Build
Capture16b.JPG (259.15 KiB) Viewed 744 times

Exterior ramp with middle tow hook.

M3A3 Bradley US Cavalry Fighting Vehicle - RC 1/16 Build
Capture17.JPG (127.78 KiB) Viewed 744 times

I gave periscopes to the driver's hatch interior.

M3A3 Bradley US Cavalry Fighting Vehicle - RC 1/16 Build
Capture17a.JPG (148.25 KiB) Viewed 744 times

These are the parts that remain to be put on the model, right before or after painting. They include all the tools, hooks, the two CIP panels and the hub caps.

M3A3 Bradley US Cavalry Fighting Vehicle - RC 1/16 Build
Capture18.JPG (333.93 KiB) Viewed 744 times

I also have 3 figures to build for the model. They include the commander figure purchased from DKLM, and two soldiers purchased from Ebay China that will be modified to fit inside the rear compartment.

M3A3 Bradley US Cavalry Fighting Vehicle - RC 1/16 Build
Capture19.JPG (274.83 KiB) Viewed 744 times

I put together the commander figure, minus the microphone that will be added later. It's of very nice quality and the modern uniforms and equipment fits the time period of the vehicle.

M3A3 Bradley US Cavalry Fighting Vehicle - RC 1/16 Build
Capture20.JPG (134.94 KiB) Viewed 744 times

Pretty cool look.

M3A3 Bradley US Cavalry Fighting Vehicle - RC 1/16 Build
Capture20a.JPG (135.56 KiB) Viewed 744 times
M3A3 Bradley US Cavalry Fighting Vehicle - RC 1/16 Build
Capture21.JPG (182.34 KiB) Viewed 744 times

I did some evening shots for fun, it gives a different look.

M3A3 Bradley US Cavalry Fighting Vehicle - RC 1/16 Build
Capture21a.JPG (118.74 KiB) Viewed 744 times

Continuing on following post
Last edited by lmcq11 on Thu Jan 05, 2023 11:55 pm, edited 2 times in total.
User avatar
lmcq11
2nd Lieutenant
Posts: 2610
Joined: Mon Dec 19, 2016 7:42 pm
Location: Quebec, Canada

Re: M3A3 Bradley US Cavalry Fighting Vehicle - RC 1/16 Build

Post by lmcq11 »

The little lights for the interior lighting were easy to reproduce and look good.

M3A3 Bradley US Cavalry Fighting Vehicle - RC 1/16 Build
Capture21b.JPG (98.23 KiB) Viewed 743 times

Construction is almost done.

M3A3 Bradley US Cavalry Fighting Vehicle - RC 1/16 Build
Capture22.JPG (108.56 KiB) Viewed 743 times

Prior to painting, it glows.

M3A3 Bradley US Cavalry Fighting Vehicle - RC 1/16 Build
Capture23.JPG (109.79 KiB) Viewed 743 times
M3A3 Bradley US Cavalry Fighting Vehicle - RC 1/16 Build
Capture24.JPG (137.15 KiB) Viewed 743 times

The interior is the highlight of the model. I will be adding a bulkhead at the front and put an image of the driver's compartment.

M3A3 Bradley US Cavalry Fighting Vehicle - RC 1/16 Build
Capture25.JPG (67.18 KiB) Viewed 743 times
M3A3 Bradley US Cavalry Fighting Vehicle - RC 1/16 Build
Capture25a.JPG (131.89 KiB) Viewed 743 times
M3A3 Bradley US Cavalry Fighting Vehicle - RC 1/16 Build
Capture25b.JPG (176.27 KiB) Viewed 743 times

Servos inside the turret.

M3A3 Bradley US Cavalry Fighting Vehicle - RC 1/16 Build
Capture26.JPG (143.25 KiB) Viewed 743 times

The Elmod board viewed through the driver's hatch.

M3A3 Bradley US Cavalry Fighting Vehicle - RC 1/16 Build
Capture27.JPG (163.49 KiB) Viewed 743 times

The "Glow in the dark" model...

M3A3 Bradley US Cavalry Fighting Vehicle - RC 1/16 Build
Capture28.JPG (147.25 KiB) Viewed 743 times

That's it for now. Next step is to adjust the torsion bars and build the figures. I am still waiting for the rubber plates to finish the tracks.

Regards, Louis
User avatar
tankme
Warrant Officer 1st Class
Posts: 1990
Joined: Tue Oct 31, 2017 3:51 pm
Location: Elgin, TX
Contact:

Re: M3A3 Bradley US Cavalry Fighting Vehicle - RC 1/16 Build

Post by tankme »

It's a great build. I always wonder how much you have invested in hex head bolts over the years... :) I just bought a bunch from the former Smalescale hardware here in the US and they are not cheap.
Derek
Too many project builds to list...
Post Reply

Return to “Modern Builds”