Page 1 of 5
M7B1 Priest
Posted: Fri Feb 25, 2022 3:35 pm
by Ecam
UK friendly / Imgur removed.
Another no to low cost build. This one is currently on the table.
Re: M7B1
Posted: Fri Feb 25, 2022 3:40 pm
by PainlessWolf
Ecam,
Good to have you back on the Forum. You always make up for how quiet, Sassgrunt gets ( at times ) Nice looking Priest shaping up there.
regards,
Painless
Re: M7B1
Posted: Fri Feb 25, 2022 4:21 pm
by Ecam
Good to be back Painless.
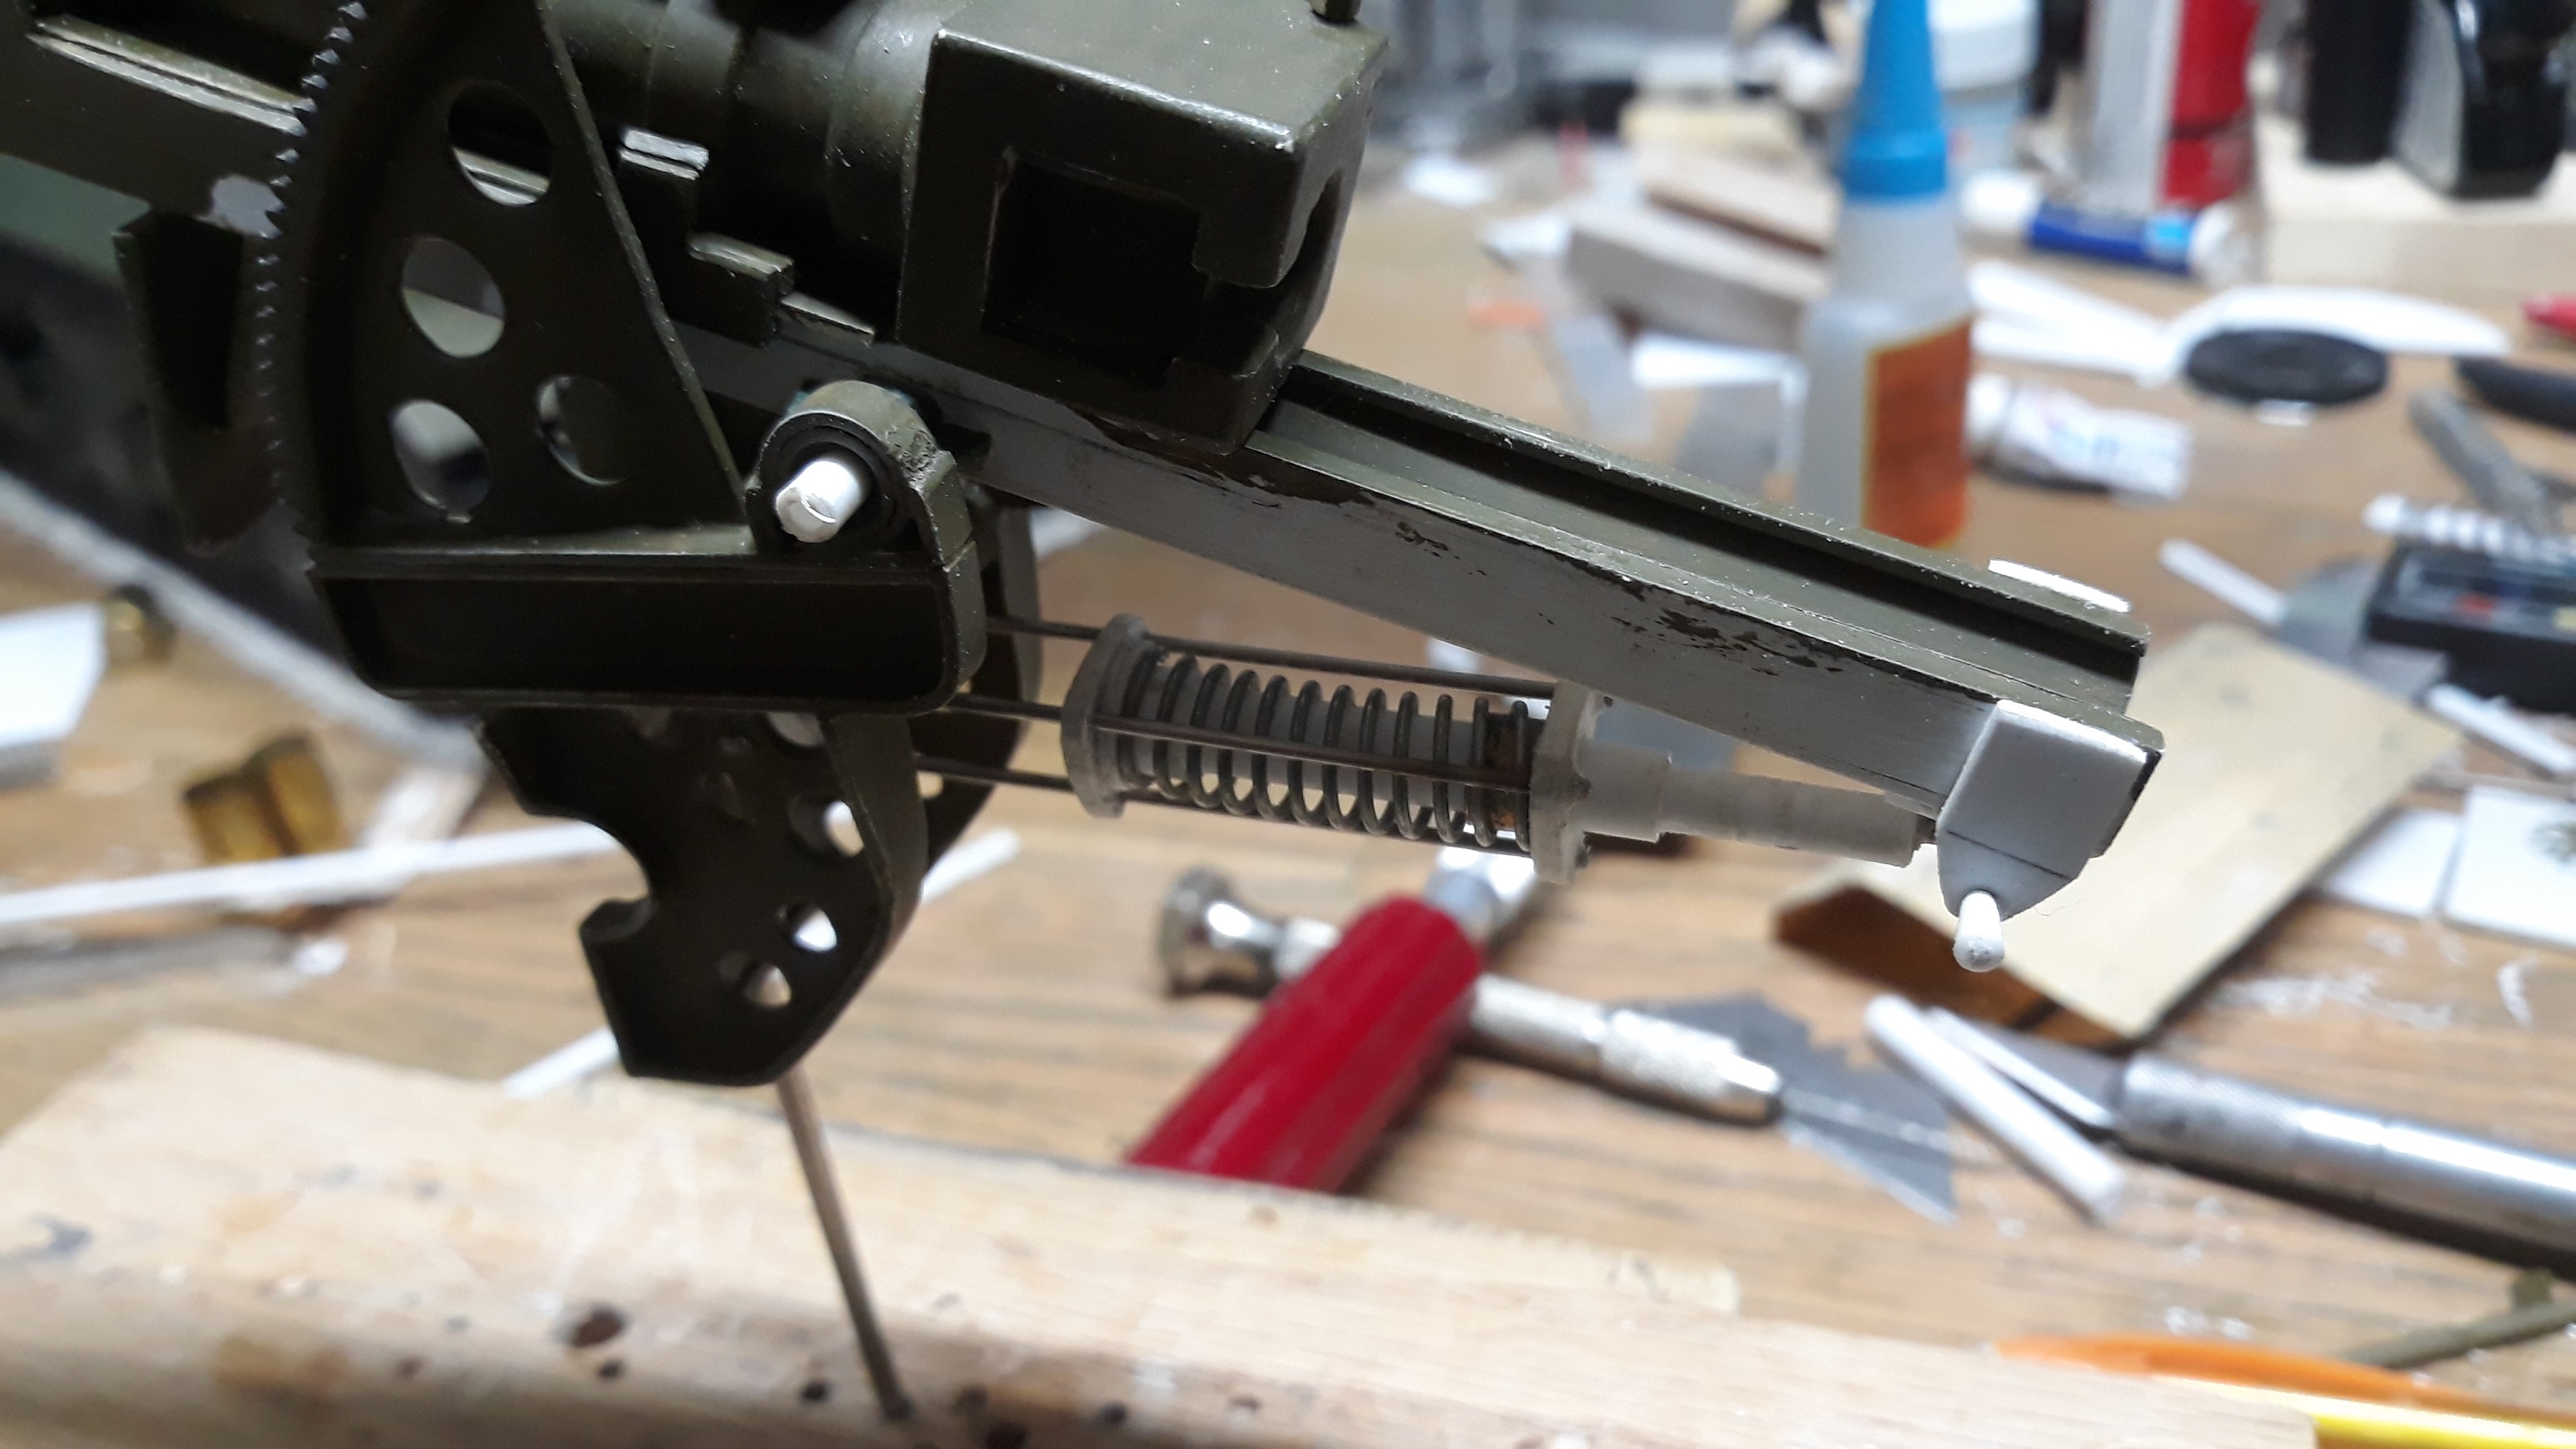
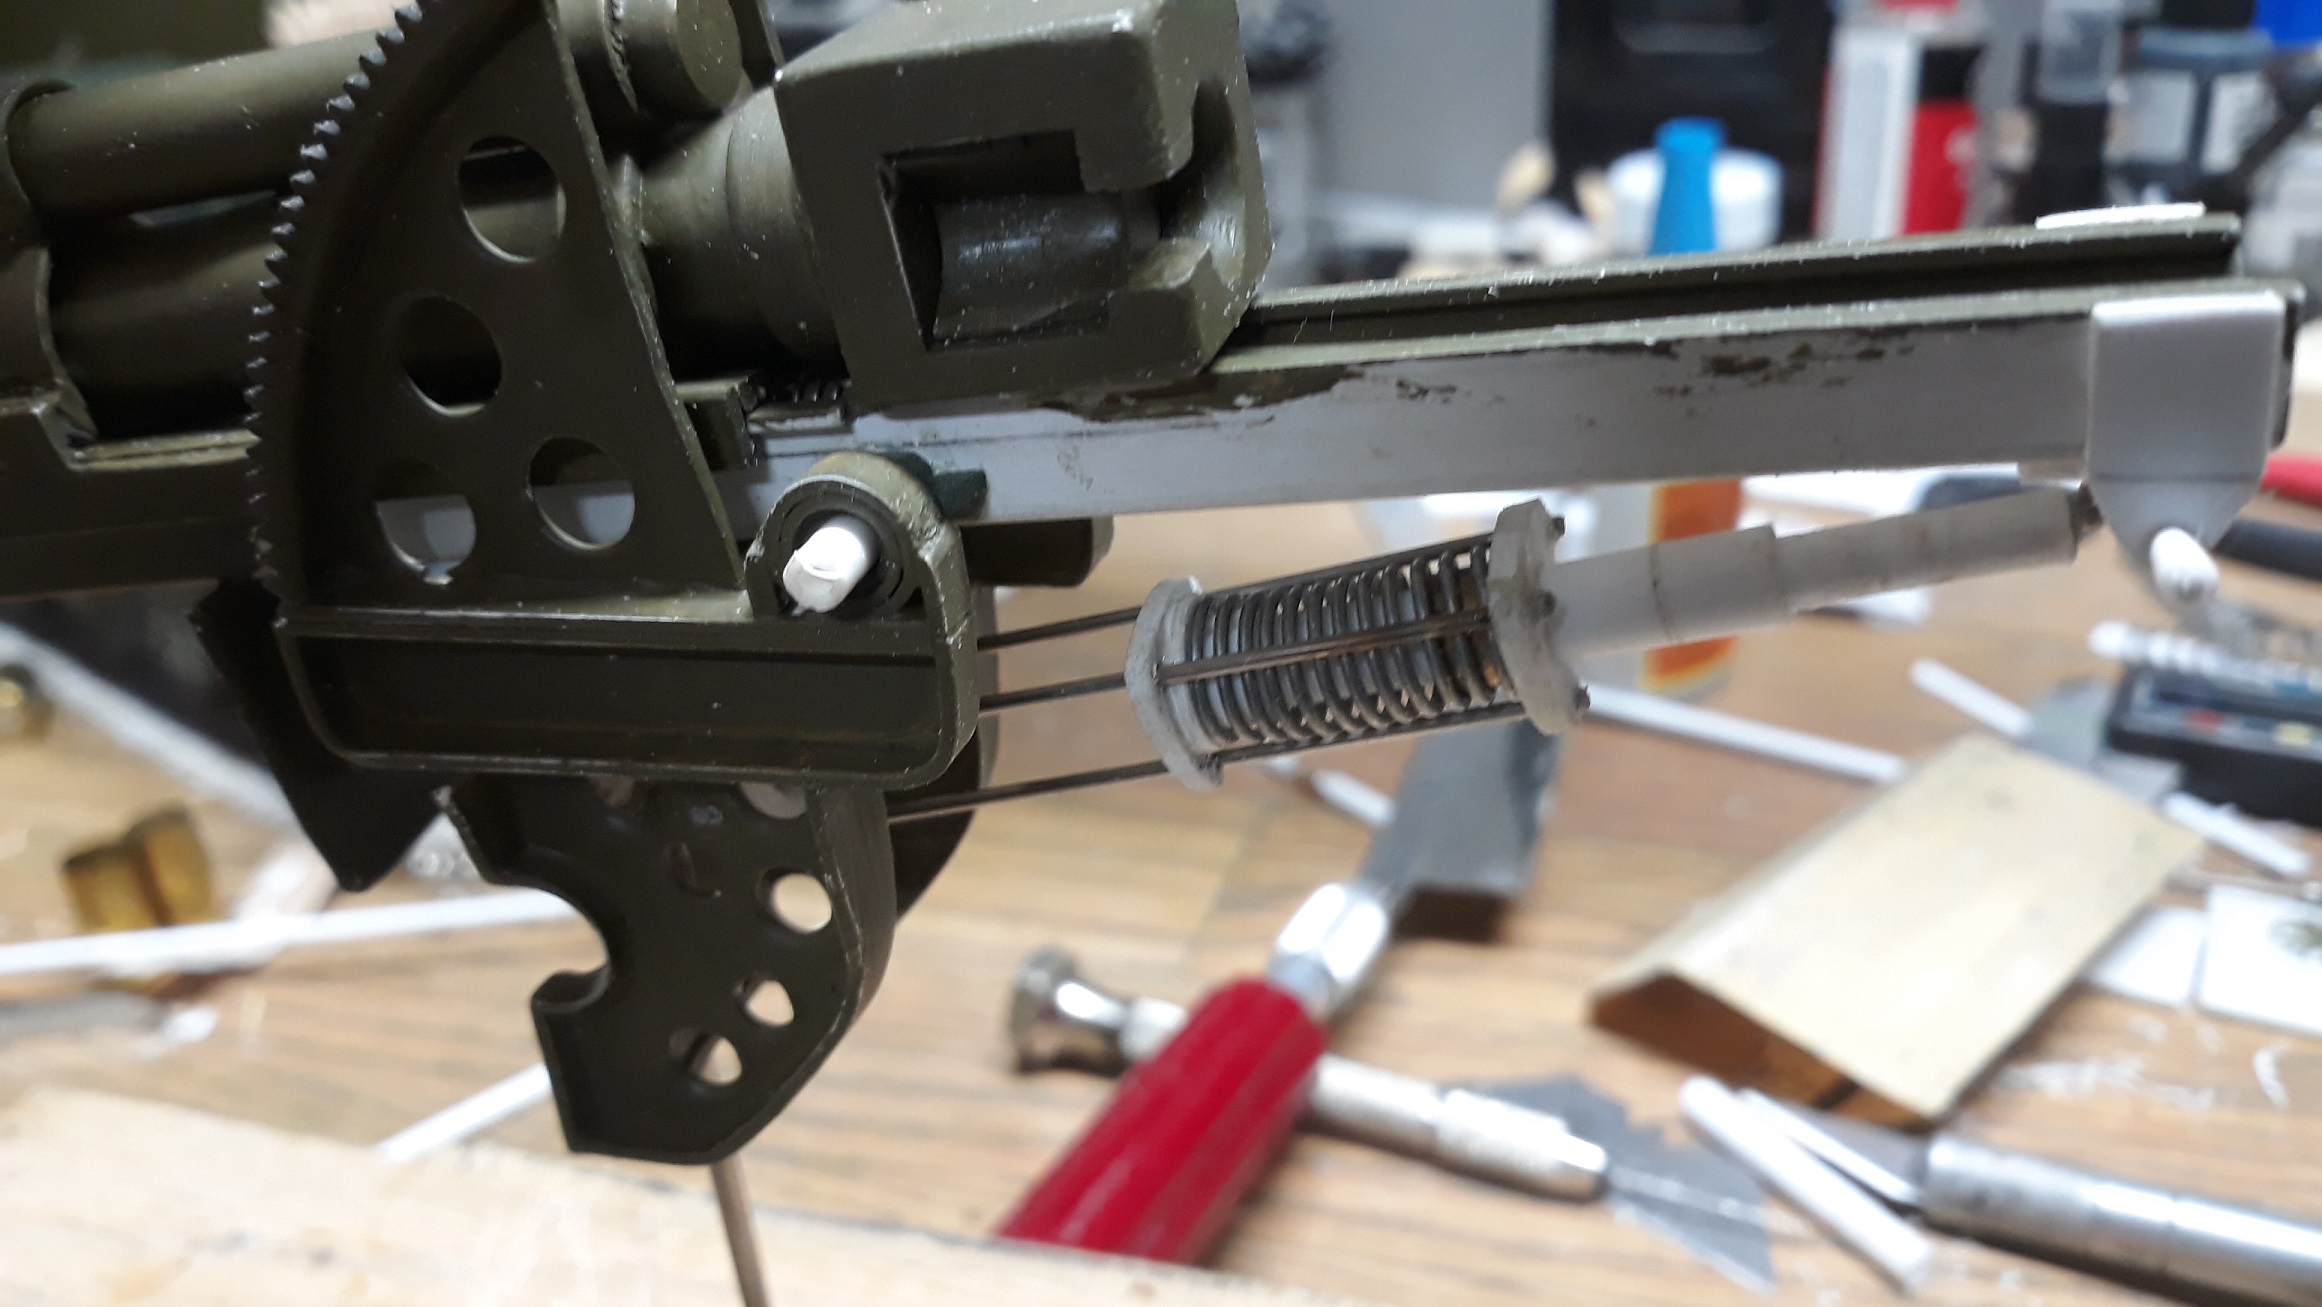
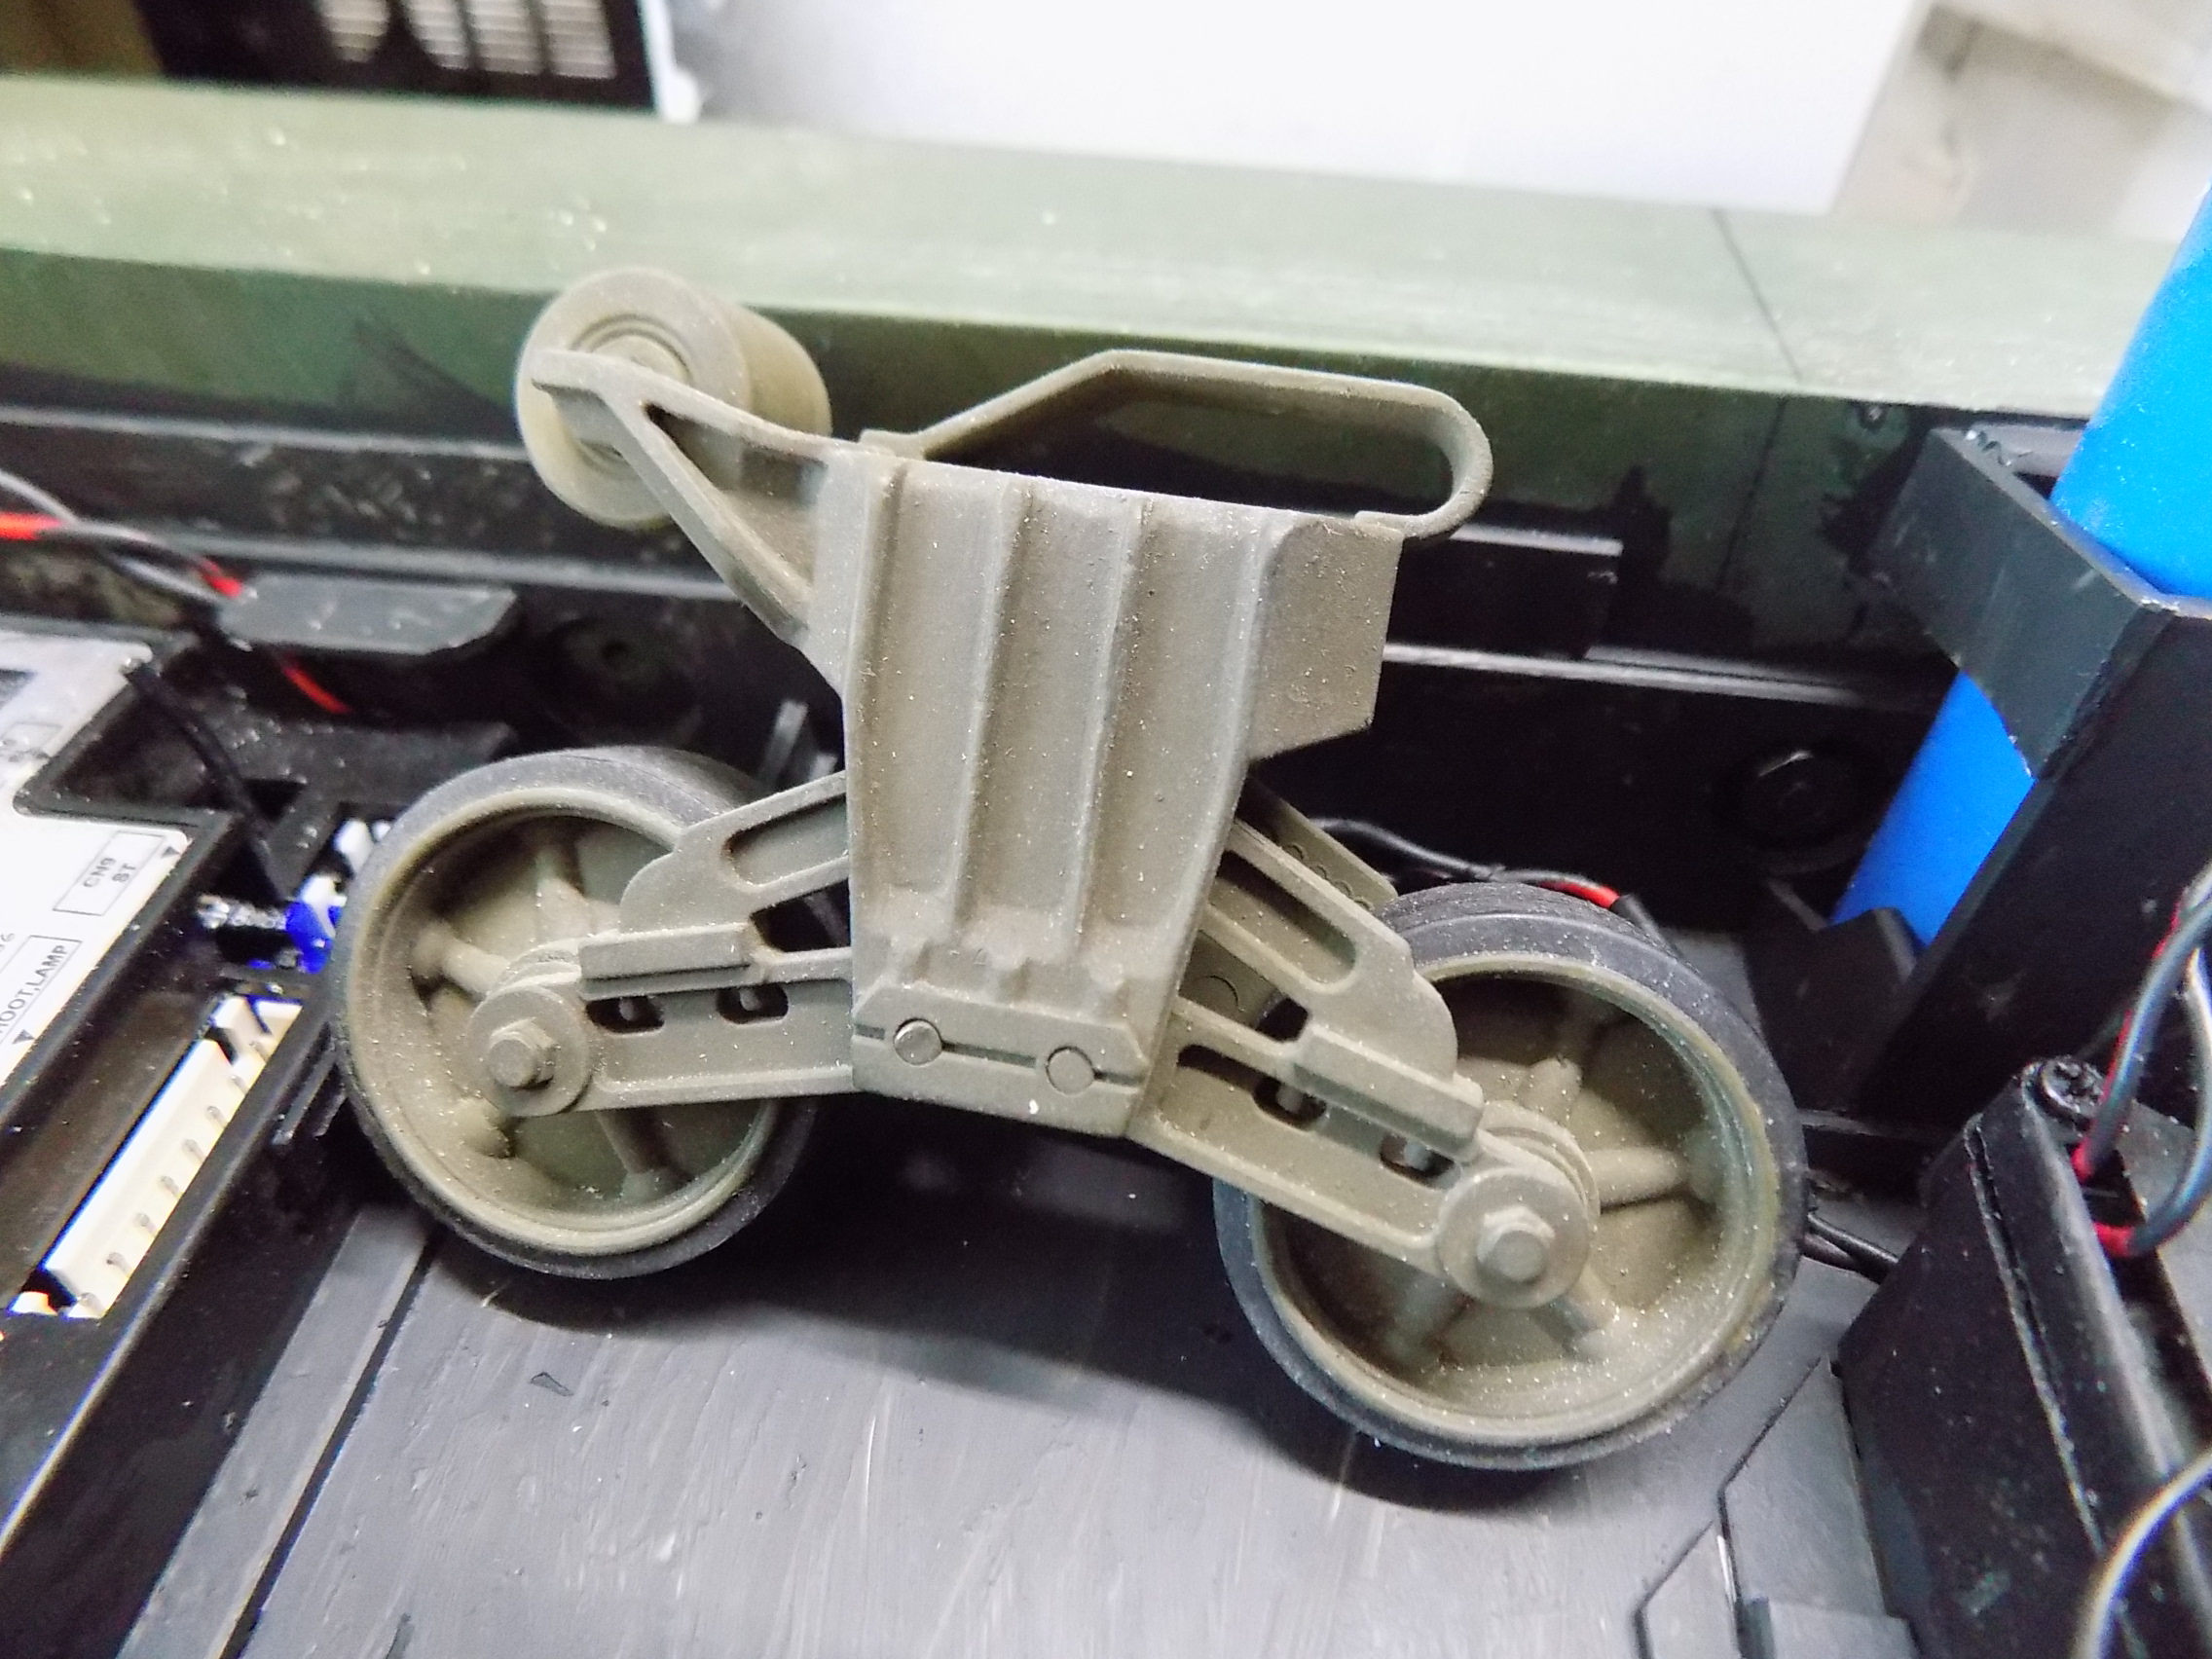
Here are a few more pics of the progress. I am kinda proud of my working counter balance spring assembly.
- 19.jpg (1021.07 KiB) Viewed 46 times
- 20.jpg (605.75 KiB) Viewed 46 times
The cannon does have recoil and spring return (by hand).
Re: M7B1
Posted: Fri Feb 25, 2022 4:32 pm
by MonsieurTox
Nice tank. I love the Priest, I'm trying to get my hands on a HL Sherman lower hull to have a crack at it.
What do you mean by it has recoil and spring return by hand ?
Re: M7B1
Posted: Fri Feb 25, 2022 4:51 pm
by Ecam
I like trying to make presentable (to me at least) representations of the things I build.
So my cannon recoils a scale-ish amount when it is pushed back on its rails, and then has a spring underneath (writing pen springs) to return it. I went that route because I haven't come up with a method to have it recoil. I think I've worked out hidden traverse and elevation.
Re: M7B1
Posted: Sun Feb 27, 2022 2:21 am
by Herr Dr. Professor
Hello! Bravo on the recoil idea. I admire the resourcefulness of your using a ball point pen spring.
Re: M7B1
Posted: Sun Feb 27, 2022 7:06 pm
by Ecam
Here are the remaining (already taken) pictures I have on my storage devices.
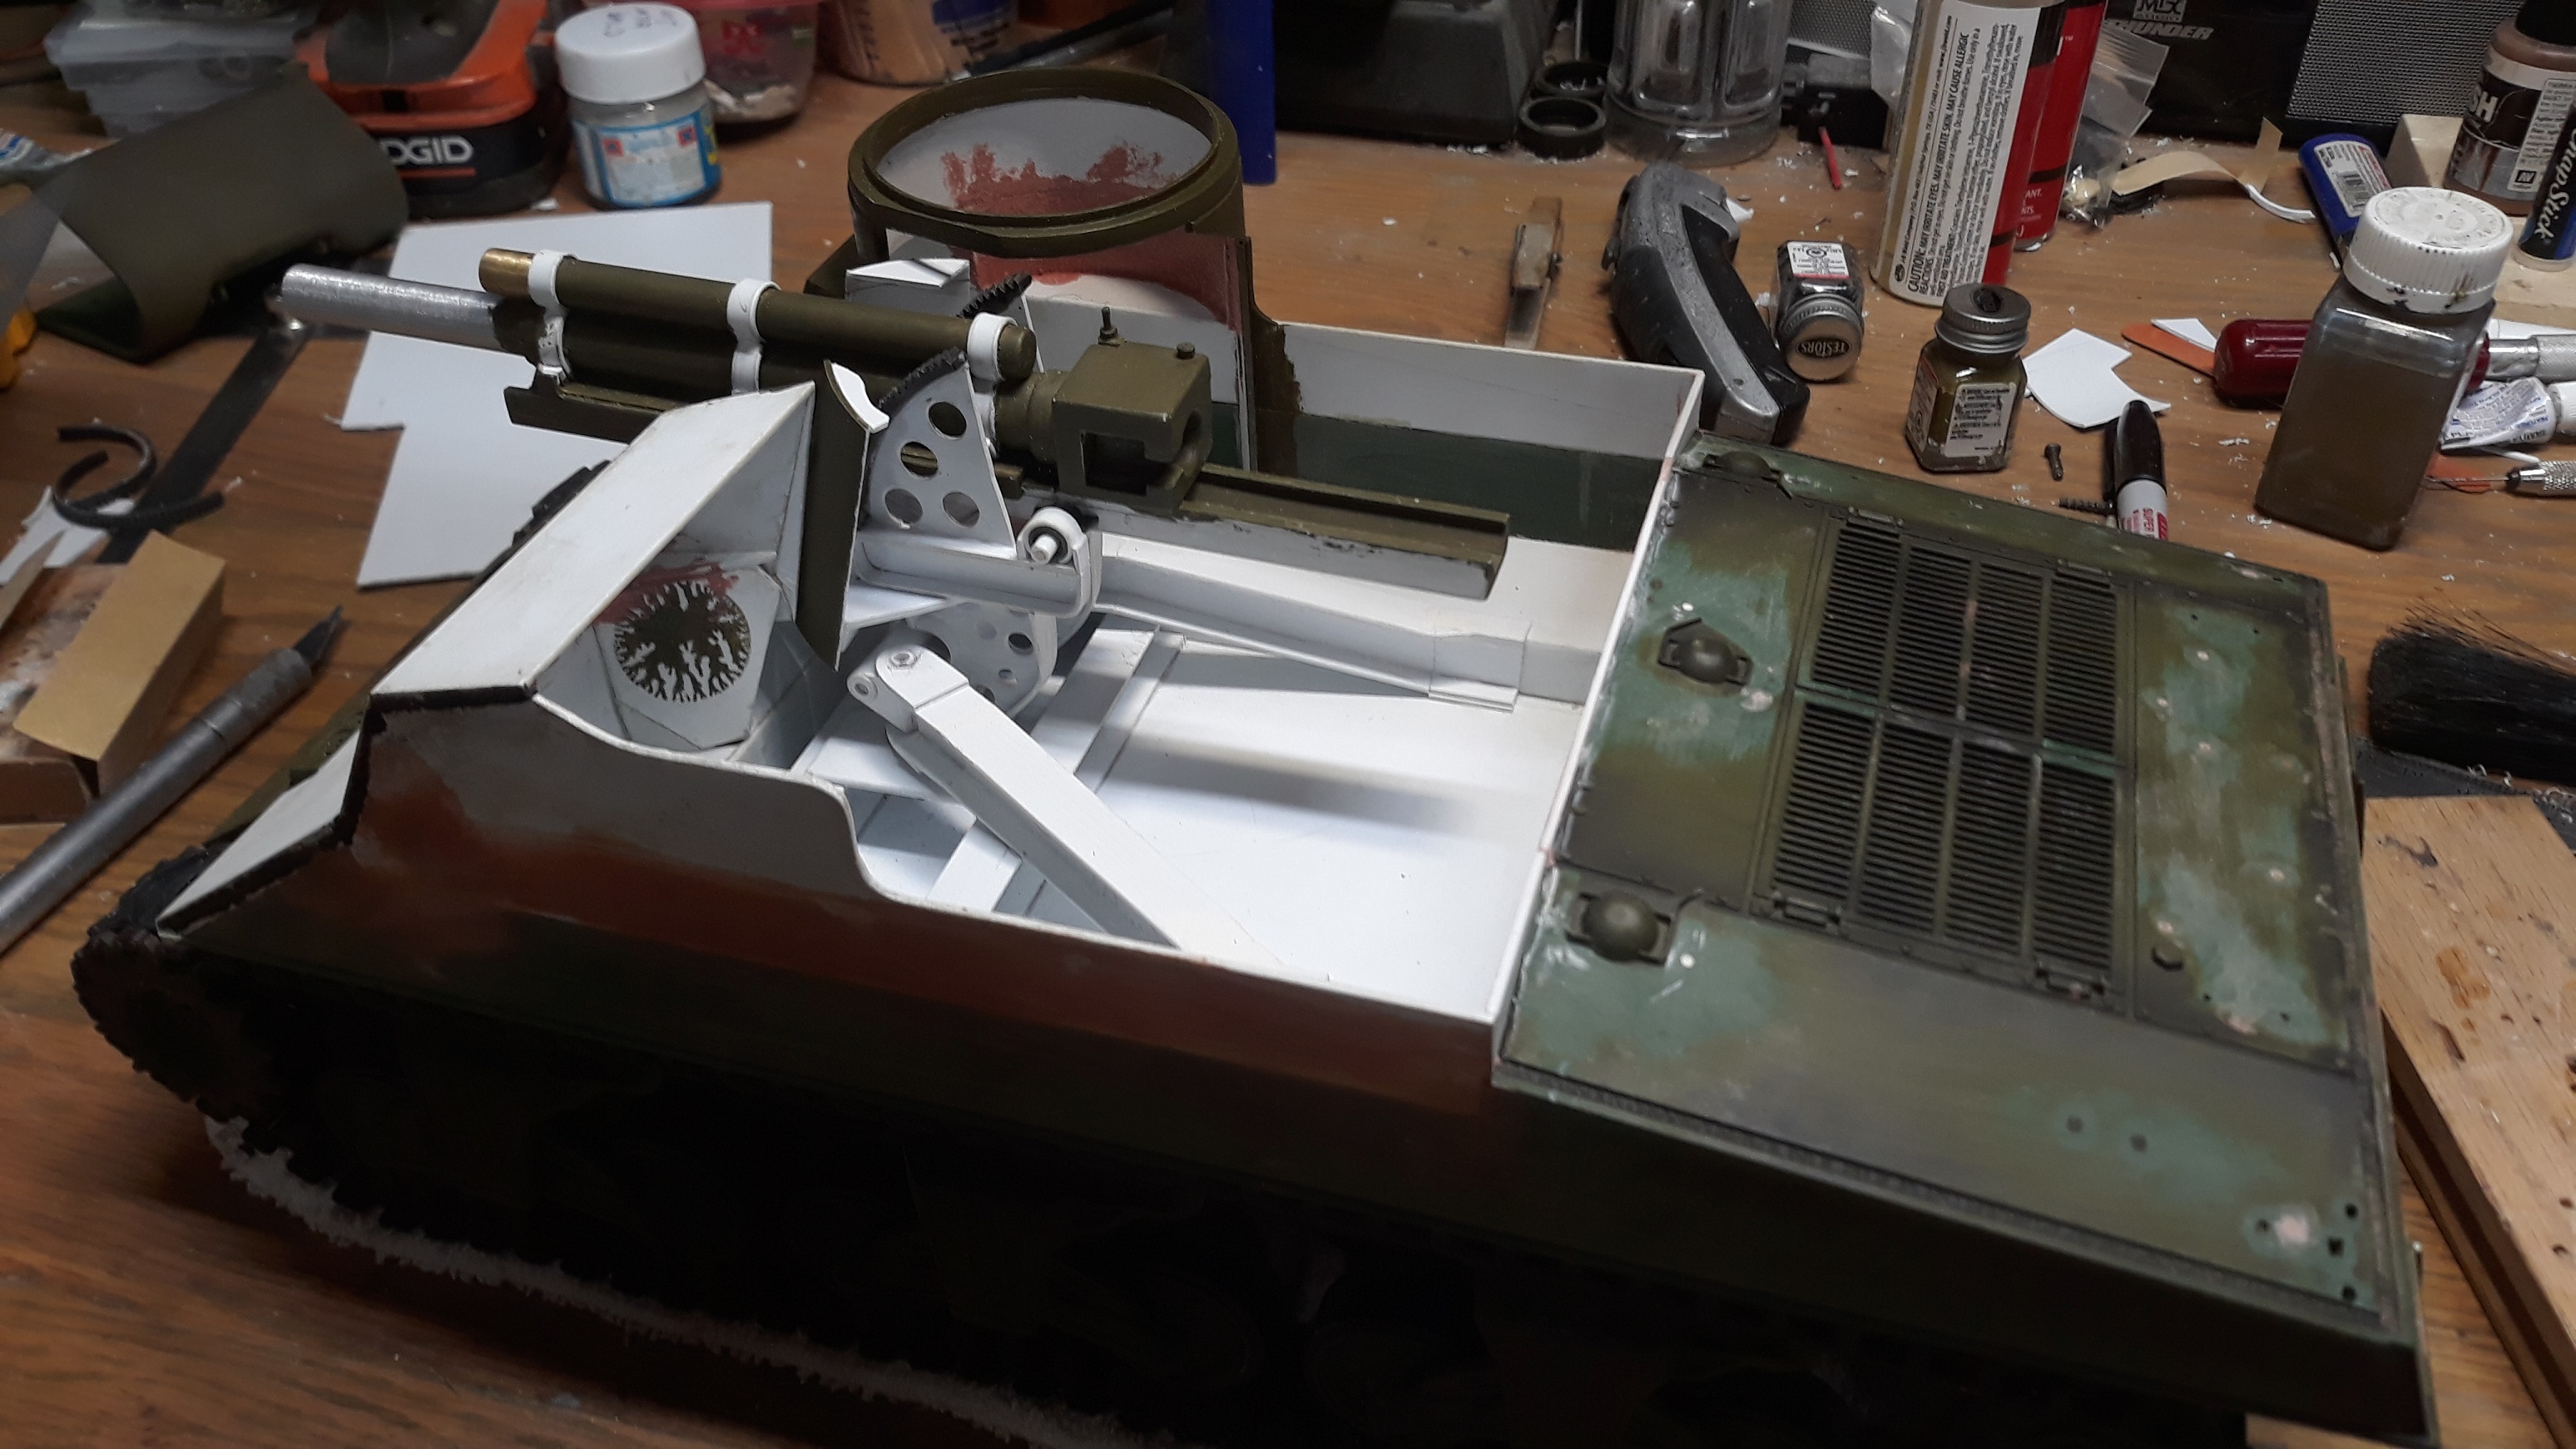
The Pulpit was built using .040 card (sheet styrene) wrapped around a short piece of exhaust pipe then crimped tight with electrical tape. Immersed in boiling water for about 20 minutes with tsp salt (kidding). Once cooled tape was removed and the splice/seam was glued. Second layer of .040 was applied with a two part epoxy and the same electrical tape wrap. Once cured it was unwrapped and removed from exhaust tubing. From there it can be cut as needed. The laminated, two thin layers have proven much easier to form and much more stiff compared to thicker one piece card when machining the material.
- 9.jpg (1.11 MiB) Viewed 43 times
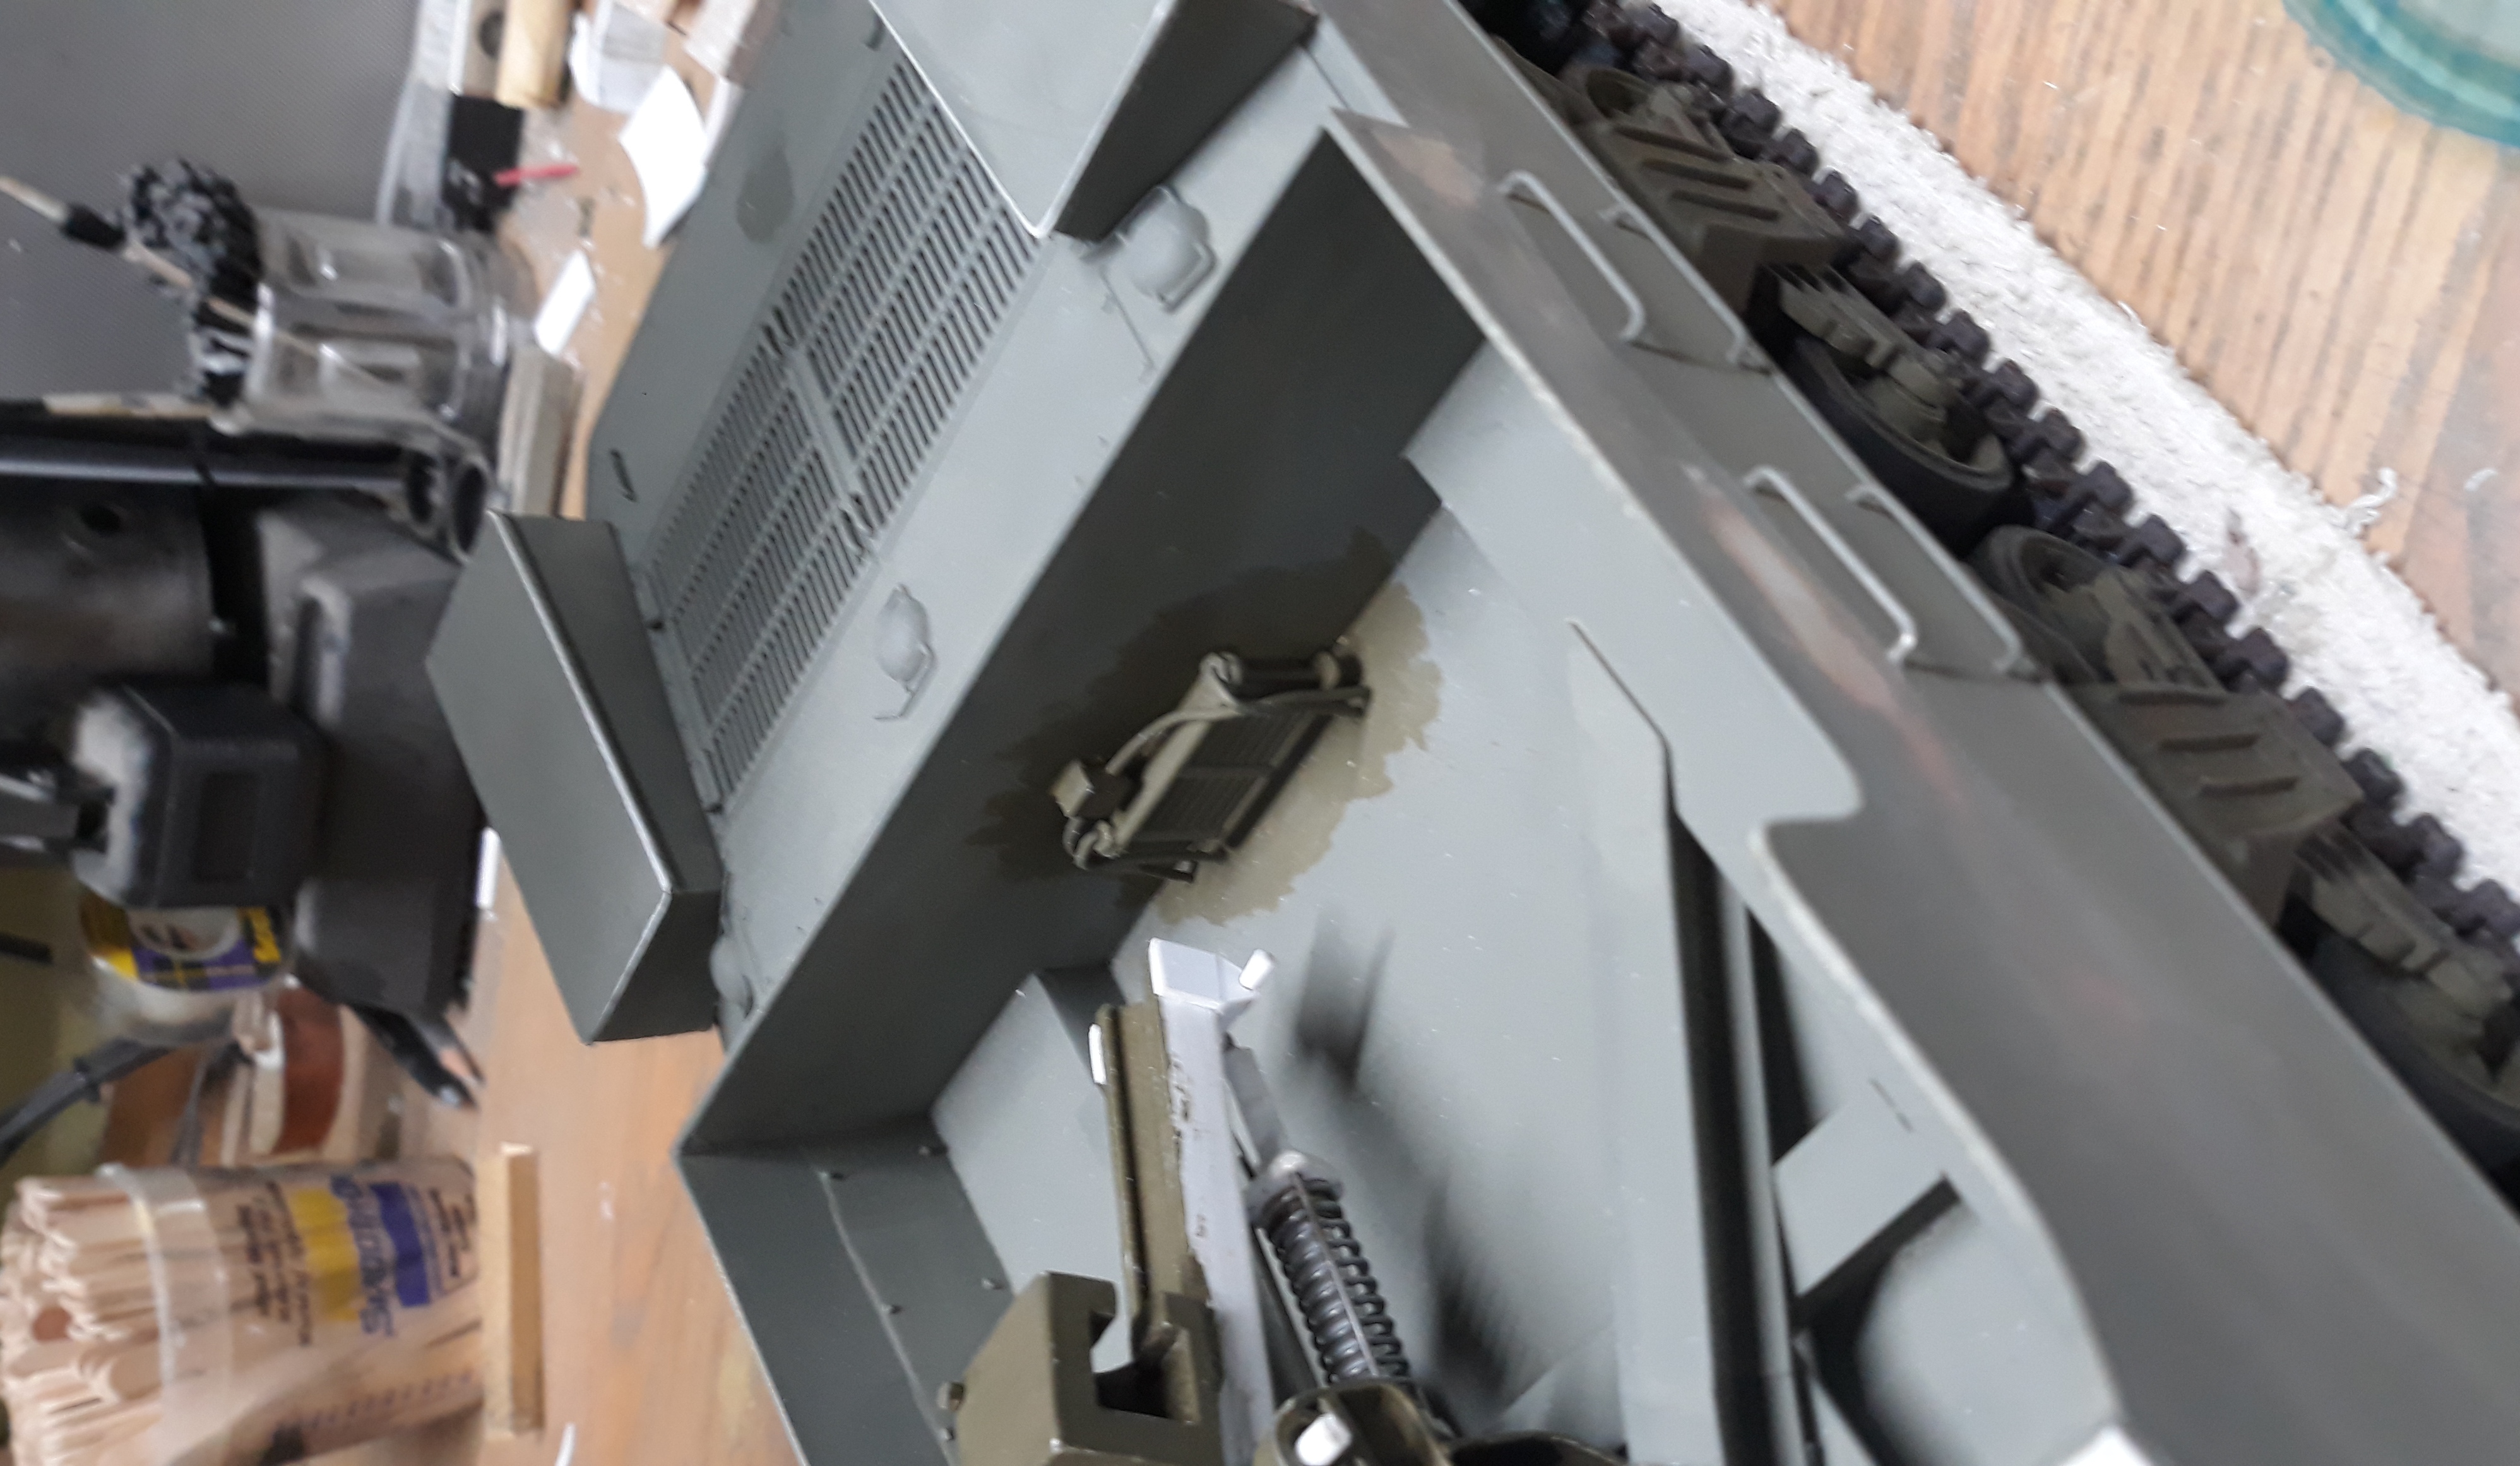
The track link boxes have several variants in all the pictures I went through, as to location and how many were used. Also combat era pictures seem to show track blocks stored as they are in my picture. The few monument tanks that have any track blocks in their boxes have them stored flat halving the shoes as I have them. Not sure that I'm right but am open to suggestions. Also there is a slight bend in the "V" heading from trans bolts to cannon to clear the HL gear box (and yes I removed the top connecter post and trimmed the two sides of the transmission). The bend doesn't show up with the paint on as much but you can see it well in the picture that starts this thread.

- 22.jpg (1.23 MiB) Viewed 45 times
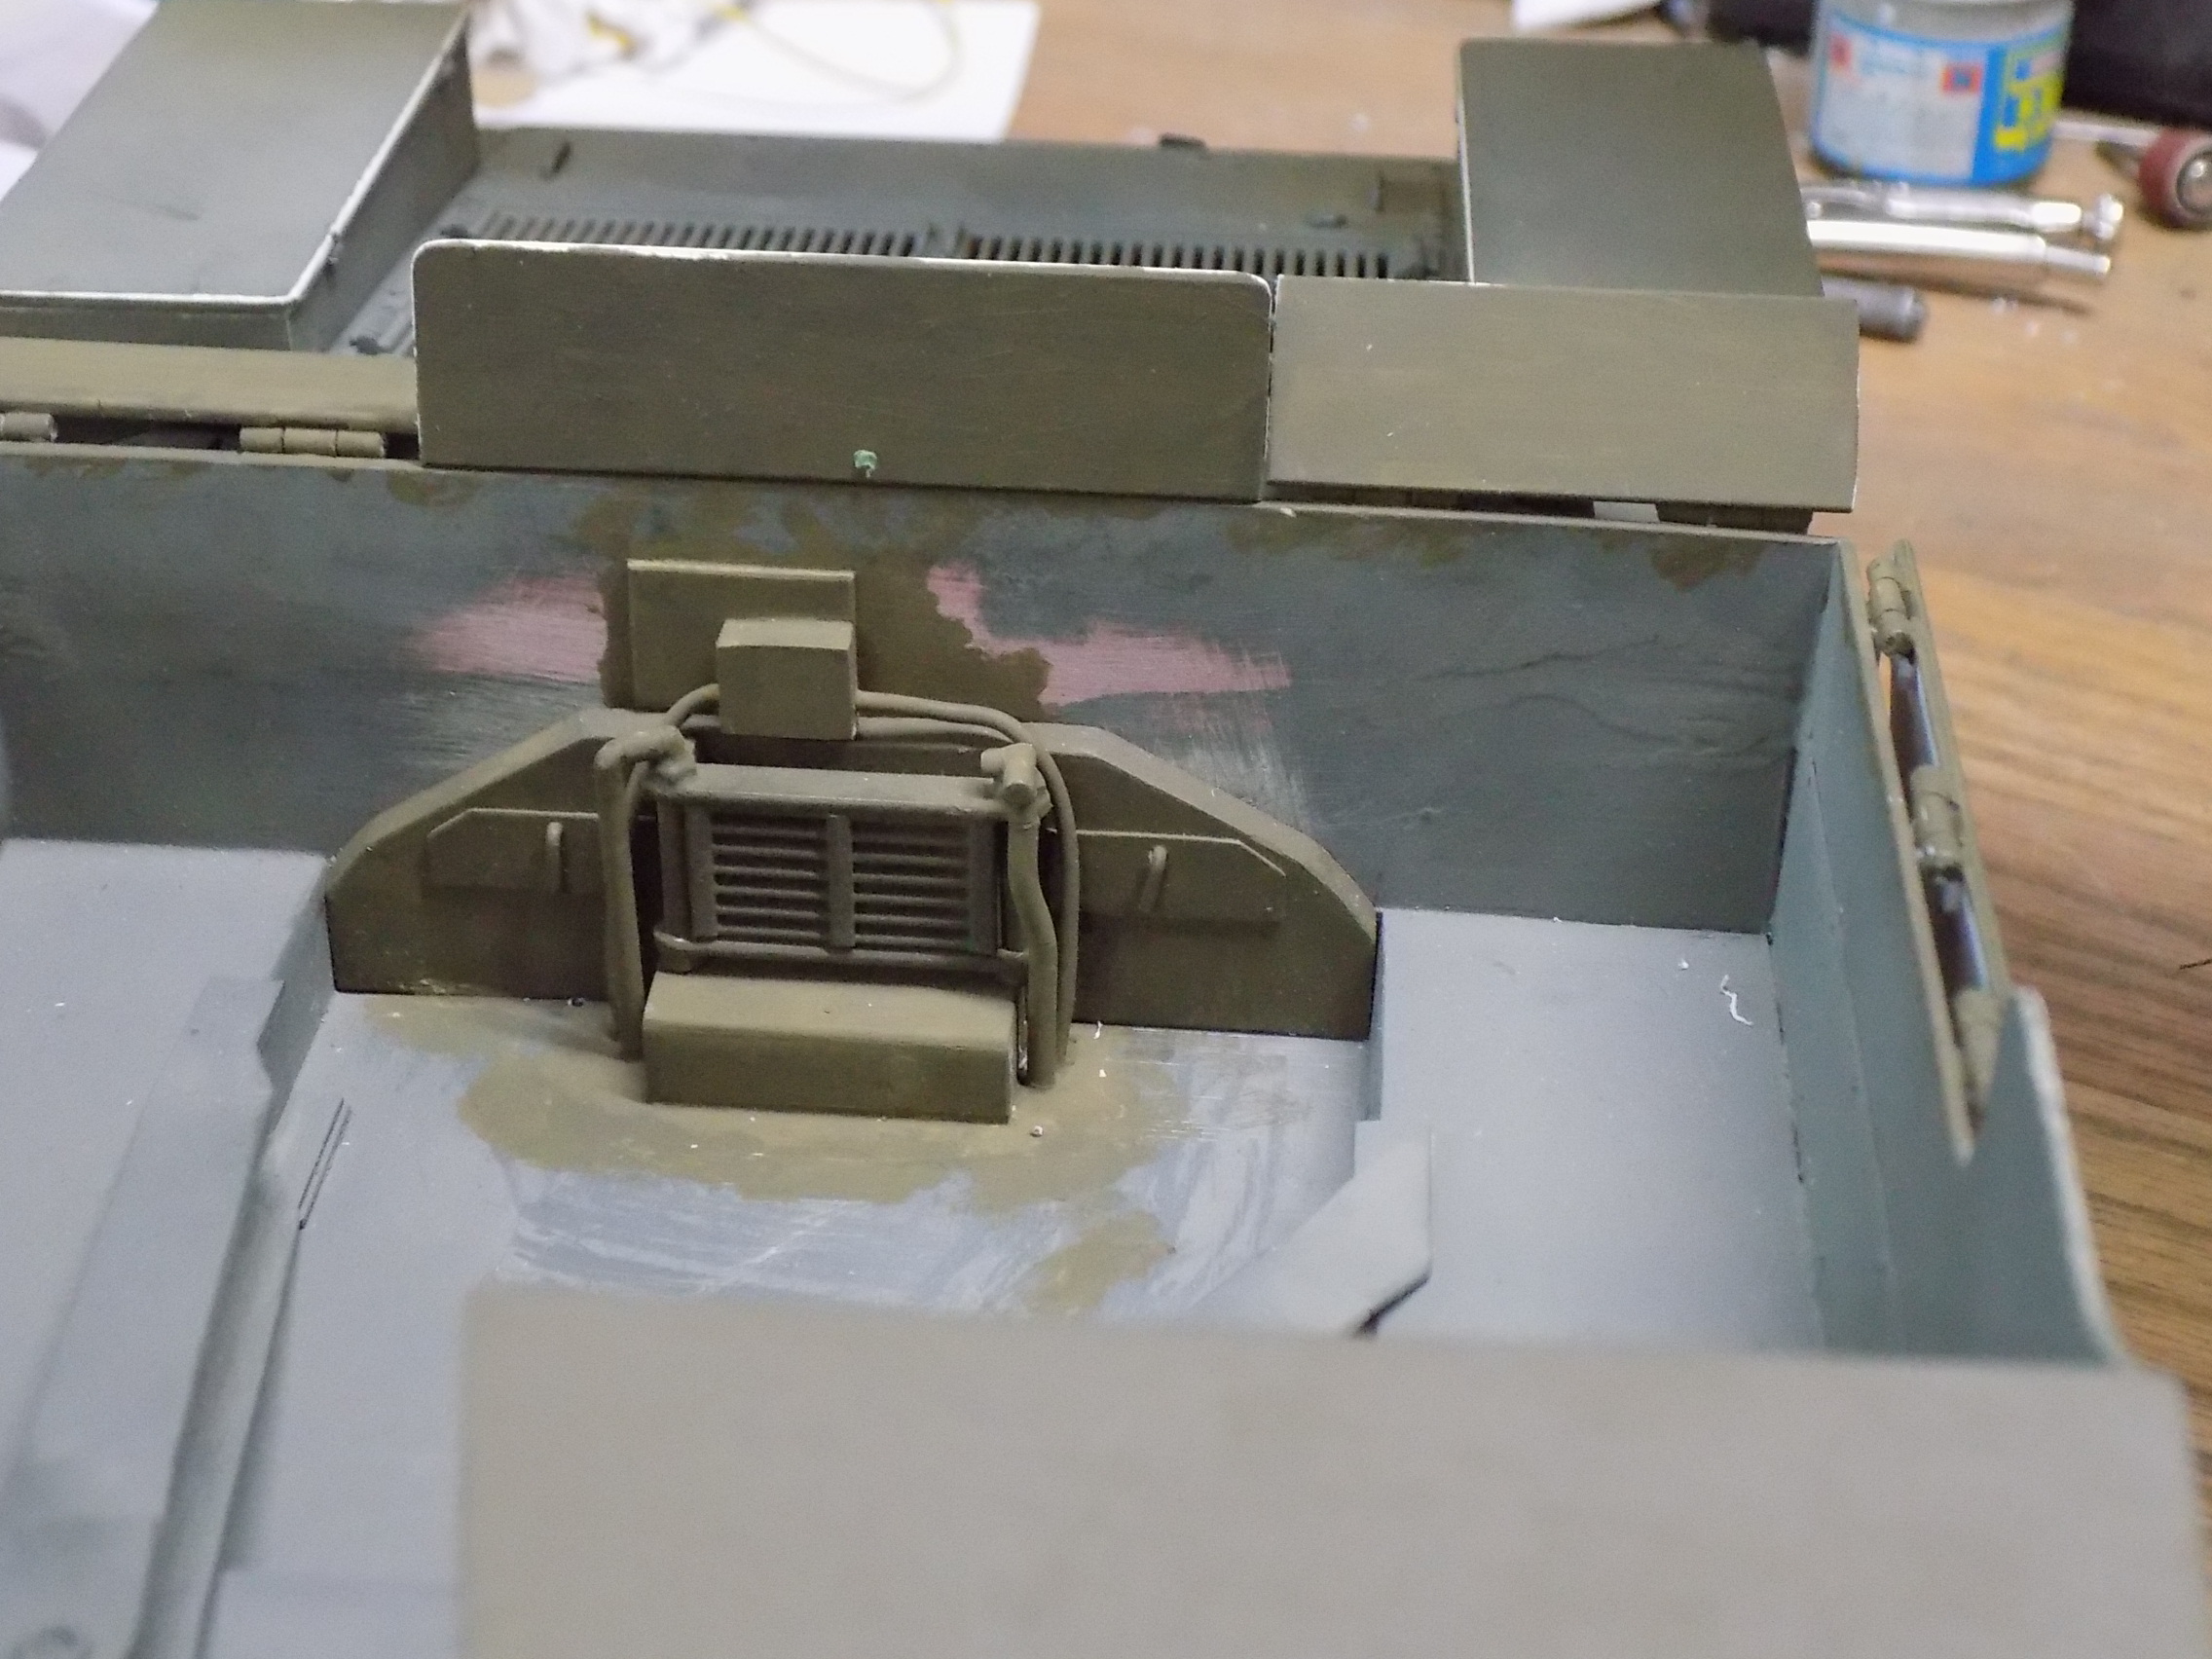
My attempt of an "it looks good to me" oil cooler and master cut of switch for the rear wall.
- 23.jpg (2.08 MiB) Viewed 45 times
Cast effect on trans cover.
Poor man's Mr Surfacer: Thinned down Bondo (automotive body filler). Thinned with acetone (resin) add hardener, mix and apply with stiff brush. It does take longer to cure than un-thinned Bondo (couple hours) then sand until the desired finish.
Re: M7B1
Posted: Mon Feb 28, 2022 5:27 pm
by Ecam
I posted this years ago but I'll show it here as well because it's a simple way to get rid of the oval plug lines on the HL bogies.
Here is the finished outside of bogie. To the left (just above road wheel) is the hole where this bogie mounts, to the right is the nut holding the next bogie behind.
- 18.JPG (1019.64 KiB) Viewed 42 times
Simply remove mounting screw underneath oval plug and drill a small diameter pilot hole all the way through the inside of hull). I use 6-32 screws (approx 3.5mm). I then drill out the bogie for a tight fit when screw is threaded in with a dab of epoxy. Then drill the mounting stud on the hull to a slightly larger diameter than your screw. Once epoxy is cured I install bogies and trim protruding screws as needed. The space between inner hull and transmission does have room a washer and nut, but not much else. I don't use washers as the plastic acts like a thread locker. The plug can now be cemented and finished as desired. I did this on my first Sherman (2015) and on every one since. None of the nuts have ever backed off. I've used 8-32 (4mm) screws as well. Last tip: There is a step on the bogie mounting stud. The thinner part (what the factory screw goes in) can be removed AFTER drilling. I have removed them and left them. If the epoxy isn't fully cured it will stick to the un-removed post/stud.

- 17.JPG (992.27 KiB) Viewed 42 times
Re: M7B1 Priest
Posted: Mon Mar 07, 2022 11:55 pm
by Ecam
Saw an older thread also by Boris Plotnikoff on his M7B1. Which inspired me to to get back to work.
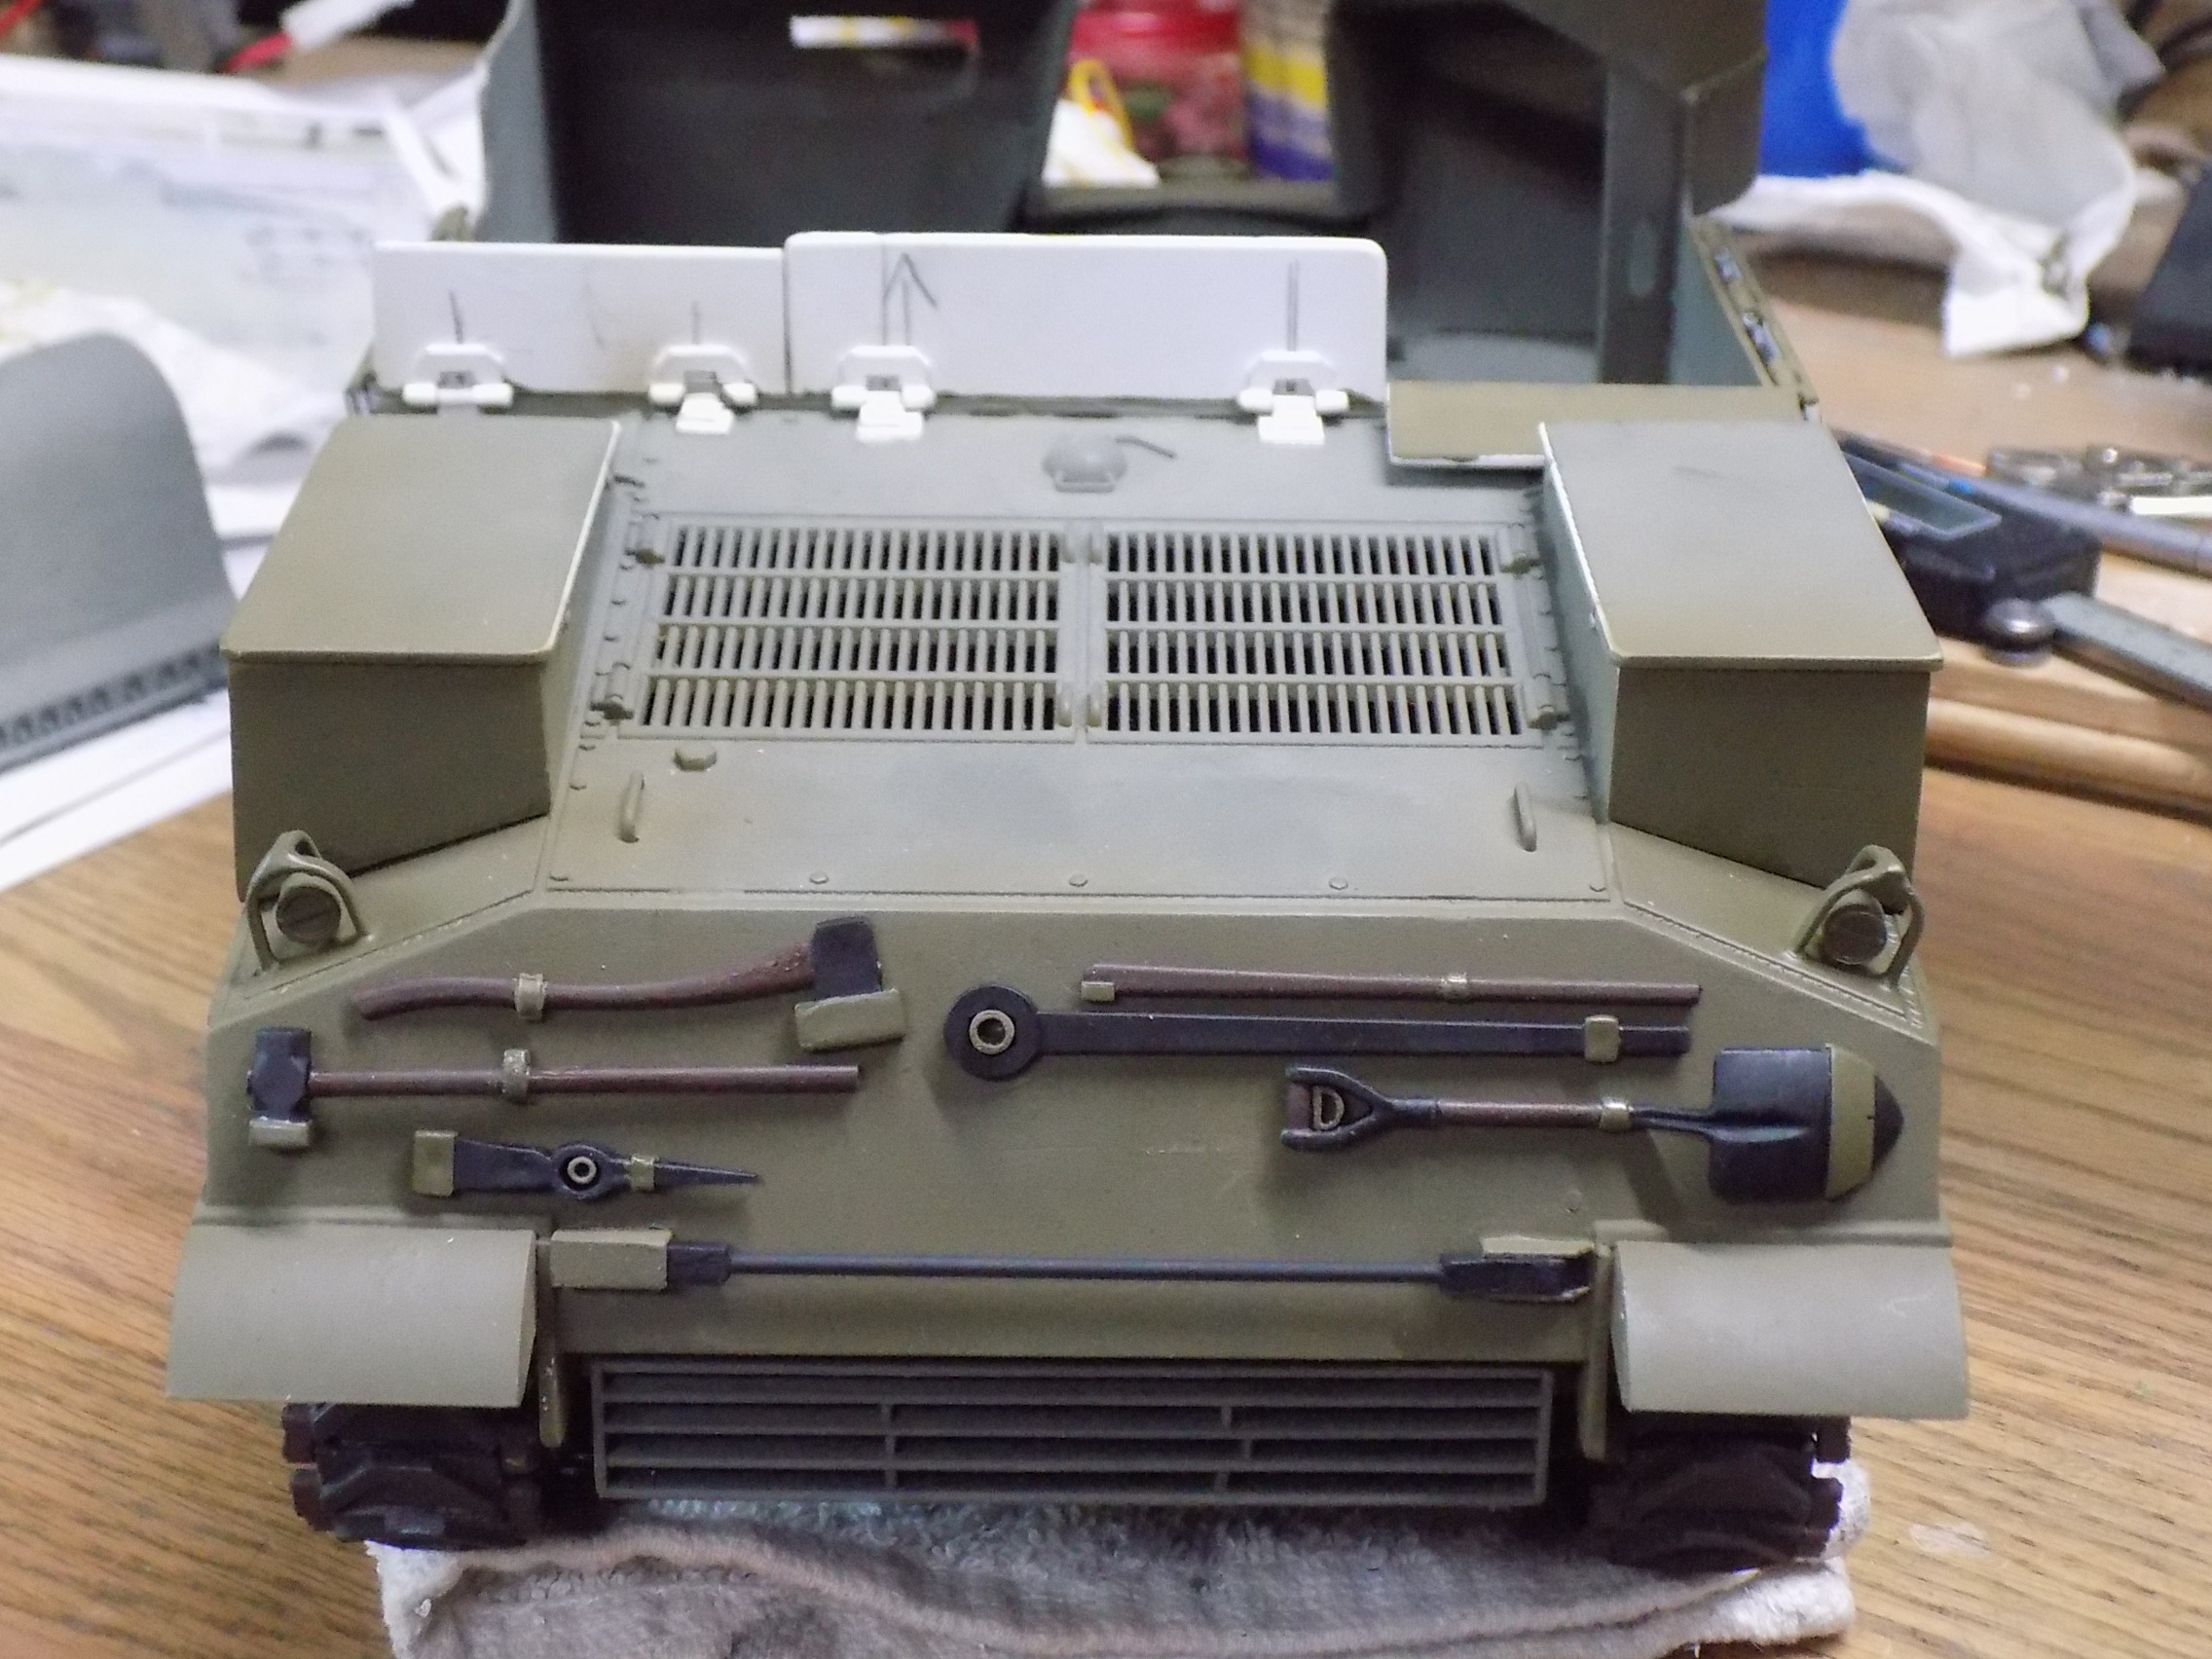
First I started upgrading the rear wall. And made hinged upper armor on the B1.
- 24.JPG (996.82 KiB) Viewed 41 times
Front light mounts and guards.
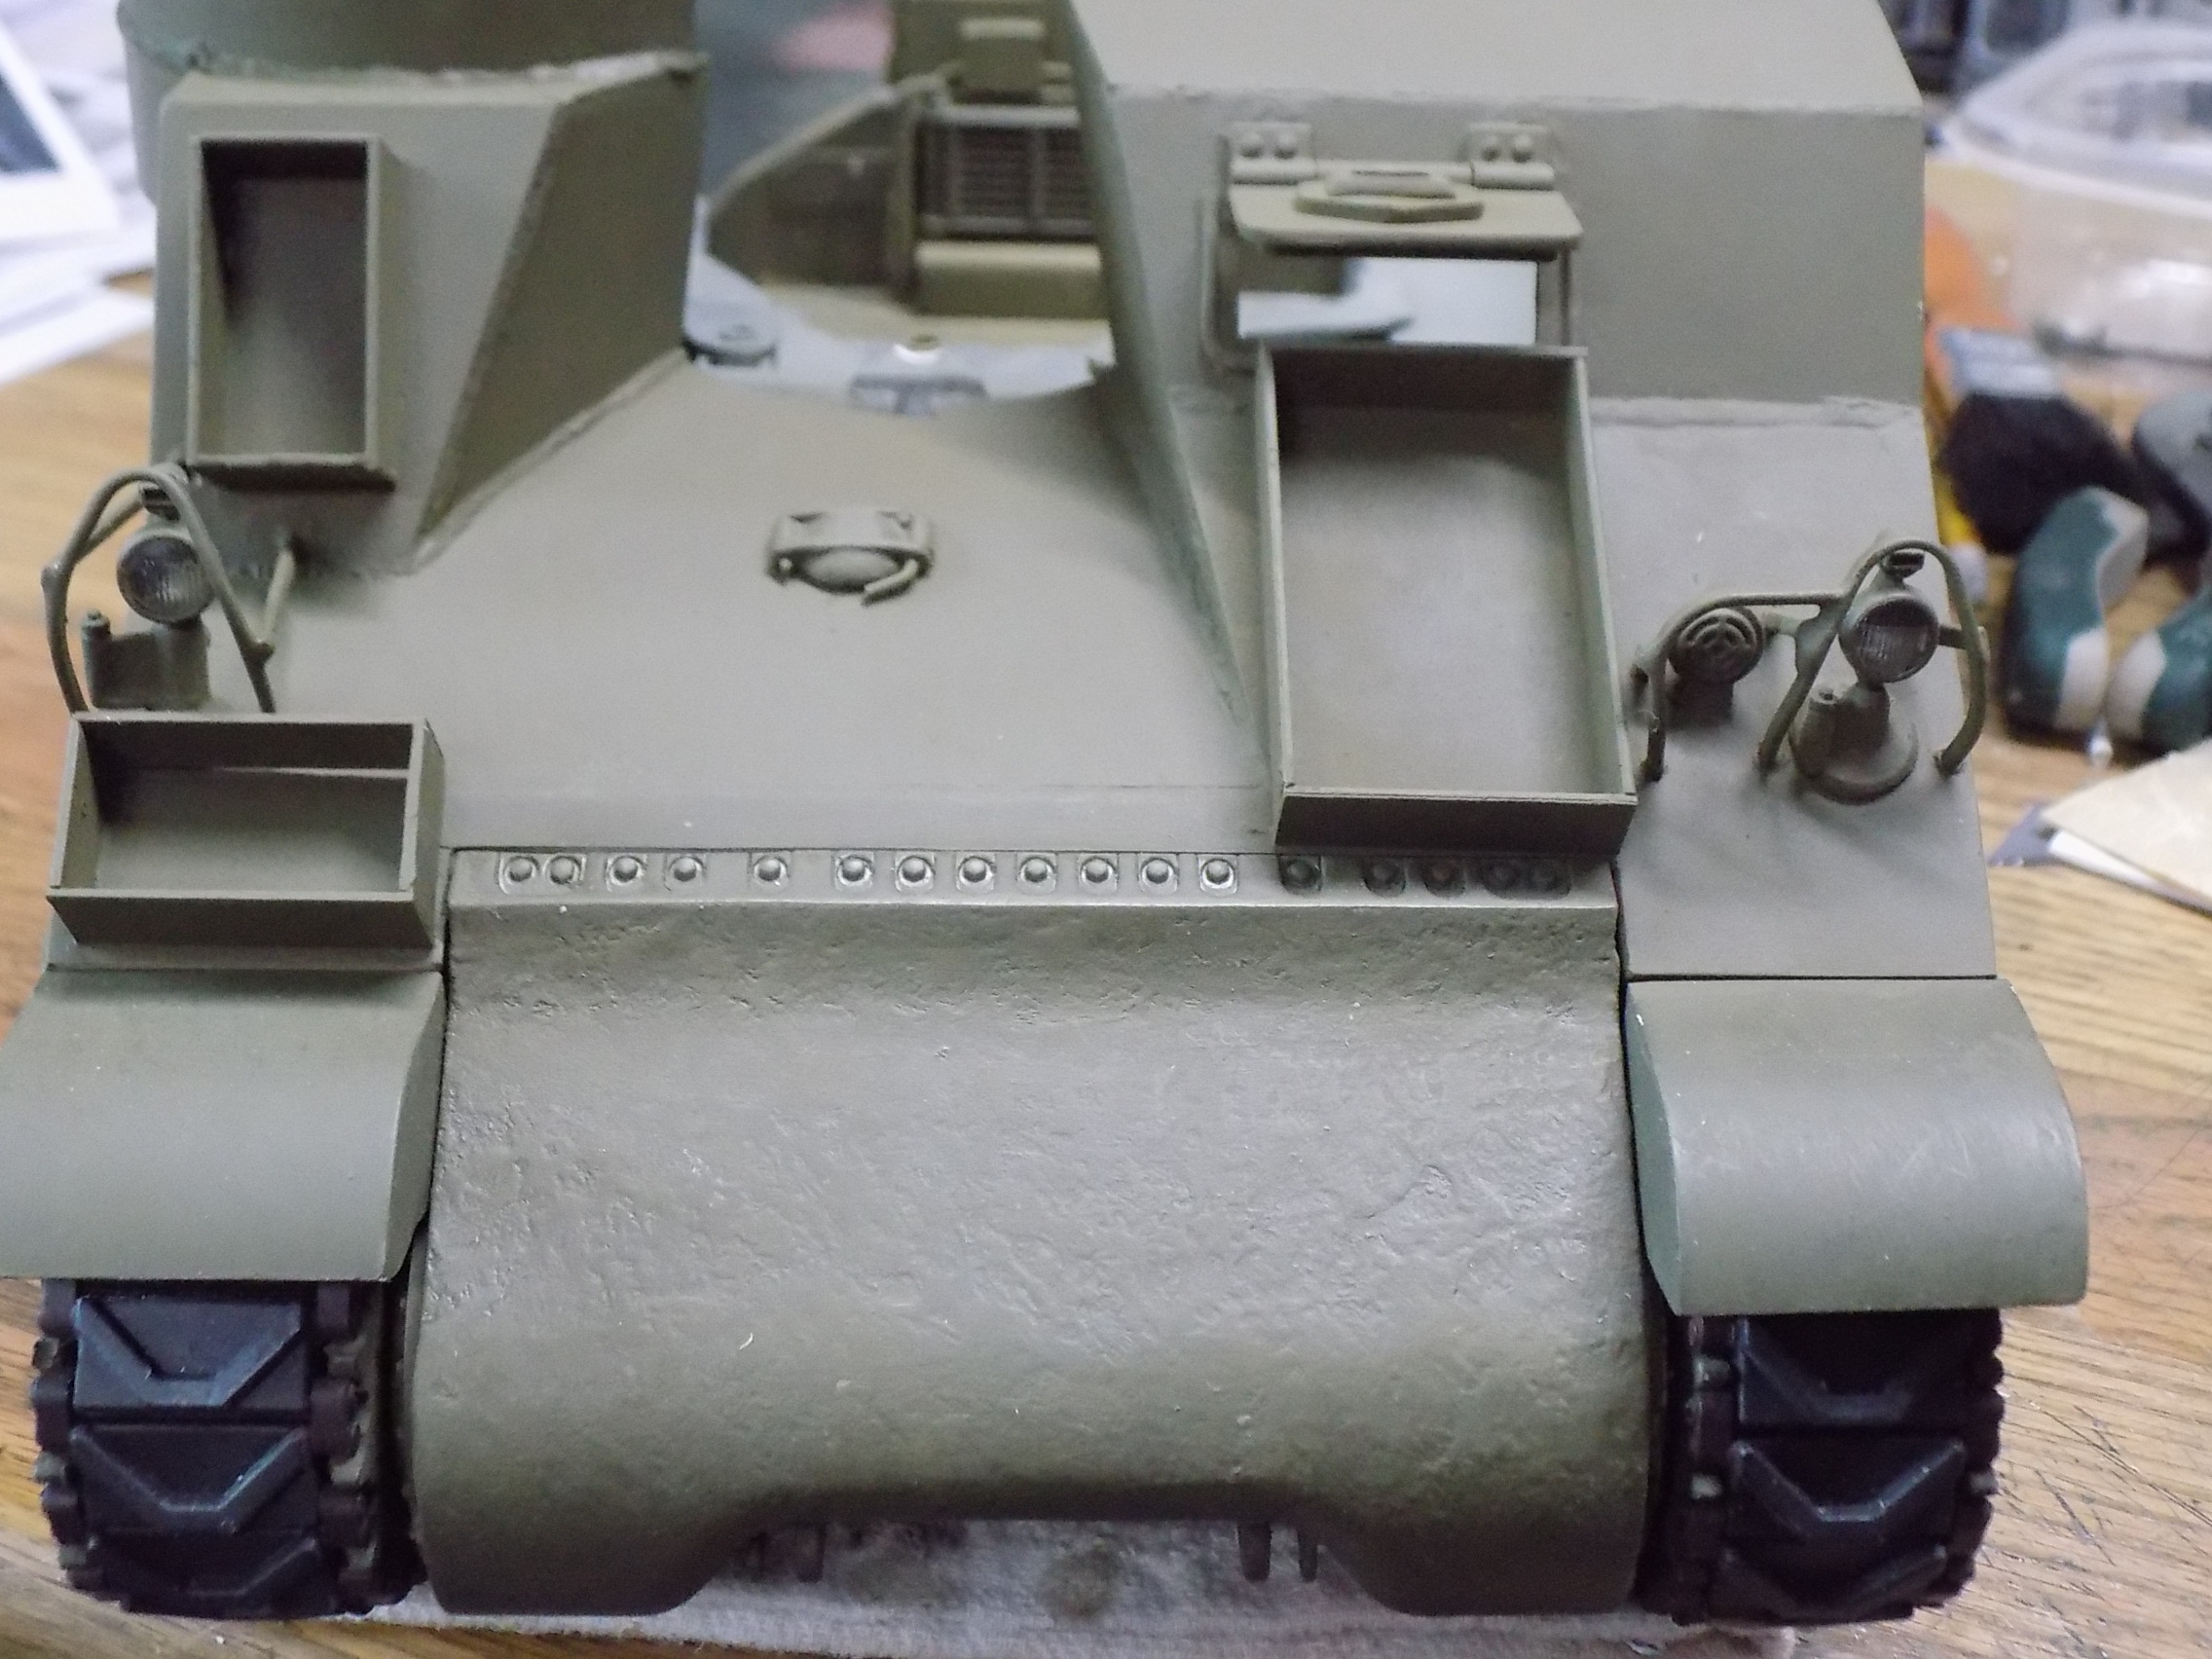
- 25.JPG (992.55 KiB) Viewed 41 times
Rear guards and pioneer tools. The Sledge and axe had to be reversed as they are opposite of the M4 series.
- 26.JPG (940.18 KiB) Viewed 41 times
Using what was on hand to create the traversing gear and hand crank handles.
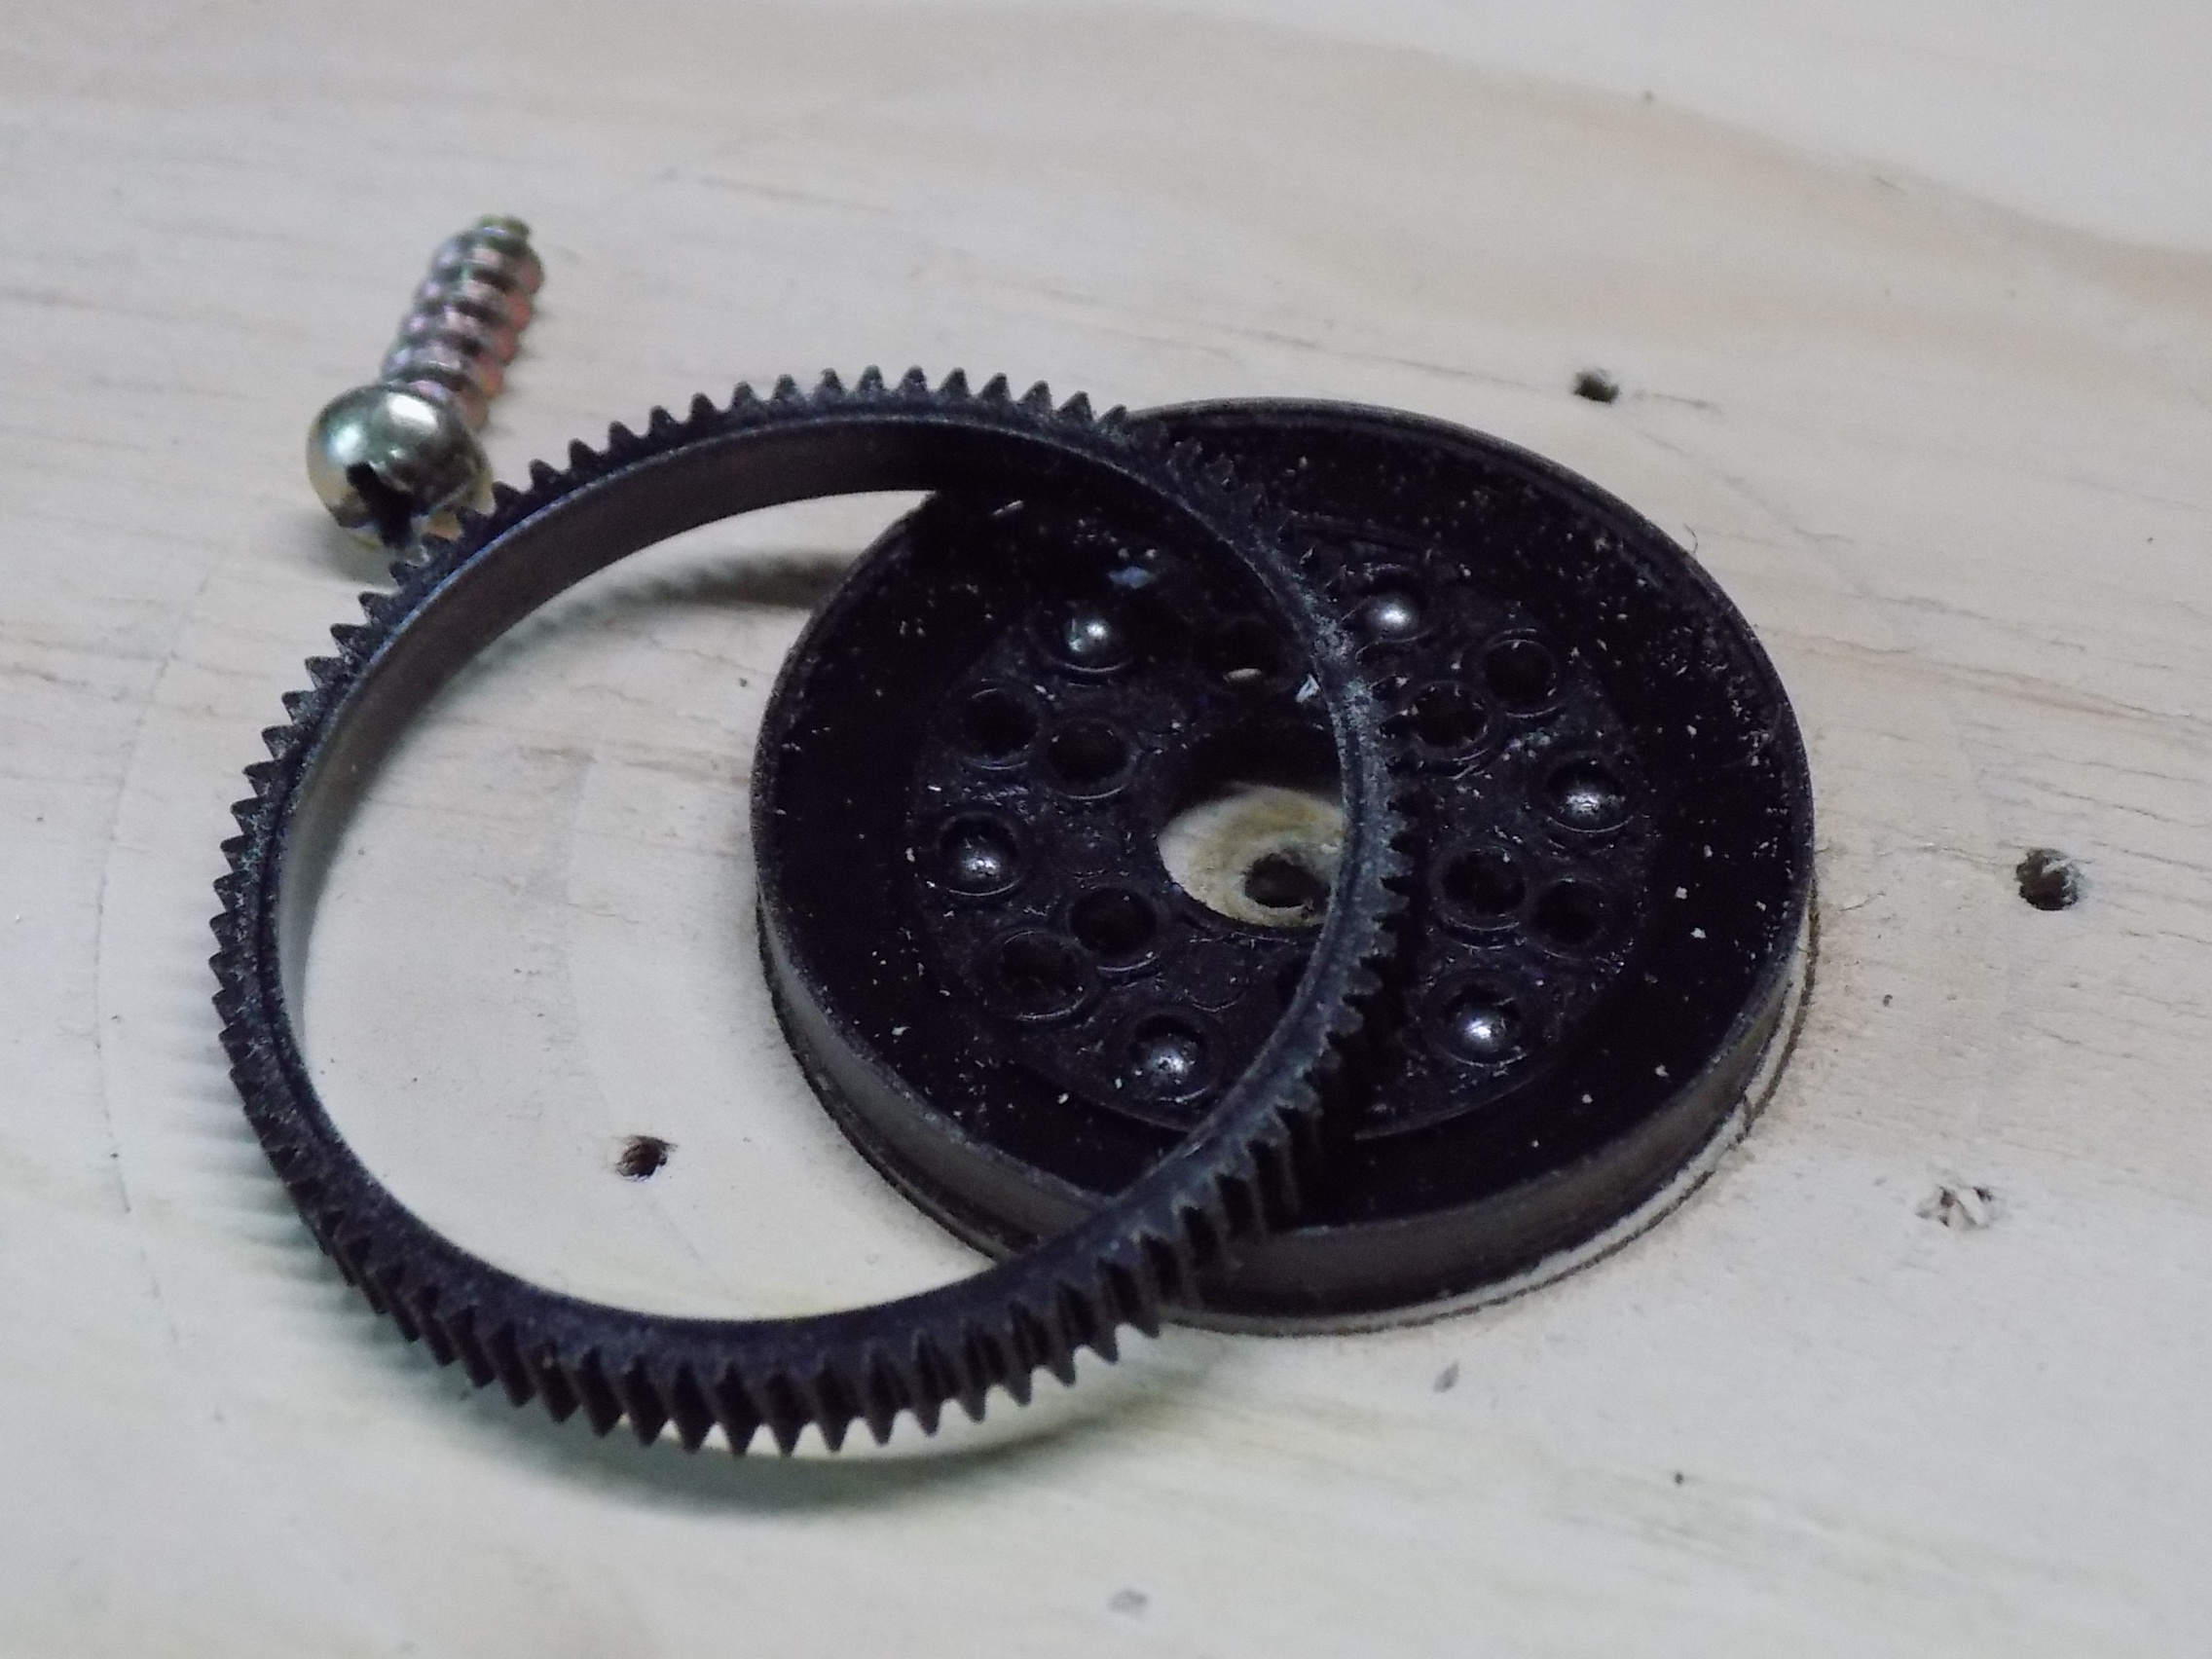
- 28.JPG (948.95 KiB) Viewed 41 times
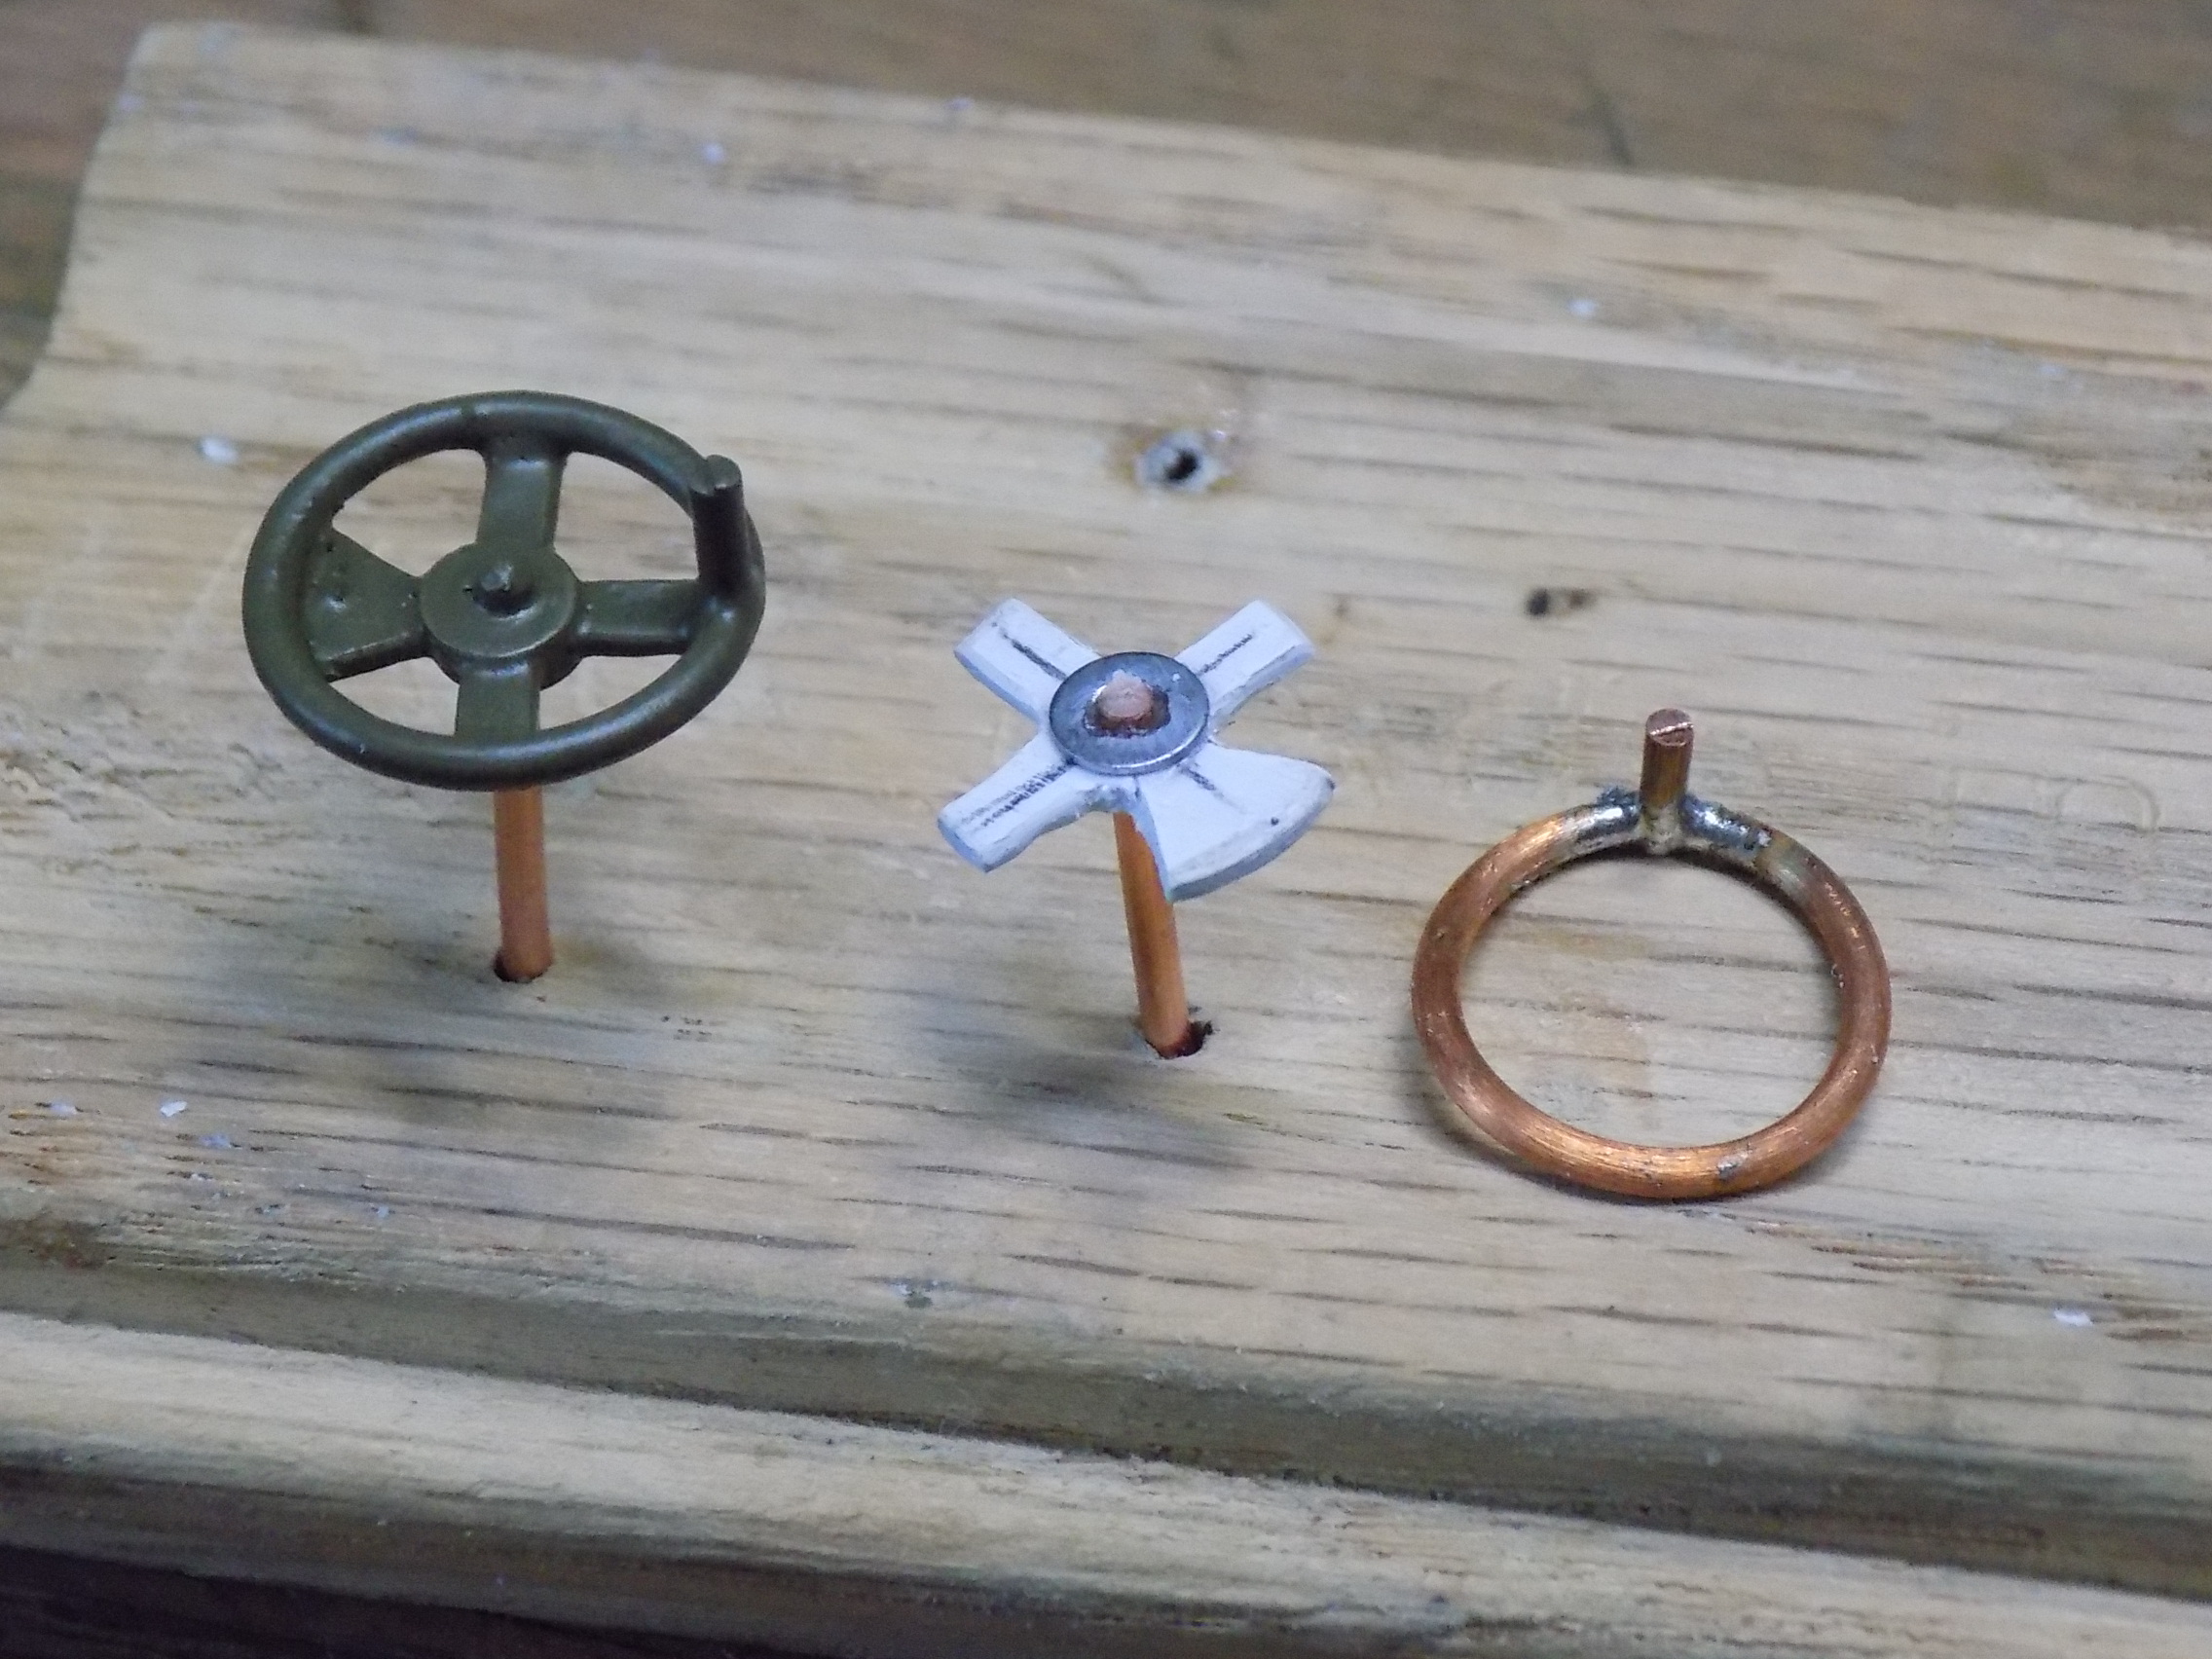
- 33.JPG (1023.38 KiB) Viewed 41 times
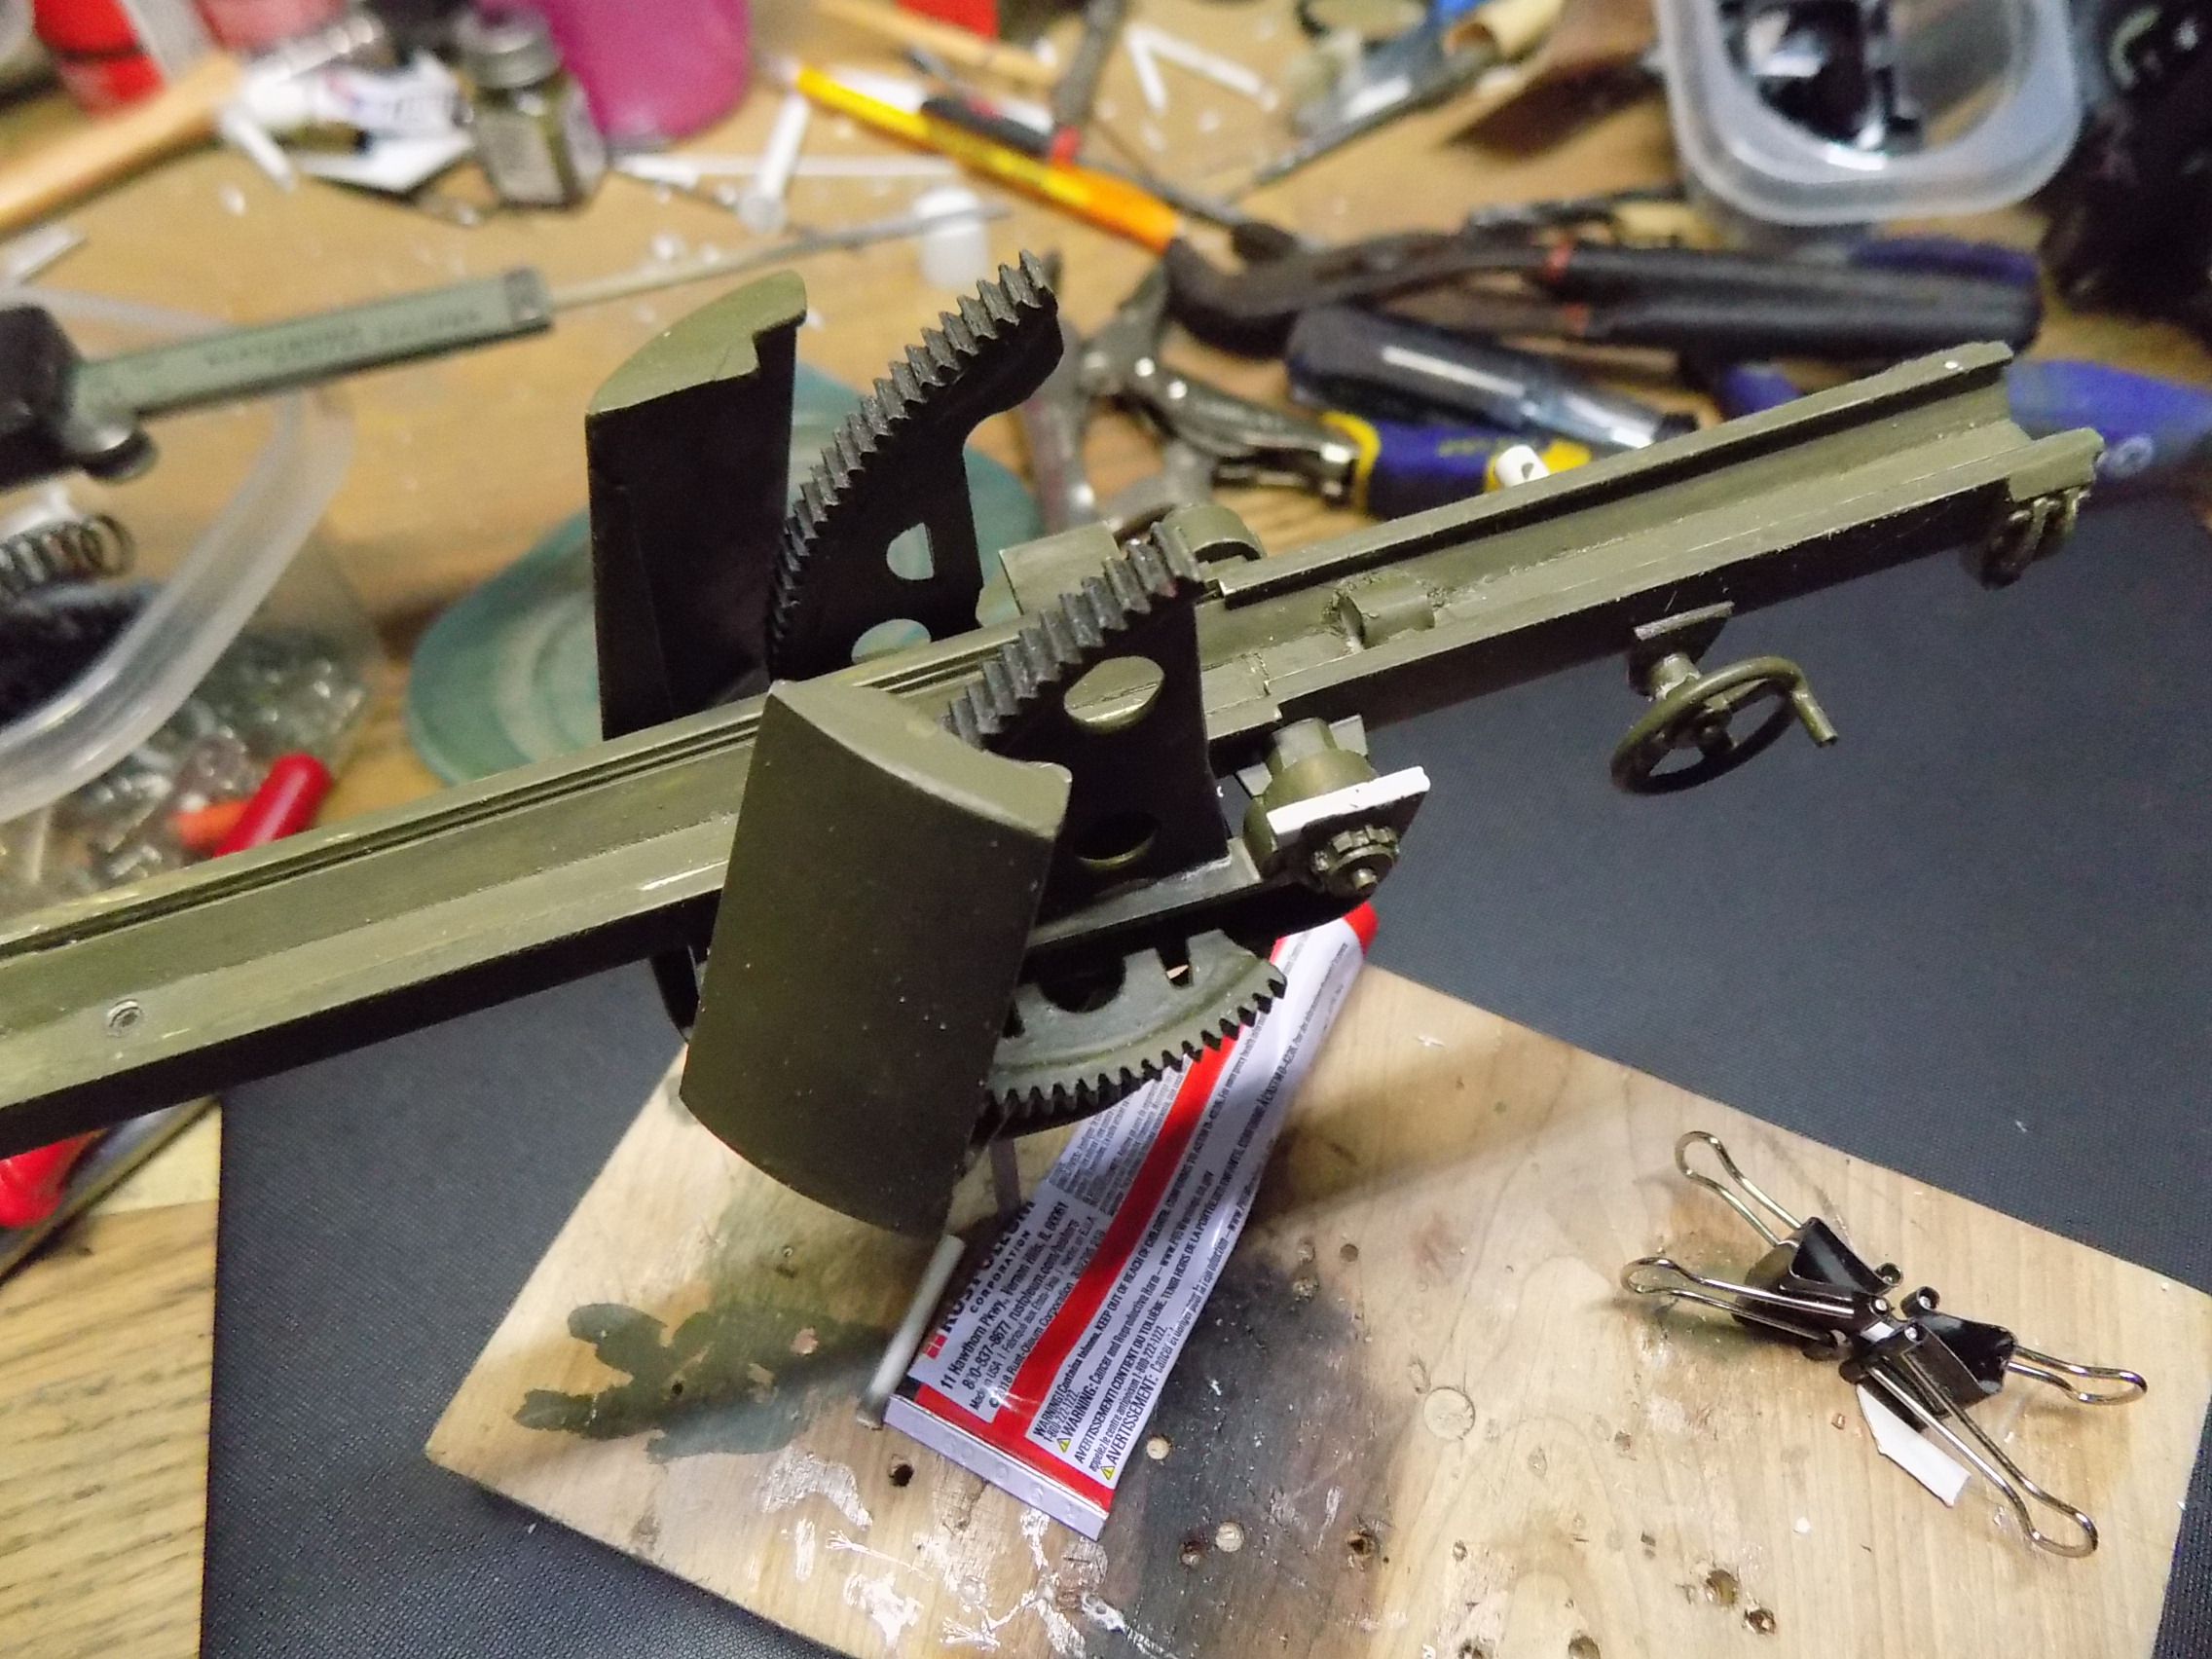
- 39.JPG (988.03 KiB) Viewed 41 times
Re: M7B1 Priest
Posted: Tue Mar 08, 2022 12:00 am
by Ecam
And as a teaser....
This might be my next one.
- D1.JPG (373.68 KiB) Viewed 40 times