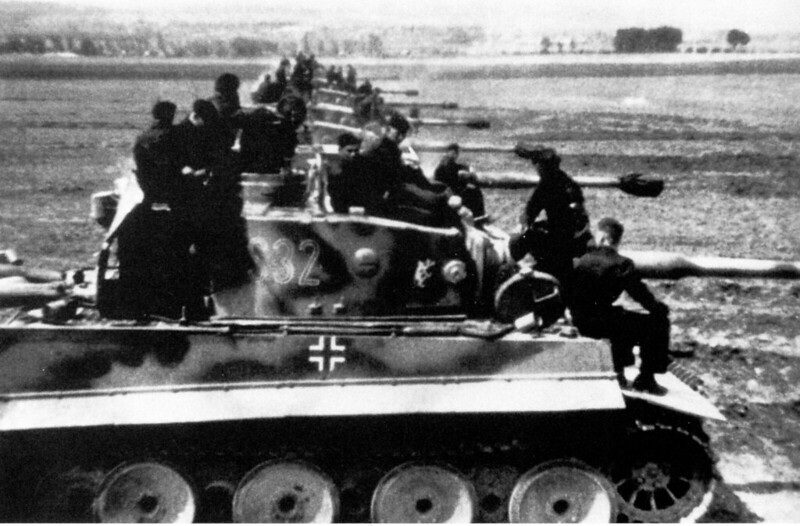
WSN Tiger I ~ Das Reich S32 at Kursk
Posted: Sun Mar 28, 2021 5:02 pm
So this is the Das Reich S32 Tiger. I started with the WSN Tiger as I like it better, I like the lines a little better and it has more detail than the Heng long, I can bring the Henglong up to my standards but its more work.
Lots of work was done before I ever started taking pictures, I didn't intend on doing a build thread but as I got about halfway through it I realize how much work it was and thought it might be useful for some of you.
I will tell you as Im sure many of you know, modeling an actual tank from photos is MUCH more difficult than just doing a general generic build, freedom and artistic licence is gone...

 355e752a77ab918685c902903de04fe8 by jon newsom, on Flickr
 289567b228010ce33a13569f64e84e97 by jon newsom, on Flickr
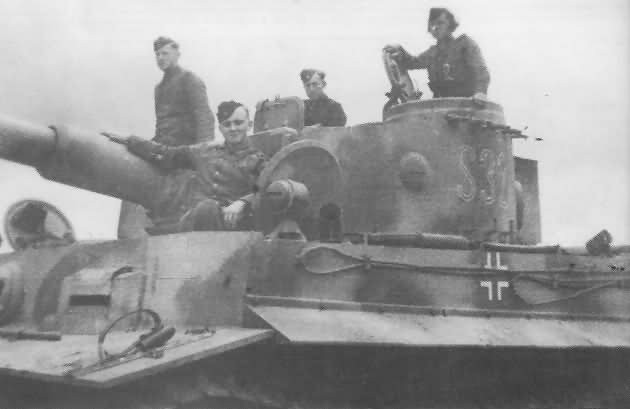
General builds can and often are still screwed up by someone missing obvious things, bad weathering or no weathering, the wrong colors, incorrect details like wrong wheels or whatever - BUT - lots of details can go either way and this Tiger is a great example! Since I am doing this particular Tiger, I had to change the gun mantel but there were Tigers running around Kursk with the reinforced gun mantels, I had to change the Loaders parascope but there were Tigers at Kursk without a loaders scope, some Tigers had 2 lights, some had none... mine has 1 and so on, so the margin for error has left the building but challenges make us stronger! 
 Tiger_s32_2 by jon newsom, on Flickr
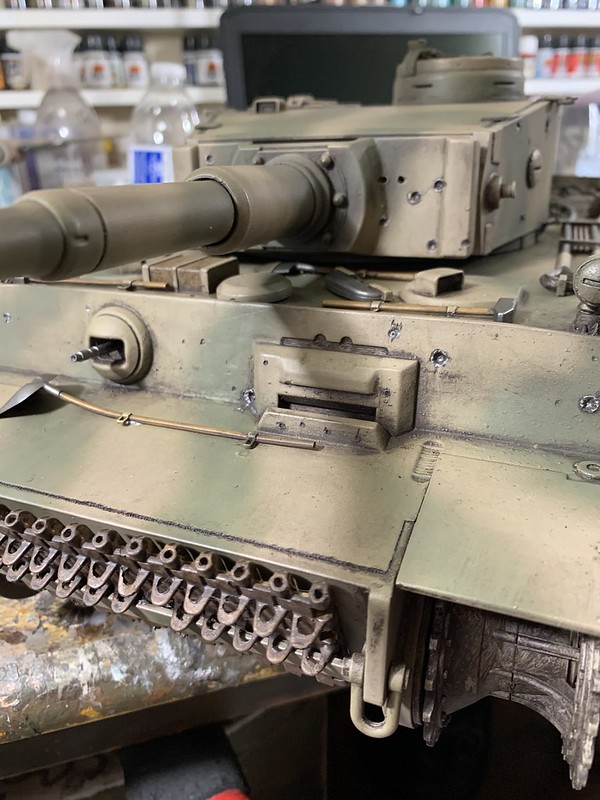
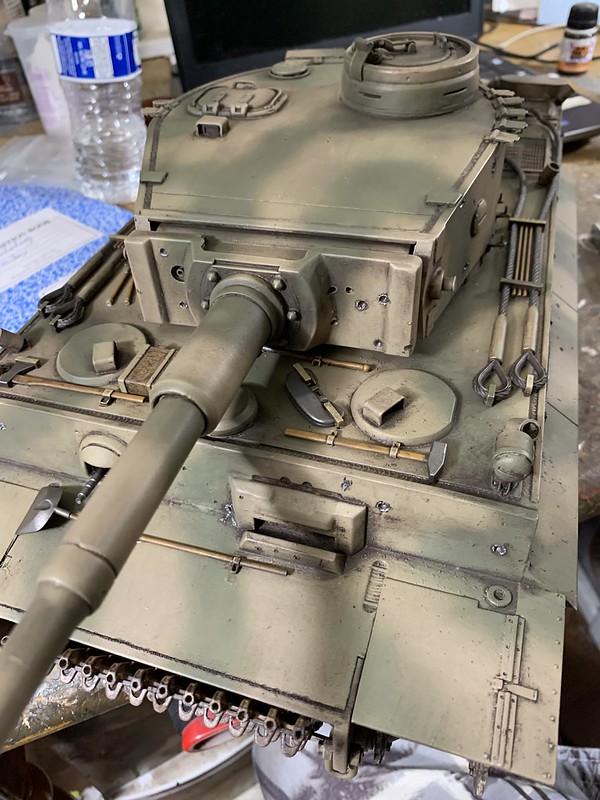
So basically the work that’s been done before the pictures you see is I took the Copula off very carefully from a Heng long and took the late version Coppola from the WSN and switched them. Then I deleted the loaders vision panel, ironically I realized later that this particular Tiger has a very early version vision port for the loader so I made a new one and put it on. It’s OK though because they’re very different, the early one is much more like the exact thing that is on the hatches.
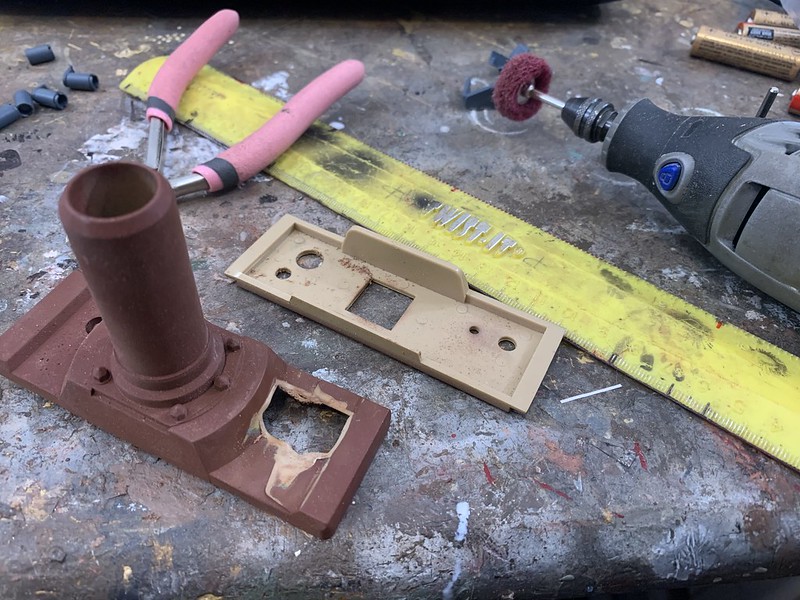
This tank has the S mine launchers, it has the air filters, it has one headlight, it has the spare tracks in the front so all that detail had to be added. The first pictures show the gun Mantel being taken off as the WSN is the late version that is reinforced at the vision port. My Tiger is an early one and does not have that reinforcement, I also moved the antenna from the engine deck to the correct place and added a resin screw to cover the hole and make the engine deck correct. Lots of little things.
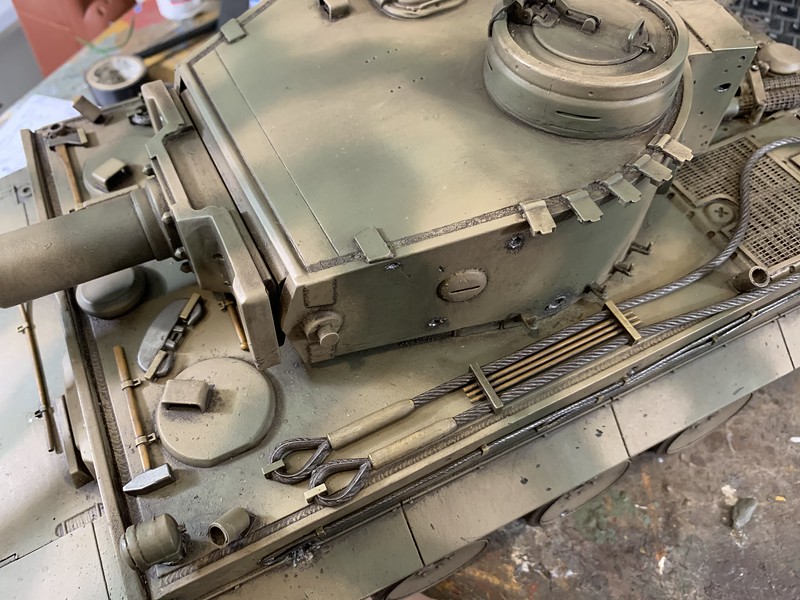
Getting the track hangers to hang right and scratching out the bottoms for the hooks and placing them in the right position on the turret can be a challenge, they don’t go right under the other but actually off to the side slightly, it’s easy to screw this up they have to be all at the right height and the right place on the turret. 5 on one side 2 on the other, some had 3 but mine only has 2
 Untitled by jon newsom, on Flickr
 Untitled by jon newsom, on Flickr
 Untitled by jon newsom, on Flickr
 Untitled by jon newsom, on Flickr
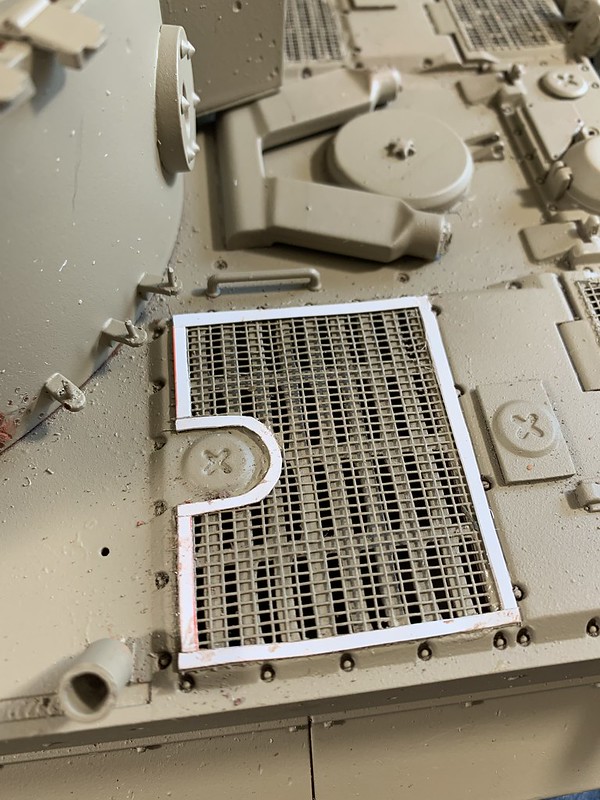
yep, to cheap to buy the grill mesh kit - just spend a hour scratch building it!
 Untitled by jon newsom, on Flickr
weld lines with a hot knife! If you don't have a hot knife... get one!! (and no I dont mean a soldering iron, although you can solder with one).
 Untitled by jon newsom, on Flickr
 Untitled by jon newsom, on Flickr
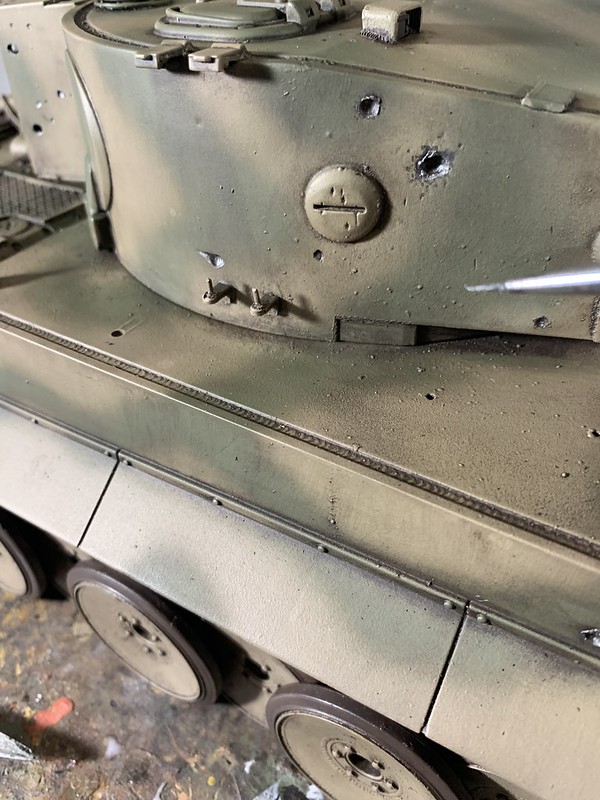
Lots of impacts! all from 76mm, some small some large, the difference is not the size of the shell but rather the range it is fired at, long distance shots rarely did much to the Tigers front and between the driver, commander, loader and gunner they were rarely missed out in front, but those sneaky Russians, they would use a trick in which one 76mm would open up on a Tiger from far away, giving away their position and Tiger would assume that the crew is inexperienced but it was bait. As it got closer to destroy the gun with an HE round the real threat, a 76mm well camouflaged would try to take the Tiger from the side at close range, didn't always work but was widely used. So to model this, major impacts are left to the sides.
 Untitled by jon newsom, on Flickr
Usual method, drill and fill then press out.
 Untitled by jon newsom, on Flickr
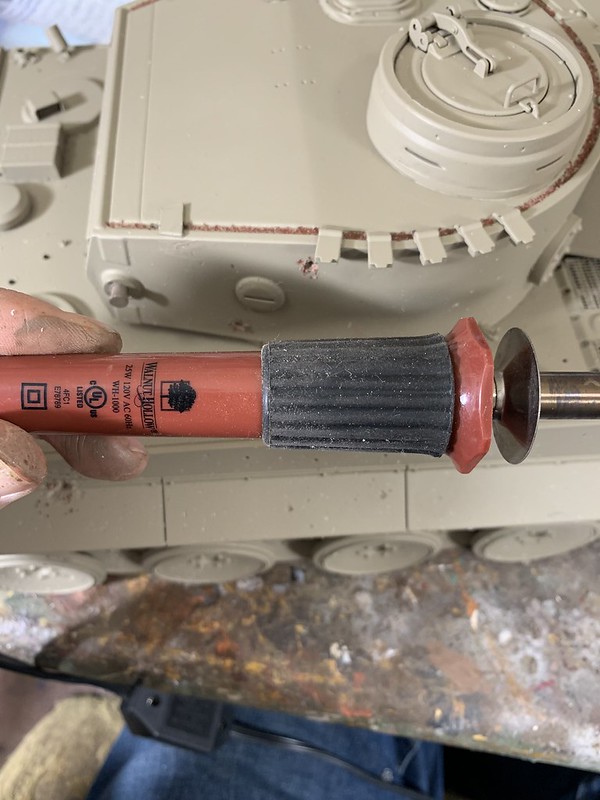
Red oxide primer - then light Dunkelgelb - then camo - then Magic Grime!
 Untitled by jon newsom, on Flickr
 Untitled by jon newsom, on Flickr
 Untitled by jon newsom, on Flickr
Then with a baby wipe, wipe it off, filters and washes at once! Magic Grime is Available on eBay!
 Untitled by jon newsom, on Flickr
touch up the impacts with some fresh steel, I paint them steel before the wash/Magic Grime and touch them up after around the edges...
Much more to come!!!
Lots of work was done before I ever started taking pictures, I didn't intend on doing a build thread but as I got about halfway through it I realize how much work it was and thought it might be useful for some of you.
I will tell you as Im sure many of you know, modeling an actual tank from photos is MUCH more difficult than just doing a general generic build, freedom and artistic licence is gone...
355e752a77ab918685c902903de04fe8 by jon newsom, on Flickr289567b228010ce33a13569f64e84e97 by jon newsom, on FlickrGeneral builds can and often are still screwed up by someone missing obvious things, bad weathering or no weathering, the wrong colors, incorrect details like wrong wheels or whatever - BUT - lots of details can go either way and this Tiger is a great example! Since I am doing this particular Tiger, I had to change the gun mantel but there were Tigers running around Kursk with the reinforced gun mantels, I had to change the Loaders parascope but there were Tigers at Kursk without a loaders scope, some Tigers had 2 lights, some had none... mine has 1 and so on, so the margin for error has left the building
Tiger_s32_2 by jon newsom, on FlickrSo basically the work that’s been done before the pictures you see is I took the Copula off very carefully from a Heng long and took the late version Coppola from the WSN and switched them. Then I deleted the loaders vision panel, ironically I realized later that this particular Tiger has a very early version vision port for the loader so I made a new one and put it on. It’s OK though because they’re very different, the early one is much more like the exact thing that is on the hatches.
This tank has the S mine launchers, it has the air filters, it has one headlight, it has the spare tracks in the front so all that detail had to be added. The first pictures show the gun Mantel being taken off as the WSN is the late version that is reinforced at the vision port. My Tiger is an early one and does not have that reinforcement, I also moved the antenna from the engine deck to the correct place and added a resin screw to cover the hole and make the engine deck correct. Lots of little things.
Getting the track hangers to hang right and scratching out the bottoms for the hooks and placing them in the right position on the turret can be a challenge, they don’t go right under the other but actually off to the side slightly, it’s easy to screw this up they have to be all at the right height and the right place on the turret. 5 on one side 2 on the other, some had 3 but mine only has 2
Untitled by jon newsom, on FlickrUntitled by jon newsom, on FlickrUntitled by jon newsom, on FlickrUntitled by jon newsom, on Flickryep, to cheap to buy the grill mesh kit - just spend a hour scratch building it!
Untitled by jon newsom, on Flickrweld lines with a hot knife! If you don't have a hot knife... get one!! (and no I dont mean a soldering iron, although you can solder with one).
Untitled by jon newsom, on FlickrUntitled by jon newsom, on FlickrLots of impacts! all from 76mm, some small some large, the difference is not the size of the shell but rather the range it is fired at, long distance shots rarely did much to the Tigers front and between the driver, commander, loader and gunner they were rarely missed out in front, but those sneaky Russians, they would use a trick in which one 76mm would open up on a Tiger from far away, giving away their position and Tiger would assume that the crew is inexperienced but it was bait. As it got closer to destroy the gun with an HE round the real threat, a 76mm well camouflaged would try to take the Tiger from the side at close range, didn't always work but was widely used. So to model this, major impacts are left to the sides.
Untitled by jon newsom, on FlickrUsual method, drill and fill then press out.
Untitled by jon newsom, on FlickrRed oxide primer - then light Dunkelgelb - then camo - then Magic Grime!
Untitled by jon newsom, on FlickrUntitled by jon newsom, on FlickrUntitled by jon newsom, on FlickrThen with a baby wipe, wipe it off, filters and washes at once! Magic Grime is Available on eBay!
Untitled by jon newsom, on Flickrtouch up the impacts with some fresh steel, I paint them steel before the wash/Magic Grime and touch them up after around the edges...
Much more to come!!!