Brummbar

All things 3D printing. Printers, design, CAD, hints and tips, models built.
User avatar
baldrick131
Lance Corporal
Posts: 140
Joined: Fri Oct 04, 2019 8:46 pm
Location: March cambridgeshire
Contact:

Brummbar

Post by baldrick131 »

After finishing my Sturmtiger build I got the urge to build something else so started looking around and decided on the Brummbar as it doesnt look too hard to model up and the citadel just fits on my printer bed.
I have the intention of the parts to be screwed together where possible and I am going to upload all files to Thingiverse when it is been put together with little to no fettling to assemble'
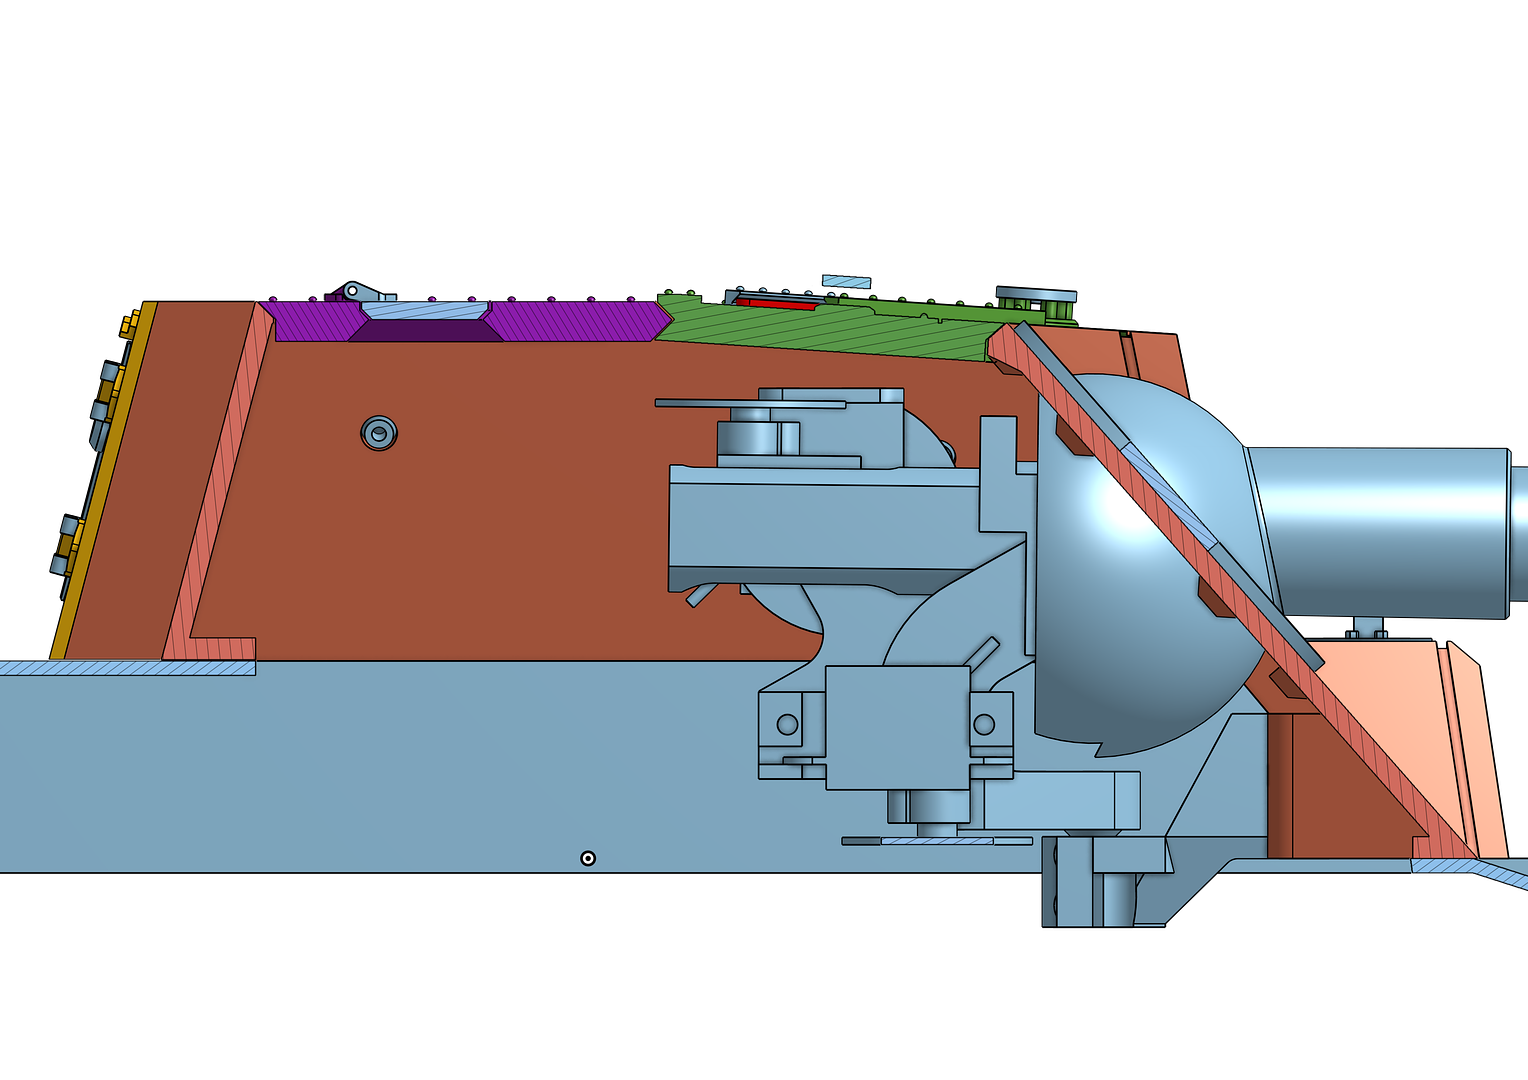
this is my first CAD model and starting point for the build.
Image
Image
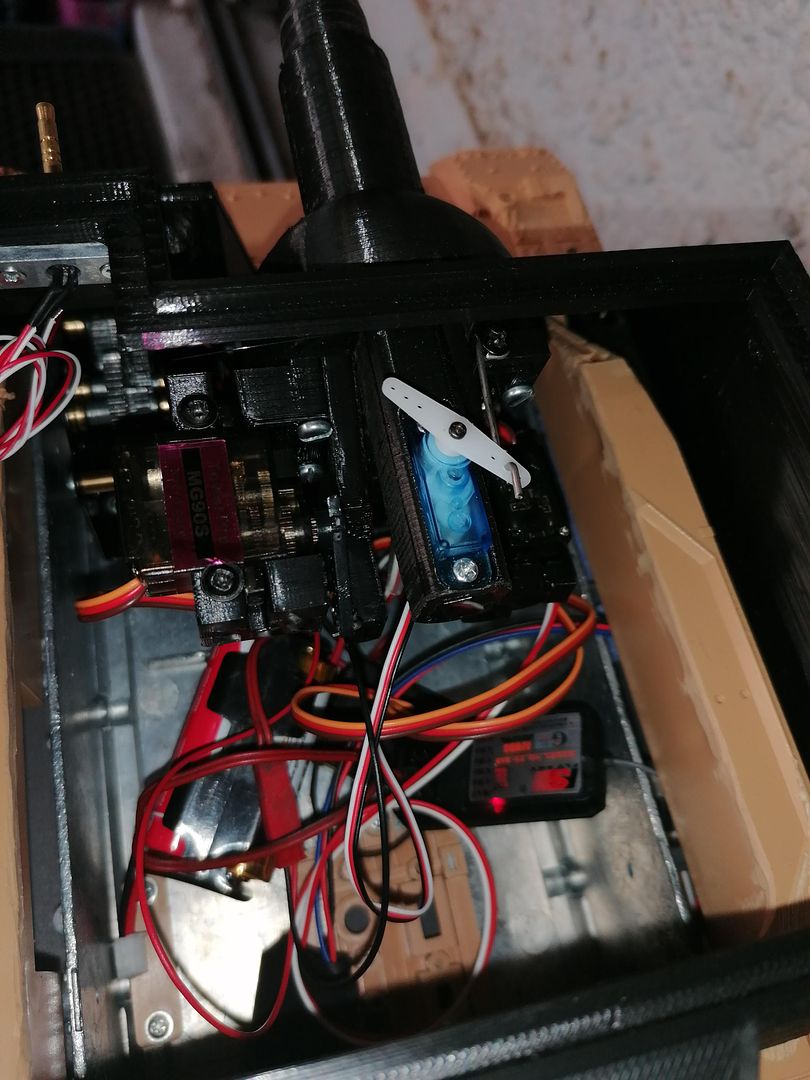
My intention is to make it have full movement with the gun plus recoil as i will be installing an IBU2U control board to run it.
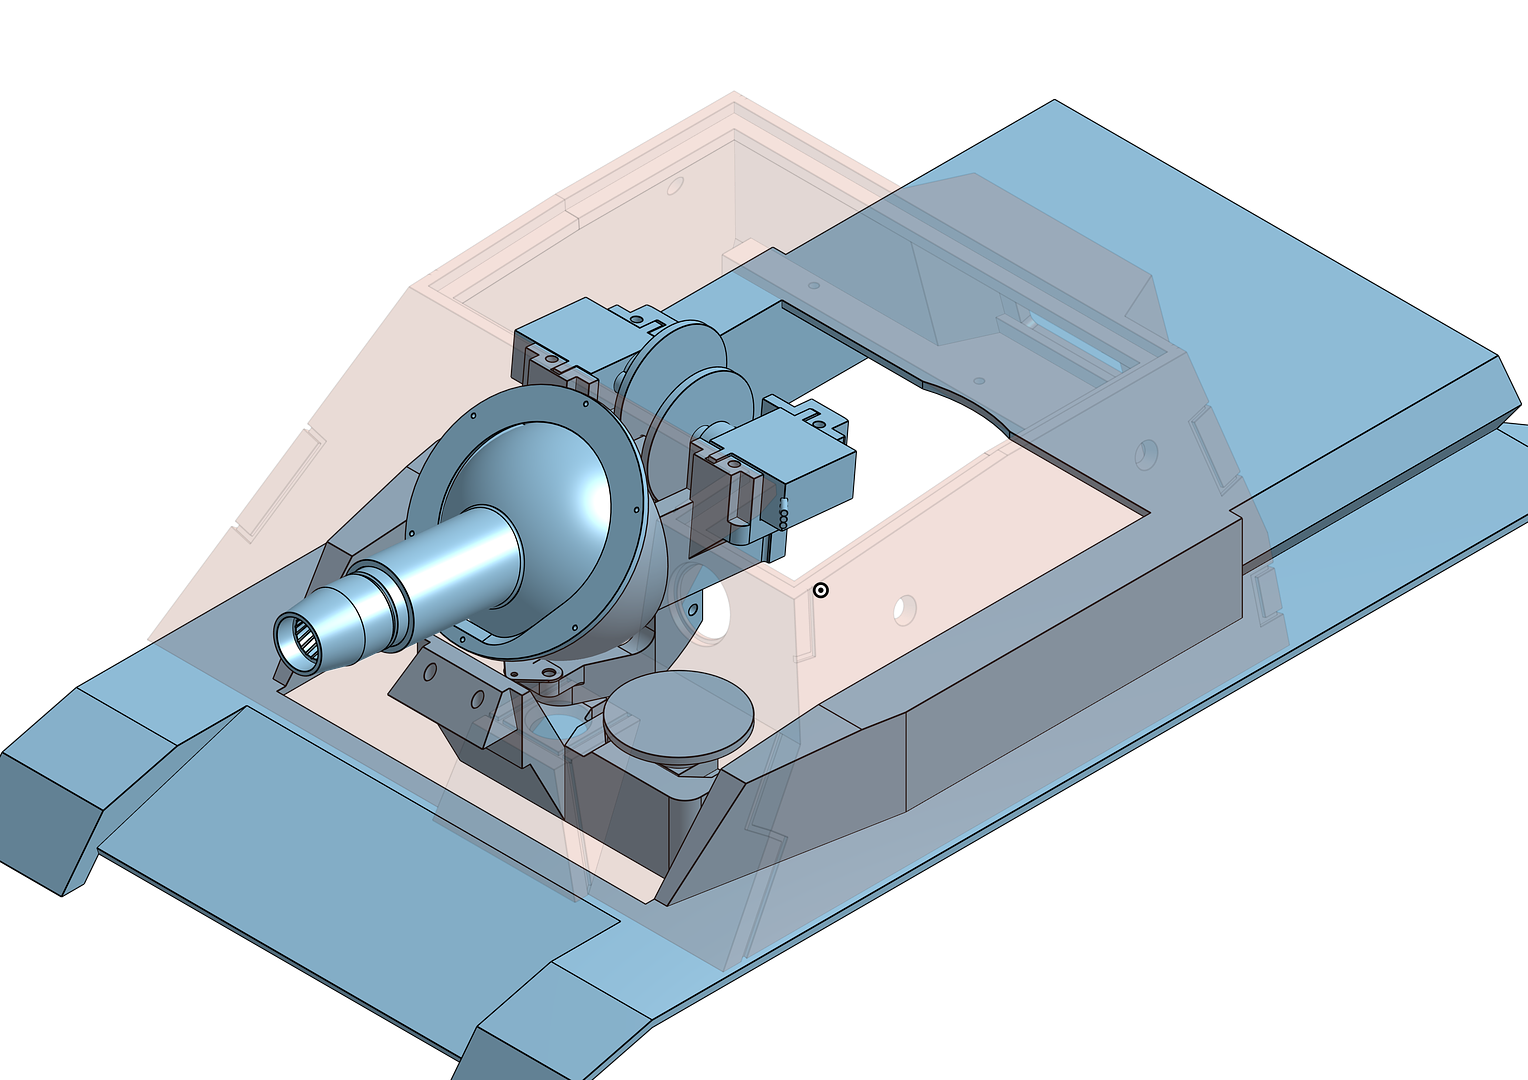
So it was time to spend some money and I ordered a Taigen Pz4 metal lower hull and upper hull as i didnt need the whole tank to get started on the project.
Image
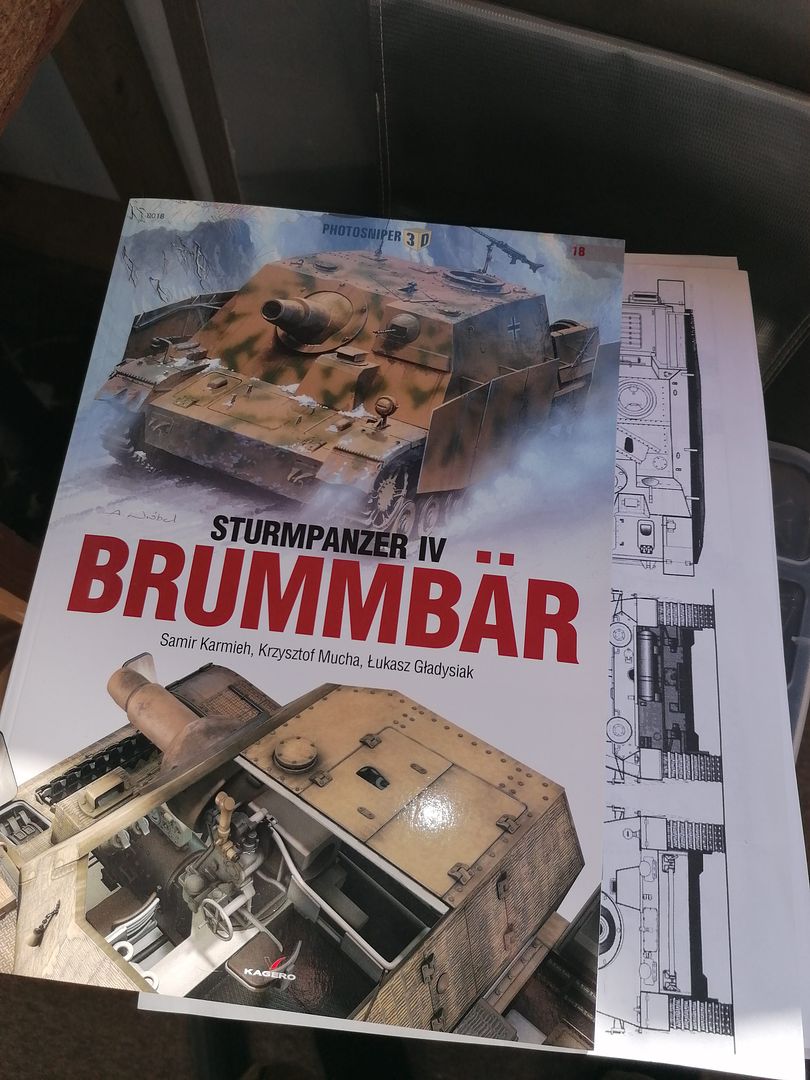
And a book to help with the build.
Image
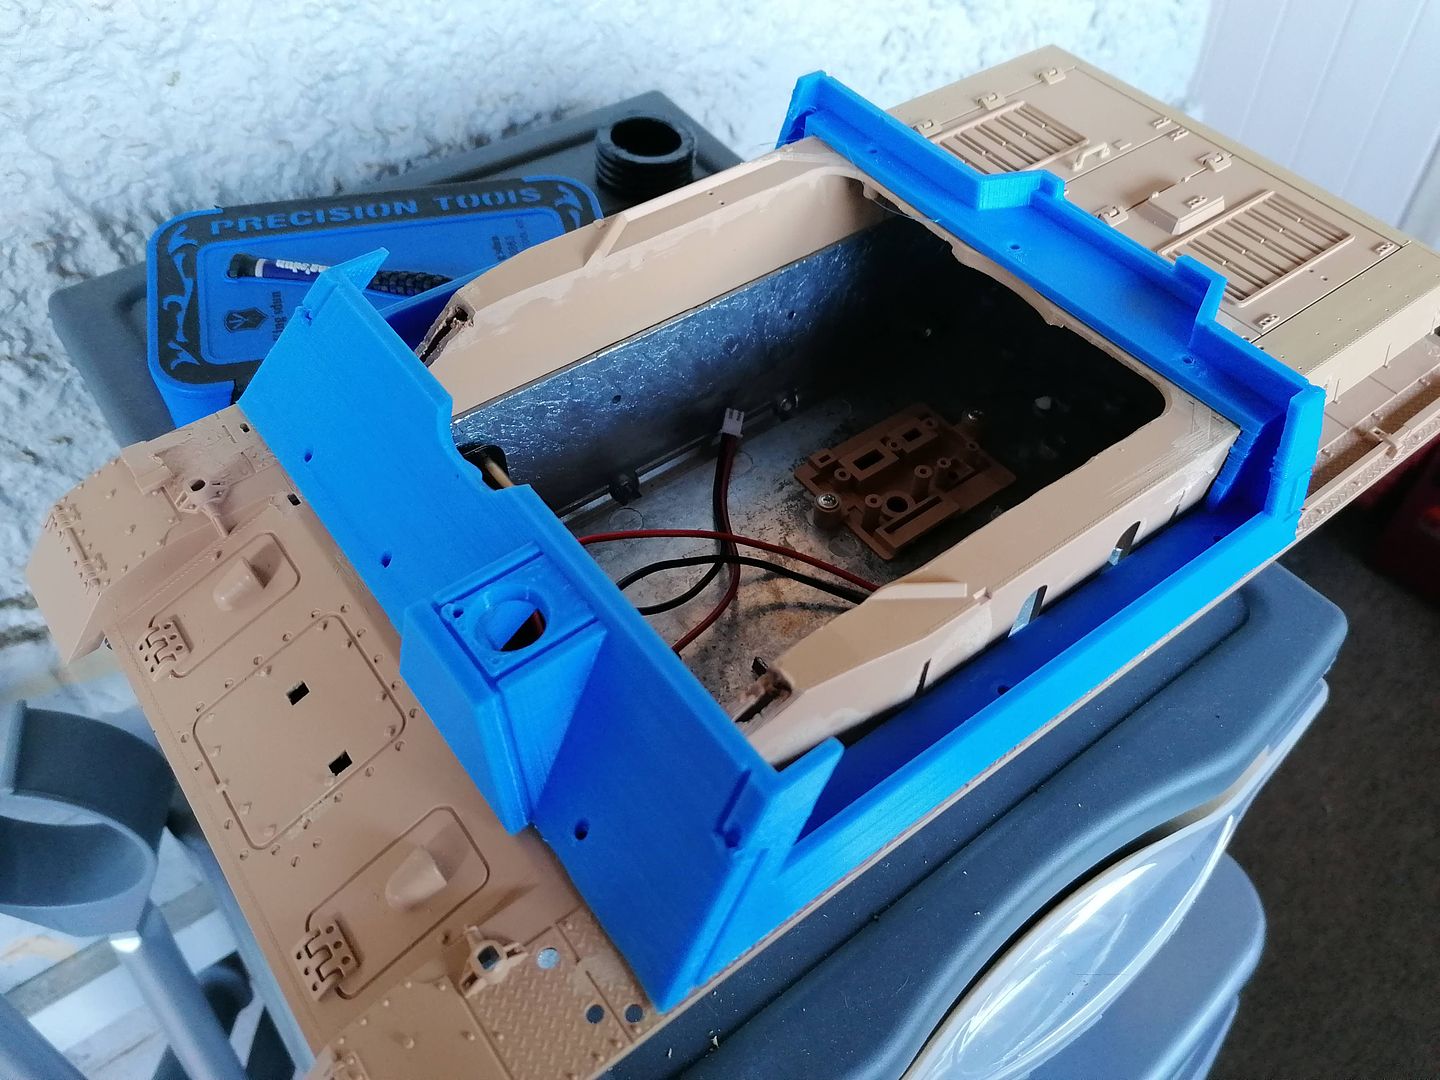
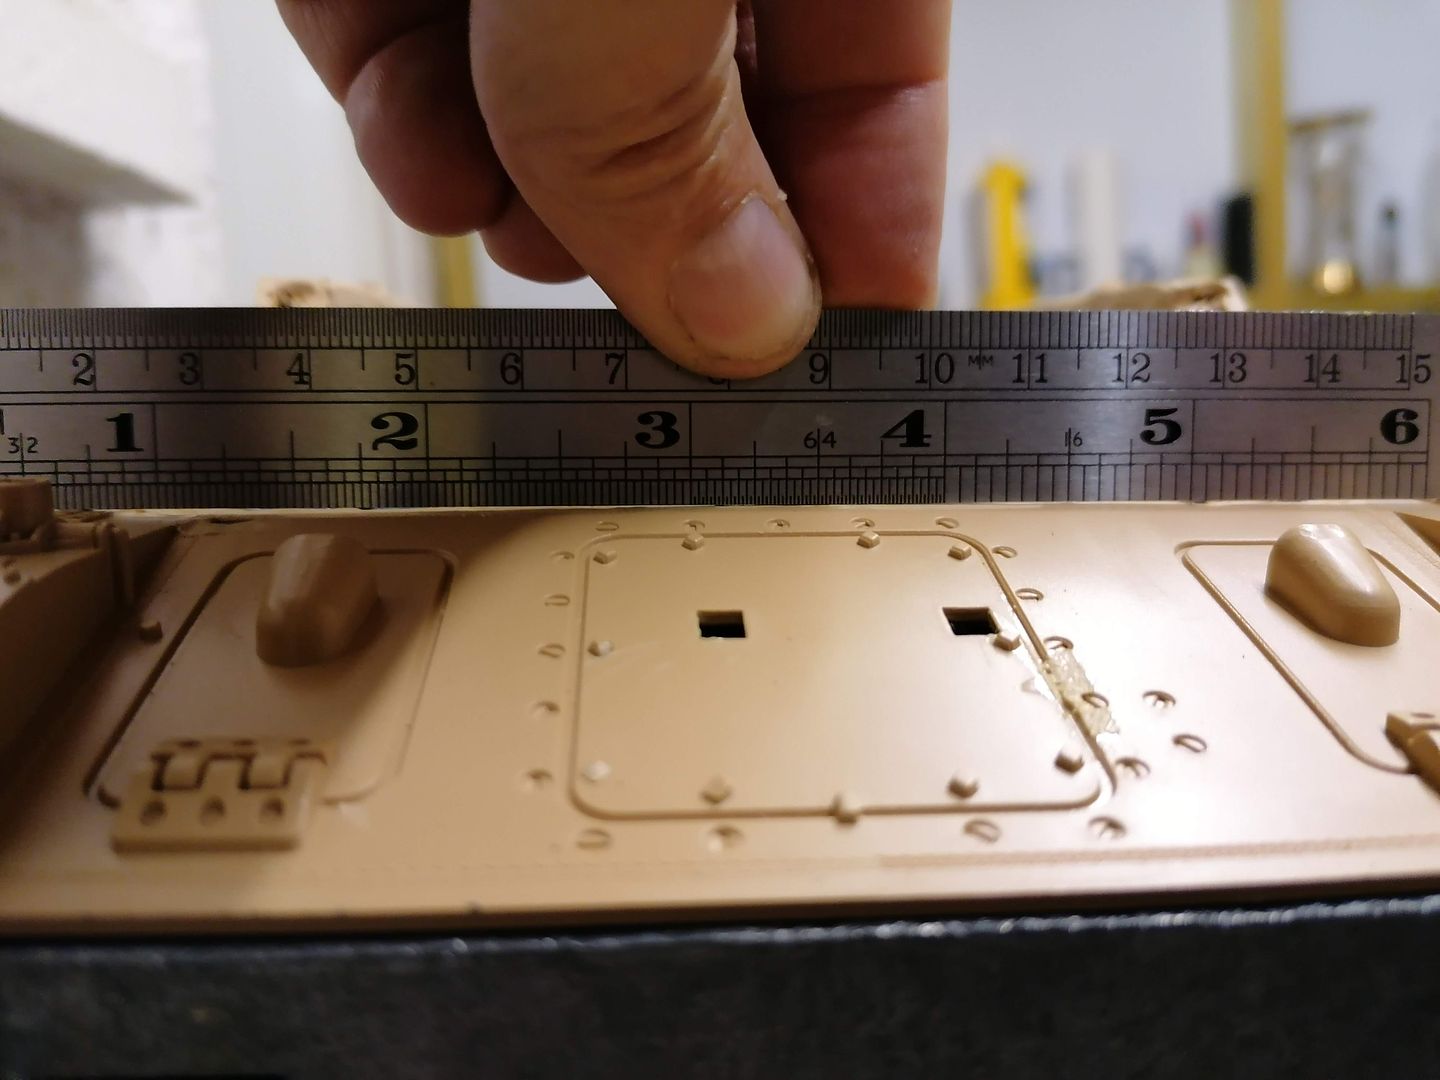
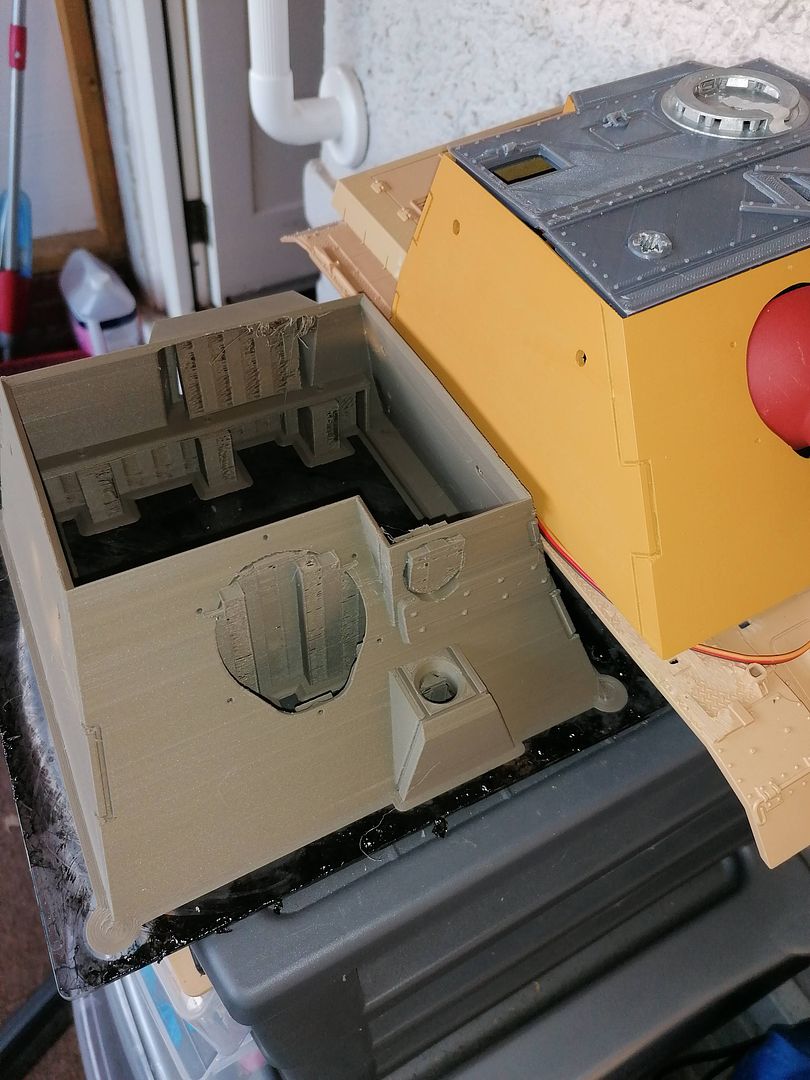
So with my plan coming together it was time to fire up the printer and print a footprint of the citadel to make sure it fitted after all the side moulded parts are removed from the front section of the hull and to work out were the hull needed cutting to accommodate it as well as a drilling guide to drill 3mm holes in the hull for fixing the citadel to the hullfor ease of fitting.
Image
Image
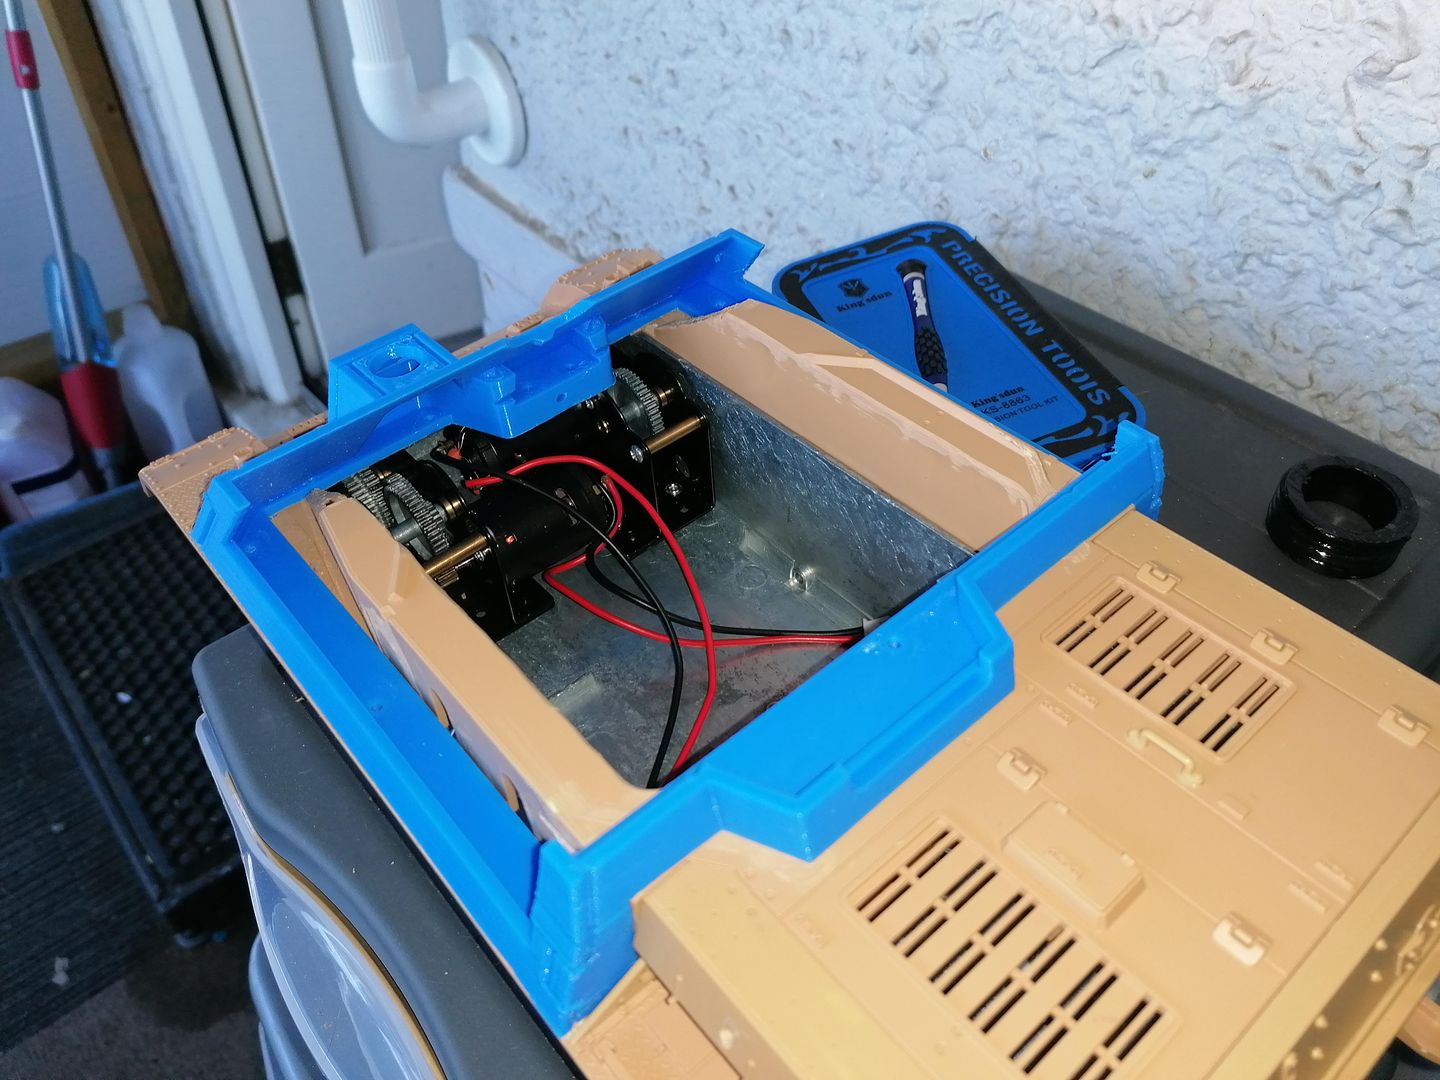
My first worry was the gearboxes I had taken out of my Sturmtiger and fitted in the Pz4 hull were hitting the hull and pushing it up slightly.
Image
Image
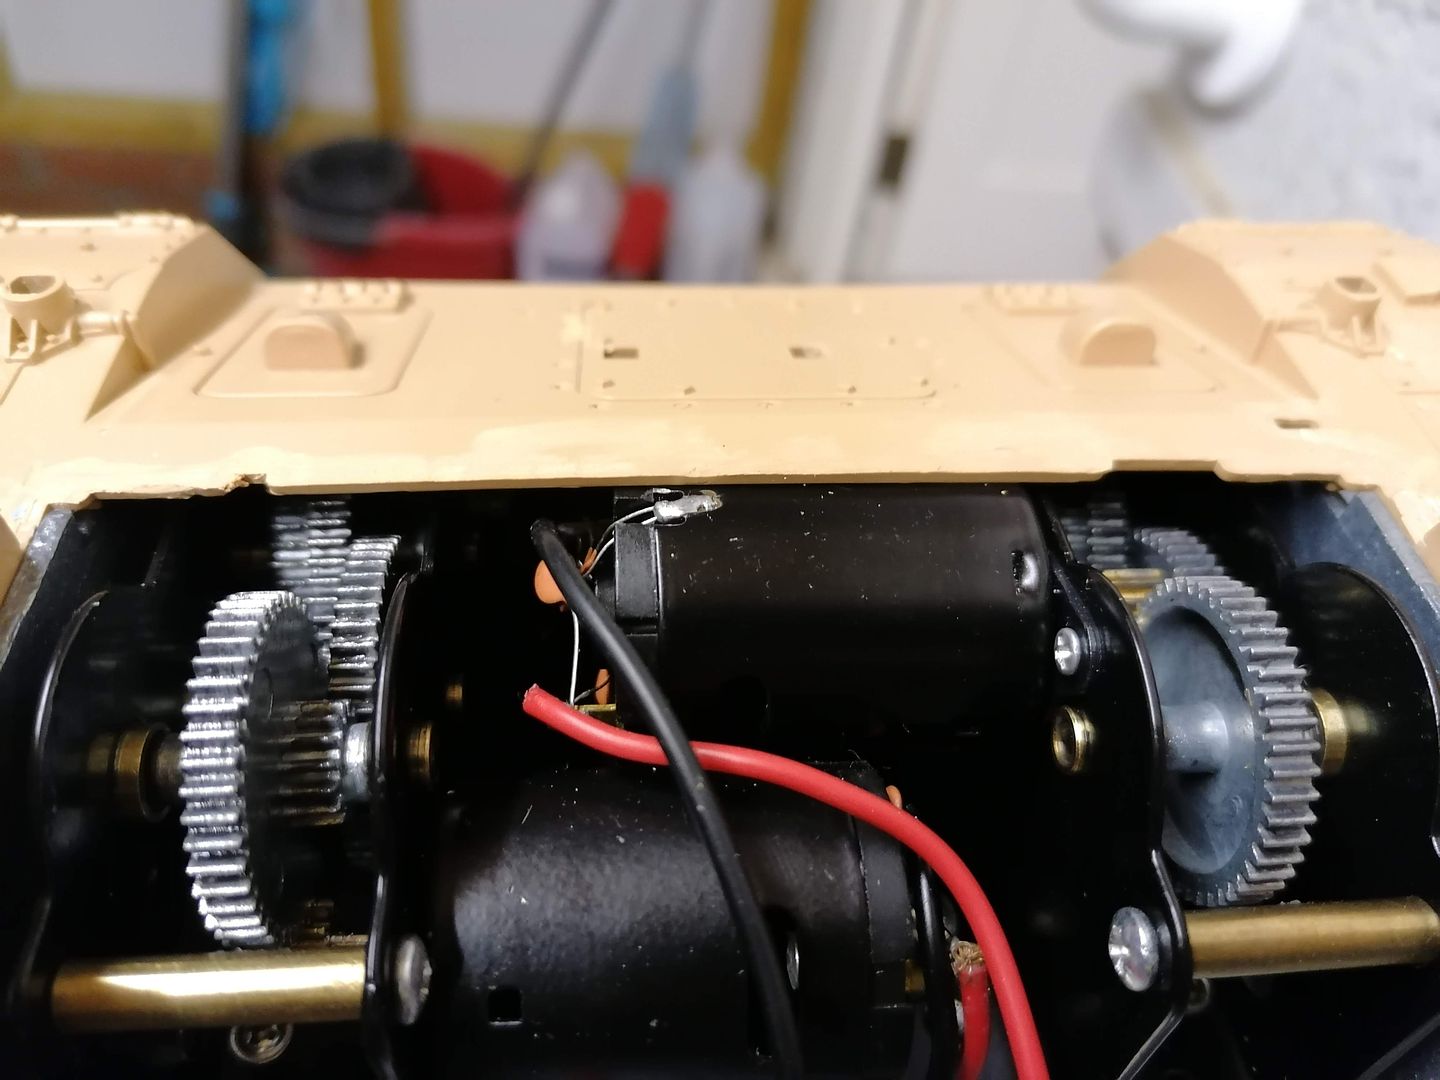
So after using a set on my sturmtiger I got a set of Taigen flat style gearboxes as I didnt want any fouling when i fit the gun into it later.
Image
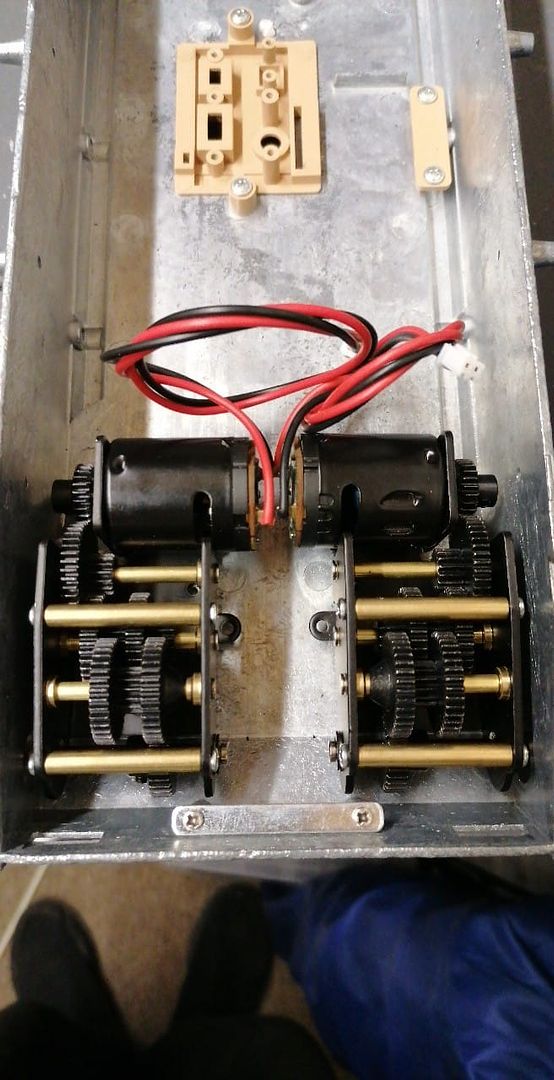
All tough they do pose a few problems of their own when it comes to fitting the two hull halves together but I will sort that out when Ihave the main parts done.
This is the first edition of the upper section with a metal tiger 1 machine gun in place for a trial fit.
Image
Image
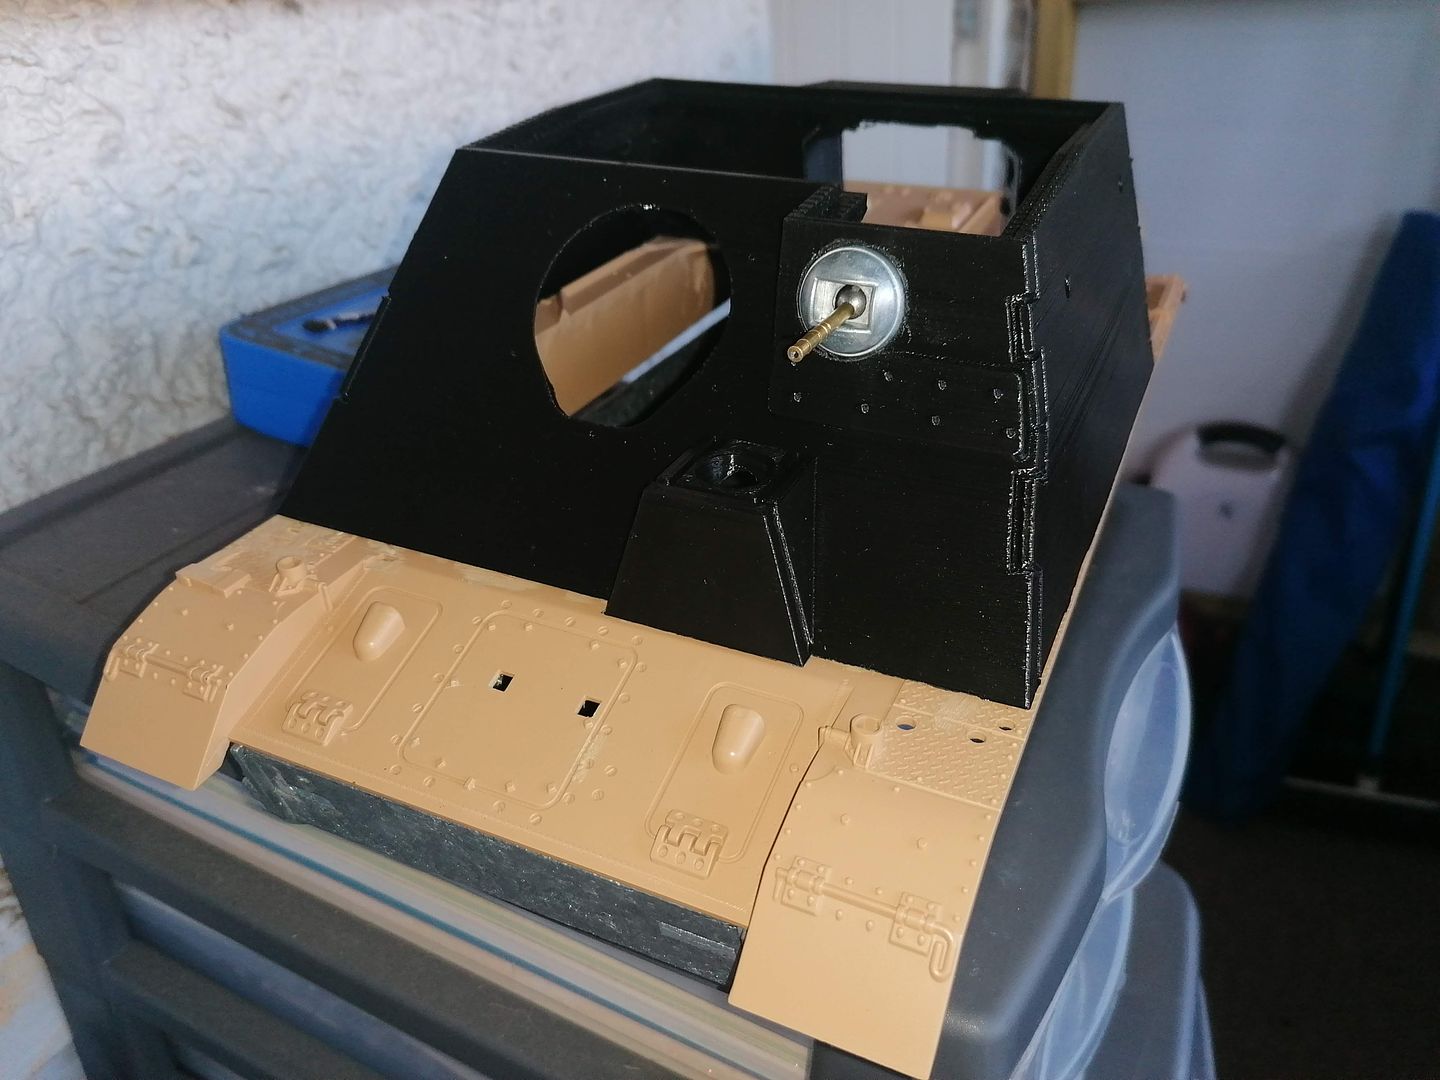
I wasnt happy with the way Iwas going to fit the top peices on to a shelf it wouldnt have been easy to get a detailed look at the edgesI gave the very top edge a design change and removed the shelf and replaced it with a tapered edge and my plan was to taper the edge of the upper sections and sit them on top and fit magnets to easily remove them.
Image
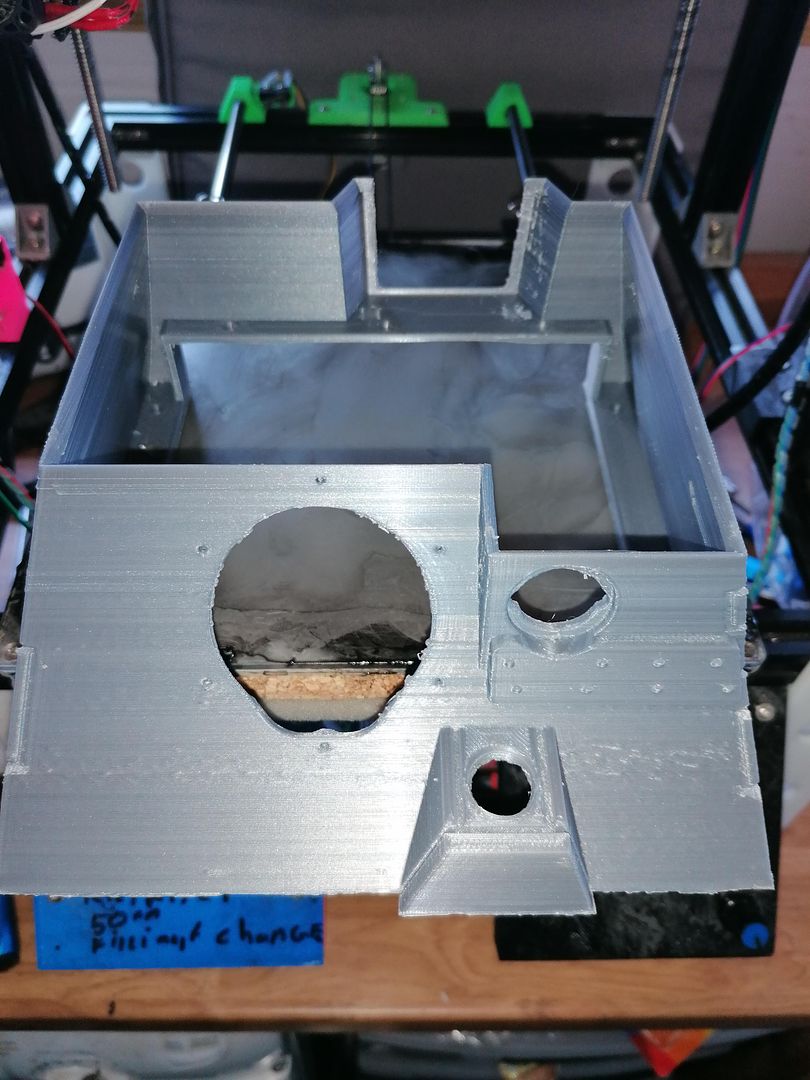
It looks rough as the filament wasnt very good and my settings were not that great but it gave me something to work on.
Image
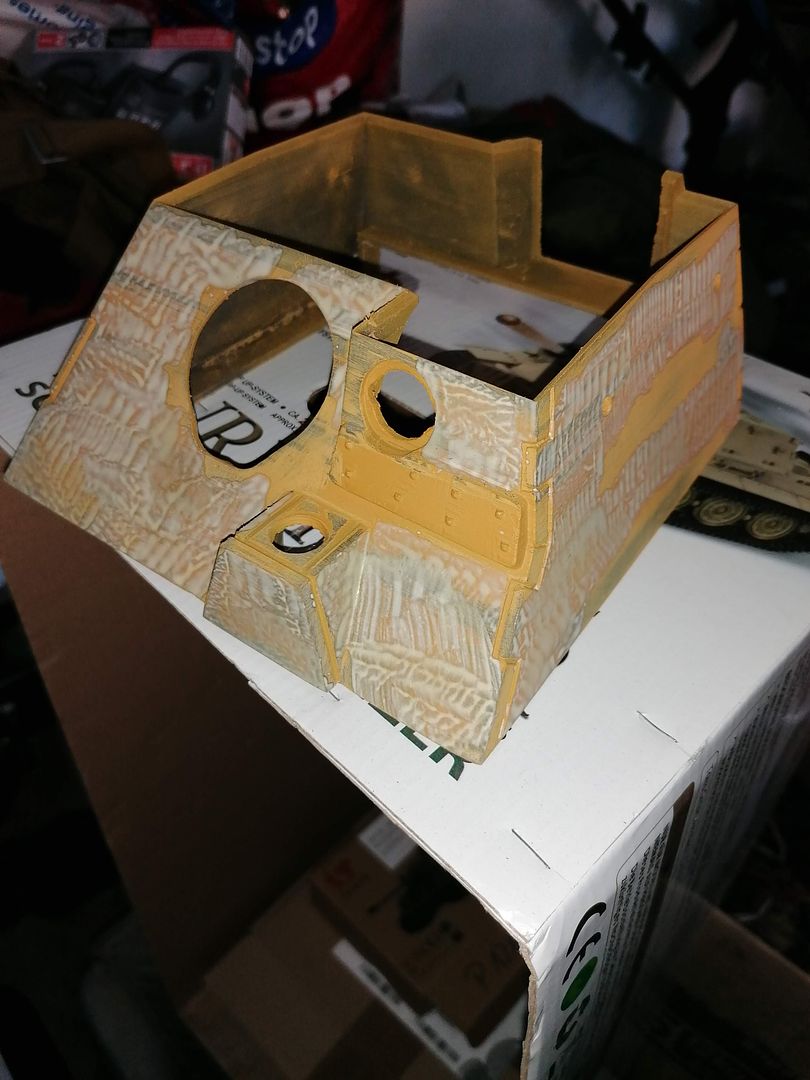
and with a bit of spray filler and sanding it didnt look too bad especially when i got the first set of roofs done.
Image
Image
But the poor results from the printing caused me to splash out on some better quality PLA filament and do some sorting of the settings on my slicer software before i did anymore printing of citadels.
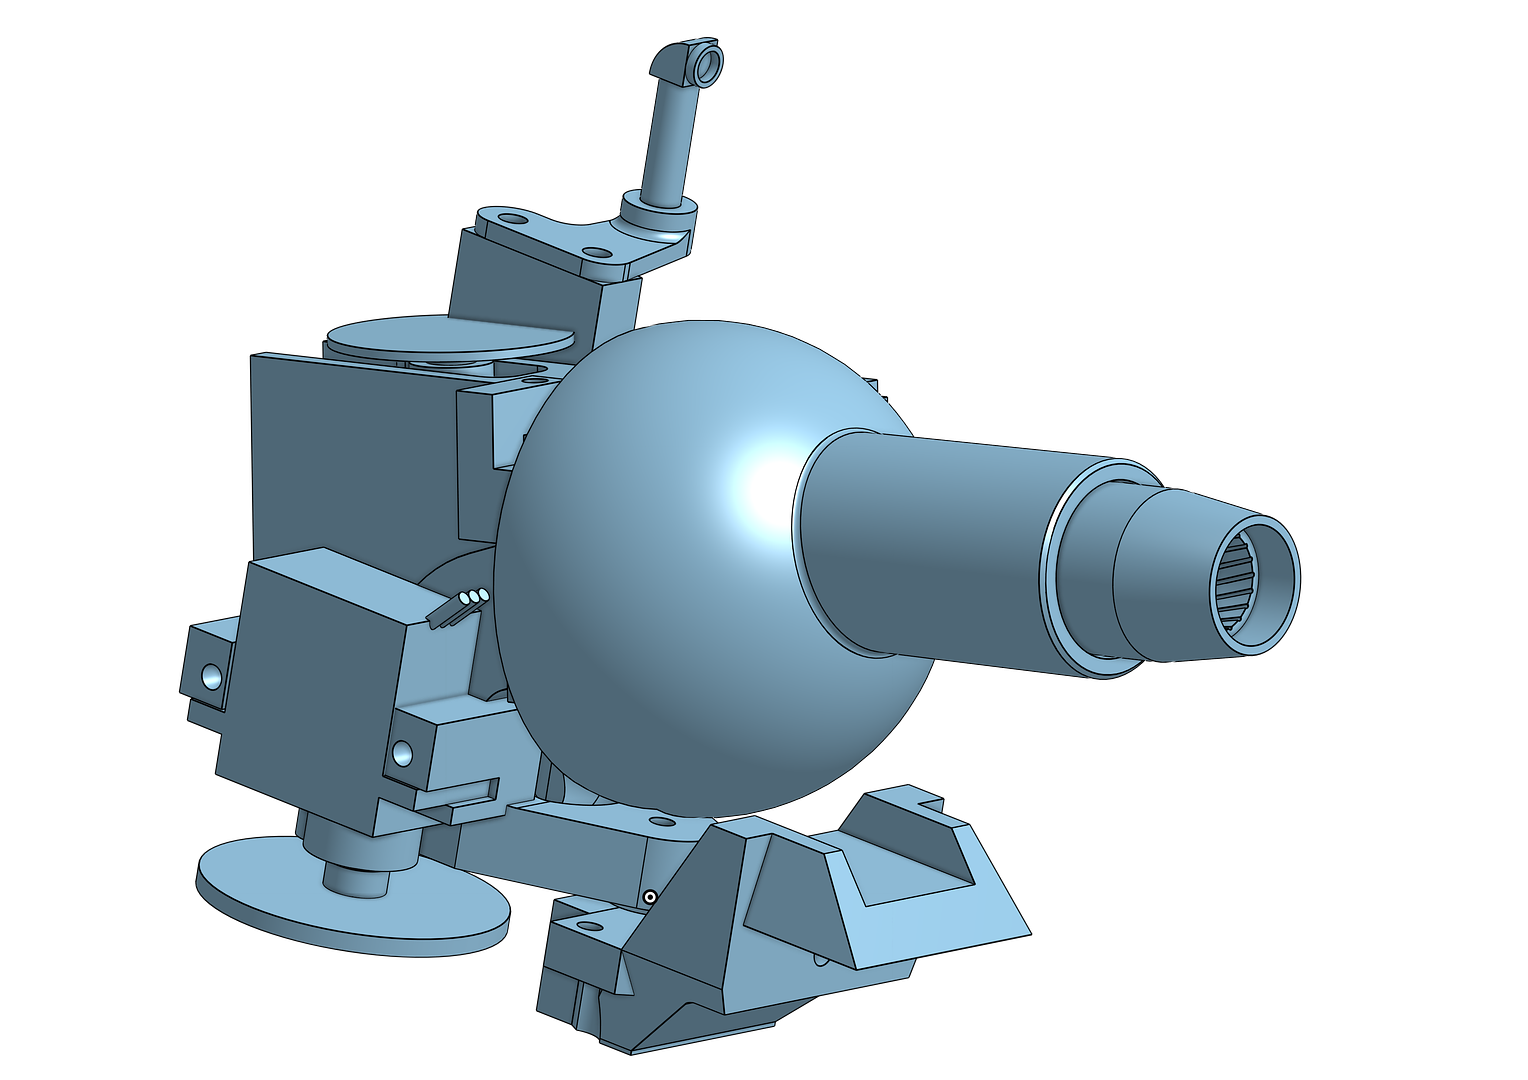
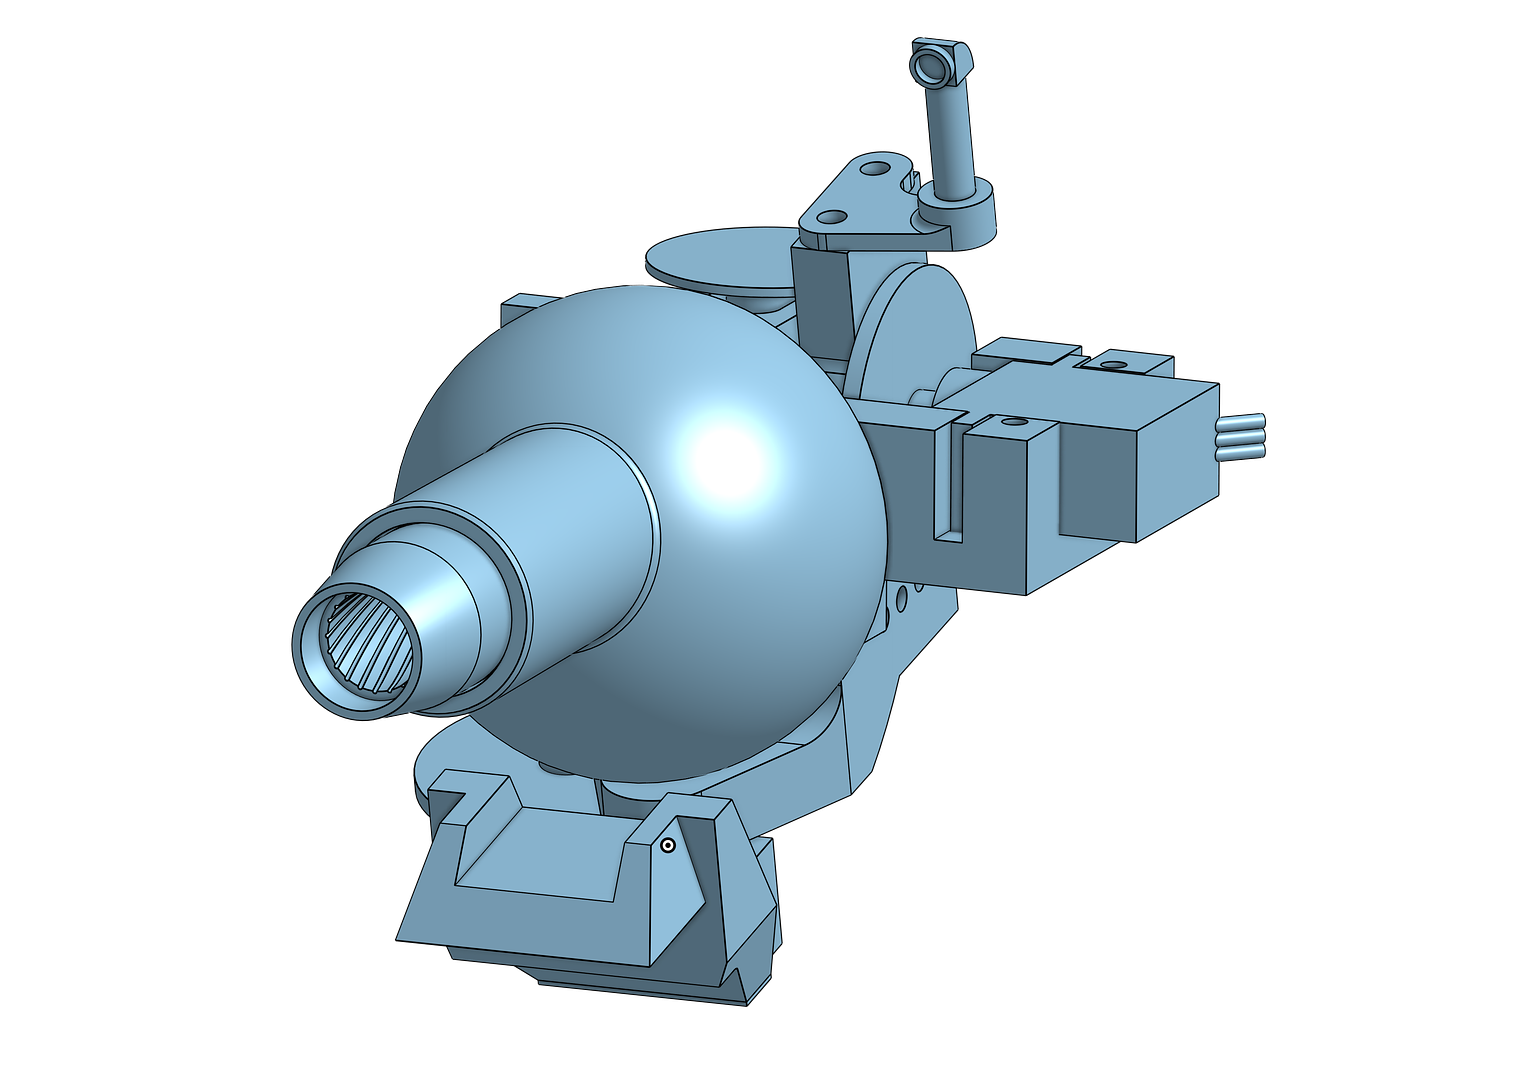
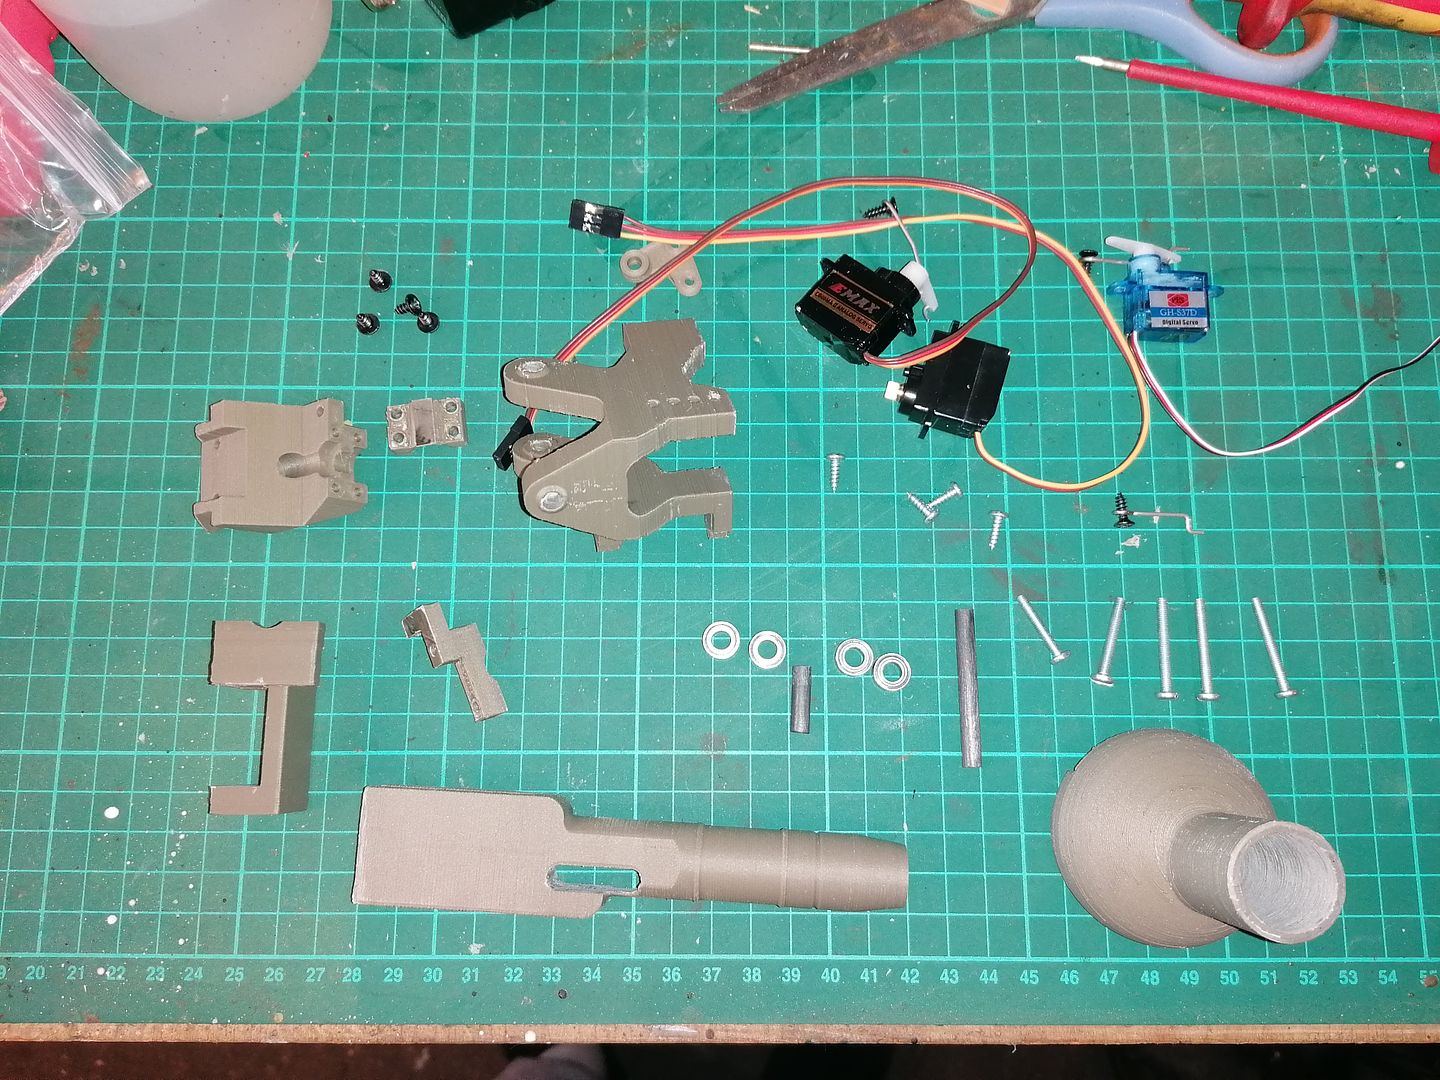
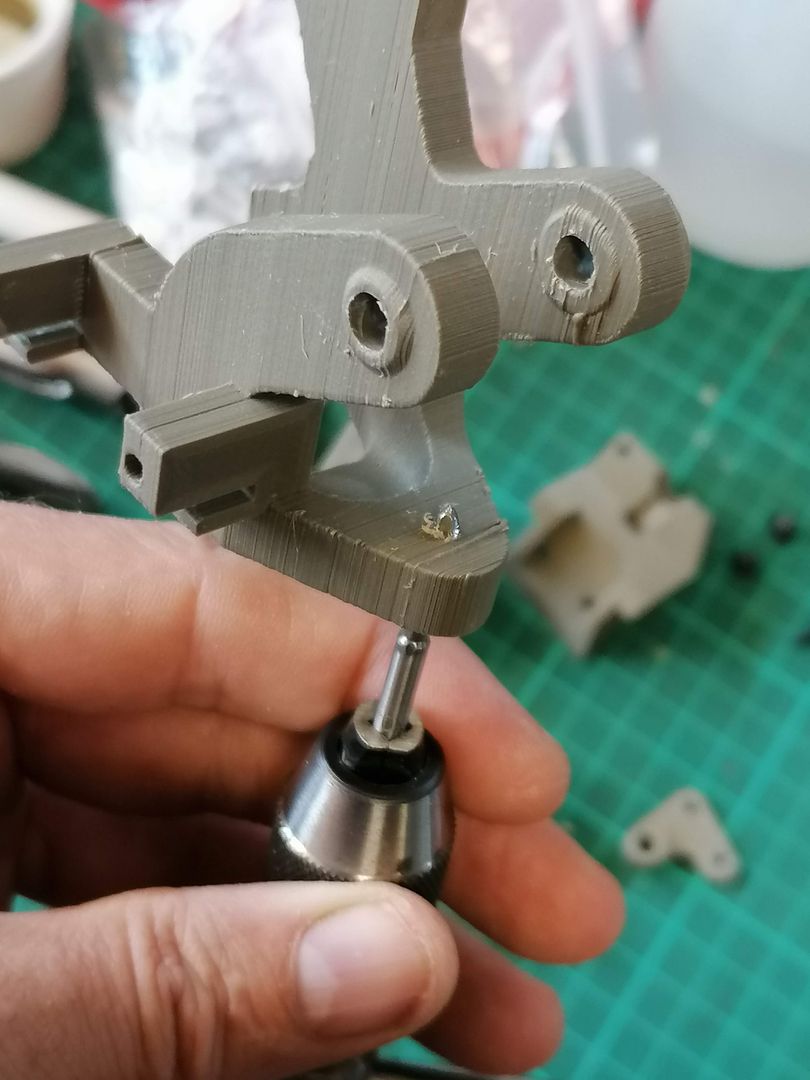
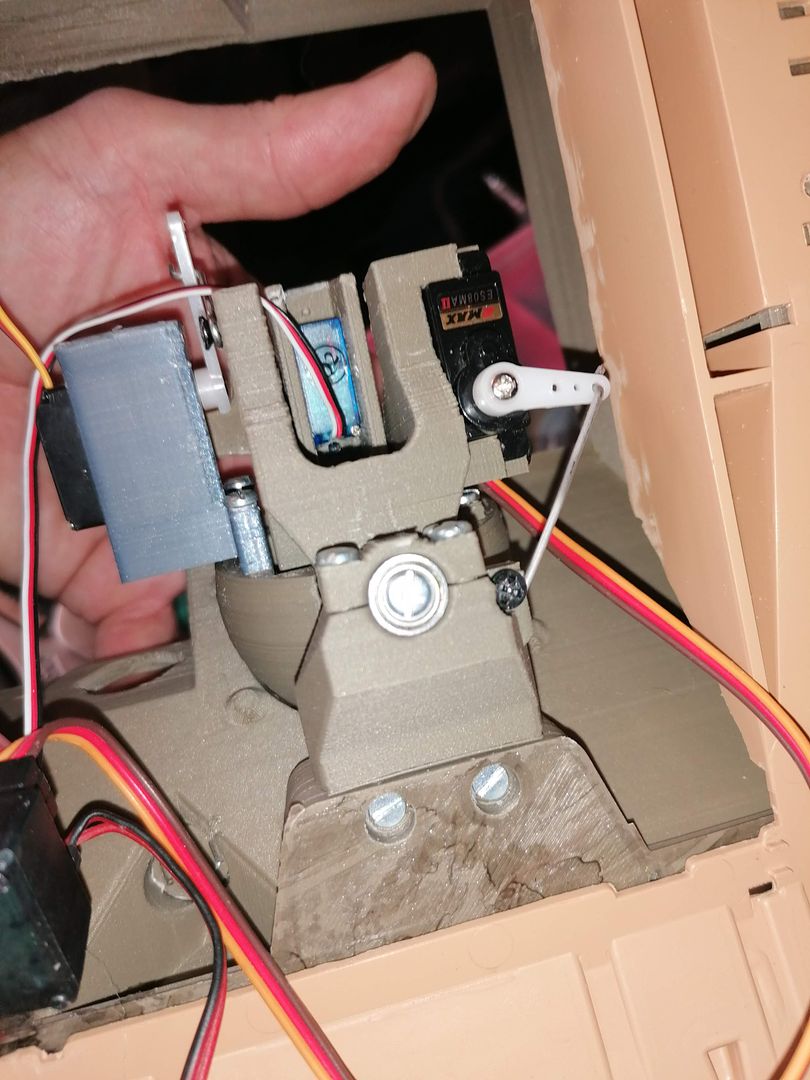
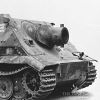
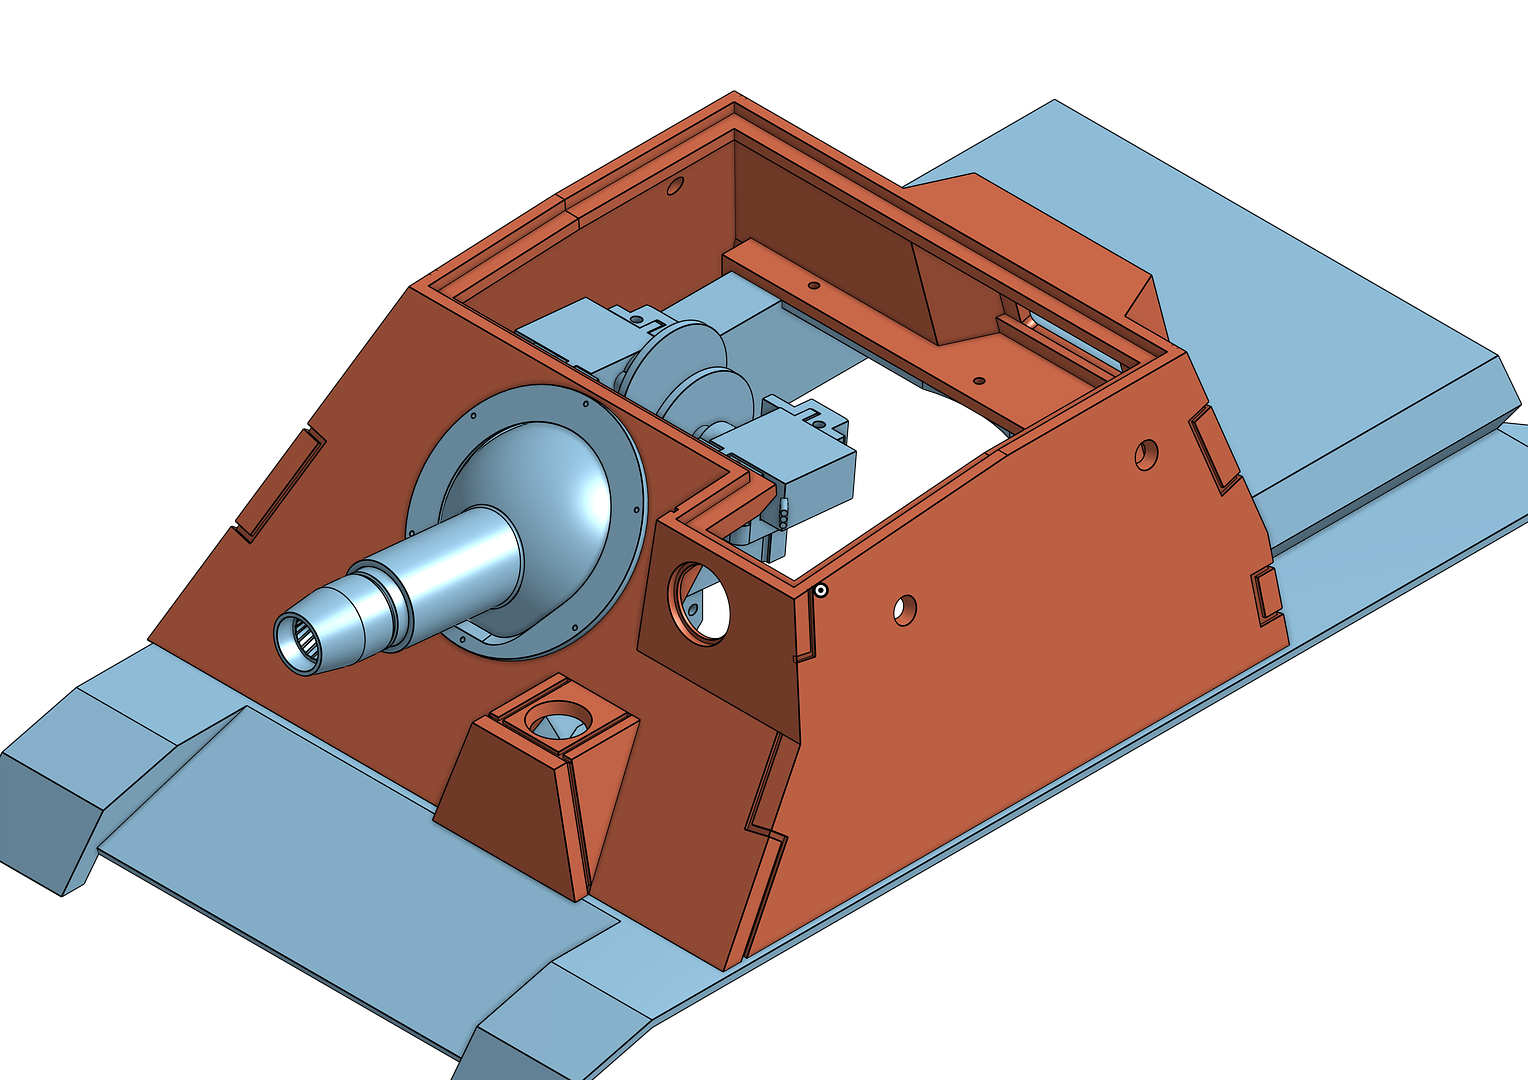
Idid however have enough of a decent filament to print of a gun assembly.
Image
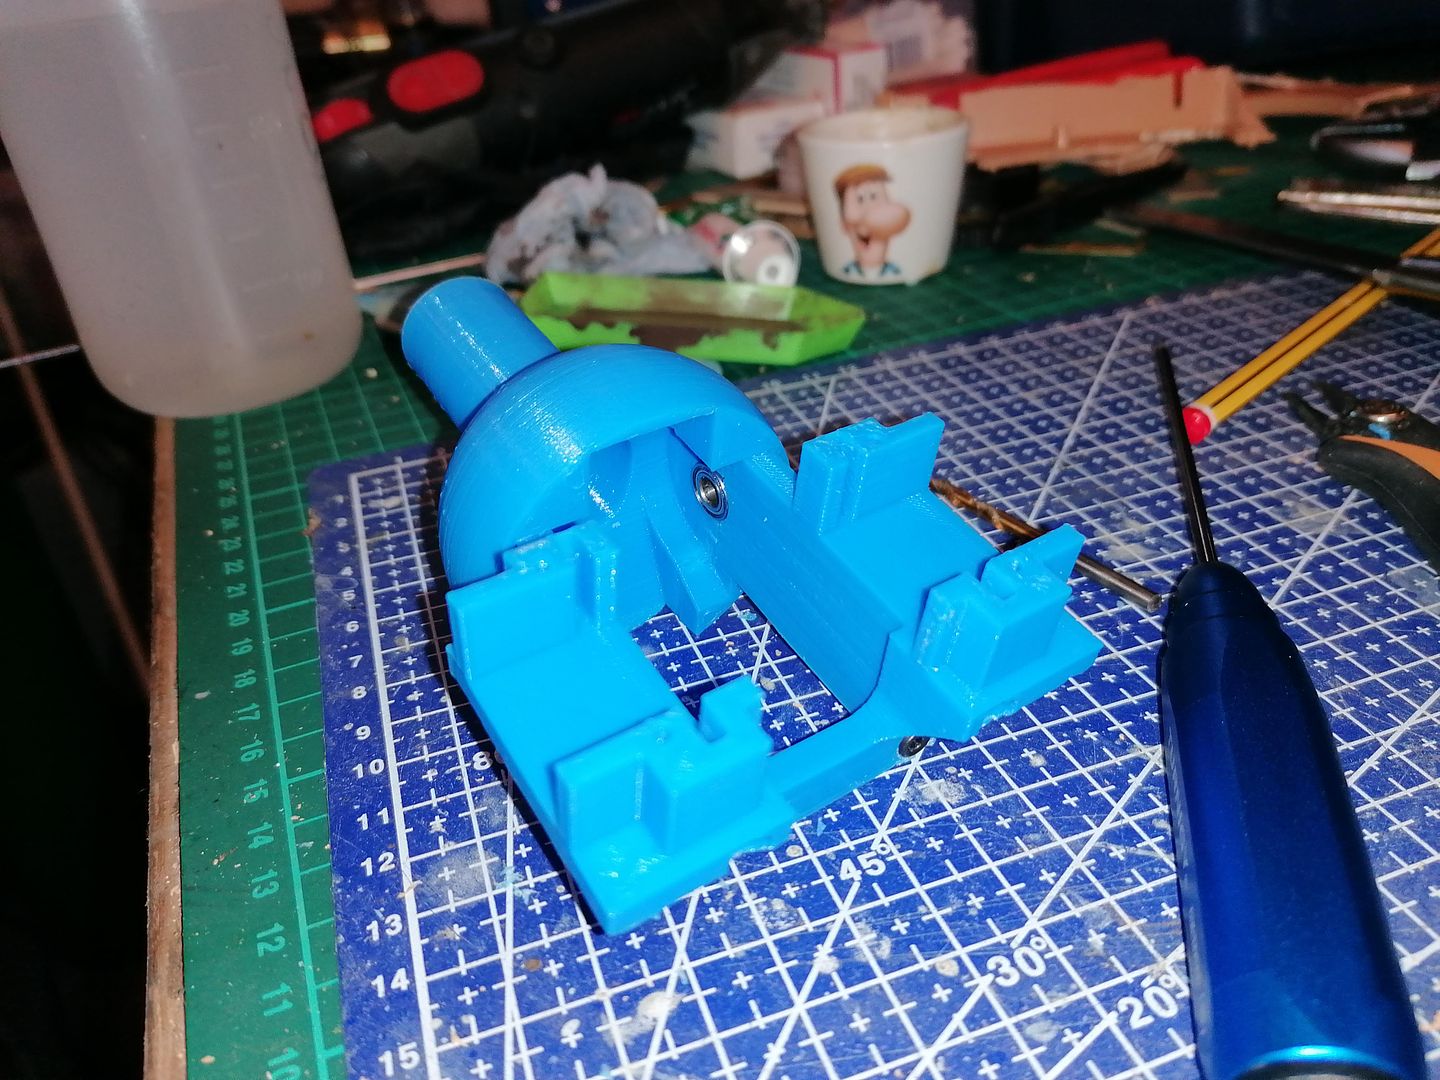
This was my first gun setup but when it was printed it soon became clear it gave the gun no space to move about in the confined space.
Image
Image
Image
Image
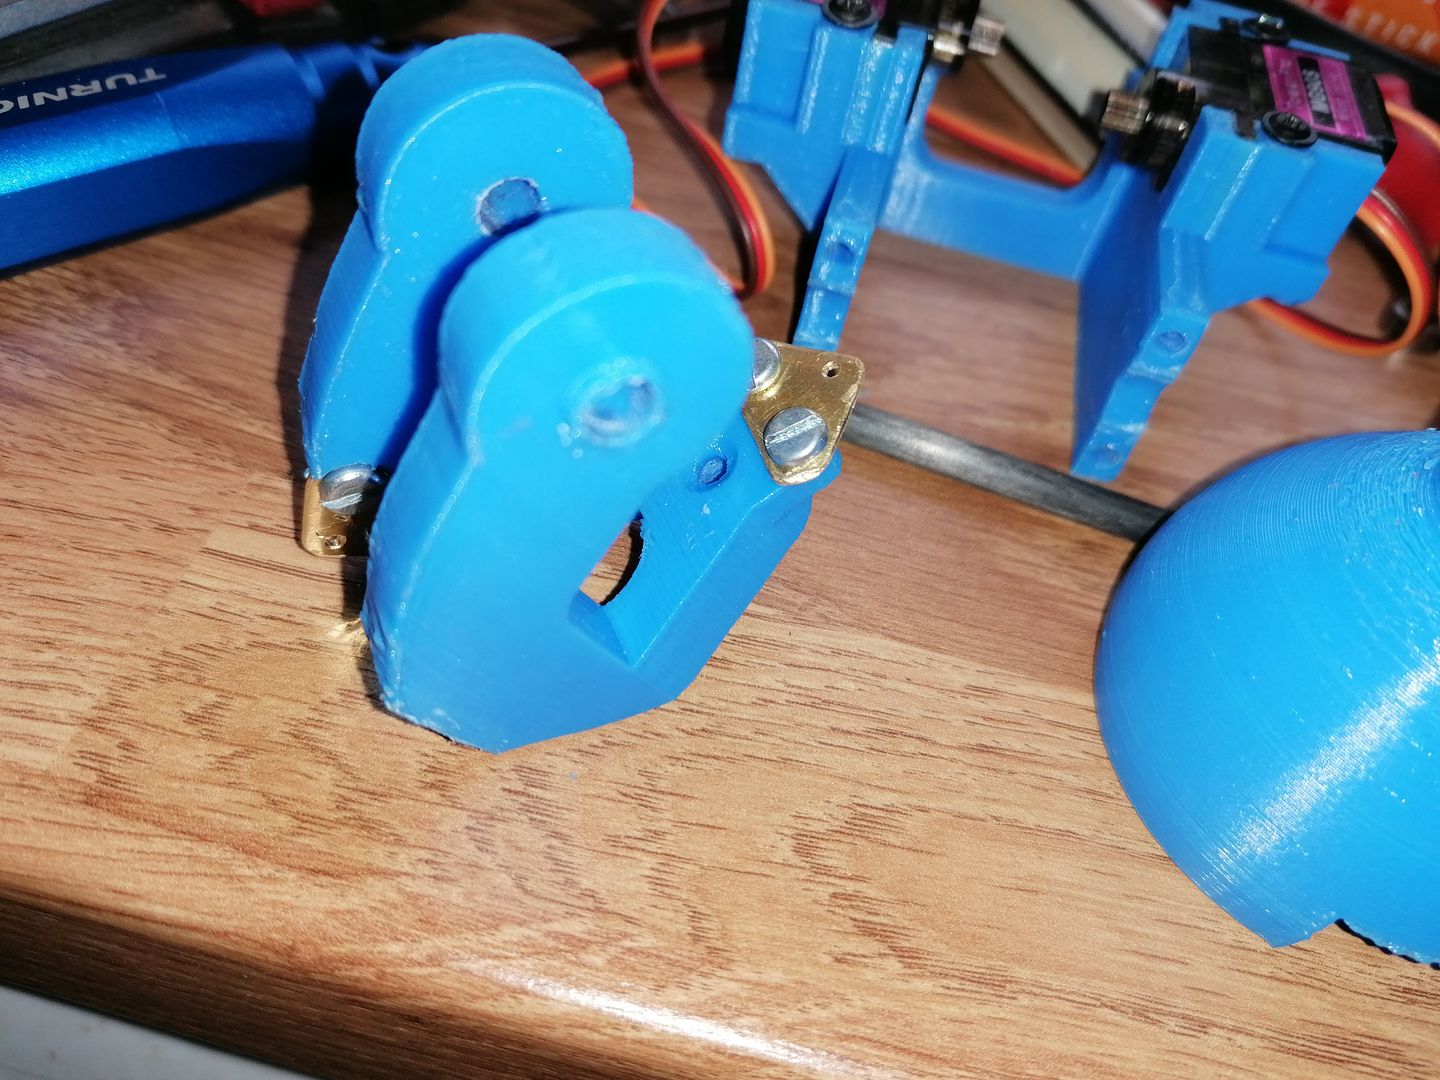
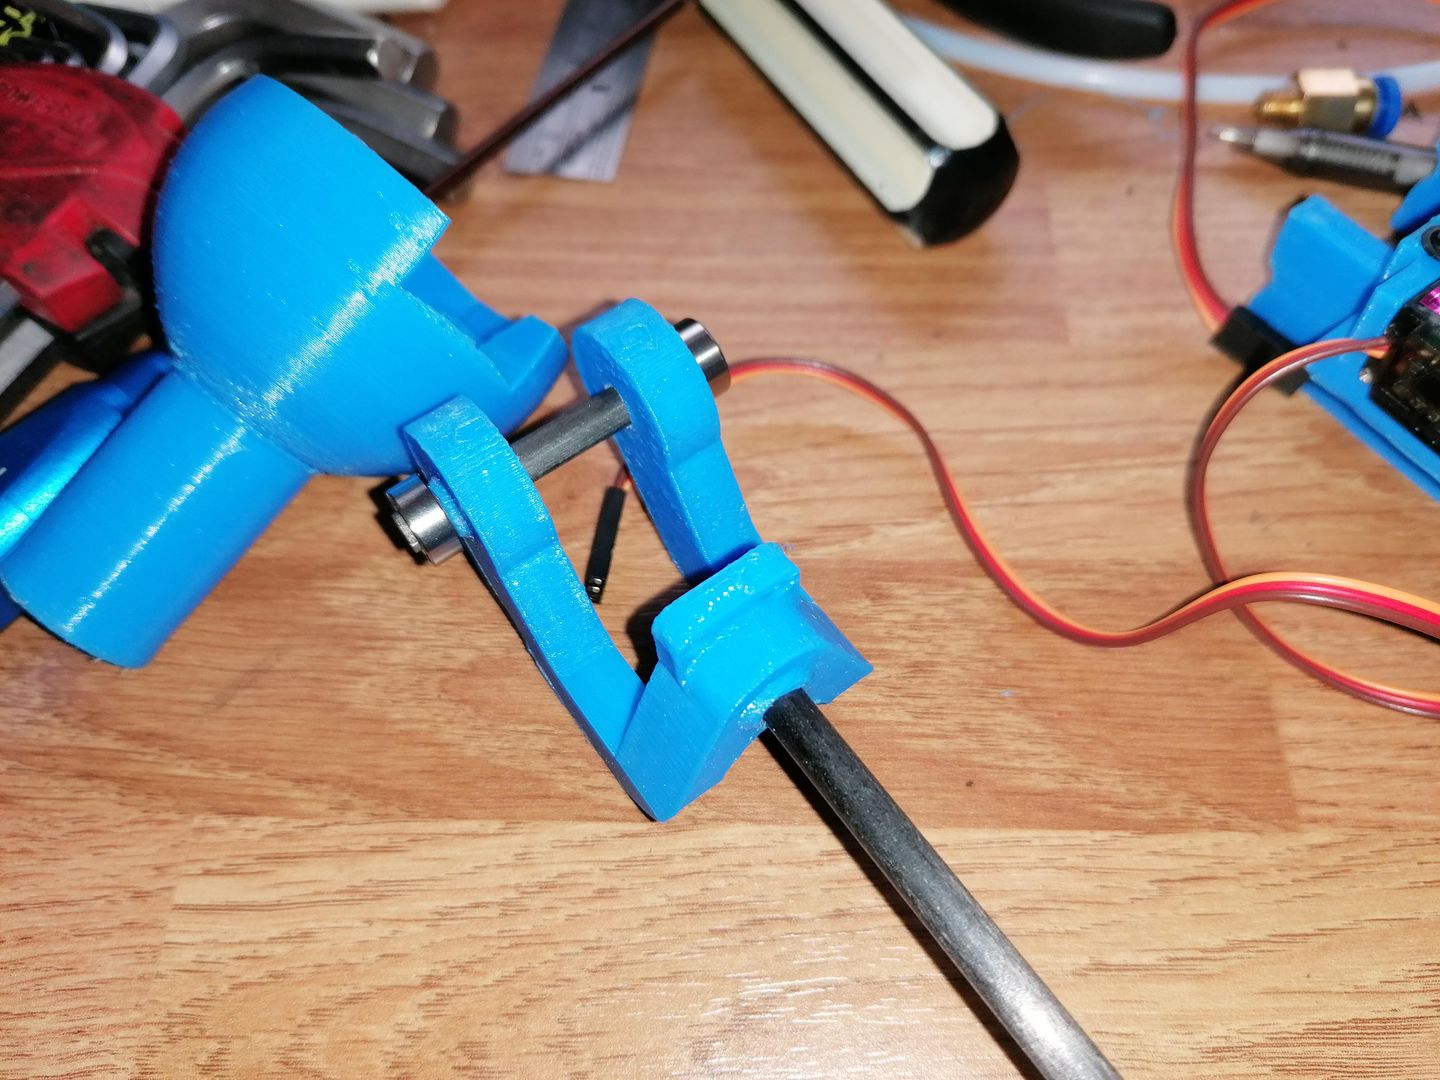
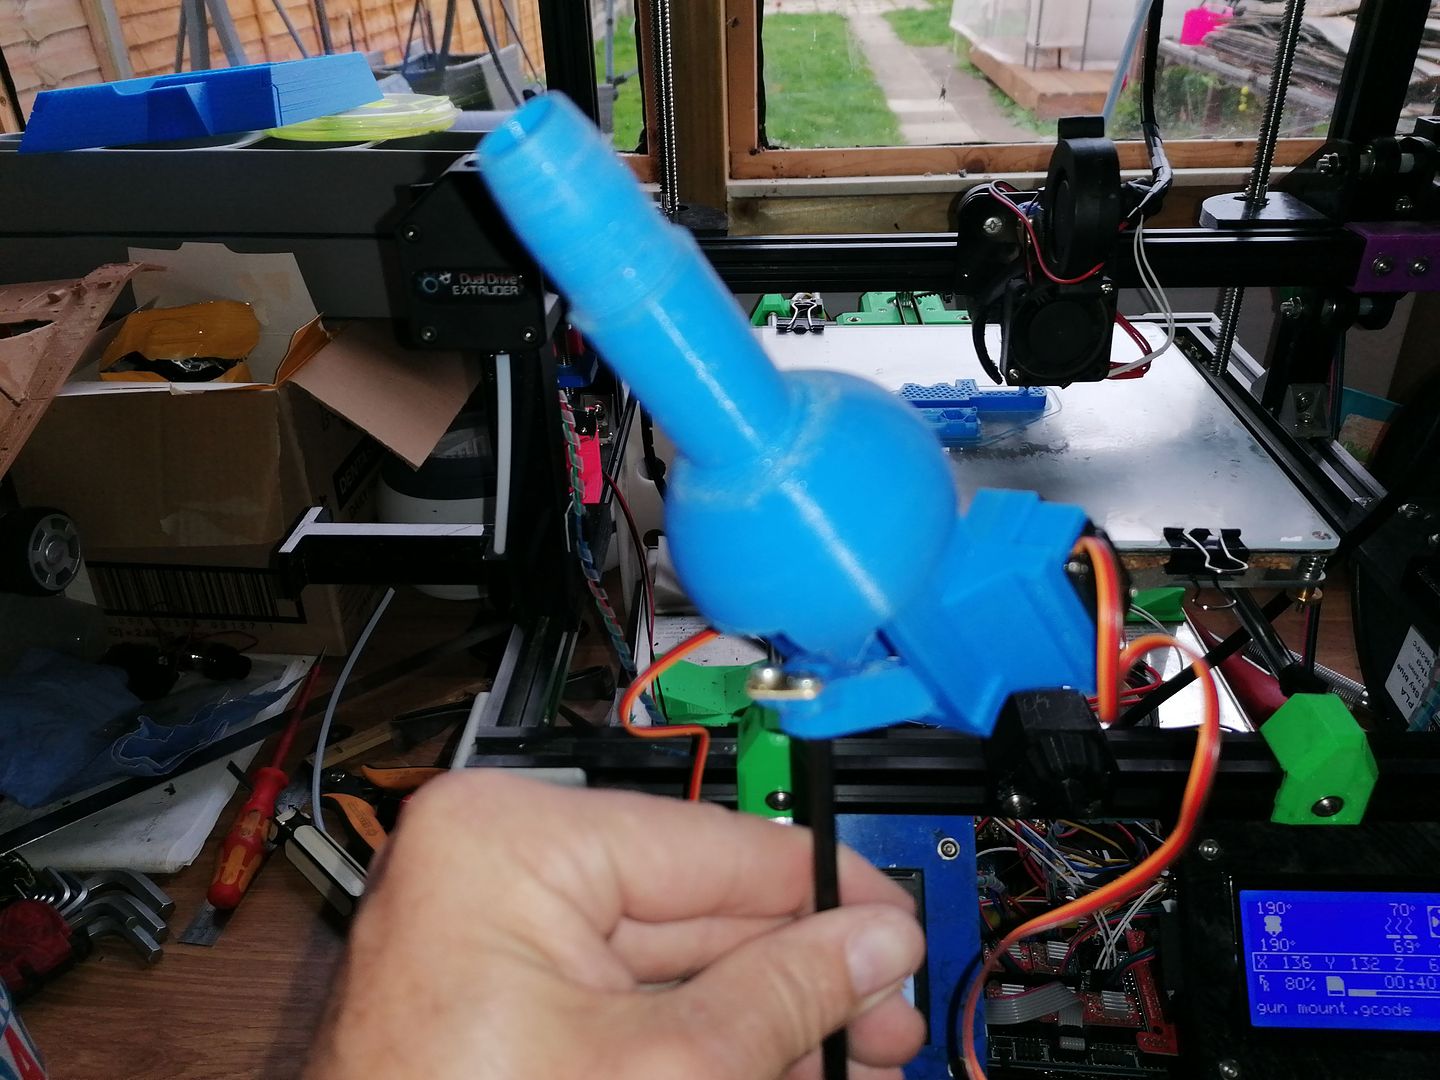
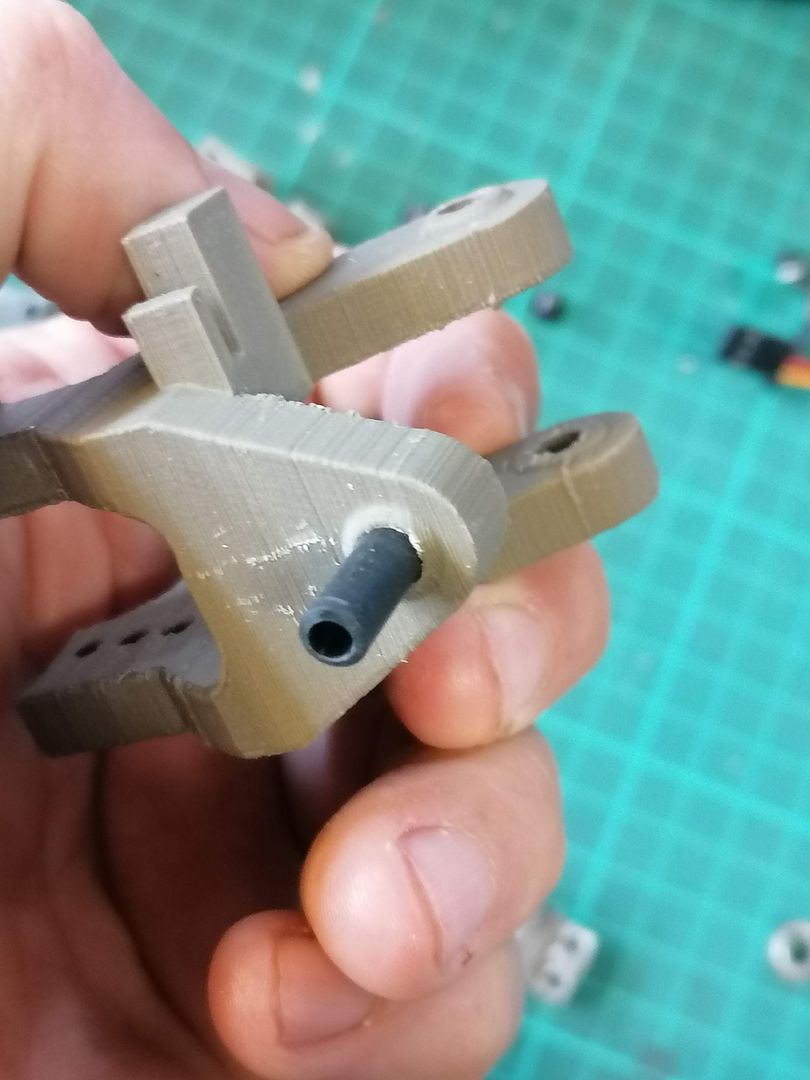
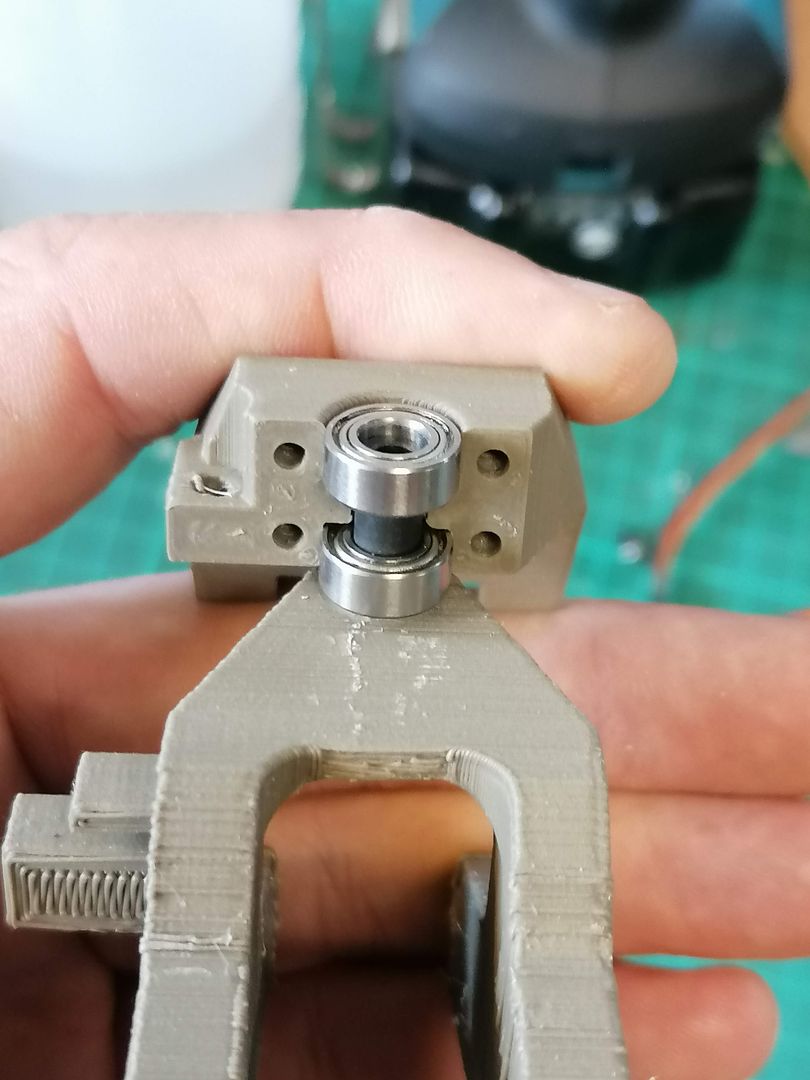
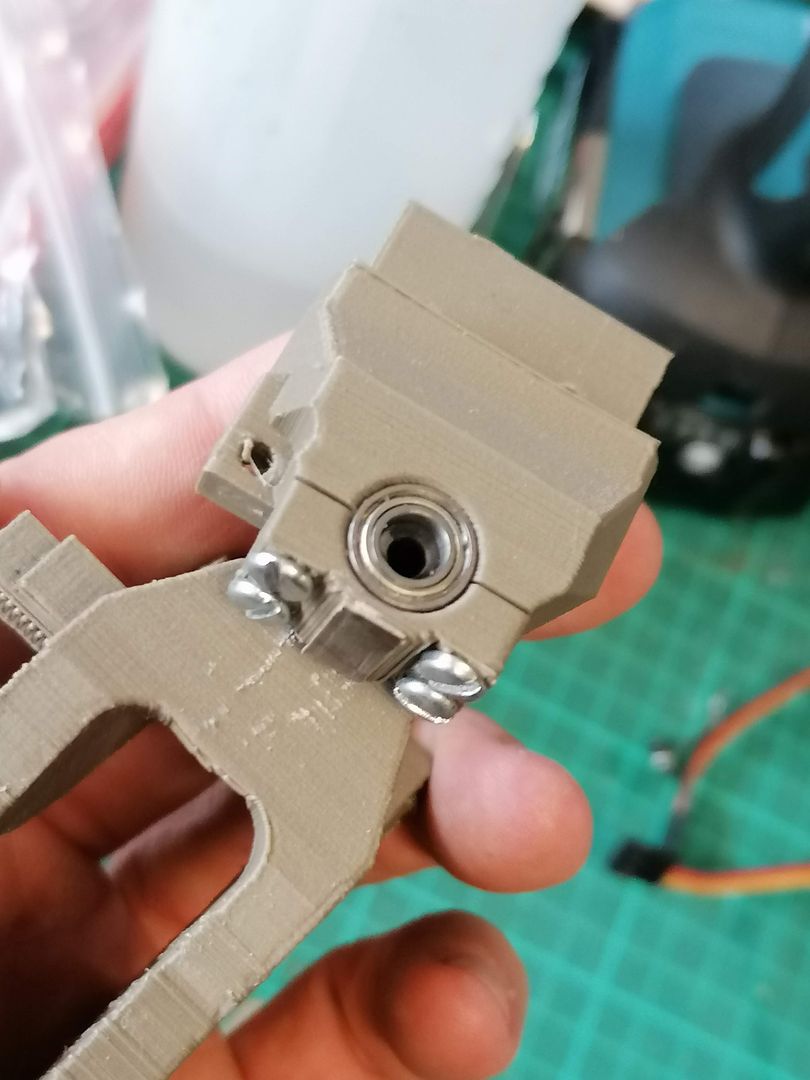
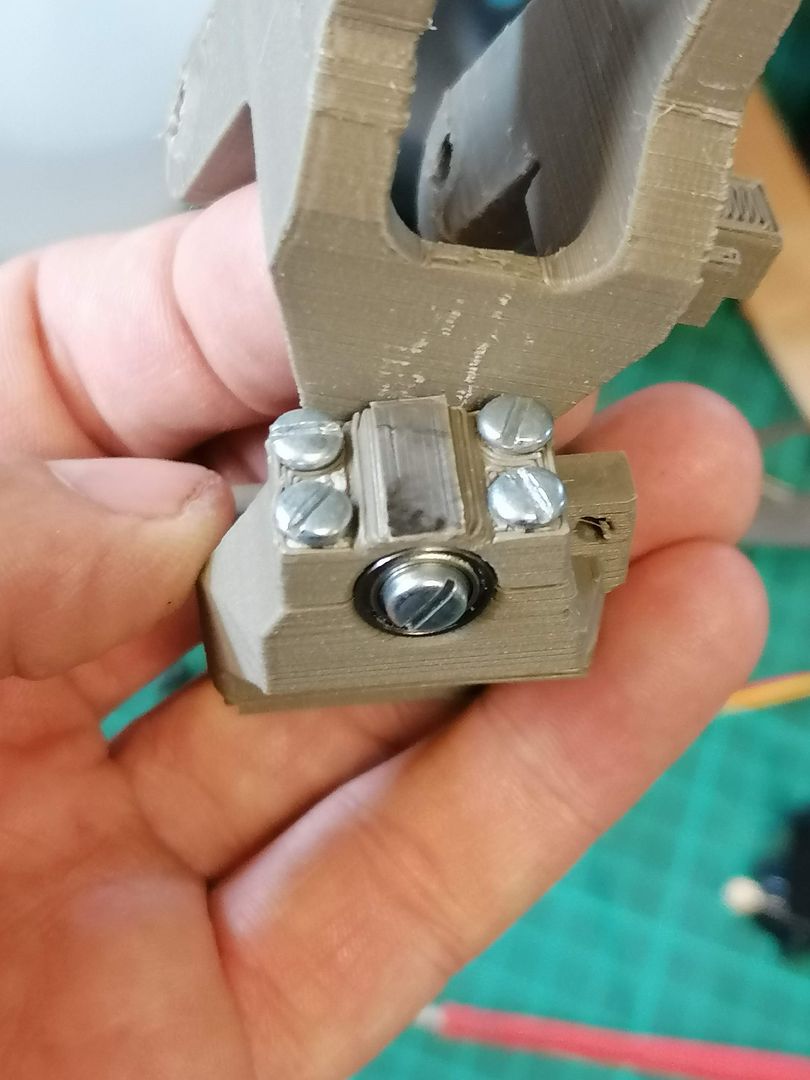
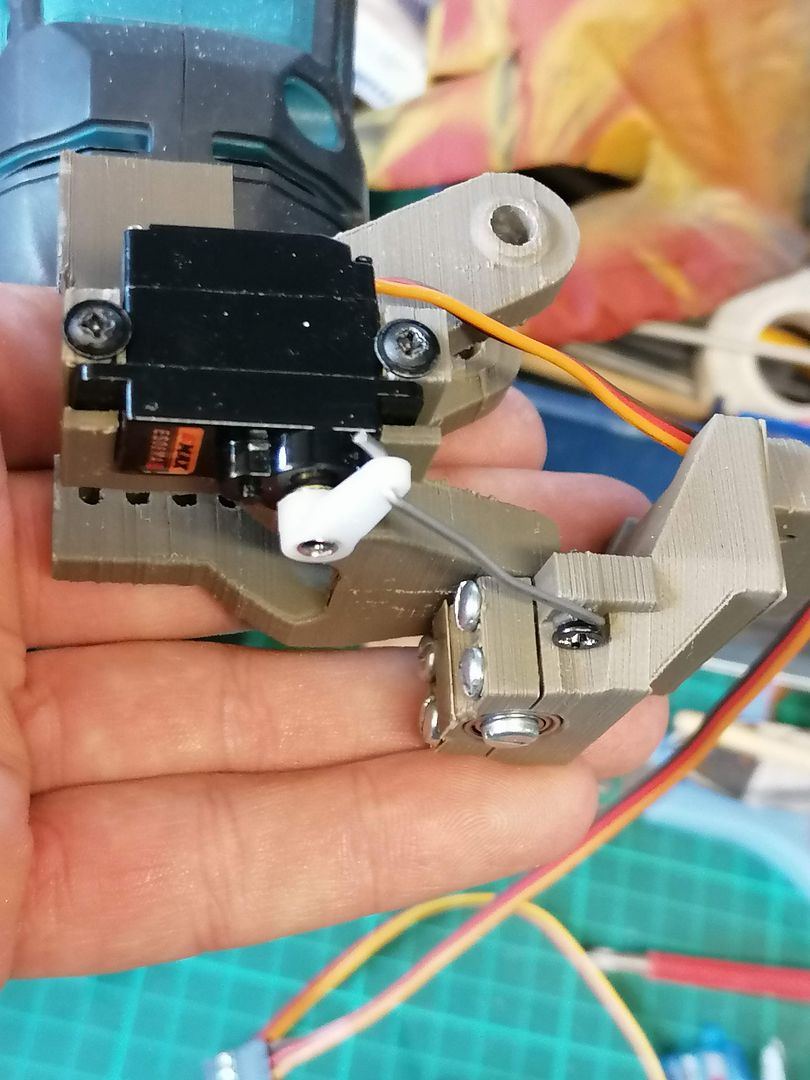
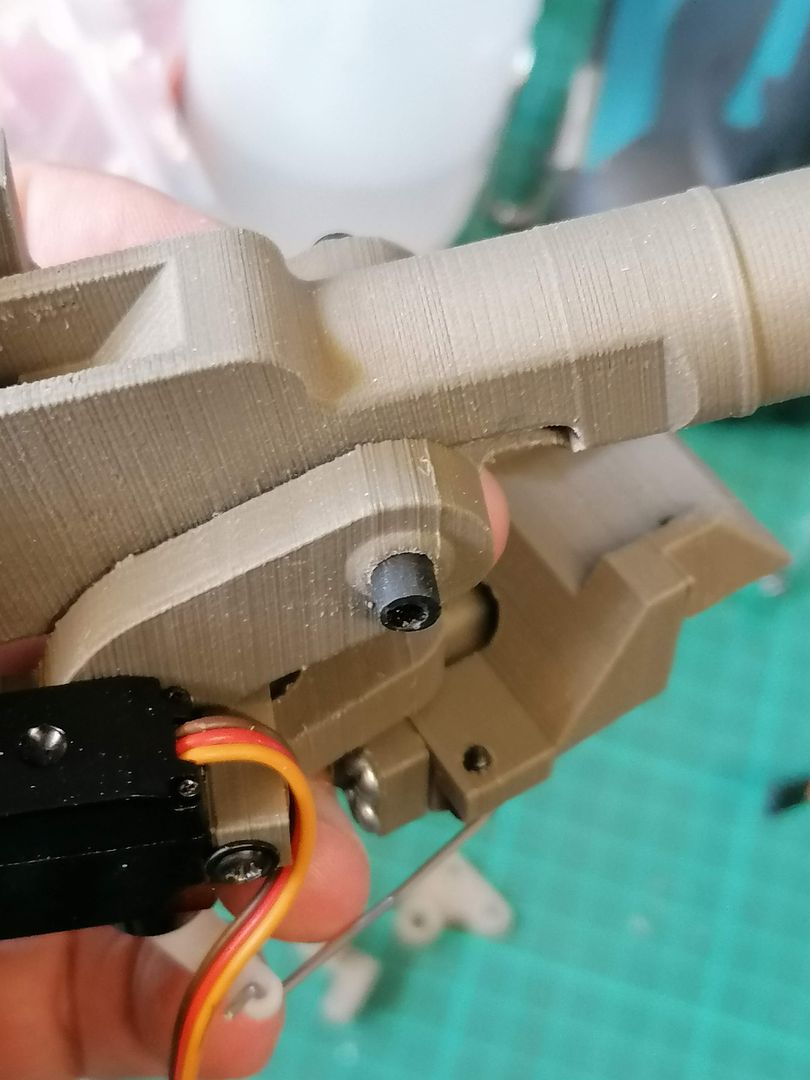
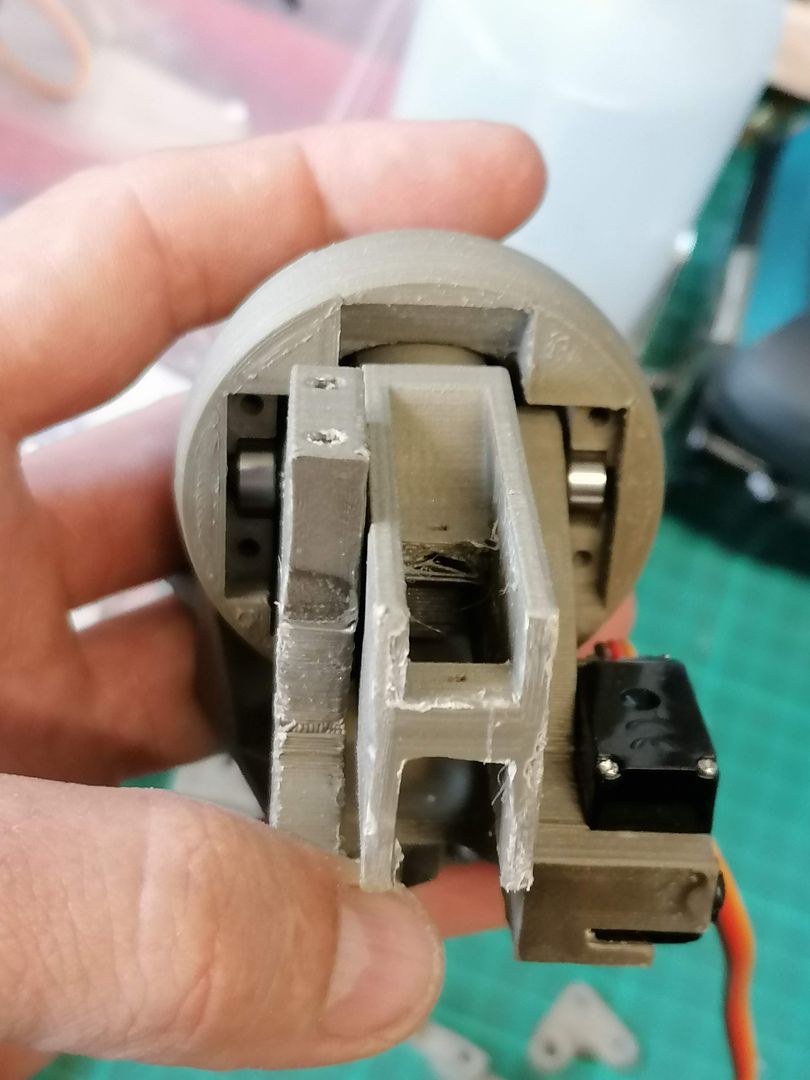
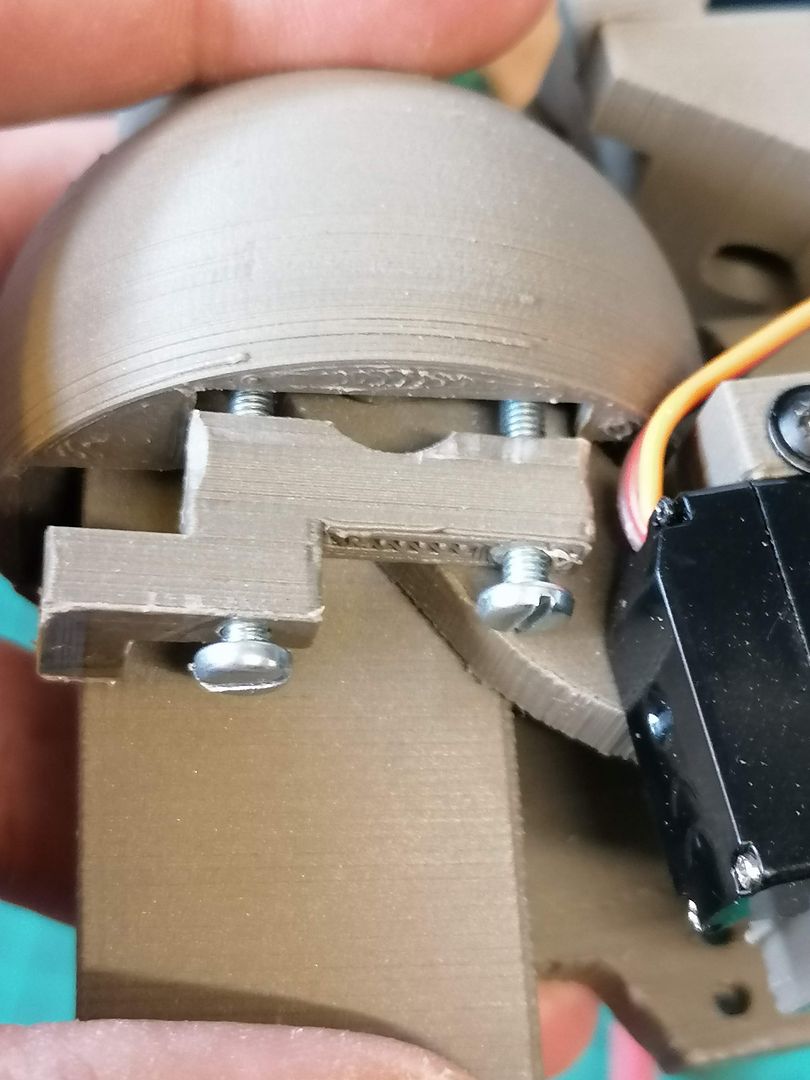
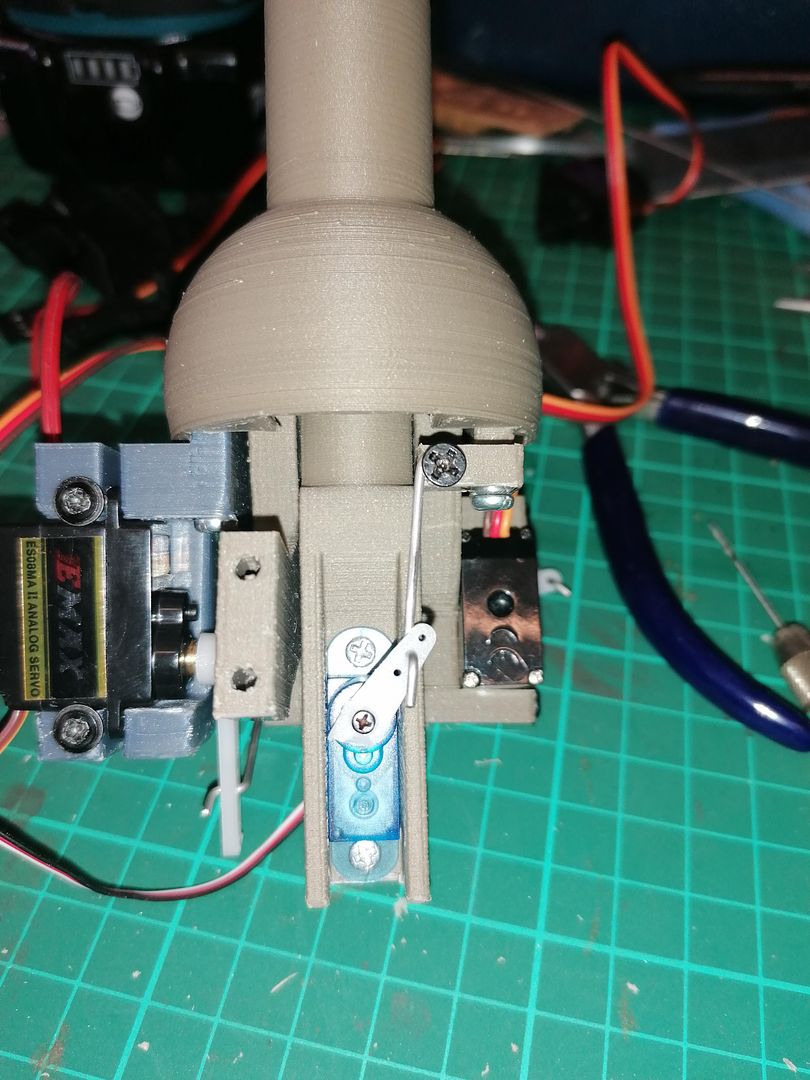
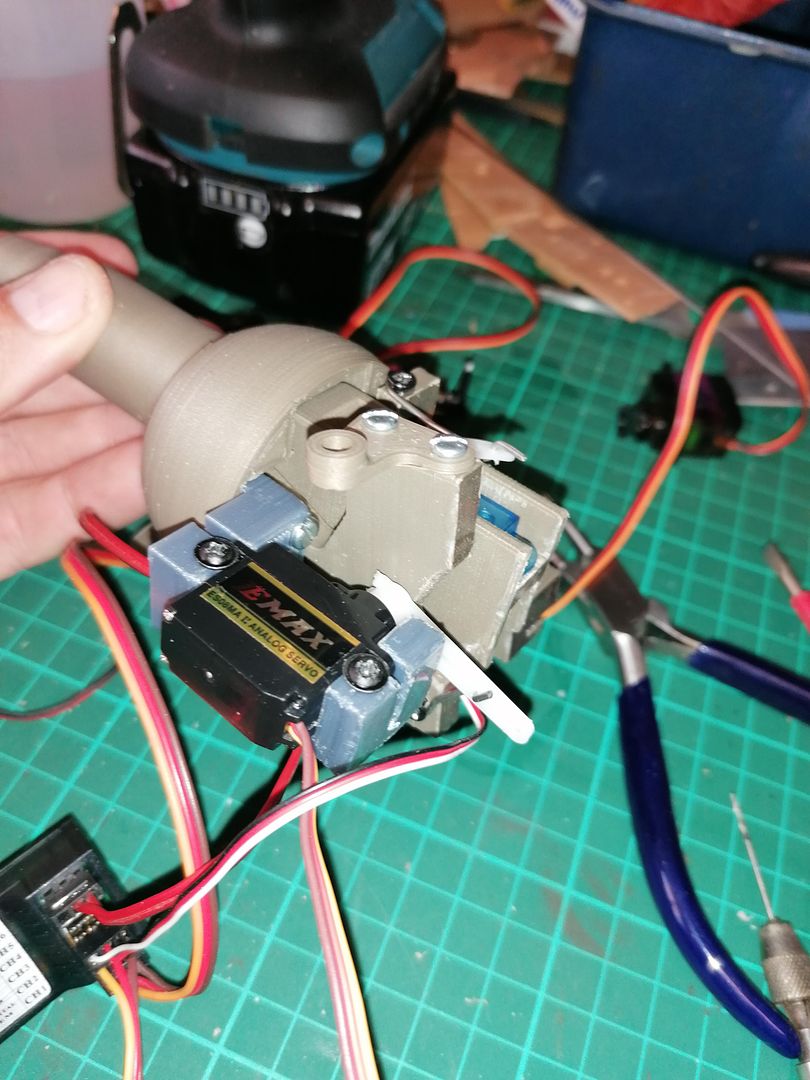
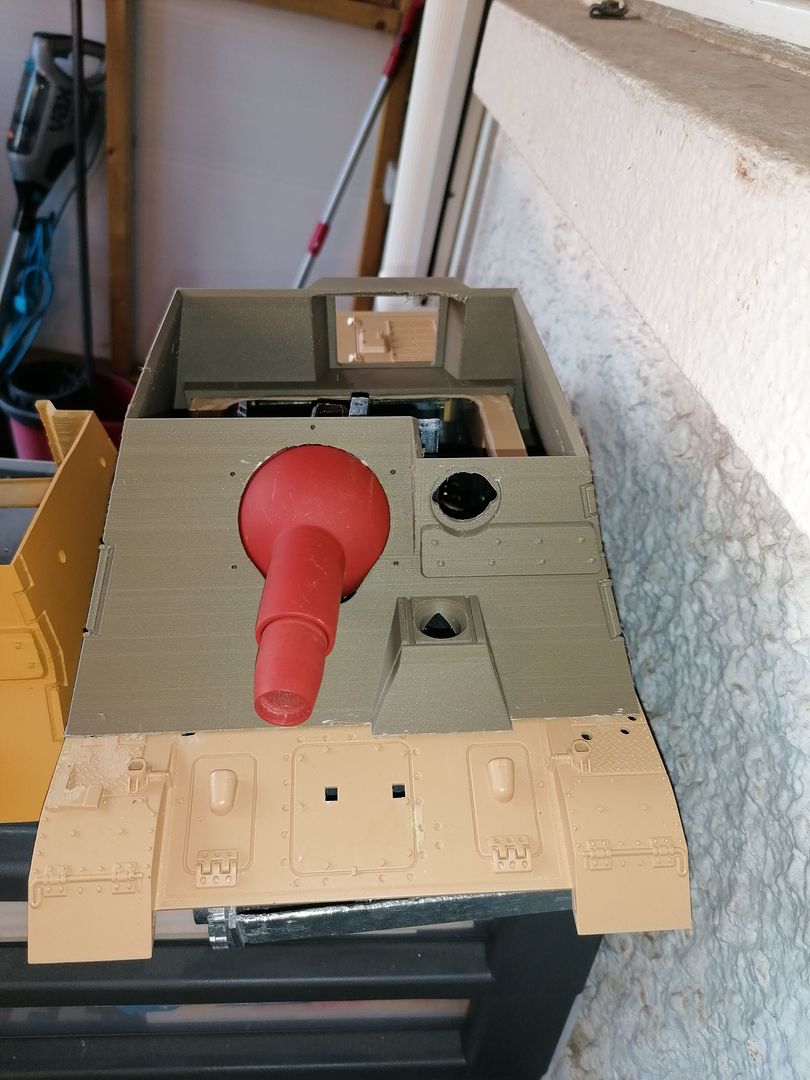
With a while spent on the computer and different configurations I finaly came up with this one compact and with plenty of movement.
Image
Sorry I havnt any pictures of its assembly but I will get some when I make a improved print quality one.
Image
Image
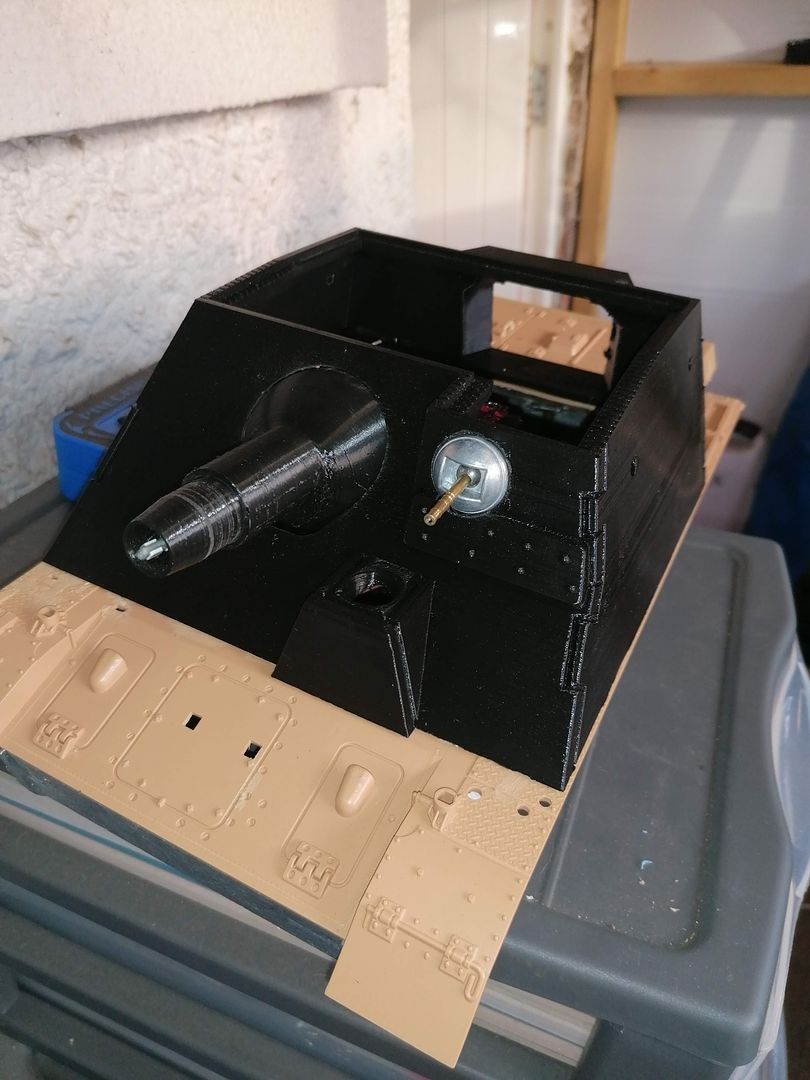
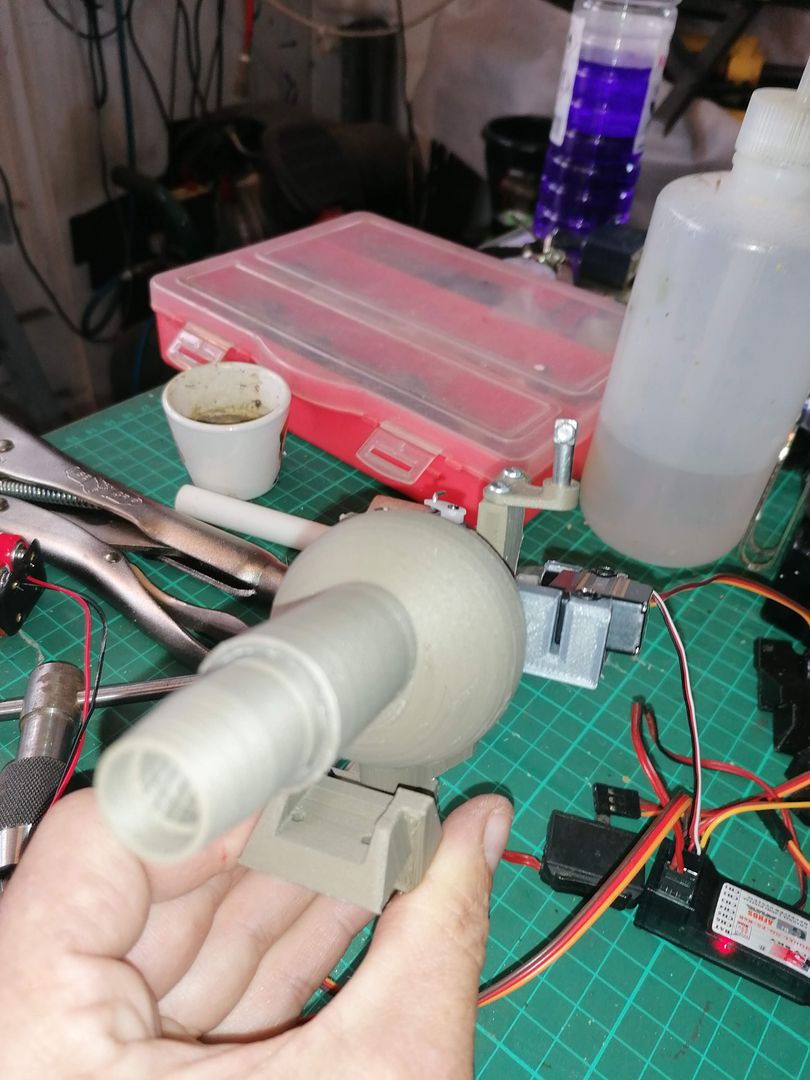
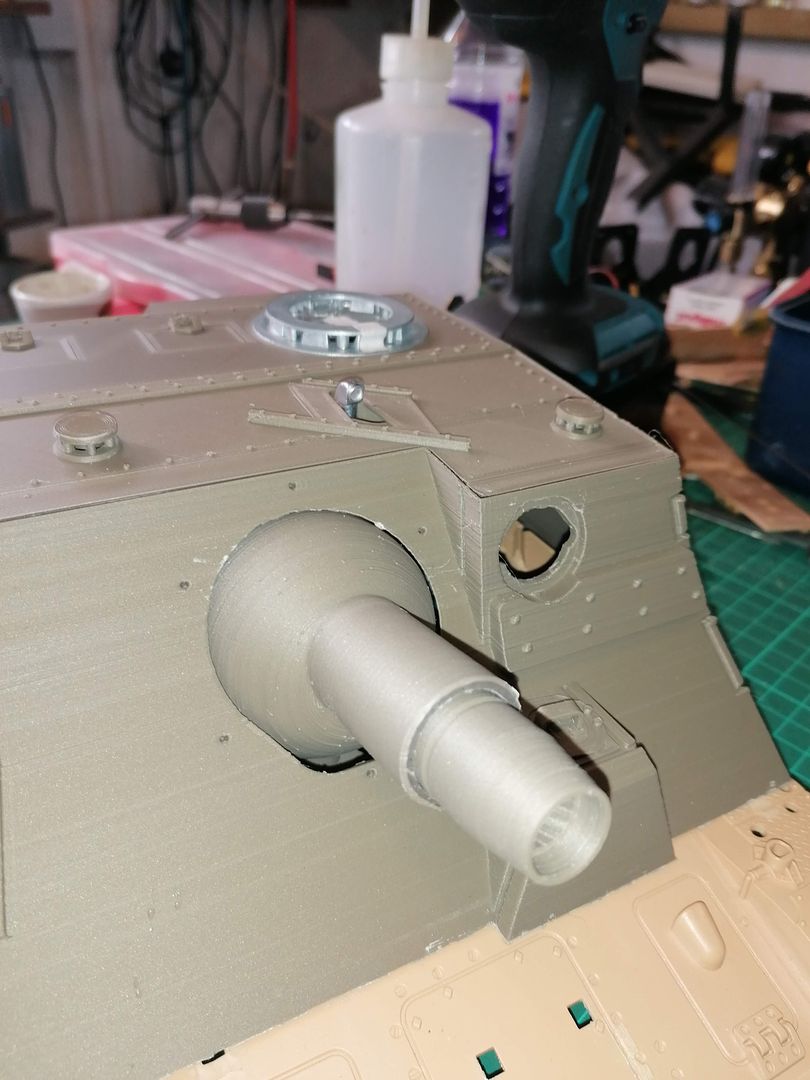
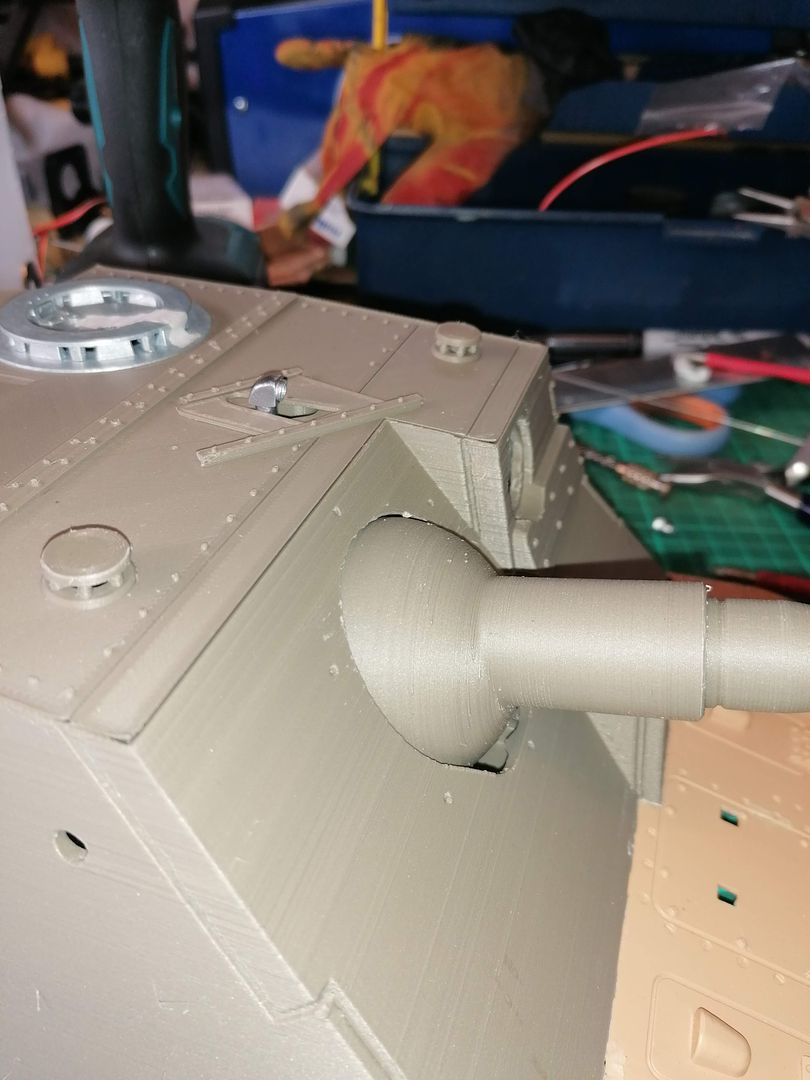
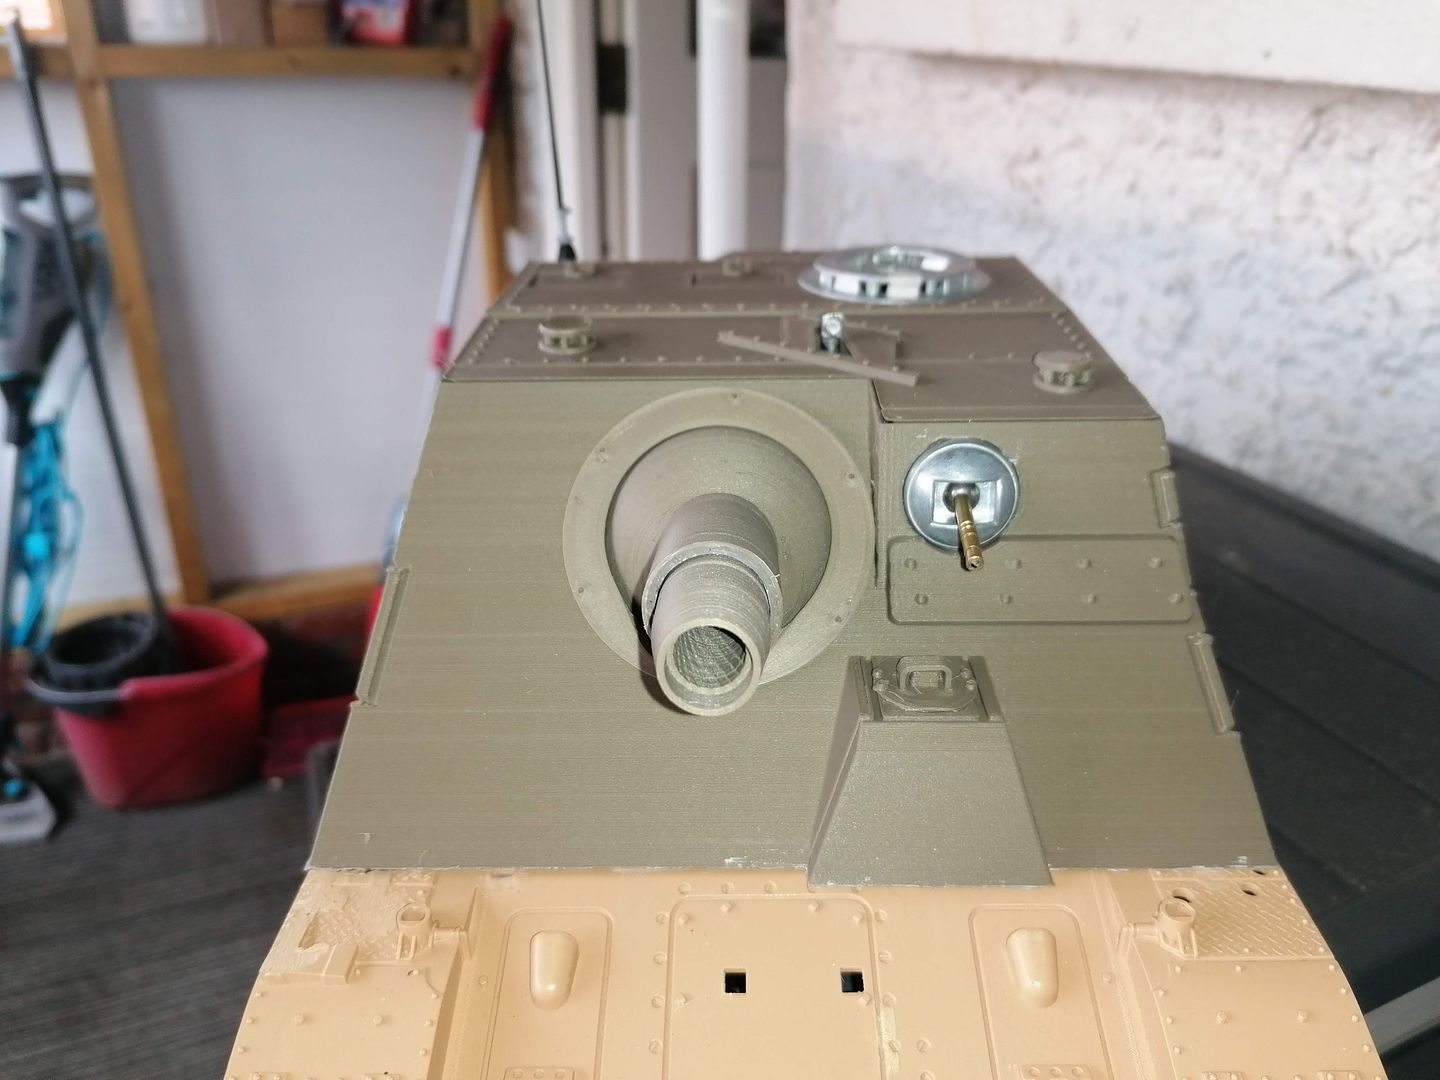
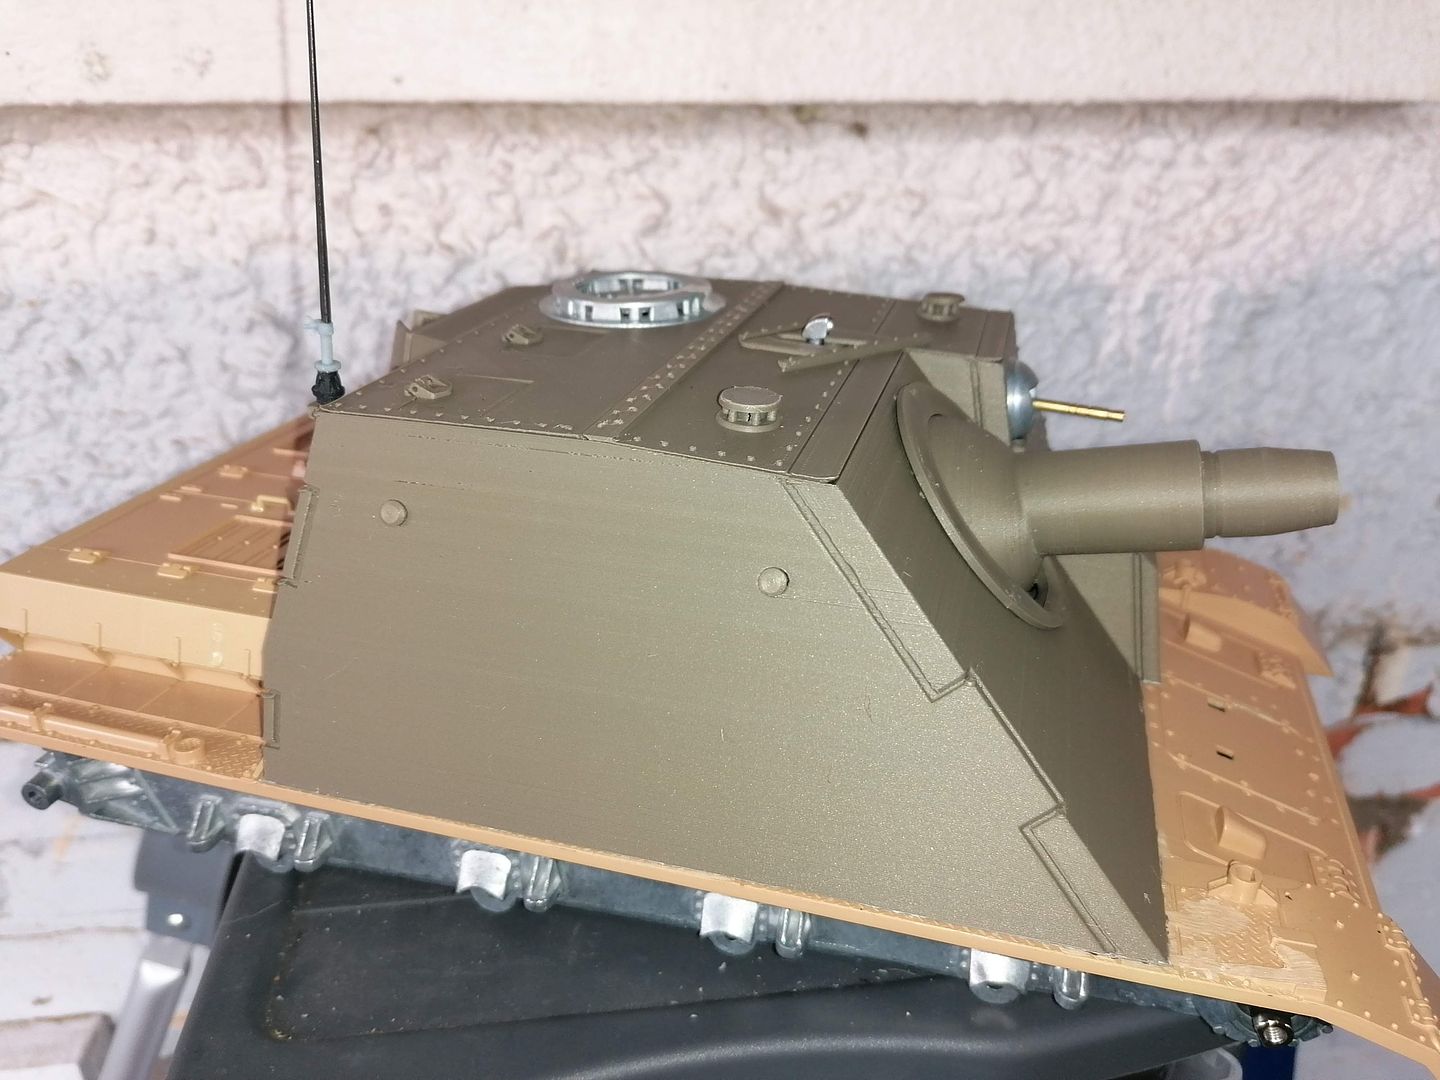
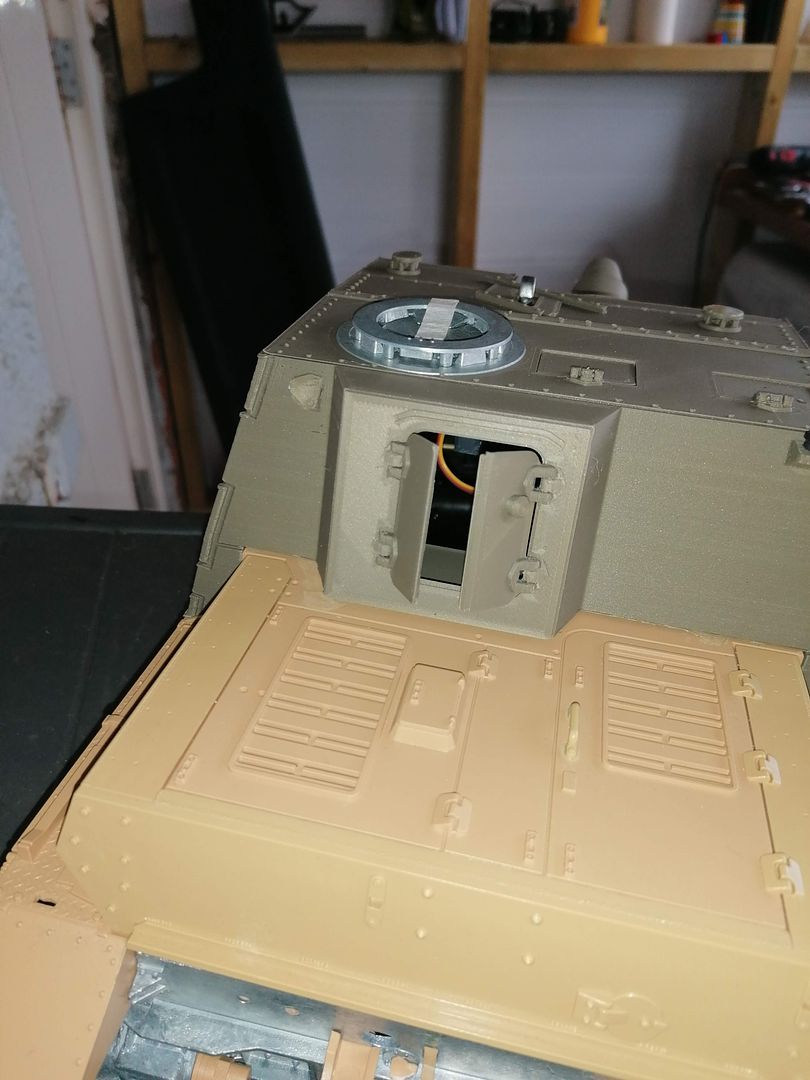
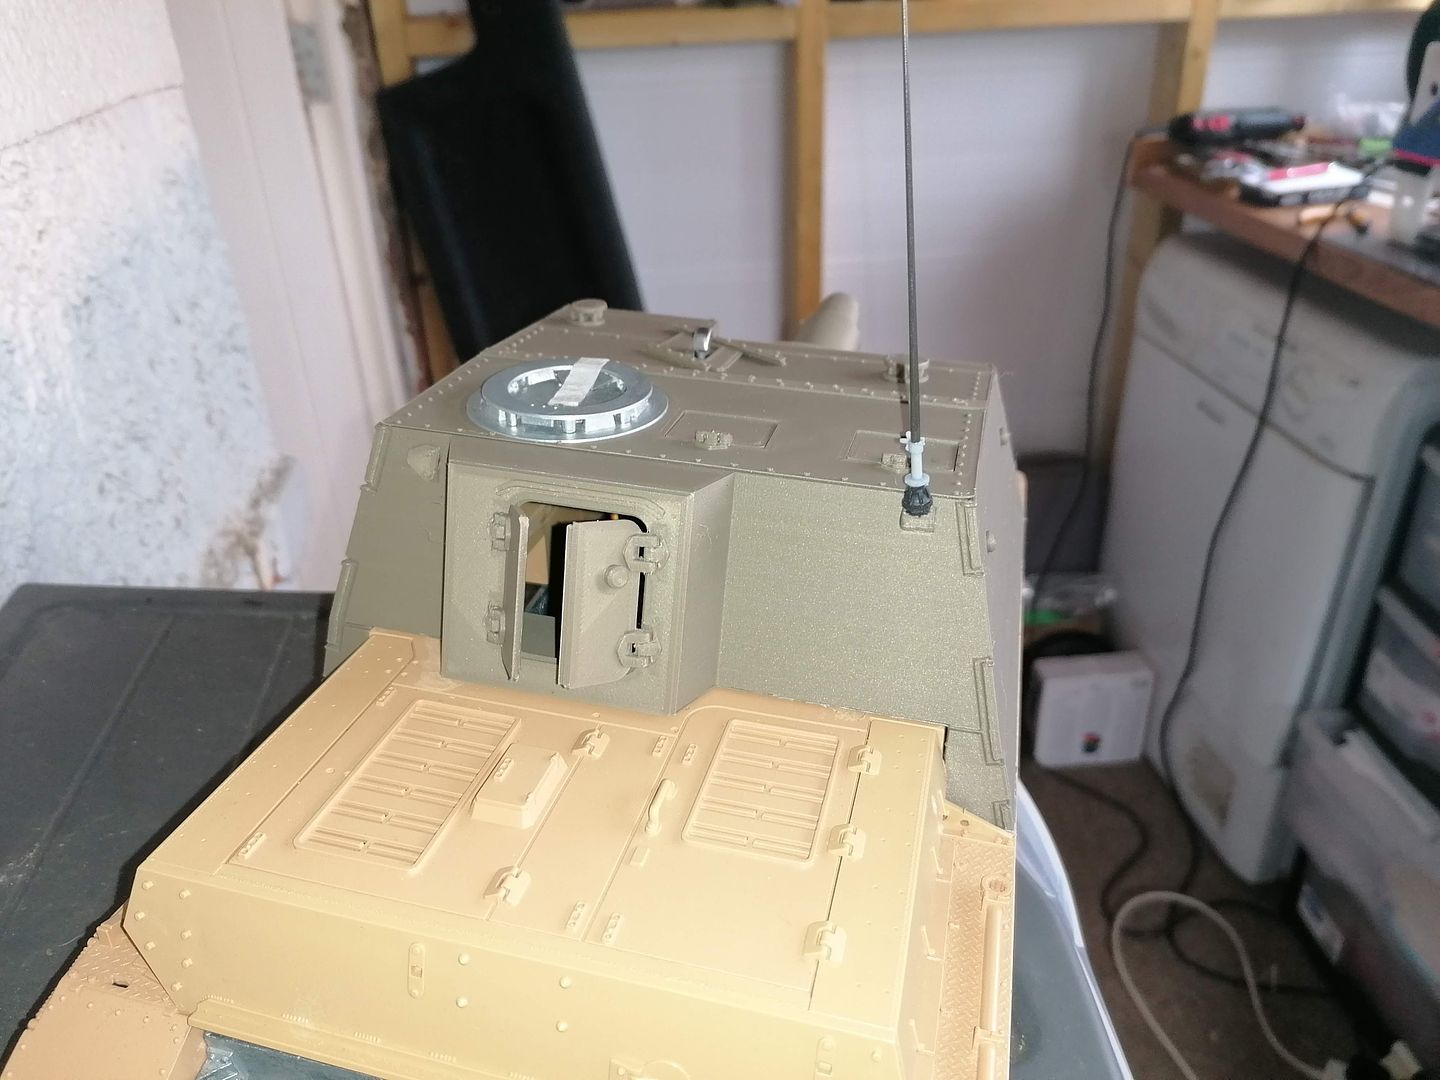
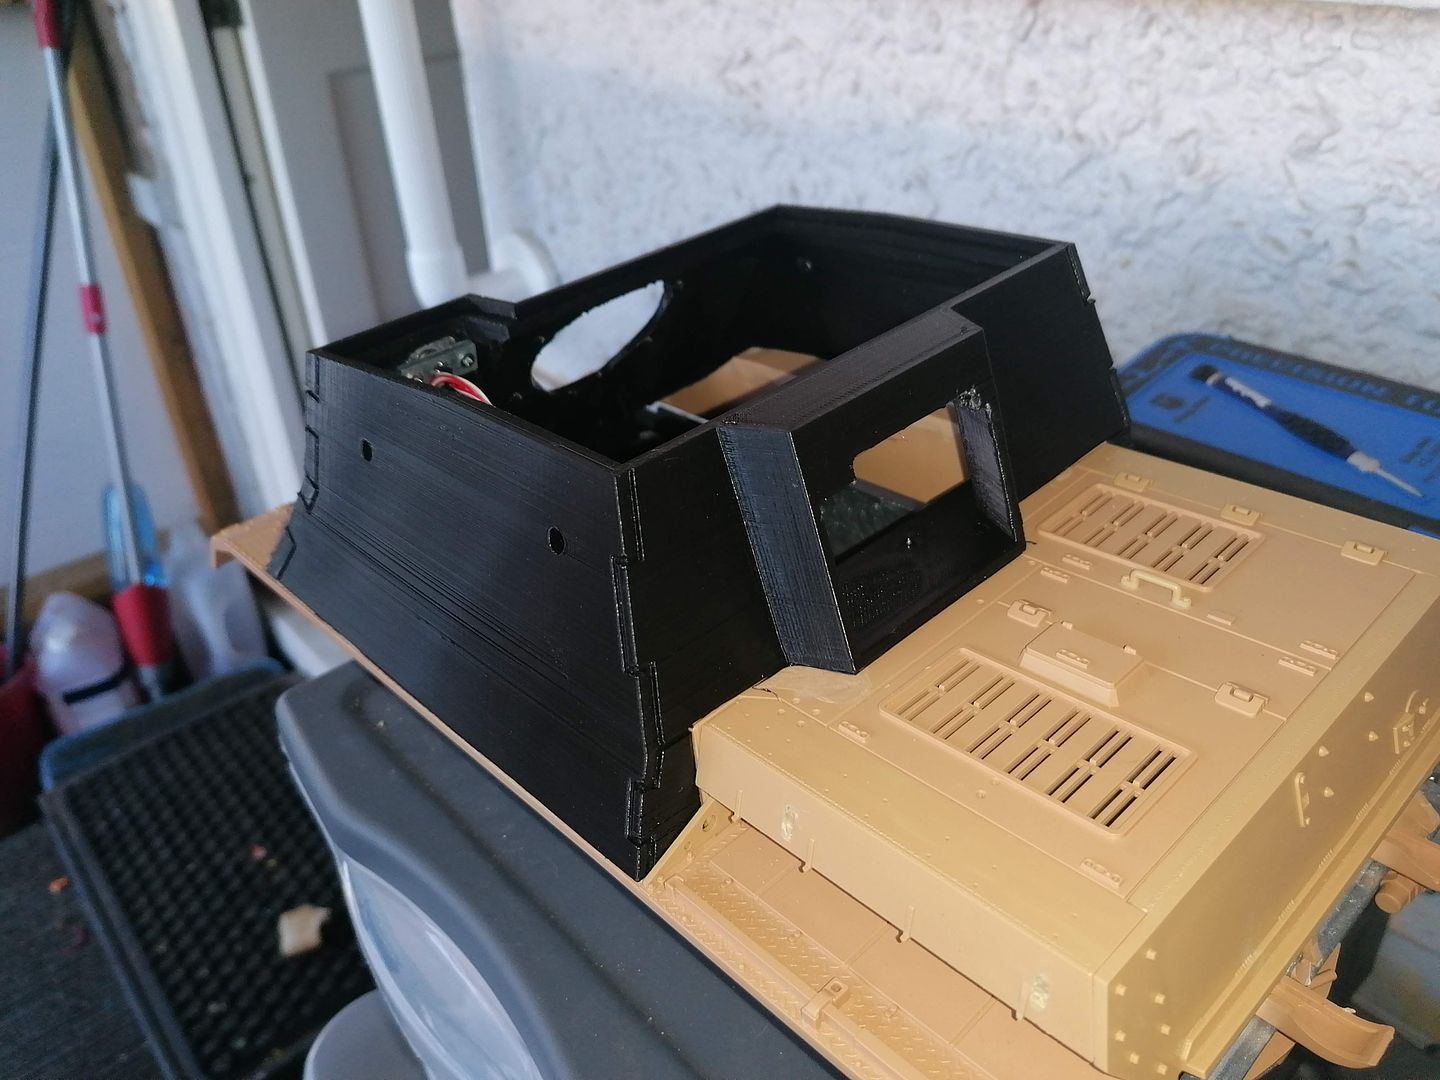
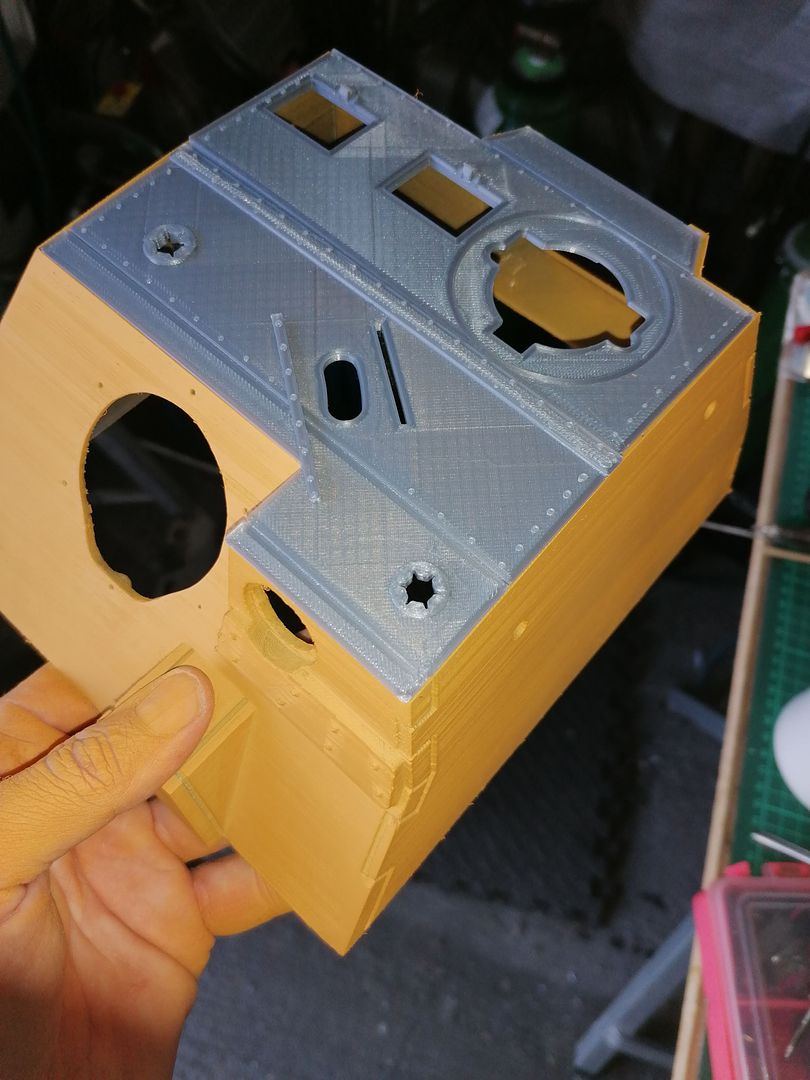
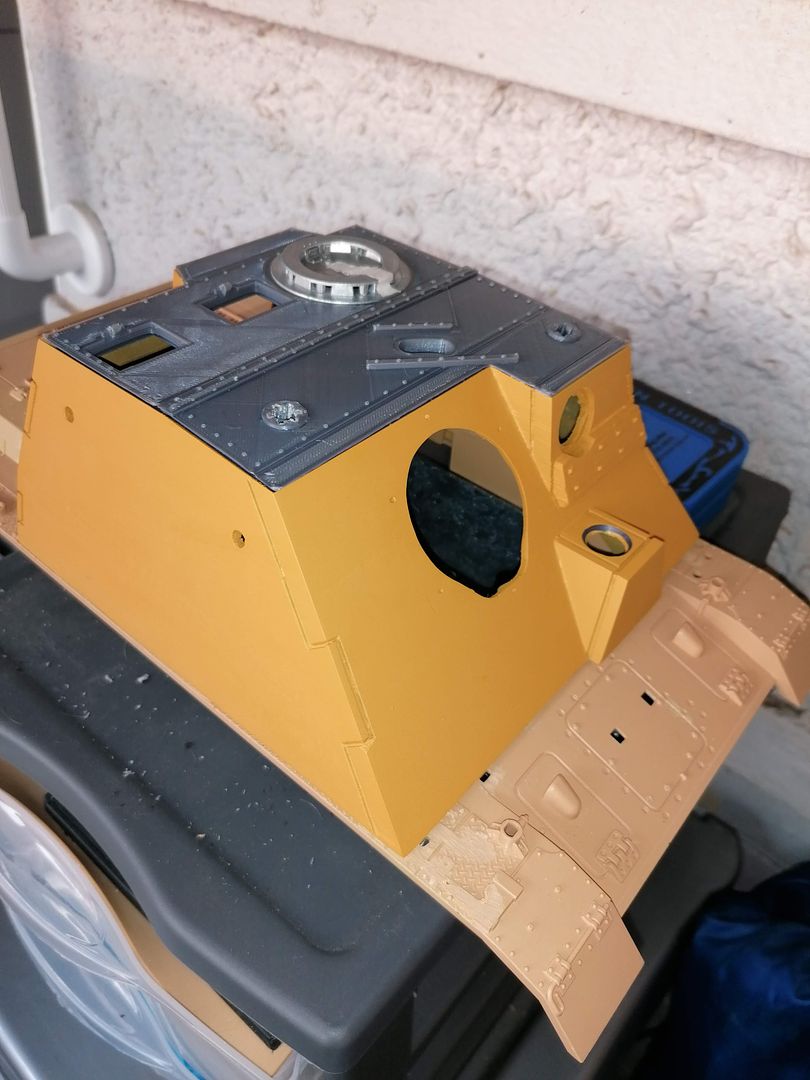
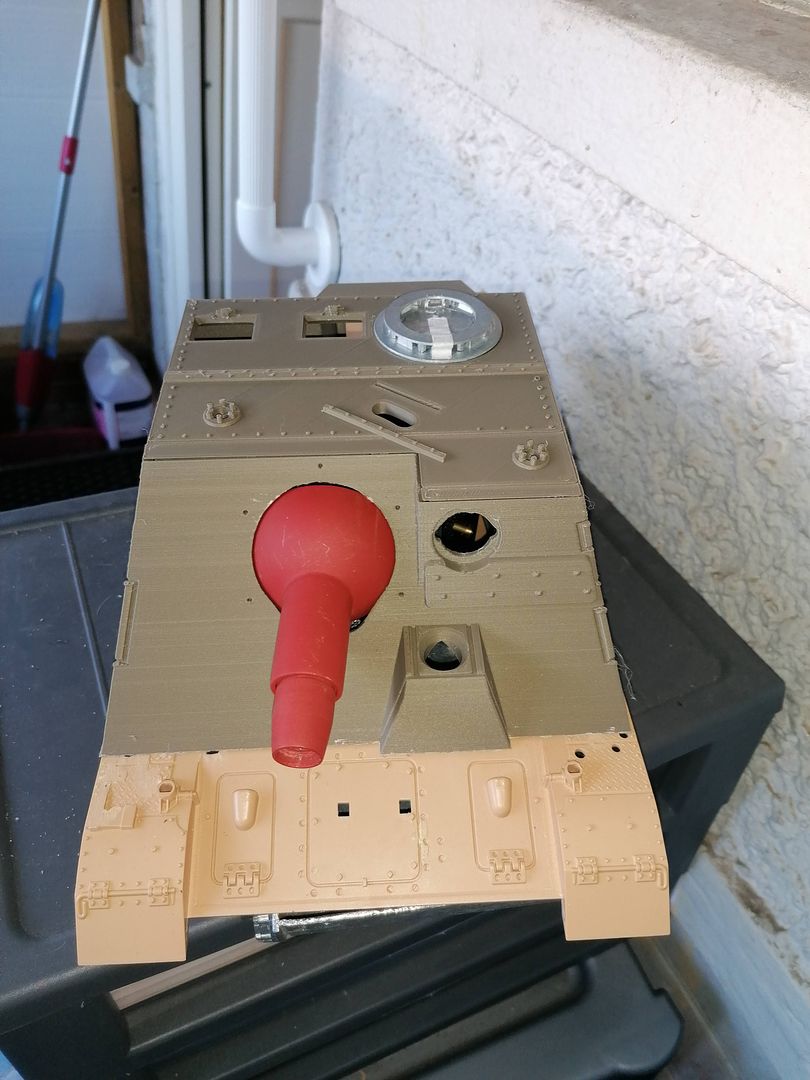
This week the better filament arrived and a new citadel was born (sort of :haha: ) the print quality is better but the combination of cheap printer and software im not 100% sure of yet means it better but not perfect but good enough for me to finally have some ware to start.
Image
Image
I have also printed off better roof sections.
Image
Image
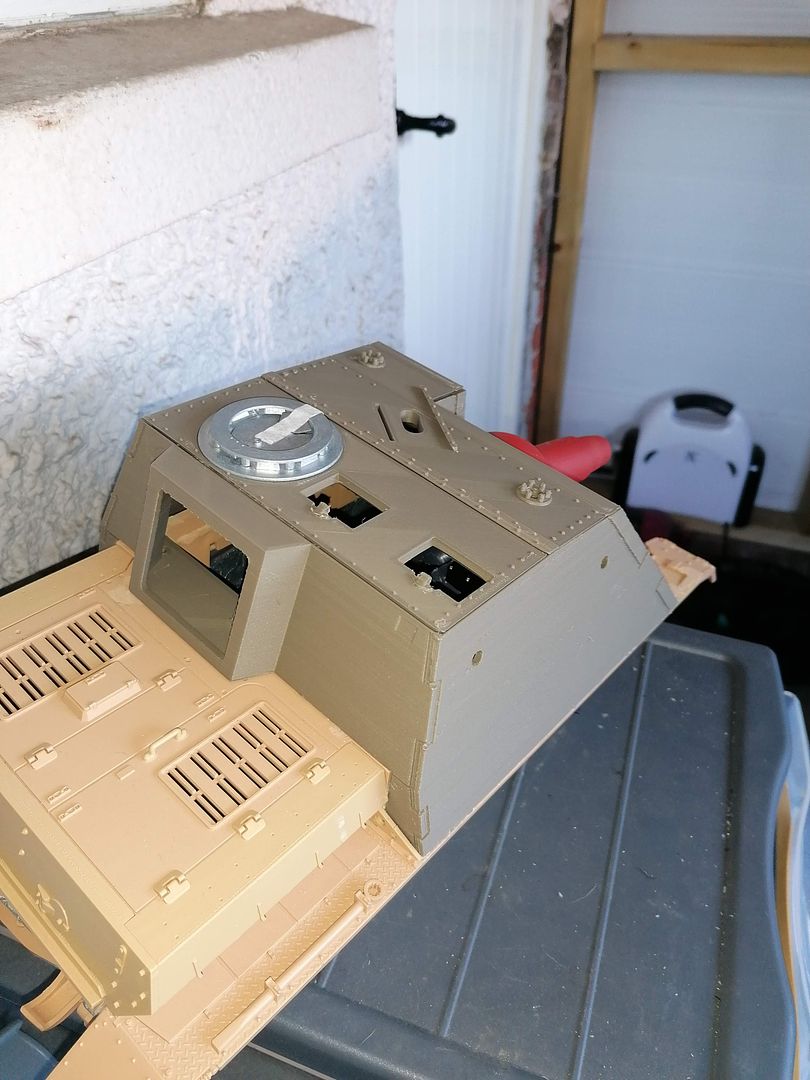
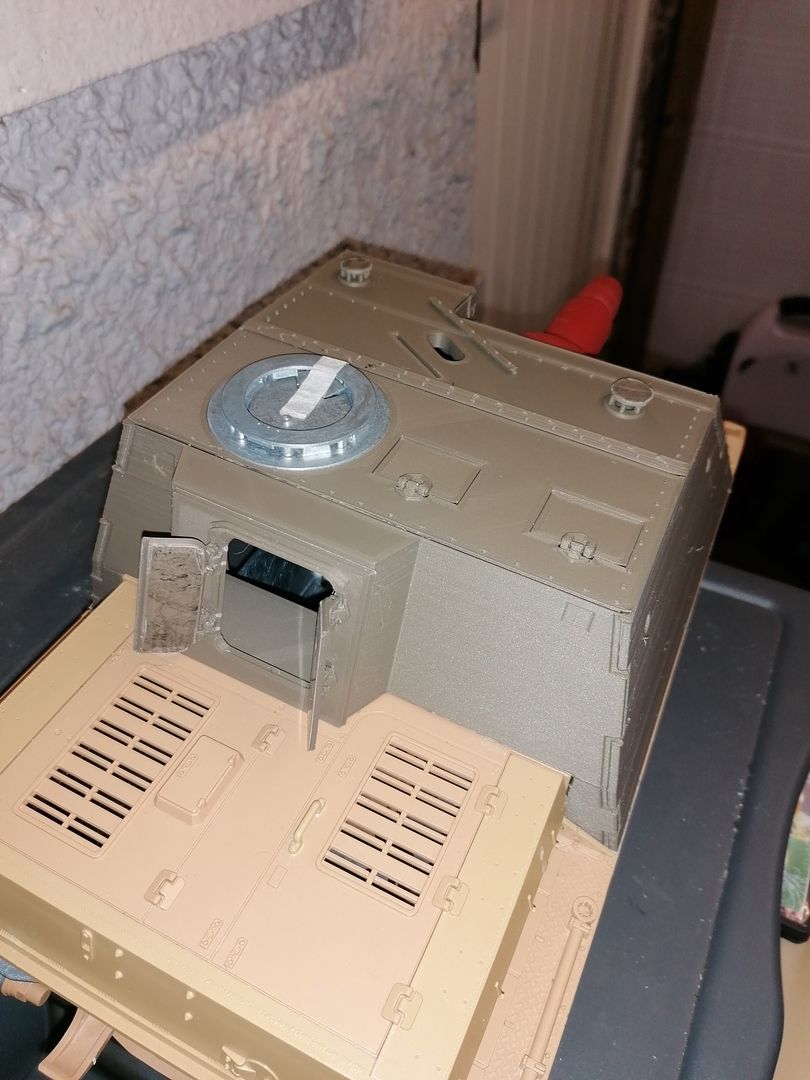
I am now working on the hatch covers and small detail parts and will post as I get further along with it.
User avatar
c.rainford73
Major
Posts: 6104
Joined: Thu Aug 25, 2016 7:34 pm
Location: Connecticut USA

Re: Brummbar

Post by c.rainford73 »

very impressive work :wave:
Tanks alot.... :wave:
User avatar
midlife306
Warrant Officer 1st Class
Posts: 2238
Joined: Sun Aug 27, 2017 10:34 am

Re: Brummbar

Post by midlife306 »

Nice work Baldrick
Cheers
Wayne


Sent from my iPhone using Tapatalk
User avatar
Will01Capri
2nd Lieutenant
Posts: 2704
Joined: Tue Jul 18, 2017 5:34 pm
Location: South Scotland

Re: Brummbar

Post by Will01Capri »

Looking good
HL camo E' Tiger
HL L' Tiger
M26 Pershing WW2 project
Tam K'Tiger project
HL Walker Bulldog project?
HL Panzer IV Munitionsschlepper für Karl-Gerät
HL Sherman project?

1/24 Leopard 2 Custom mod

2 many trucks to list!
User avatar
baldrick131
Lance Corporal
Posts: 140
Joined: Fri Oct 04, 2019 8:46 pm
Location: March cambridgeshire
Contact:

Re: Brummbar

Post by baldrick131 »

Today Iam going to post about the gun assembly.
all the STL Files for the gun can be got here https://www.thingiverse.com/thing:4433929
I will be uploading all the parts of the Brummbar when I have got all the fiddely bits sorted its 98% done but as the gun was the first thing i worked on I have loaded that first.
Image
Image
this is the parts ready to assemble.
Image
first thing i did was use a 5mm drill bit to clean out the large holes and a M3 tap to tap out the holes in the gun shroud and the gimble,
Image
I placed a peice of 5mm carbon tube 17.5mm long into the gimble.
Image
Followed by 2 10x5x4 bearings and placed them in the gun mount and clamped in place
Image
Image
a m3 x25 screw cut down to 19mm was used through the tube to hold the gimble in place
Image
next a servo
https://www.ebay.co.uk/itm/ES08MA-II-12 ... 2749.l2649
was placed in the gimble and a connecting rod made from 1.2mm filler rod to give side to side movement
Image
Now the barrel was placed in the gimble and held in place through a slot wit another peice of 5mm carbon tube 41mm long
Image
Two more 10x5x4 bearingd were placed on the ends of the tube and the gun shroud was pushed over them
Image
The small clamp was fitted using 1 M3 x 25 screw and one M3 x 25 screw cut down to 21mm
Image
Image
The second clamp/servo mount is fitted with 2 M3 x 25 screws (Imanaged to break the first one fitting a sevo :O but had a spare standing by)
Image
and the second servo is installed and a connecting rod made and fitted
Image
Image
The barrel was fitted with a small servo after a small amount of cleaning up and another connecting rod was made and fitted to the small clamp
Image
The bracket to mount the periscope was fitted next
Image
A periscope was got from here
https://www.rctank.de/Metal-tank-perisc ... -unpainted
Image
It was cut down and pushed into the bracket
Image
Now to see if it fits
Image
Image
Image
This is the assembly in the citadel and wired up to my RC car hand set to get it to move
phpBB [video]
User avatar
midlife306
Warrant Officer 1st Class
Posts: 2238
Joined: Sun Aug 27, 2017 10:34 am

Re: Brummbar

Post by midlife306 »

Very nice work Baldrick


Sent from my iPhone using Tapatalk
User avatar
baldrick131
Lance Corporal
Posts: 140
Joined: Fri Oct 04, 2019 8:46 pm
Location: March cambridgeshire
Contact:

Re: Brummbar

Post by baldrick131 »

As its been raining I have been busy on the computer and uploaded the files for the brummbar citadel on Thingiverse Ihave made all the parts and with minimal work just had to remove brimm material and any elephants footing from the base of prints to get them to fit the rear doors still need some filing and cleaning up around the hinges thats more to do with my printer than the STL files they are made from.
the files can be downloaded here
https://www.thingiverse.com/thing:4434264
here are a few views of it together it still needs smoothing off and weld seems adding to the joints and all the hinges having pins in but a bit of double sided tape here and there let you see how it looks.
Image
A metal front machine gun from a tiger 1 was used but the original can be cut out and used
Image
The pistol port bungs are just pushed in and can be put on a bit of chain to let them hang open
Image
here the rear doors are just pushed together and the frame held in place with tape
Image
looks good with the antenna fitted even though its a bit wonky until its all glued properly
Image
Im going to glue the 2 halves of the roof together and have the hole roof just sat in place
I bought myself a long 1mm drill bit to help clean out the holes in all the hatches and intend to have them all opening.
All in all I am happy with it and have tried to make it as detailed as i can with the limitations of my 3D printer and as simple to assemble as possible and maybe over engineered the gun assembly a bit but hey i had some bearings kicking around and used them :haha: and i hope anybody with a printer can make one and if you do show me some pictures and let me know how you got on with the kit
User avatar
midlife306
Warrant Officer 1st Class
Posts: 2238
Joined: Sun Aug 27, 2017 10:34 am

Re: Brummbar

Post by midlife306 »

Thanks, I will be having a crack at this as soon as I’ve got my Kugelblitz done
Cheers
Wayne


Sent from my iPhone using Tapatalk
User avatar
baldrick131
Lance Corporal
Posts: 140
Joined: Fri Oct 04, 2019 8:46 pm
Location: March cambridgeshire
Contact:

Re: Brummbar

Post by baldrick131 »

midlife306 wrote:Thanks, I will be having a crack at this as soon as I’ve got my Kugelblitz doneImage
Cheers
Wayne


Sent from my iPhone using Tapatalk
Glad to hear if you do make it let me know how it was to do to see if I can improve the model
User avatar
midlife306
Warrant Officer 1st Class
Posts: 2238
Joined: Sun Aug 27, 2017 10:34 am

Re: Brummbar

Post by midlife306 »

Will do, I’m working on a 1/6 Pz iv lower hull, so one day you never know


Sent from my iPhone using Tapatalk
Post Reply

Return to “3D Printing”