Next up is back-dating the mantlet to one of the re-inforced 'first 50'. You used to could just order Parts tree 'F' from the Tamiya Afrikan kit and the world was fine, but they discontinued the kit, so we have to do some surgery. Here's cutting out the offending area, and then making the area smooth, I re-used the gun-sights portion, then using automotive putty (Evercoat Z-grip) I made it all back up. it's going to be covered in zimmerit anyway, but I digress...
- 11) Mantlet-IMG_3085a.jpg (80.29 KiB) Viewed 4810 times
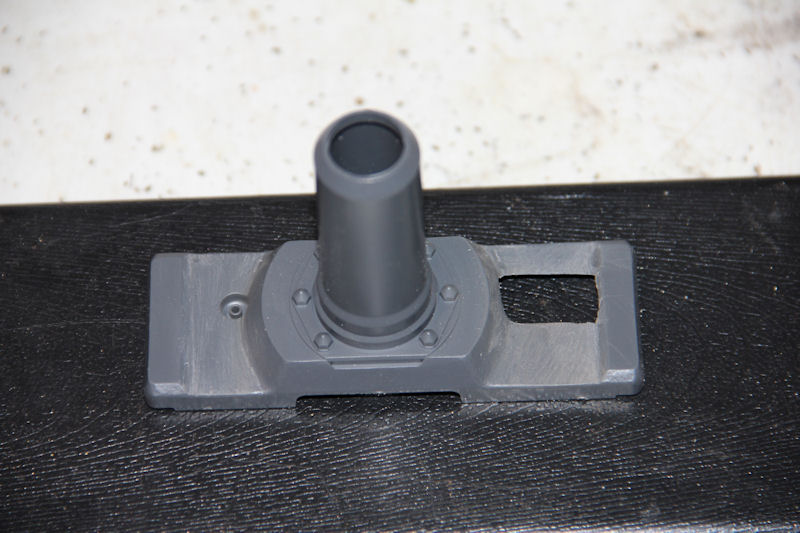
And here's the finished piece.
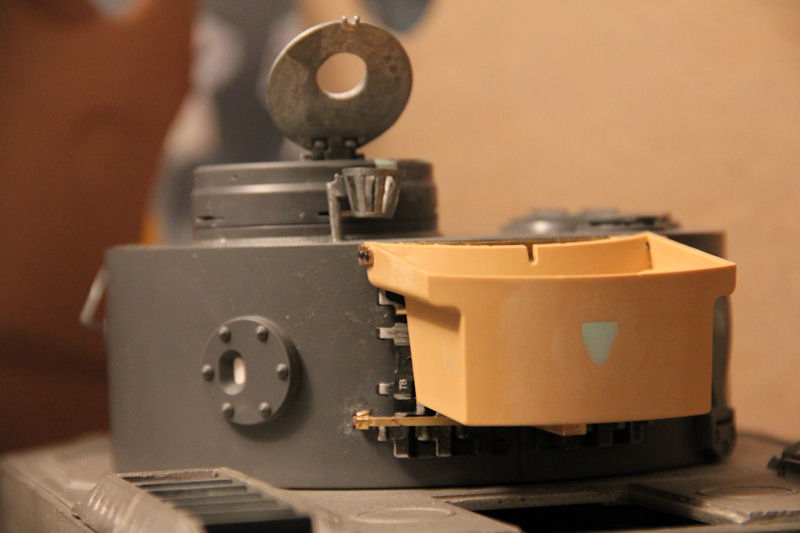
Next up for the turret is the stowage bin and the track stowage assembly that has to be created beneath it. ALERT: WHAT ASIATAM GIVES YOU FOR ALL THIS JUST TOSS IT ASIDE. Asiatam provides a PzIII stowage bin, so I had to get one from a Tamiya kit that was correct, but lacked any detail which we'll fix later. Years ago, I had to scratch one out for a Bandai PzIV when I tossed the whole turret in the garbage, but luckily I don't have to this time...but the parts tree with the stowage bin is $40. Also, getting info on the stowage rack was tough, and I had 5 references, but that all came through.
- 13) tracks stowage-IMG_3068a.jpg (63.46 KiB) Viewed 4810 times
- 14) tracks stowage-IMG_3404a.jpg (54.76 KiB) Viewed 4810 times
Another thing Asiatam does not do is provide the correct front glacis fittings, so these have to be modeled in and strengthened as its a metal RC vehicle.
- 15) front glacis work-IMG_3544a.jpg (59.86 KiB) Viewed 4810 times
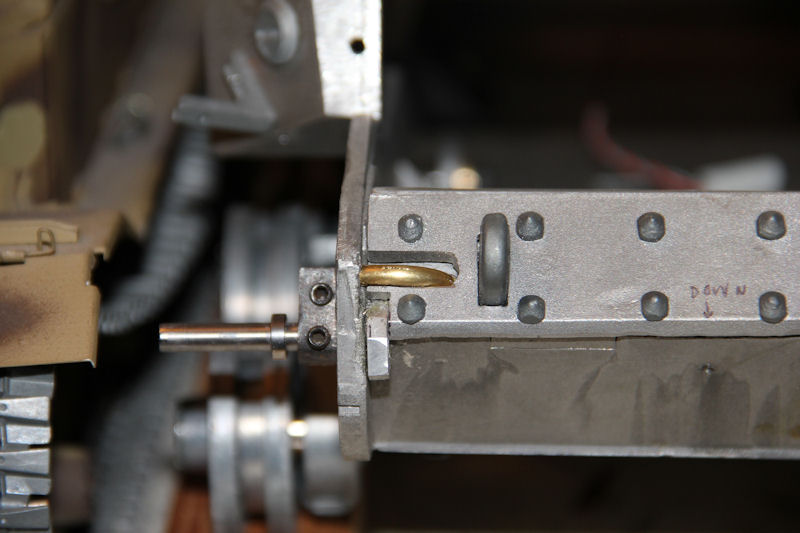
Now another big-game changer. When I got the lower hull complete, I assembled all that was needed to test the drive system. During this testing I had to re-adjust some of the bogies and how the sprockets ran, so no big deal and back to testing, and it ran great...until...it was discovered the gearboxes have gears that are heat-pressed onto the shafts and a number of them were slipping. Tossed these into the box and went and grabbed a set of Tamiya Type I's as they would fit into the back end of the hull. So I had to machine new outdrive shafts and mount them into new holes and filling in the old ones. Getting everything aligned again and test ran it...and it works great. What you see in the photo below from the lower right going counter-clockwise is the stock Asiatam gearbox, above it is the new Tamiya gearbox with a newly machined outdrive shaft, to it's left is the stock Tamiya Type I and below it the brass stock that's going to be it's new outdrive shaft.

- 16) gearbox upgrades-IMG_3563a.jpg (64.28 KiB) Viewed 4810 times
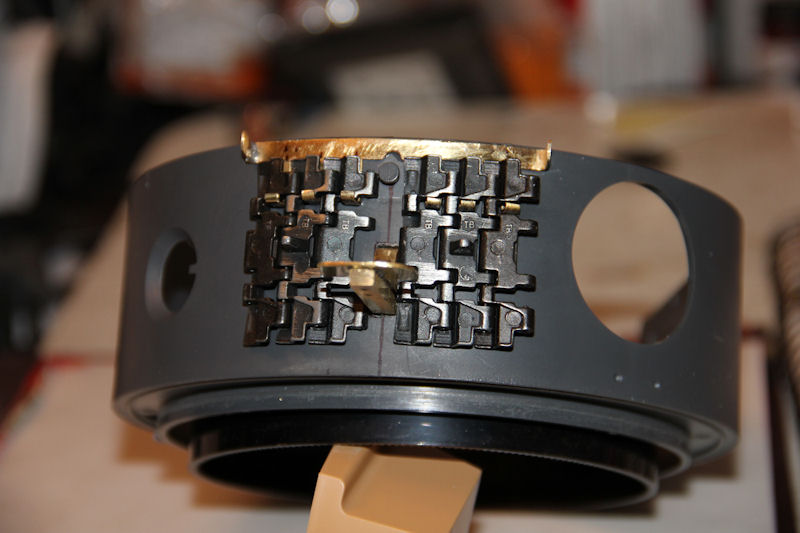
Next deal, is to create the rear deck screens with racks. These were all soldered then screening glued down.
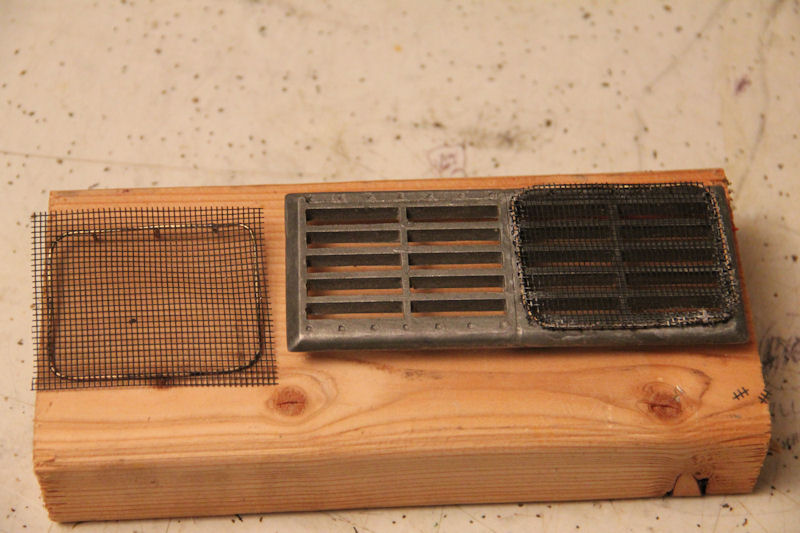
- 17) screens-IMG_3677a.jpg (87.95 KiB) Viewed 4810 times
At this point I'm laying zimmerit and am using Milliput, and as you all know when doing zimmerit, you have to have the tools/fitting ready to go. Here I had to get creative with brackets I had to make and how they were to be mounted, while laying zimmerit. Fun, fun, fun.
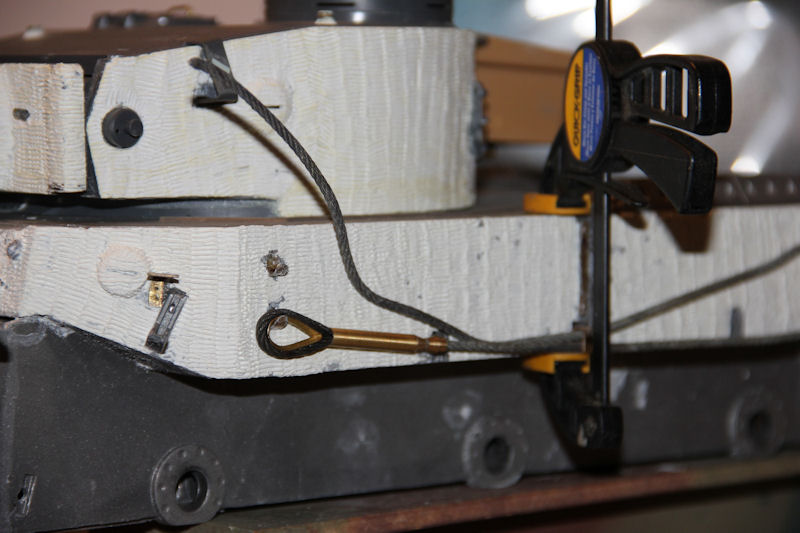
- 18) zimmerit-IMG_3619a.jpg (72.83 KiB) Viewed 4810 times
Now it's time to get all the interior electronic items installed. I forgot to mention, and I believe it's because of all this metal, but the original motors were getting a lot of interference, so I replaced them with some higher-torque long cans and the problem was eliminated. To get these to fit, I had to cut even more portions of the gearbox frames away...no biggie. Of course all the outside fittings and base coat of the exterior and the interior is all painted out.
Now it's time for painting, and this also is the first time I get to use my spray booth I bought a few years ago. I wasn't at the point of doing any painting, so hadn't used it. Here I've got the basic 3-colors on.