Page 1 of 2
How to...
Posted: Wed Mar 07, 2018 8:41 am
by HammerWihoutASickle
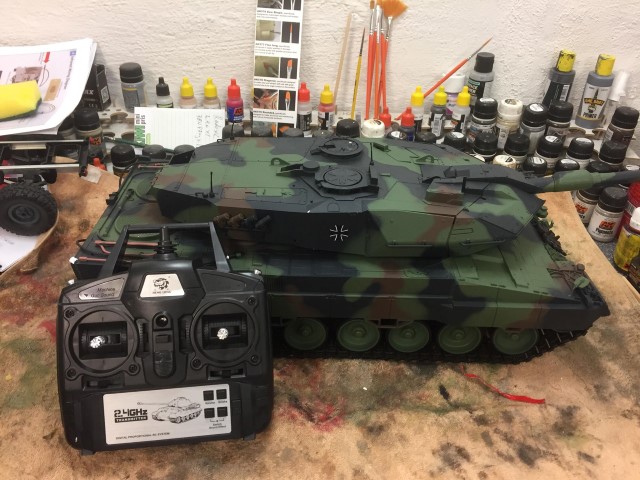
So, thanks to Stian and his chocolate bars, I have a TK60 and a flyski radio and receiver.
The thing is, I cannot for the life of me figure out what wires go where, even with the diagram for the distinct lack of 3 pin connectors and wires that go into channels 1 through 8. The tank I'm trying to upgrade is the Heng Long Leopard 2A6. Most of the connections are the larger, two pin connections, but the instructions are talking about 3 pin connections which I don't seem to have. I've looked all over for a tutorial and come up with nothing.
There's a set of wires that came with it, with a 10A fuse, but the thing is so alien to me that I don't know where to start.
Anyone know of a step by step tutorial to installing this correctly?
I do have other questions but, that can wait for now, I'm just looking to finish the hull first before I move to the turret. I'll put some pictures up later.
I'm supposed to be asleep but this is quite literally keeping me up. This hasn't happened in a while.
Oh, and Stian; if you're reading this - I want more chocolate.
Re: How to...
Posted: Wed Mar 07, 2018 10:55 am
by maxmekker
I'll take you true it my man . My Leo showed up today , so just hang in there .


- 28740890_10155039468056582_1699081868_n.jpg (42.58 KiB) Viewed 4320 times
chocco you said.. Just been out shopping

Re: How to...
Posted: Wed Mar 07, 2018 2:44 pm
by HammerWihoutASickle
maxmekker wrote:I'll take you true it my man . My Leo showed up today , so just hang in there .
28740890_10155039468056582_1699081868_n.jpg
Oh, hey - look its a wee kitty.
chocco you said.. Just been out shopping
28694152_10155030187146582_1945888738_o (Small).jpg
What now, would you like me to beg?
Re: How to...
Posted: Wed Mar 07, 2018 5:46 pm
by maxmekker
So, lets see now, if we can get the basics done, before we go on with the heavier stuff
- 28876648_10155040124251582_1528187960_o (Small).jpg (98.75 KiB) Viewed 4271 times
after opening up and taking / unplugging the stock board
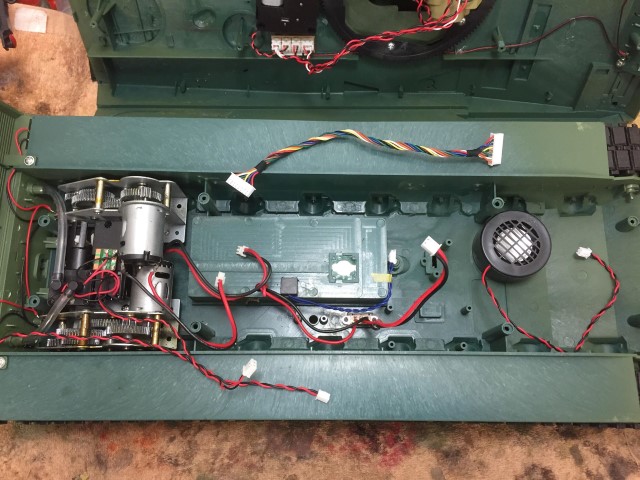
- 28810967_10155040126231582_630542547_o (Small).jpg (94.41 KiB) Viewed 4271 times
make a small jumper from one of the spare wires I included , and plug into SW port
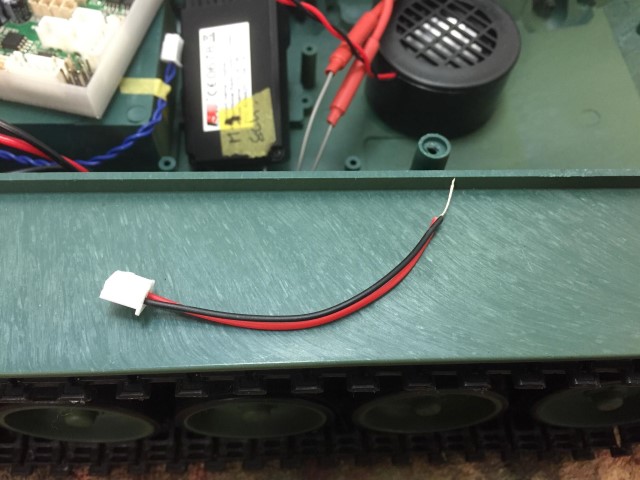
- 28878917_10155040126856582_1629606187_o (Small).jpg (66.85 KiB) Viewed 4271 times
then connect the basic to get it up and running , ref to the included layout sheet , and my photo here
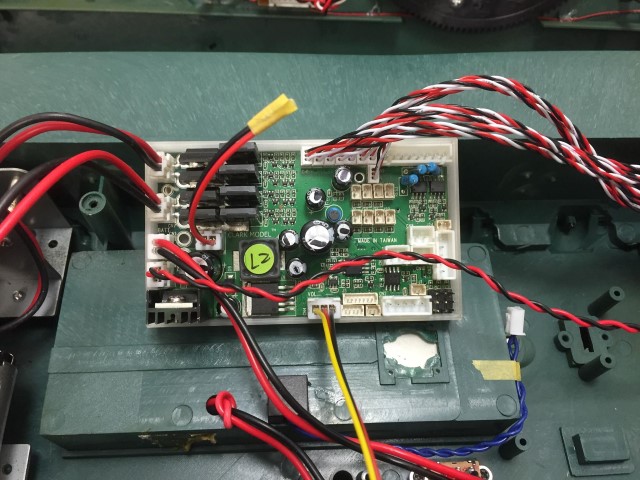
- 28876570_10155040127146582_1925058065_o (Small).jpg (95.78 KiB) Viewed 4271 times
motor plug
battery
speaker
receiver wires
charge battery and fire it up ( sorry for poor video)
Re: How to...
Posted: Wed Mar 07, 2018 5:47 pm
by maxmekker
Later , we will rewire the airsoft setup, and after that, take a look at adding the servo recoil kit to the tank
- 28876873_10155040126551582_363818922_o (Small).jpg (80.32 KiB) Viewed 4269 times
Re: How to...
Posted: Wed Mar 07, 2018 7:13 pm
by HammerWihoutASickle
I have no 3 pin wires. Where did those come from (Ch 1-8)?

Re: How to...
Posted: Wed Mar 07, 2018 8:21 pm
by maxmekker
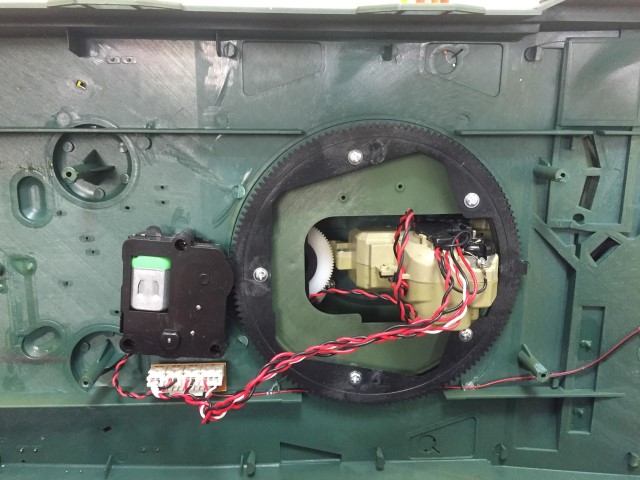
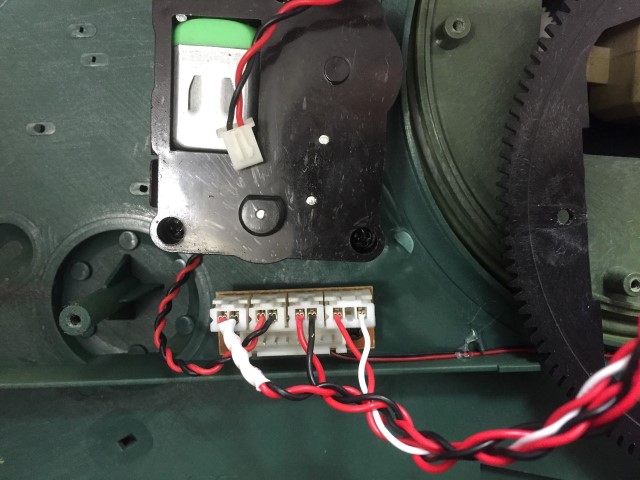
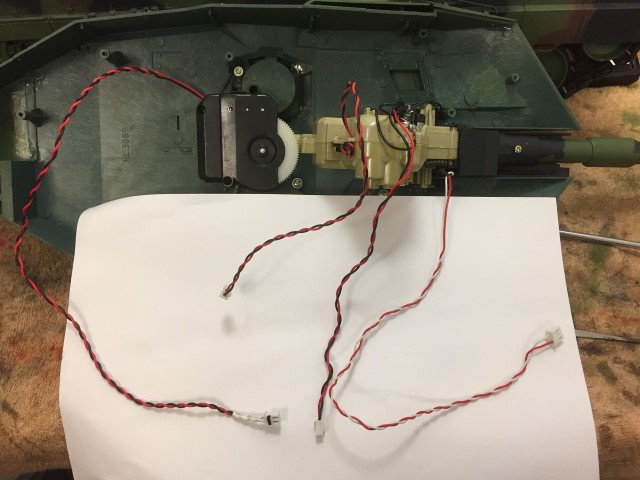
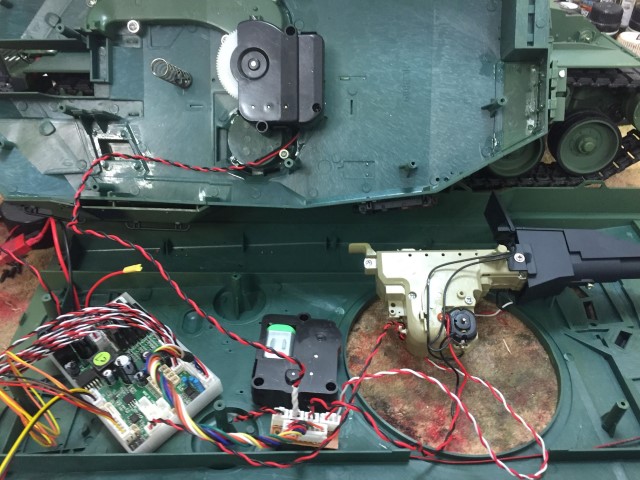
Moving along to the turret .
When opening it , to me , it seems to have the 'latest' connection setup ( for airsoft) , and unlike the challenger , the wires to the elevation motor/recoil motor are now seperated.
So in reality , one only need to connect the 8pin wire to the TK board( and just dobble check with diagram once more ) and set TK board in 'airsoft' modus with the sony remote , plug recoil sitch wire into CN3 ( according to schematic) and ready .
- 28928192_10155040415941582_548885633_o (Small).jpg (72.28 KiB) Viewed 4244 times
- 28822787_10155040416686582_1669591264_o (Small).jpg (62.62 KiB) Viewed 4244 times
- 28942436_10155040417751582_603484720_o (Small).jpg (98.88 KiB) Viewed 4244 times
- 28822589_10155040417821582_1436171605_o (Small).jpg (95.09 KiB) Viewed 4244 times
Re: How to...
Posted: Wed Mar 07, 2018 9:03 pm
by HammerWihoutASickle
maxmekker wrote:So, lets see now, if we can get the basics done, before we go on with the heavier stuff

28876648_10155040124251582_1528187960_o (Small).jpg
after opening up and taking / unplugging the stock board
28810967_10155040126231582_630542547_o (Small).jpg
make a small jumper from one of the spare wires I included , and plug into SW port
28878917_10155040126856582_1629606187_o (Small).jpg
then connect the basic to get it up and running , ref to the included layout sheet , and my photo here
28876570_10155040127146582_1925058065_o (Small).jpg
motor plug
battery
speaker
receiver wires
charge battery and fire it up ( sorry for poor video)
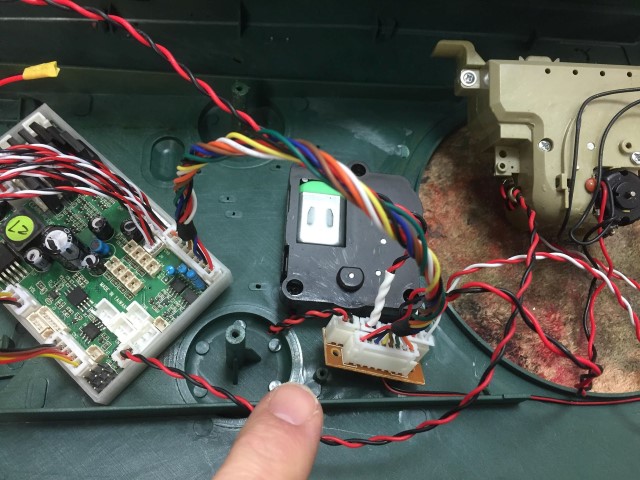
My layout with the sbus unit.
I need to know where these red wires go from the receiver go.
I also see a volume control wire on CN4, something I don't seem to have.


Sent from my Phone using Tapatalk
Re: How to...
Posted: Wed Mar 07, 2018 9:46 pm
by HammerWihoutASickle
Okay, so the existing wire according to the diagram needs a 10A fuse (in picture). How do you go about attaching it?

Sent from my Phone using Tapatalk
Re: How to...
Posted: Mon Mar 12, 2018 12:24 am
by HammerWihoutASickle
Got to work on the turret. Connected the airsoft gun to the board. Seems okay.
Though, I need to remove the airsoft unit to replace it with the one you gave to me. The wires need to go for that.
Do you have any advice?


