Page 1 of 4
Bitza Tiger 1 build
Posted: Fri May 27, 2016 8:40 am
by wibblywobbly
Originally I was handed a dogs breakfast of a Tiger and asked to see whether I could make it presentable.

I did my best and ended up with this
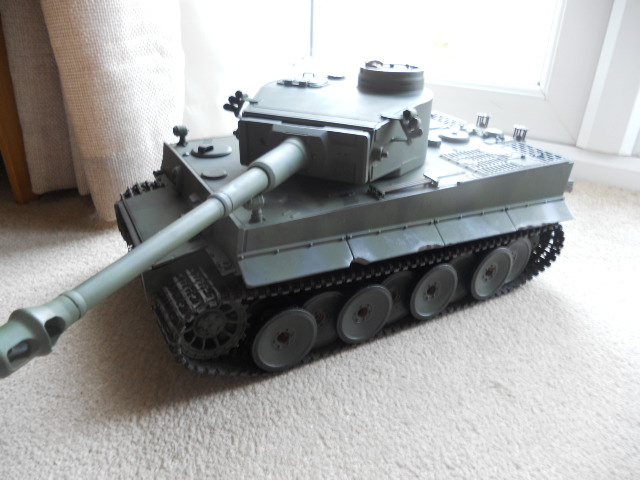
However, the owner then decided that as it now looked rather better than it did before, why not go the whole nine yards and make it a bit more representative of an early Tiger 1, so he hands me back the Tiger, and a pile of parts, and sends me a pic of the camo job that he wants. I'm posting the build so that he can see what the progress is, and so that anyone else can see how to do a quick makeover on a Tiger.
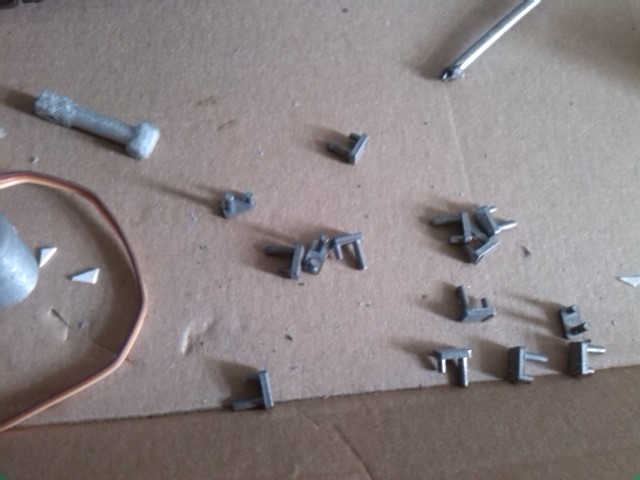
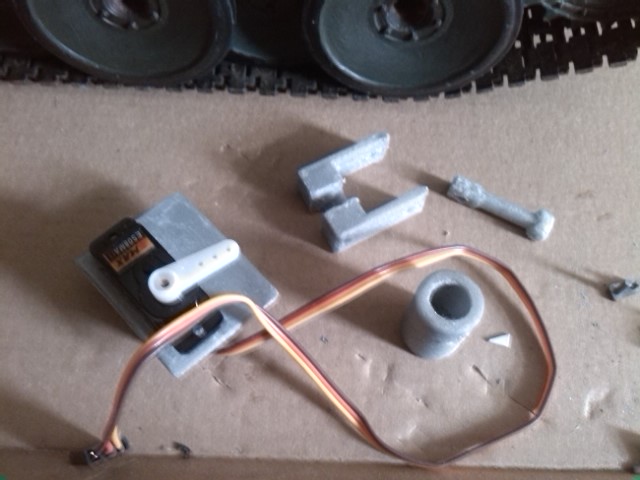
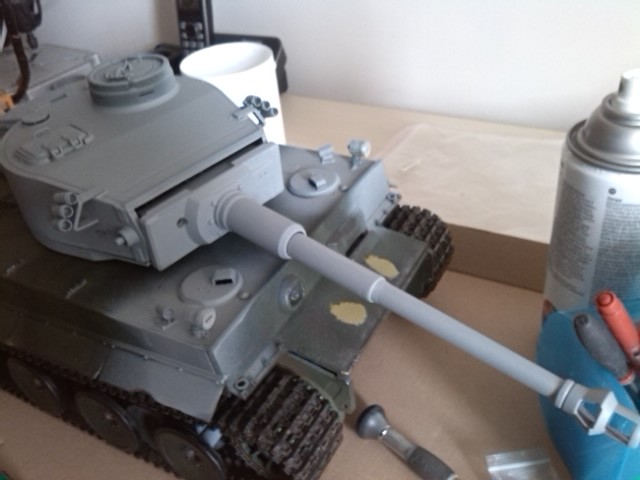
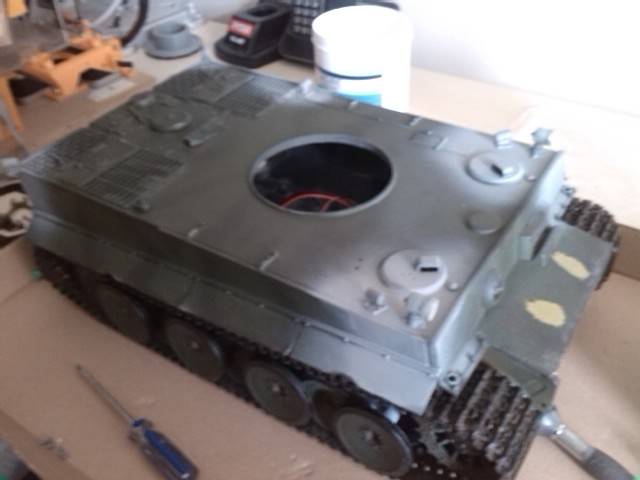
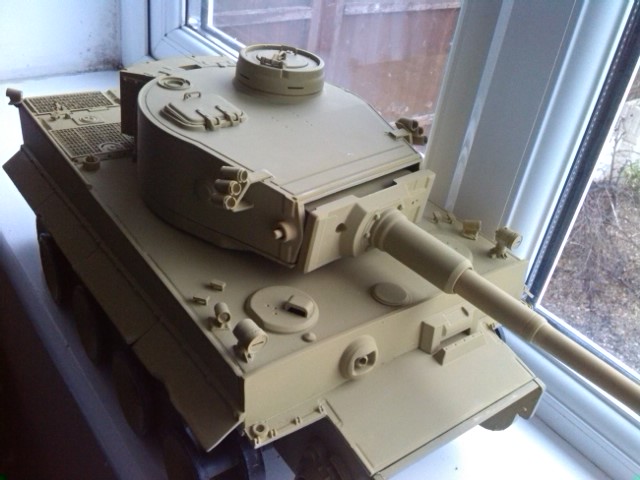
I set to, and after a couple of days I am now at this stage. It now has black steel gearboxes, a metal barrel, s-mine launchers, smoke launchers, fire extinguisher, and will have metal tow ropes, tow rope holders, servo recoil etc.
- IMG_20160527_081957.jpg (92.26 KiB) Viewed 5572 times
- IMG_20160527_081940.jpg (40.73 KiB) Viewed 5572 times
- IMG_20160527_081919.jpg (64.82 KiB) Viewed 5572 times
- IMG_20160527_081902.jpg (74.37 KiB) Viewed 5572 times
- IMG_20160527_081854.jpg (80.14 KiB) Viewed 5572 times
- IMG_20160527_081716.jpg (71.5 KiB) Viewed 5572 times
- IMG_20160527_081629.jpg (66.62 KiB) Viewed 5572 times
Re: Bitza Tiger 1 build
Posted: Wed Jun 01, 2016 10:58 am
by wibblywobbly
After much rubbing down, airbrushing different paint mixes, and getting completely the wrong base colour, I decided to do a bit of research.
First stop was to find out what colour an early Tiger would actually have been painted. Well, at the beginning of the war, or at least around 1943, they really only used one base colour, and that was Dunkelgelb. That colour, according to all of the colour charts that give you the cross-references between paint colours, was Vallejo Middlestone. 882. The disruptive camouflage was dark green, and I have the colour for that too.
Just to check I went on the web and started looking for pics of the real thing and models. This is where the fun starts, as different camera's accentuate different colours and in many cases change the colour completely. We the have the monitor variations etc, as well as the fact that because paint was supplied, and applied, there is pretty much no accurate depiction of camo anywhere. Looking at the sites that claim to show German WW2 camo, there seem to be more camo patterns than there were Tigers built. Most of them are simply artistic impressions that 'look nice'. There is no way that a German tank crew in the midst of battle is going to paint their tank in some complicated camo scheme that would have done the ceiling of the Cistine Chapel proud.
So looking at models I came across these:
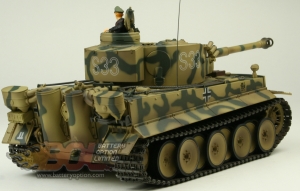
- A02121651b.jpg (57.36 KiB) Viewed 5507 times
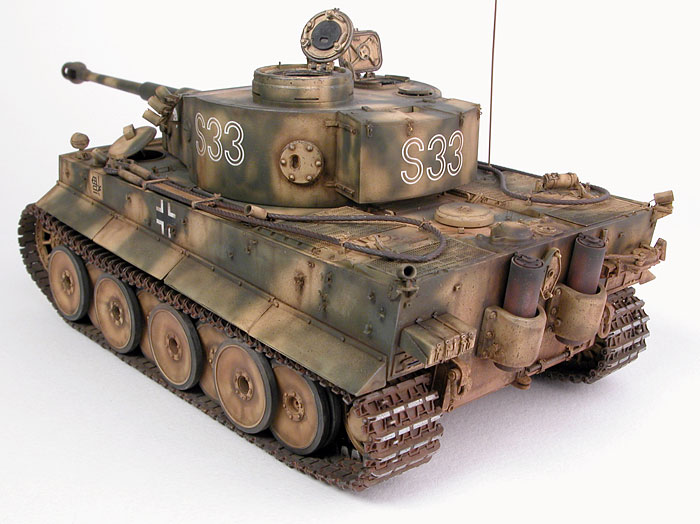
- tiger1s33cw_11.jpg (78.04 KiB) Viewed 5507 times
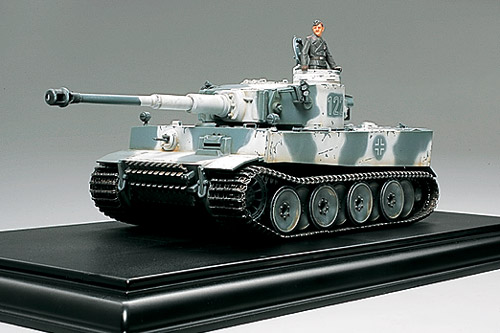
- top.jpg (46.81 KiB) Viewed 5507 times
I also looked at the Bovington tanks, and again different pics taken by different people with different camera's, show the same tank in a variety of different colours. The one photo I found in natural daylight indeed shows the base colour as a sand yellow/green.
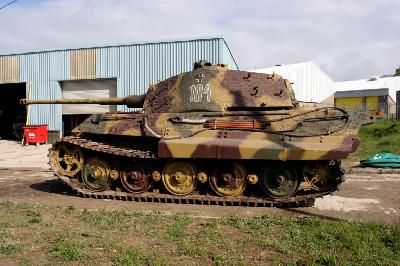
- kt.jpg (27.51 KiB) Viewed 5507 times
So, Vallejo Middlestone was duly applied. This is RAL7028. I let it dry as it changes colour over 24 hours, and sure enough it is a sand yellow/green colour. Again, when I take a pic in natural daylight, on a windowsill, it doesn't appear that colour at all, it appears to be a tan colour, which is what some of the models look like. The actual colour of this Tiger is closer to the KT above, which is what it should be. It just goes to show that when someone says that the camera never lies, they have obviously never painted a model tank!
- IMG_20160601_091128.jpg (92.15 KiB) Viewed 5507 times
So I reckon I am on the right track.

Re: Bitza Tiger 1 build
Posted: Wed Jun 01, 2016 12:28 pm
by Bogeyman
Now that looks a lot better since I last saw that dogs dinner.
John
Re: Bitza Tiger 1 build
Posted: Wed Jun 01, 2016 8:07 pm
by wibblywobbly
One set of wheels done, will try and do the other side tomorrow. They look a bit bright at the moment but after a coat of dust and earth it will all come together for a more natural look.
Brass etch vents on, with shading beneath.
Re: Bitza Tiger 1 build
Posted: Wed Jun 01, 2016 9:05 pm
by wibblywobbly
I have to make a fairly good job of it, as I am going to get a right earful off the owner if I don't!!

Re: Bitza Tiger 1 build
Posted: Thu Jun 02, 2016 2:54 pm
by Panther Ausf G
Colour interpretation.
Take a Camera and many shots in the same area on the tank and the colour will look different just by moving in small stages the light is the is the bogeyman. Take any irregular shape but uniform in colour, look carefully at and you will see many different shades.
The reference colours are only a guide to work from. Your model, your interpretation, as said camouflage was added in the field hurriedly by the crew. Brush, Rags, Hands even branches broken off shrubs. It was hide it, leg it.
You are doing a great job

keep the piccy's coming.
Re: Bitza Tiger 1 build
Posted: Thu Jun 02, 2016 6:40 pm
by wibblywobbly
I couldn't agree more about the camera and light, it makes a world of difference. I often have to tweak pics before I post them on here as otherwise the tones would be completely wrong.
I finished the road wheels today, and applied the green camo pattern. I can now leave it to dry overnight and then start on the weathering and stone chips. The dark green almost looks charcoal, so I will see what it looks like in the morning. Maybe the 1/35 sites were right, and it really needs Russian Green, which is lighter, to get the green to actually show up as the required colour?
Re: Bitza Tiger 1 build
Posted: Thu Jun 02, 2016 7:36 pm
by kj68
Hi it looks really good WW the guy should be pleased.
Re: Bitza Tiger 1 build
Posted: Thu Jun 02, 2016 11:08 pm
by wibblywobbly
Well I spoke to him today, and he would much prefer the colour of S33 above, and I have to confess that it does look better, so I set about mixing paint to get a colour that was close.
I ended up with a couple of spots of chocolate brown in a small puddle of beige, it is pretty much spot on. Amazingly the green then looked green. These are some strange colour combinations??
Re: Bitza Tiger 1 build
Posted: Fri Jun 03, 2016 10:15 am
by wibblywobbly
A quick whizz round and its now changing colour, I'll let this dry out and then one more slightly darker coat should get it where I want it to be. I am quite determined to turn this tired old HL Tiger into something presentable, just to prove that there is plenty of life in those car boot bargains that people come across, if nothing else.
