M1A1HA, 9/18/23 update. Delay of Game, two week penalty!

ALPHA
Major-General
Posts: 10963
Joined: Thu Oct 03, 2013 1:06 am

Re: HL M1A1 HA Build -Update 2/28, beginning Belly Armor

Post by ALPHA »

BarryC wrote:Hi Alpha,

I appreciate your input and am always open to sound advice. I am planning on creating some internal bracing between the hull sides. I had thought about a bulkhead just ahead of the motors and gear boxes creating if you will an "engine compartment". One to contain the grease splatter within the engine compartment and away from my electronics and two to provide bracing. However I am a little concerned about heat build up though I will not be running for extended periods of time. There will need to be another bulkhead forward perhaps between the 1st and 2nd road wheels. I even thought of using aluminum plate for the bulkheads. What are you thoughts on that approach?

Cheers,
Barry
Just as a reference point...you might want to check out Hotte's King Tiger buildviewtopic.php?f=23&t=10690...in the early stages he goes through a lot of helpful tips on bracing the hull..It is a Taigen...already metal..but he also found there was stress on the sides of the hull because of the metal turret and running gear....I think you find the pattern he used is very similar to the Triangulated removable bottom armor you made....I think that is an excellent design...but if it were me...and planned to cut the battery box out...I would make it permanent...that added structure would add strength to the linear structure of the hull...adding the same kind of gusseting would help the inner walls ...the drawback you will eventually have to figure out is fitting all the internals...as the added gusseting will take up a lot of space
The Hull of the M1 and other modern tanks from HL is pretty generous though...so with good foresight there really shouldn't be a problem ;)

ALPHA
User avatar
atcttge
Sergeant
Posts: 661
Joined: Wed May 13, 2015 4:35 am

Re: HL M1A1 HA Build -Update 2/28, beginning Belly Armor

Post by atcttge »

The belly armour should give you added structural integrity. If you want, make it hollow and pour resin in it, just make sure you account for the heat as the resin cures to avoid warping the hull. That's gonna give you a really solid hull.
User avatar
atcttge
Sergeant
Posts: 661
Joined: Wed May 13, 2015 4:35 am

Re: HL M1A1 HA Build -Update 2/28, beginning Belly Armor

Post by atcttge »

As for heat build up at the engine compartment, I don't think that's much of a problem. I've got a speaker in between the gearboxes and the speaker mount effectively covers the engine along with the bulkhead. Electronics heat build up would be more of a concern but if you're gonna put a fan I don't see a problem.

Since the M1 doesn't produce any smoke (or very little smoke), you can bin the smoker and replace it with a cooling fan. Open up the central exhaust vents, and you can ventilate your gearbox area.

The engine bulkhead can also help in waterproofing the hull, sealing the rear area from the electronics. Add another bulkhead upfront just behind the driver's hatch, then seal all the holes where the suspension is connected, and you got a fairly water resistant hull - just don't make it dive beyond the hull deck hehehe

I got mine running in the rain and on puddles of water and there wasn't an issue, the electronics was dry.
User avatar
atcttge
Sergeant
Posts: 661
Joined: Wed May 13, 2015 4:35 am

Re: HL M1A1 HA Build -Update 2/28, beginning Belly Armor

Post by atcttge »

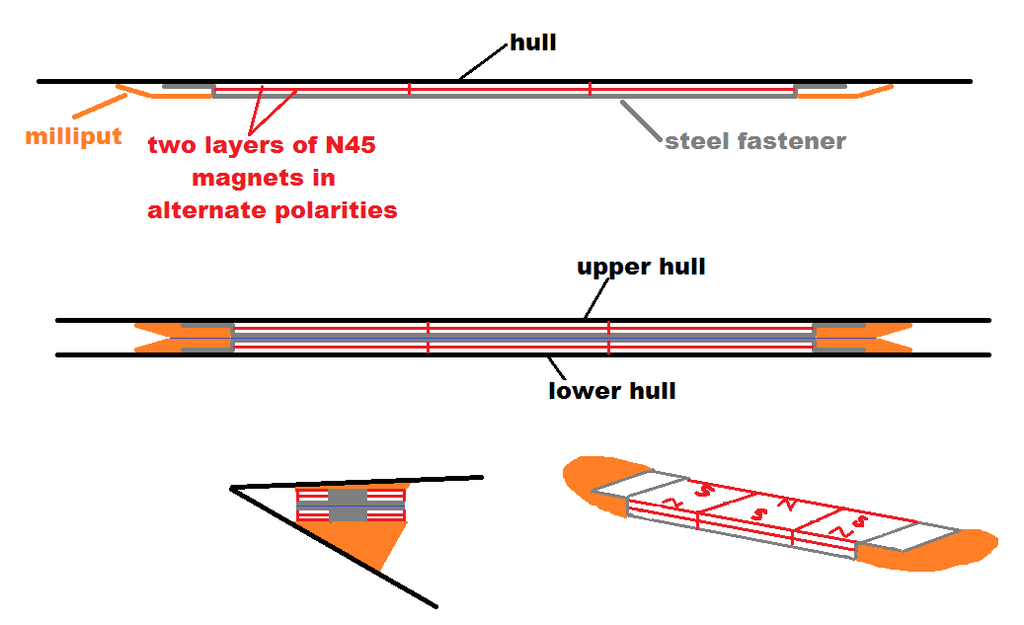
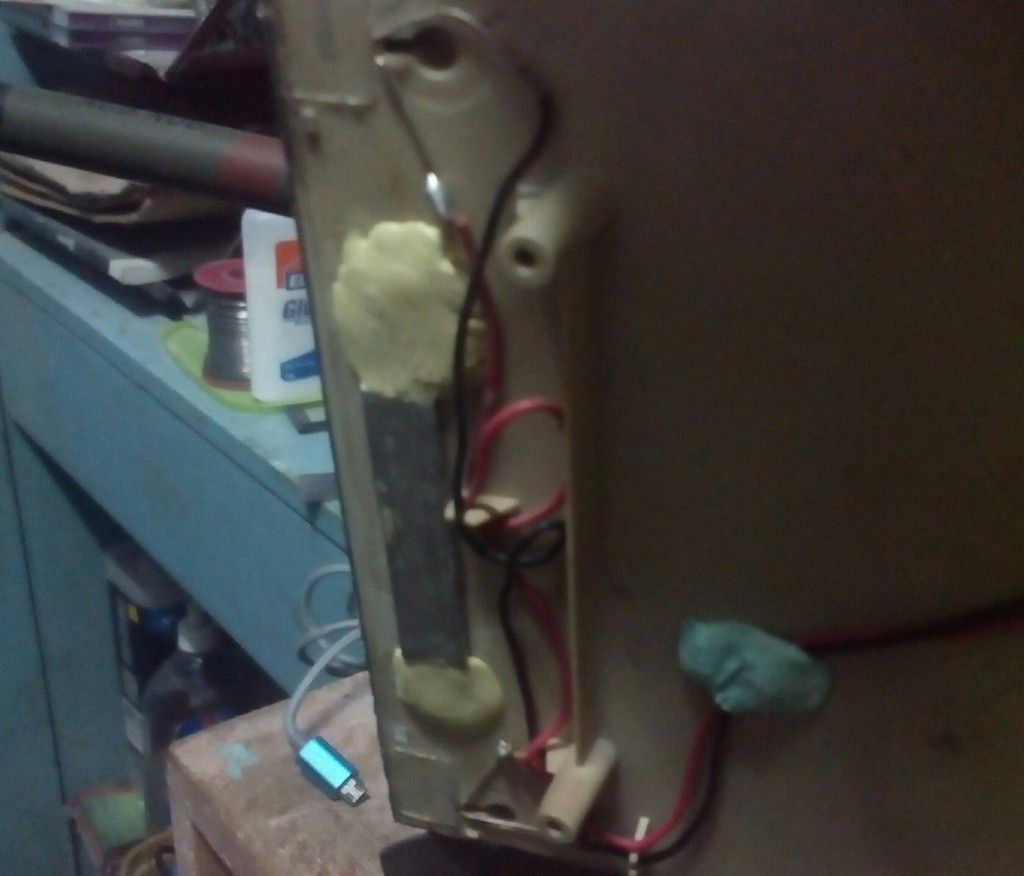
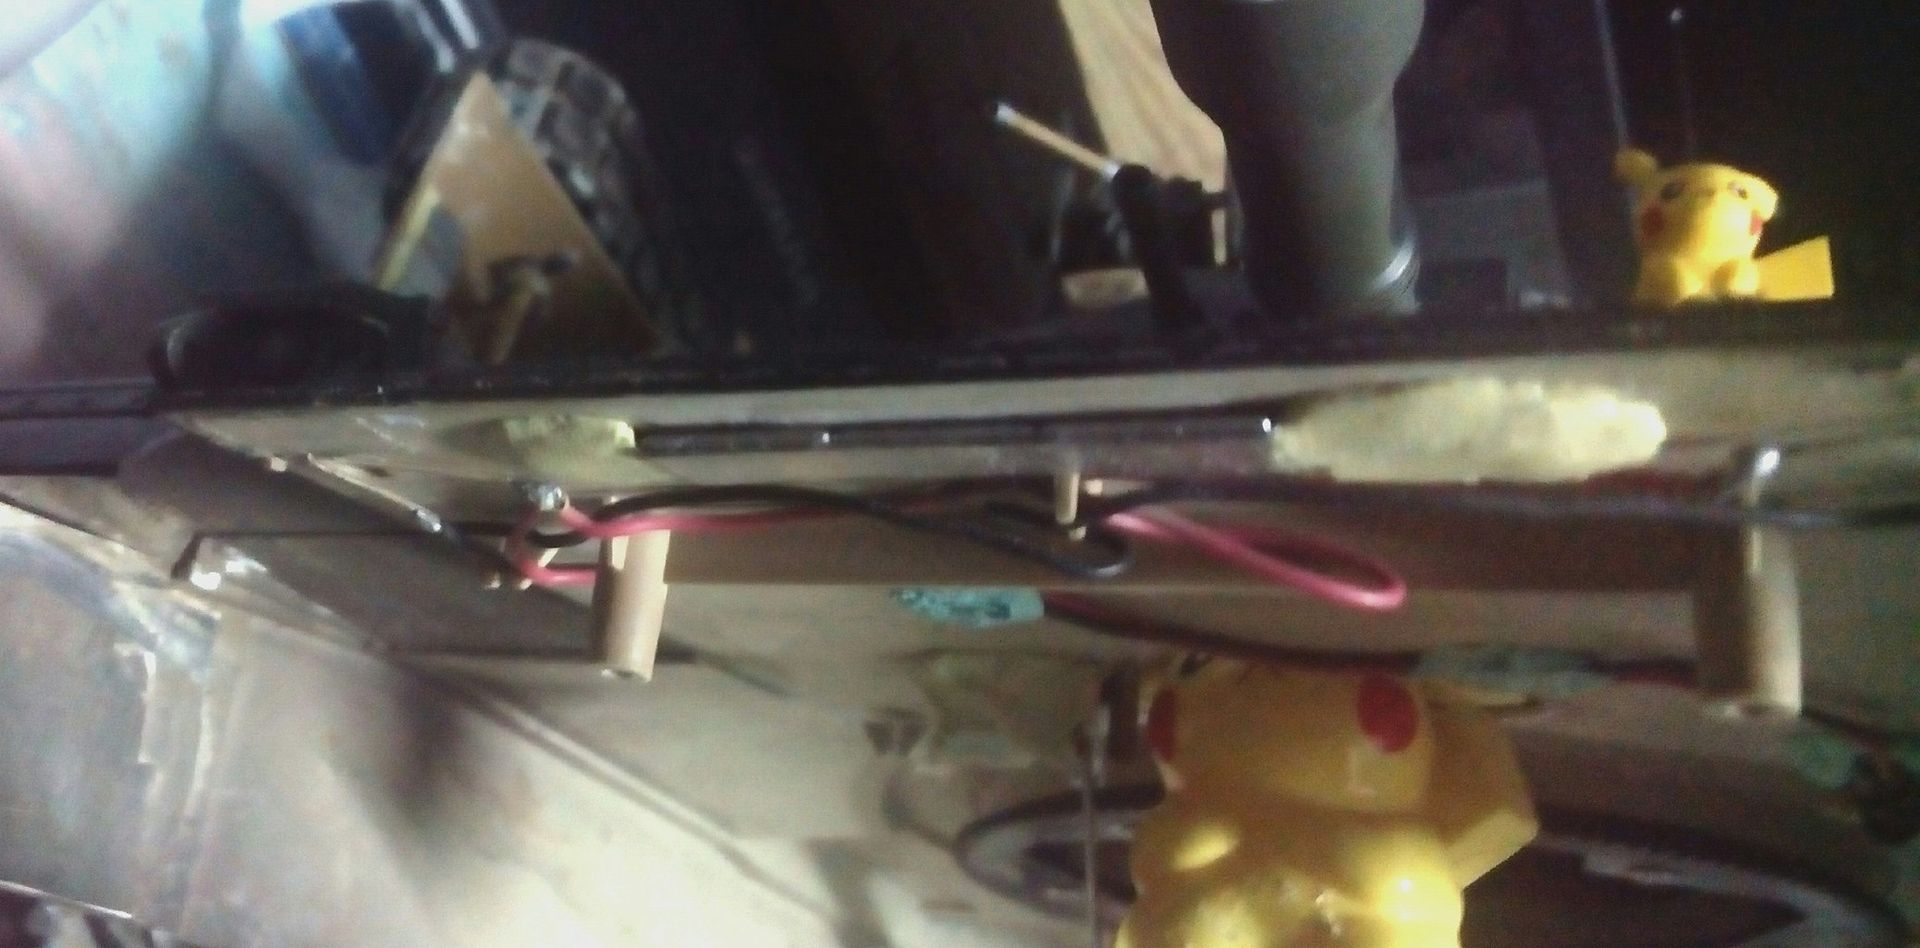
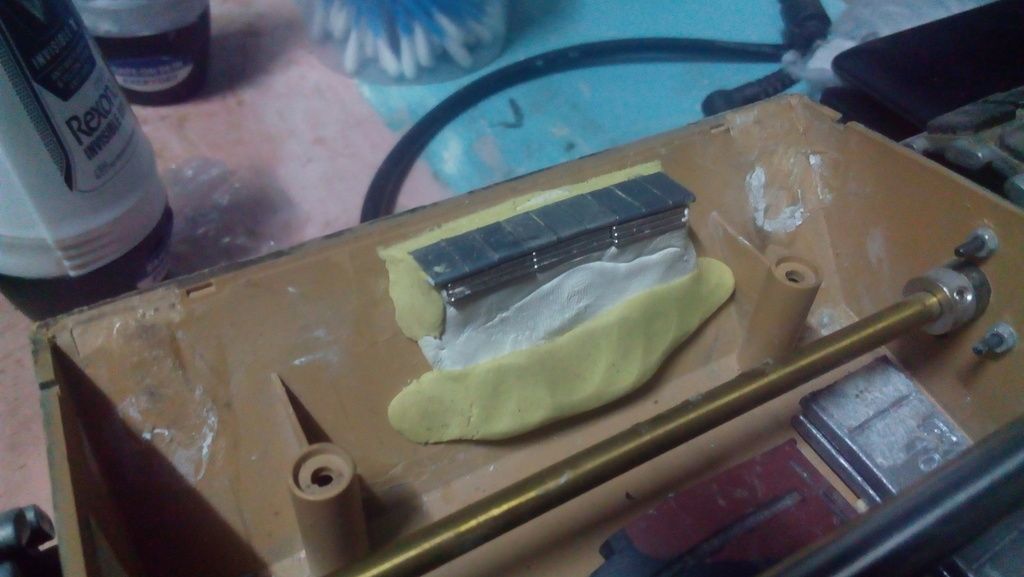
Ok, as promised, here are the pix and diagram for my magnets.

Image

Image

Image

Image

I used steel fasteners and bent to shape to serve as the housing-anchor. Magnets I used were N42 14x9x2mm I think (although I wrote N45 in the diagram - the higher the rating, the better). For the assembly under the hull deck, it was just one layer inside the housing-anchor. For the lower assembly, it was several layers of these magnets. The more magnets, the greater the strength.

The steel housings serve to prevent the magnets from prying each other off the plastic hull. I've seen that if the magnets are strong, and are directly glued to the hull, eventually one of these will be pried out of the hull because of the magnetic bond. So to ensure that doesn't happen, I glued the magnets to the steel faster, then bent the steel fastener to shape with the wings serving as anchors. I then glue the upper assembly under the hull deck. To ensure the magnets stay at the proper place, I put magnets on TOP of the hull deck. This also serves to pull up the magnets underneath, pressing onto the plastic and ensuring it really is glued. When the glue is cured (I use superglue), I then use milliput over the anchors to make the whole thing really secure. Once the milliput is cured, it will take deliberate prying with a tool to remove the assembly from the hull.

The result is a very strong bond between the assemblies, ensuring that the hull top does not pop out when the tank is run hard over rough terrain. Repeat the same for the rear. An additional advantage is you can now cut off all the posts inside to free up more space, especially if you add the belly armour filled with resin as that would give structural rigidity to the hull instead of the battery box and posts.
User avatar
atcttge
Sergeant
Posts: 661
Joined: Wed May 13, 2015 4:35 am

Re: HL M1A1 HA Build -Update 2/28, beginning Belly Armor

Post by atcttge »

As for internal space...

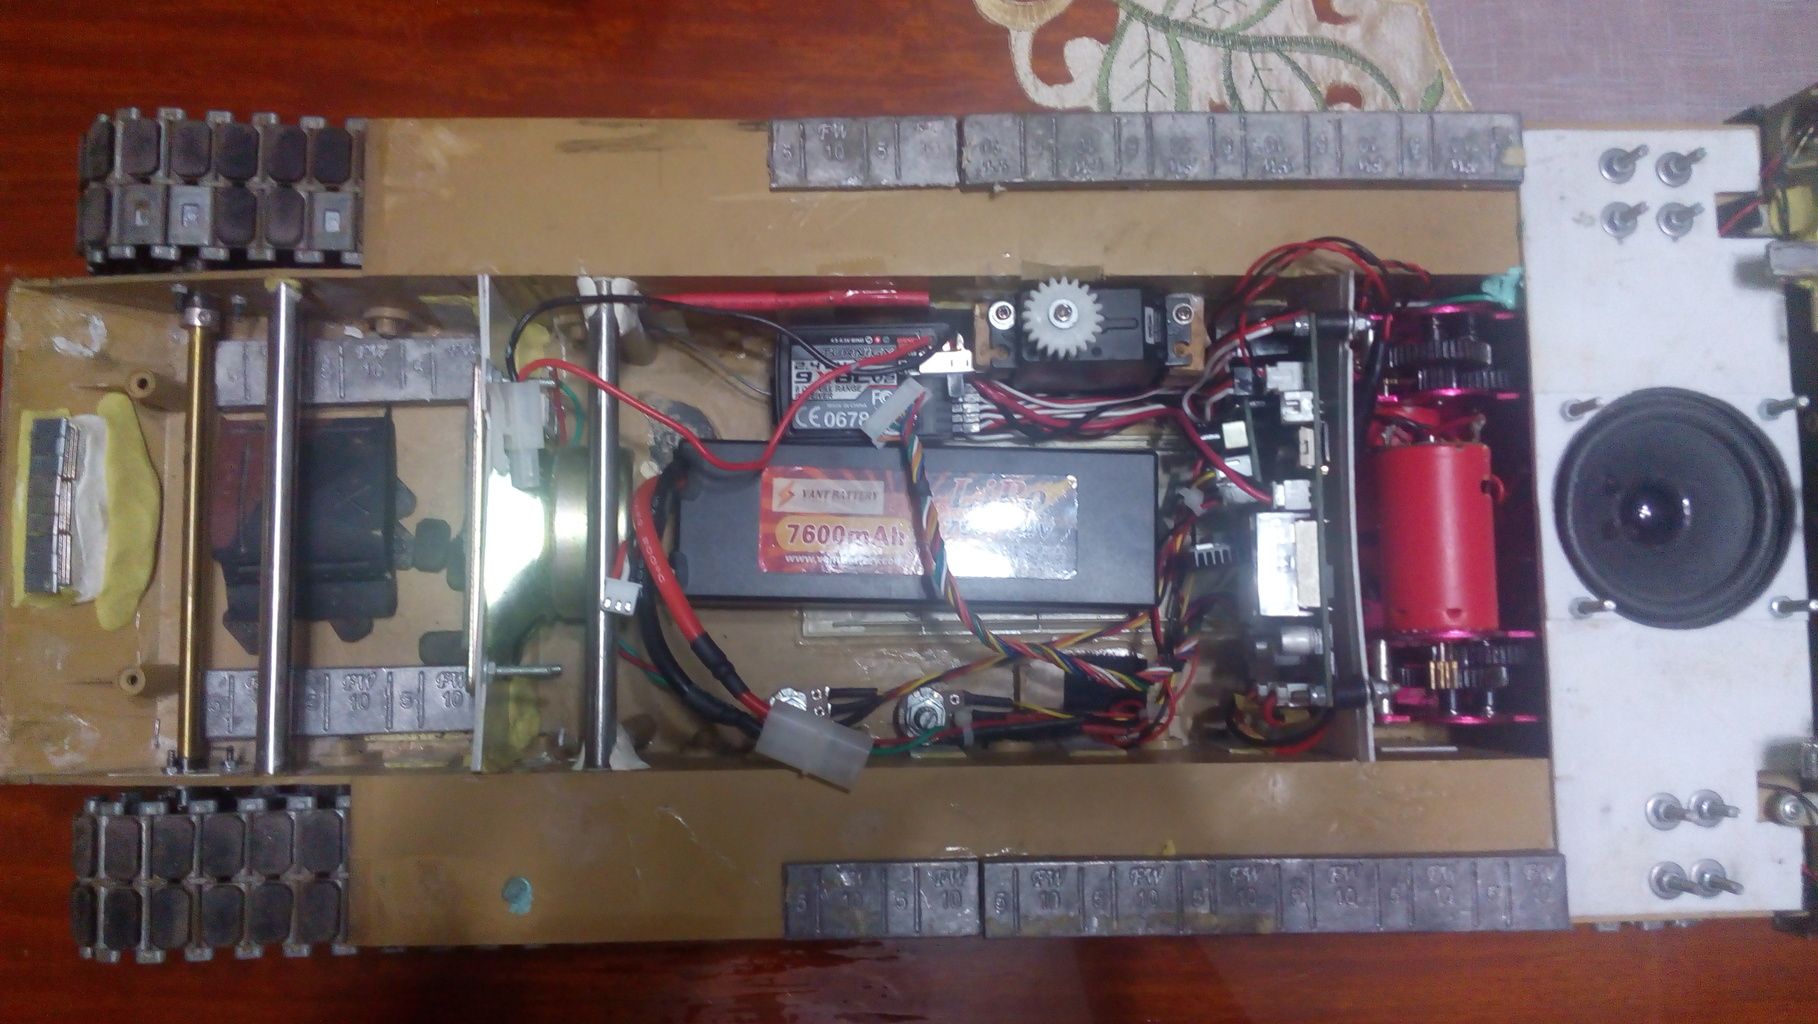
I dunno about you, but after removing the battery box, I still see the need for more space. Which is why I attached my IBU2 on its side to the bulkhead separating the electronics compartment and the engine area, especially since a major reason for the lack of space is the oblong speaker I have installed just behind the driver.

Image

But that lack of space is because of my setup. If I didn't have a driver, that oblong speaker would be further forward. Also, with the IBU3, there won't be a need for a second speaker, although that would mean I'd retain the oblong speaker in its place and replace the rear one with either a fan, ballast, or just keep it empty.
User avatar
BarryC
2nd Lieutenant
Posts: 2473
Joined: Sun Jan 03, 2016 11:43 am
Location: Savannah, GA. USA

Re: HL M1A1 HA Build -Update 2/28, beginning Belly Armor

Post by BarryC »

Atcttge,

First thank you very much for taking your time to explain, I understand the theory and your process. I can see in the pics the installation between the upper and lower, forward hull but am I missing the installation on the other locations?

Thanks,
Barry
"Details make perfection, and perfection is not a detail."
Leonardo Da Vinci
User avatar
atcttge
Sergeant
Posts: 661
Joined: Wed May 13, 2015 4:35 am

Re: HL M1A1 HA Build -Update 2/28, beginning Belly Armor

Post by atcttge »

Yes, there is a simple reason for that, and it's that I haven't implemented the same method for securing the rear. :D As of now, I still use the old Mk2.5 version (Mk1 was MichaelC's version hehehe) in that I had the magnet glued directly to the hull deck, while its opposite number was on a mount using steel fastener that was glued and secured by milliput. The one on the front is using the Mk3 version hehehe

You can see the the rear magnets on the lower hull at the last pic I posted showing my M1's guts. It's the two, uhm, appendages that's protruding from the rear part over the white styrene speaker mount. Come to think of it, I can now do the Mk3 version since I now have more space to mount the lower hull magnets thanks to that speaker mount (and I wouldn't have thought of doing that until you raised the point :) ).

I reckon you can do something similar and even more refined with your precision. I am lazy and it shows in my work hehehe :haha:
User avatar
atcttge
Sergeant
Posts: 661
Joined: Wed May 13, 2015 4:35 am

Re: HL M1A1 HA Build -Update 2/28, beginning Belly Armor

Post by atcttge »

I'm thinking of also adding more magnets, on the sides this time over the tracks but making sure there is ample space between the magnets and the tracks, as strong magnets can and will make the track pull up towards the magnets from what I've seen. This is to ensure that the sides are also magnetically locked onto the hull and, hopefully, help prevent misalignment issues with the servo gear and the turret ring gear when running the tank hard over rough terrain.
User avatar
BarryC
2nd Lieutenant
Posts: 2473
Joined: Sun Jan 03, 2016 11:43 am
Location: Savannah, GA. USA

Re: HL M1A1 HA Build -Update 2/28, beginning Belly Armor

Post by BarryC »

atcttge wrote:Yes, there is a simple reason for that, and it's that I haven't implemented the same method for securing the rear. :D As of now, I still use the old Mk2.5 version (Mk1 was MichaelC's version hehehe) in that I had the magnet glued directly to the hull deck, while its opposite number was on a mount using steel fastener that was glued and secured by milliput. The one on the front is using the Mk3 version hehehe

You can see the the rear magnets on the lower hull at the last pic I posted showing my M1's guts. It's the two, uhm, appendages that's protruding from the rear part over the white styrene speaker mount. Come to think of it, I can now do the Mk3 version since I now have more space to mount the lower hull magnets thanks to that speaker mount (and I wouldn't have thought of doing that until you raised the point :) ).

I reckon you can do something similar and even more refined with your precision. I am lazy and it shows in my work hehehe :haha:
I thought that might have been them but better to ask than assume!

Barry
"Details make perfection, and perfection is not a detail."
Leonardo Da Vinci
User avatar
BarryC
2nd Lieutenant
Posts: 2473
Joined: Sun Jan 03, 2016 11:43 am
Location: Savannah, GA. USA

Re: HL M1A1 HA Build -Update 2/28, beginning Belly Armor

Post by BarryC »

First pass at establishing slope and center height. Center height is good but I miss calculated the slope.

Cheers,
Barry

Image

Image
Last edited by BarryC on Mon Jul 17, 2017 11:28 pm, edited 1 time in total.
"Details make perfection, and perfection is not a detail."
Leonardo Da Vinci
Post Reply

Return to “Modern Builds”