Page 1 of 9
KV-1 metal upgrades
Posted: Tue Jul 28, 2015 6:45 am
by Arnie_DK
So, its about time I started some real work on my KV-1.
I have acumulated quite a few upgrades the past couple of months, that I want to install.
I made a quick "swap" from the standard HL tank I got and put it in its new hull, to see how everything fitted together, and they fit very well.
I did notice that the suspension is very weak in the back and wanted to adjust this as a first order of buisness. If anyone have a tip on how to easily adjust the suspension bars, I would greatly apreciate it

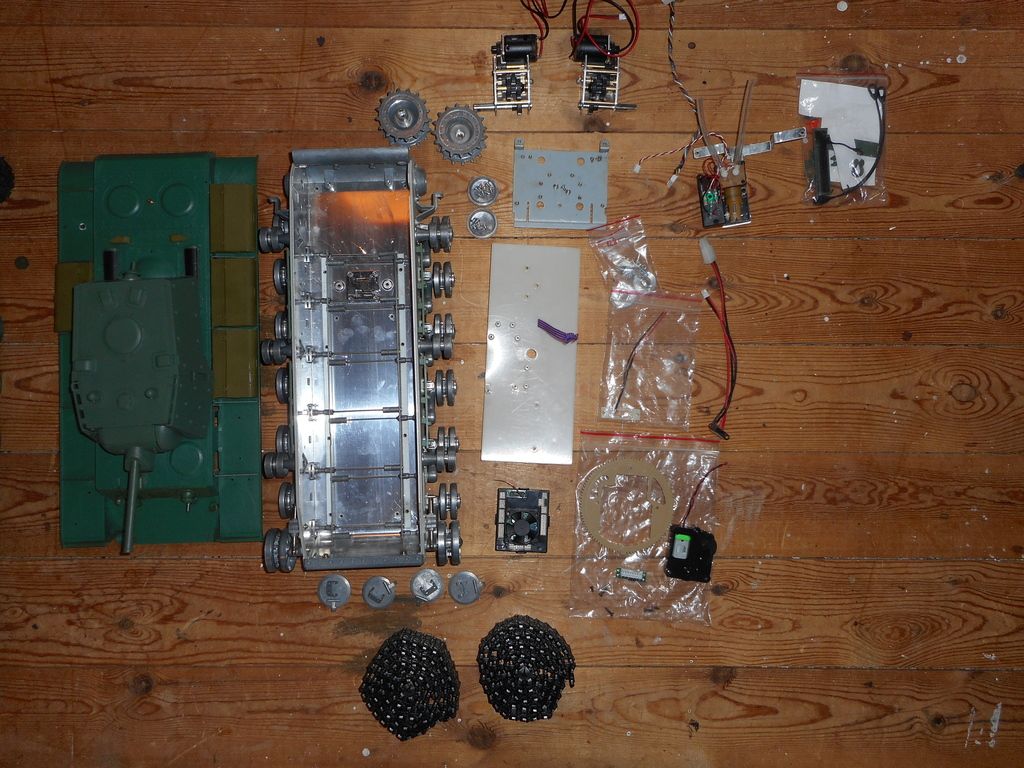
Here is everything laid out. Only thing that survived from the original tank, was the board and turret
Re: KV-1 metal upgrades
Posted: Tue Jul 28, 2015 6:50 am
by HERMAN BIX
wow, you sure have a mission there mate !
I cant be any help on the suspension as Im looking at correcting a Russian model as well.
How do you intend to secure the upper hull to the lower ? magnets ?
Re: KV-1 metal upgrades
Posted: Tue Jul 28, 2015 7:08 am
by ALPHA
Looks like you got your adventure off to a good start...that Taigen hull has a sag in the rear ...you might want to check out Painless Wolfs Kv2 conversion thread...he did a great job sorting that out
Good Luck

ALPHA
Re: KV-1 metal upgrades
Posted: Tue Jul 28, 2015 7:16 am
by Arnie_DK
Herman: The lower hull comes with a metal bar that connects to the upper hull, so its as easy to open it, as the Taigen/Torro T-34. You just fasten the metal bar to two of the upper hull screw struts and it locks into the lower hull. Easy peasy
Alpha: Thanks, I will search for his build thread right now
Re: KV-1 metal upgrades
Posted: Tue Jul 28, 2015 7:21 am
by ALPHA
Arnie_DK wrote:Herman: The lower hull comes with a metal bar that connects to the upper hull, so its as easy to open it, as the Taigen/Torro T-34. You just fasten the metal bar to two of the upper hull screw struts and it locks into the lower hull. Easy peasy
Alpha: Thanks, I will search for his build thread right now
If my memory serves me right...search Ice Palace ..or just Palace as a key word
Good Luck Arnie
ALPHA
Re: KV-1 metal upgrades
Posted: Tue Jul 28, 2015 8:23 am
by Arnie_DK
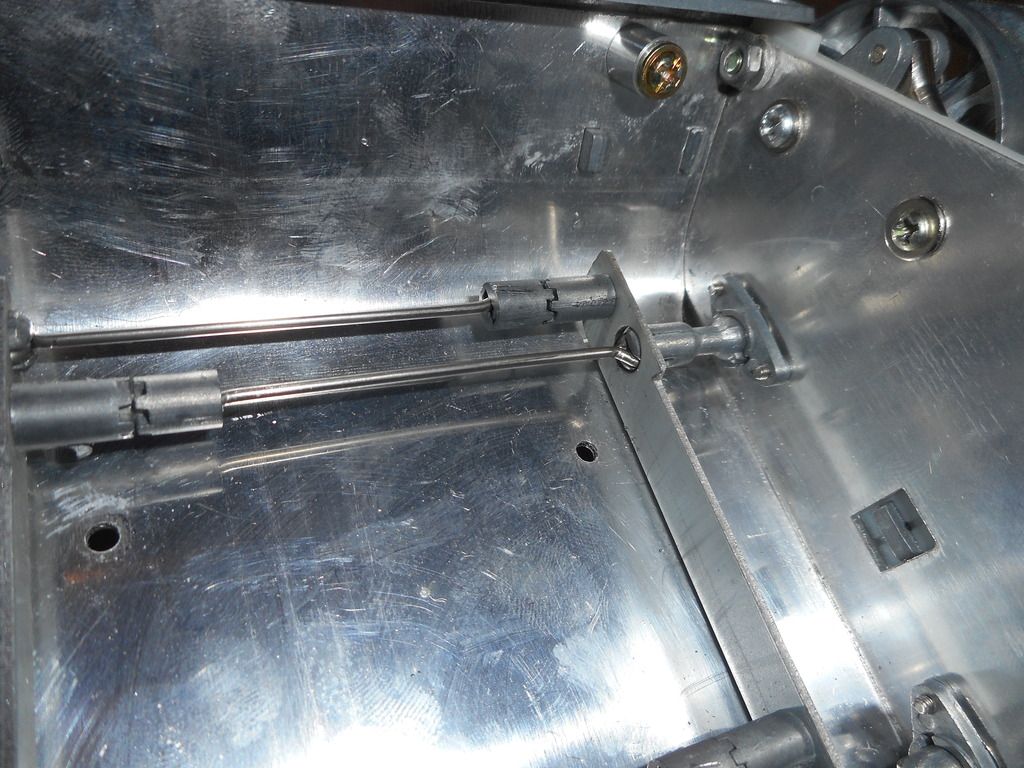
HA!! I figured out the suspension. Real simpel really.
The suspspenion arms are turned to an vertical position and then you wiggle it a bit out of the hull, then the suspension system can be adjusted and the arm is wiggeled back into place.
The hull rides way too high right now, but I'm pretty sure it will look more natural, once the motors and tracks are installed. Time will tell

Here is what I did
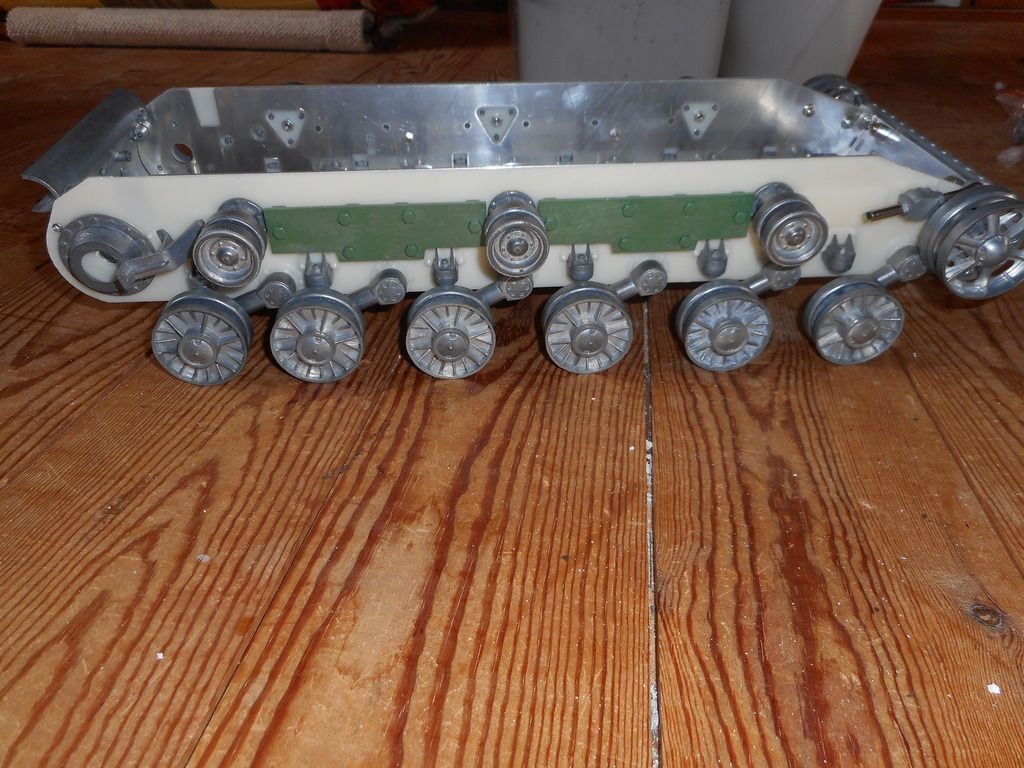
Suspension before
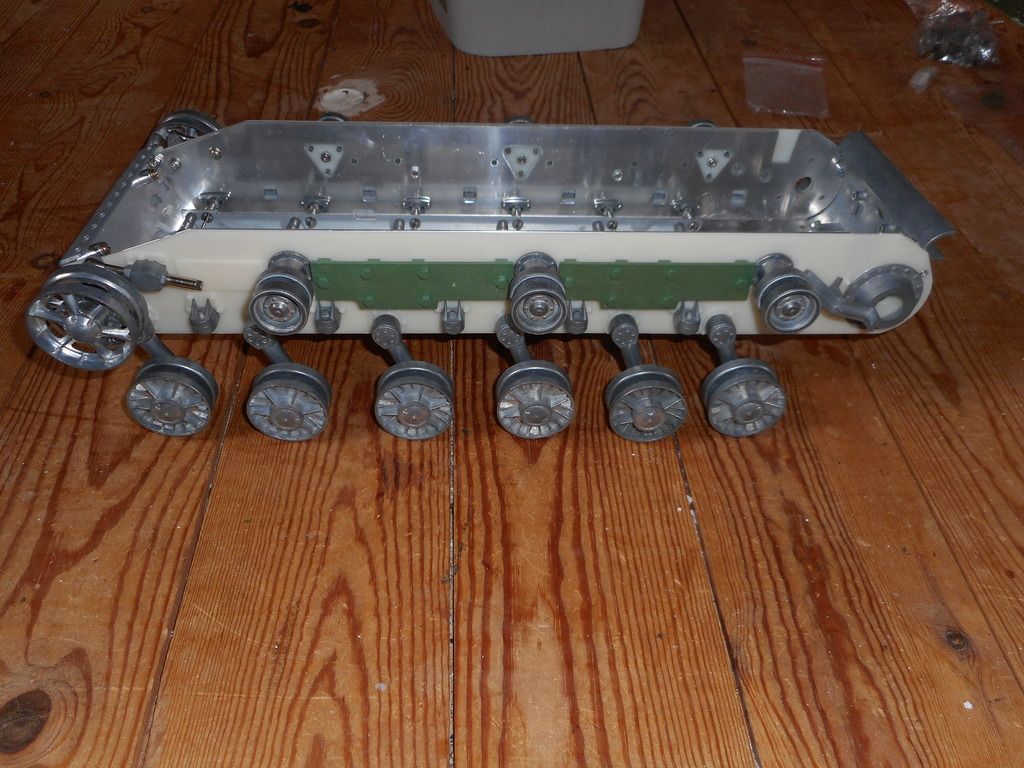
And now
Re: KV-1 metal upgrades
Posted: Tue Jul 28, 2015 9:24 am
by wyvern
Hi,
I think that may ride too high after the bits are added but hopefully its ok. Although there is adjustment in the suspension, its too coarse to be of much use - the other option is to gently twist the torsion bars where required to get more/less spring force at each suspension arm. I am going to try and modify the suspension on mine to make it adjustable. I will post some pics if successful.
Keep up the good work
Guy
Re: KV-1 metal upgrades
Posted: Tue Jul 28, 2015 1:08 pm
by Arnie_DK
It rode way too high, even after the rest was added, so have moved the 4 center arms, back to their original position, leaving only the front and rear arms tighter. This seems to work
Re: KV-1 metal upgrades
Posted: Tue Jul 28, 2015 2:03 pm
by PainlessWolf
Good Morning,
You were looking for the 'Crackerbox Palace' build. ;o) I corrected the suspension by mounting an extra arm on the back four mounts under the gearboxes. I got the tip from Alpha ( who is being too modest ) and adjusted it by adding an arm brace made from spring steel as well. It was rube goldberg-ian but it raised the arse of my 25 lb Capture KV-IIA right up to level and keeps it there to this day. Following along on this build, Arnie. I do love a well done KV-2
regards,
Painless
Re: KV-1 metal upgrades
Posted: Tue Jul 28, 2015 4:24 pm
by ALPHA
Arnie_DK wrote:HA!! I figured out the suspension. Real simpel really.
The suspspenion arms are turned to an vertical position and then you wiggle it a bit out of the hull, then the suspension system can be adjusted and the arm is wiggeled back into place.
The hull rides way too high right now, but I'm pretty sure it will look more natural, once the motors and tracks are installed. Time will tell
Here is what I did
Suspension before
And now

Arnie! ...you supposed to do the rear only...that's the part that sags...especially once you put the gearboxes in

Another suggestion for your suspension is to take out those rods ...and find appropriate length Tamiya "flat" torsion bars...and swap them out...I used torsion leaf from the Tiger I for my Panzer III

Are we having fun yet?
ALPHA


