Page 1 of 3
Toro Tiger 1 Kit + Asiatam SturmTiger Build
Posted: Wed Mar 04, 2015 5:16 pm
by Onesmallstep1966
This little lot arrived today...
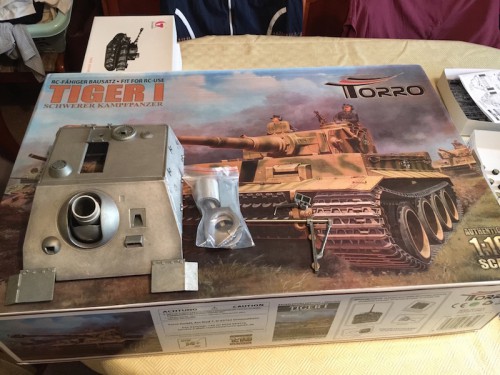
- Toro Tiger 1 Kit & Asiatam Sturmtiger Upper Hull
I ordered a separate upper hull for the Sturmtiger so that I can keep the kits original Tiger 1 upper hull/turret and swap them out as needed.
I can't wait to get started

P.S, BIG thanks to RCtank.de. He swapped out the kits Tiger 1 early wheels for late wheels at no extra cost

Re: So it begins...
Posted: Wed Mar 04, 2015 8:35 pm
by Merlin707
Hi Onesmallstep, Dominique at RCTank.de is an amazing chap and he goes that extra mile for his customers.
Great looking kit, bet you can't wait to get started?
Re: So it begins...
Posted: Wed Mar 04, 2015 8:38 pm
by edpanzer

I was considering the asiatam sturm conversion for my tiger so post lots of pics of your build
Re: So it begins...
Posted: Thu Mar 05, 2015 7:57 am
by HERMAN BIX
Yip, you said "Tiger" so I will be watching

!
Re: So it begins...
Posted: Thu Mar 05, 2015 9:01 am
by Dietrich
That SturmTiger top is very impressive indeed....

Please can I ask if you have a link to the part in the site ?
Re: So it begins...
Posted: Thu Mar 05, 2015 10:38 am
by Onesmallstep1966
Dietrich wrote:That SturmTiger top is very impressive indeed....

Please can I ask if you have a link to the part in the site ?
I got it from their eBay shop here...
http://www.ebay.co.uk/itm/141561192335? ... 26_rdc%3D1
But you can also buy it directly from their web site here...
http://www.asiatam.com/product_info.php ... pesbjegv90
You should note that this is only for the Metal Sturm top so you will need to purchase another plastic upper hull (or use an existing one). This cost me €25.00 euro from rctank.de (about 18 quid).
Re: So it begins...
Posted: Thu Mar 05, 2015 4:36 pm
by Onesmallstep1966
I couldn't leave it alone for long

and just had enough time this afternoon to prepare the upper plastic hull for the metal top.
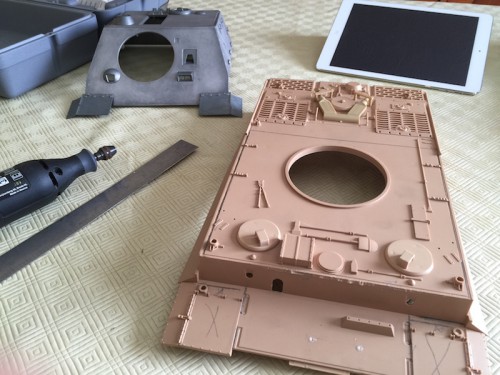
- Plastic Tiger 1 Tp Ready for Conversion (aka Hacking to bits)
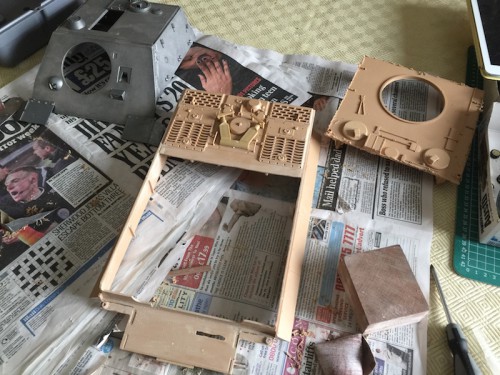
- Unwanted Material Removed
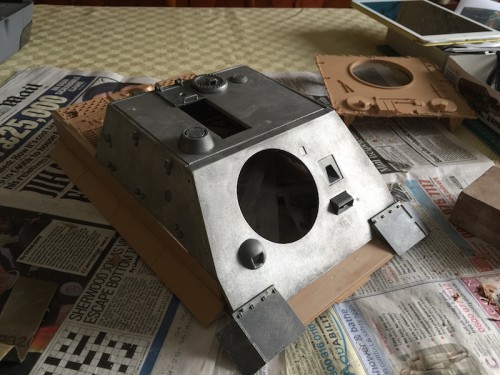
- Hallelujah, it fits.
Next will be filling the holes left behind by the removal of some moulded features, cleaning up the metal hull and then fixing them together.
Re: So it begins...
Posted: Thu Mar 05, 2015 8:33 pm
by MichaelC
1966,
Quick question...... Did the front mud guards come attached to the upper hull on the strum or did you epoxy it on yourself ?
1966 was a good year.....
MichaelC.
Re: So it begins...
Posted: Fri Mar 06, 2015 9:25 am
by Onesmallstep1966
MichaelC wrote:Quick question...... Did the front mud guards come attached to the upper hull on the strum or did you epoxy it on yourself ?
All the metal parts come attached to the Strum upper hull (except for the hoist that needs assembling) and the front mud guard appears to have a couple of metal pins holding it to the main body (I don't think it would be a problem removing them if needed).
MichaelC wrote:1966 was a good year......
It was, but my wife thinks I should be past getting exited about model tanks at my age

Re: So it begins...Toro Tiger 1 Kit + Asiatam Sturmtiger
Posted: Sun Mar 15, 2015 9:12 am
by Onesmallstep1966
I found a bit more time to progress this project a little further but spent most of it messing around with the Asiatam Casemate/Heng Long Tiger 1 upper hull, trying to figure out the best way to join them together, but finally decided to use brass pins and epoxy to do the job (I'm still at the dry-fit stage).
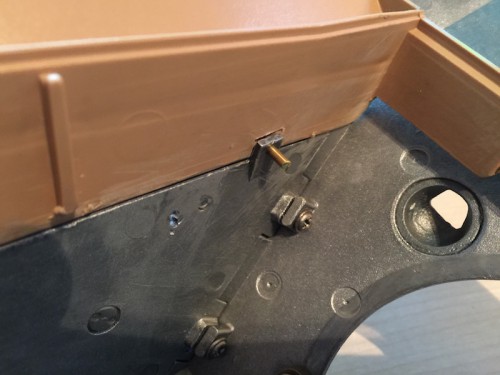
- Brass Pin
Whoever assembled the Asiatam casemate didn't drill one of the conical bolt holes in the correct position (the indent where it should have been was clearly visible). Thankfully it was an easy job to knock it out and re-drill another hole. (its actually useful to have a complete conical bolt not attached to the casemate. I'm going to need lots more of them and this has allowed me to make a simple mould of it using milliput so I can cast my own).
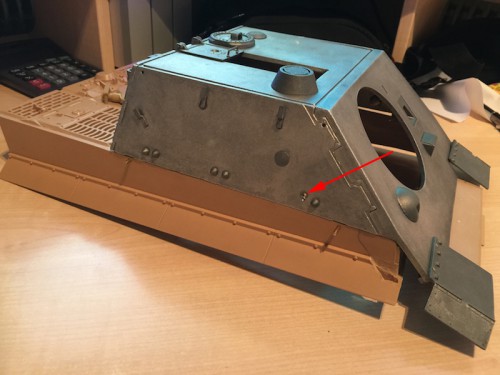
- Conical Bolt
I've also been stumped on how best to modify the front fender to fit around the front mounting point, but thanks to the help of another forum member (BIG thanks Tony) I now have a way forward.
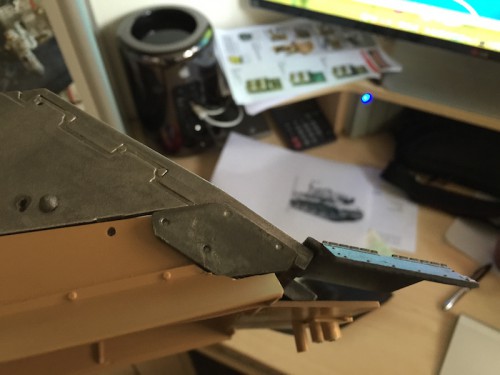
- Fender
I've also started construction of the lower hull and I have to say that I'm really impressed with the Torro Tiger 1 kit. The instructions are clear, the components (lots of them) are clearly labeled and so far the fit on everything is perfect.
It's also very refreshing (and welcome) to see Torro include spares for almost every component part (some of those grub screws are tiny and extras are to be expected, but to include an extra suspension arm, torsion bar etc, left me pleasantly surprised).
The first job was the assembly of the track tensioners and suspension. The manual recommends using threadlock on all screws so it was handy I had some loctite lying around

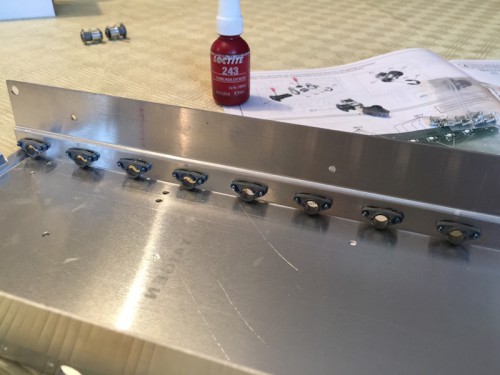
- Suspecsion
I've now fitted the suspension arms and torsion bars.
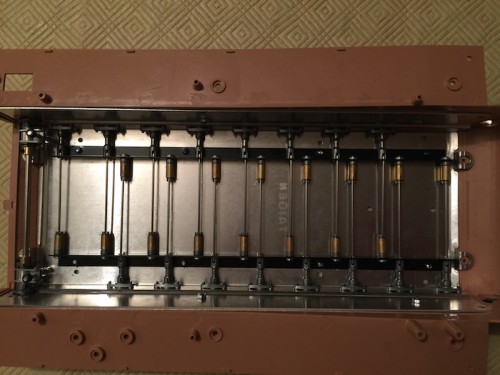
- Torsion Bars
The next job will be to clean up the Asiatam casemate and permanently attach it to the HL upper hull. I also need to prime and paint the lower hull before doing much more of that.
More to follow...

