Page 1 of 12
"JAGD"- KAMPFWAGON 173 REDO
Posted: Sun Jan 12, 2014 10:50 am
by HERMAN BIX
Clean forgot to get the camera out untill well into it, but have a reasonable sequence line to outling the revamp of a stock driveline Jagdpanther , in my opinion mid-late build towards wars end.
Hope this picture submission works as planned, or this could get messy !
Re: "JAGD"- KAMPFWAGON 173
Posted: Sun Jan 12, 2014 4:43 pm
by doc larsson
man i so want a jagdpanther ! will be watching......
Re: "JAGD"- KAMPFWAGON 173
Posted: Sun Jan 12, 2014 6:07 pm
by PainlessWolf
Herman,
Nice paint there! I am with Doc, I need to get a Jagdpanther one day. The only thing holding me back is thoughts of another go round with the spare track holders. *chuckles* They are the same on the Panther and Jagdpanther.
Regards,
Painless
Re: "JAGD"- KAMPFWAGON 173
Posted: Sun Jan 12, 2014 7:18 pm
by Red Devils
Sweet looking Jagdpanther Herman, you got some great brass details...
Derek
Re: "JAGD"- KAMPFWAGON 173
Posted: Sun Jan 12, 2014 10:01 pm
by HERMAN BIX
Got the vents closed in The one below the shell case ejection hatch was made to sit just below the opening so the hatch would still open.
concept is that these would have been hastily fabricated by the crew, or another member of the deployment to try and stave off battlefield destruction by aircraft. By the later stages, I would assume the crew had more to worry about from aircraft and mechanical failure or fuel shortage than enemy tank action per-se. The mounts will have been welded onto the engine covers, not bolted-to hard with no access to time, gear and skills. in fact, they used their own Schurzen to provide materials!. The lack of maintenance units and technical support meant that the inconvenience of the armour secured to the engine deck covers did not attract the usual trouble from the maintenance guys !!
simply 'form follows function'
Textured using baking soda onto the wet undercoat, then over coated with Dunkelgelb.
Re: "JAGD"- KAMPFWAGON 173
Posted: Sun Jan 12, 2014 11:02 pm
by HERMAN BIX
broke out the airbrush for the first time. new out of the box. tested it on paper & brass to get the swing of it before any tears on the main event.! Used Tamiya J green with a touch of white. I was nervous to hit the paint valve to say the least - my last job painting something like this(but smaller) was using the 'Verlinden' technique of dry brushing over basic sprayed base. 50/50 thinned out seemed to offer the best balance of coverage and colour depth. (starting to sound like a halfwit Piccaso !)
Re: "JAGD"- KAMPFWAGON 173
Posted: Sun Jan 12, 2014 11:20 pm
by HERMAN BIX
got a handle on it now. painting at night after the little ones are in bed, compressor outside-hose running in through the window !
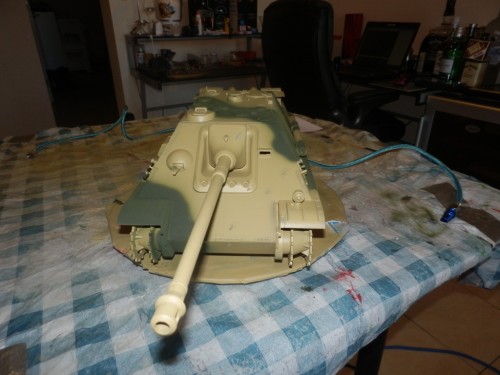
- front

- top
Re: "JAGD"- KAMPFWAGON 173
Posted: Sun Jan 12, 2014 11:31 pm
by HERMAN BIX
Now for the Red-brown. again thinned 50/50, dropped the pressure right down so I could get a thin outline of the brown pattern, then upped the pressure back to 30psi for the infilling. I carried the pattern down into the lower hull behind the roadwheels because at this stage I had not made my mind up on the final look.
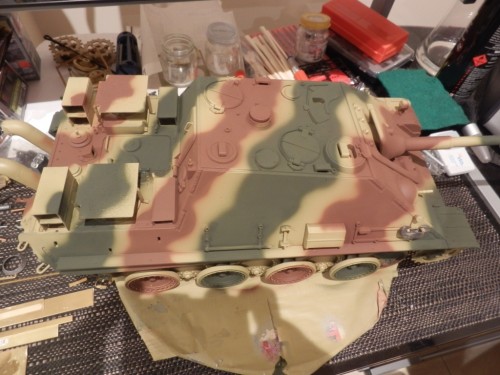
- top right 3/4 view

- left front 3/4 view
Re: "JAGD"- KAMPFWAGON 173
Posted: Mon Jan 13, 2014 1:37 am
by PainlessWolf
Good Evening, Herman,
First time out for using an Airbrush? You, sir, are a Natural! People try multiple times to achieve the excellent! results you got right at the start.
regards,
Painless
Re: "JAGD"- KAMPFWAGON 173
Posted: Mon Jan 13, 2014 3:39 am
by HERMAN BIX
Thanks mate, yes, first time on the airbrush. Back in the other life I couldn't afford a Badger (at the time they were all that we could get growing up in New Zealand) so, it was spray cans from the hobby shop & dry brushing. I feel though that with the small war gamming scales of 172/76 an airbrush would have just worn my patience out much earlier than now !
Got onto some preliminary weathering, mud application etc. Did up a brew of white glue, burnt sienna, raw umber, and Tamiya flat earth, baking soda, and dry used tea leaves. Decided I didn't like the cam pattern on the lower hull, so this was the stuff to fix that !
Lay'd out a few add- ons once the 'mud' settled to see how it was going to look, and to get a feeling for alternative placement.

- muddy chin
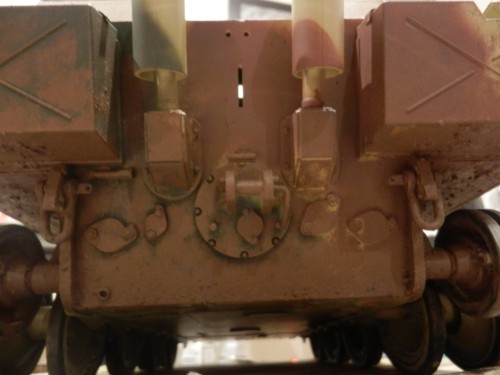
- muddy rear-nothing worse

- stuck grit
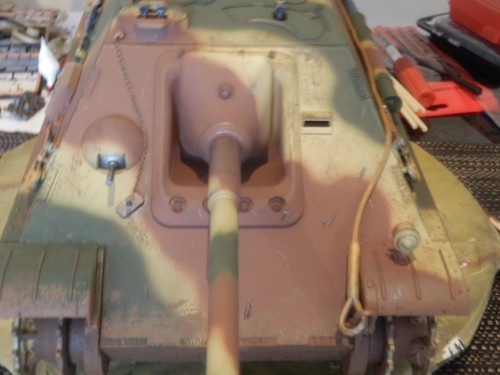
- scuffs & splashes
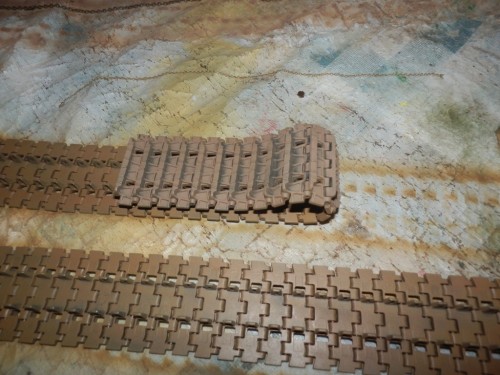
- tracks with flat earth and raw umber basecoat