KV-1 on the bench
Posted: Sun Dec 01, 2013 4:10 am
So I decided to start today on the KV-1 today. I have spent the past few weeks collecting photos and details, courtesy of this killer site. I have been lucky to find what I needed to get going on this.
First off, I was really impressed with the tank right out of the box. Tear down was pretty simple once I realized there were two screws just in front of the drives on the side of the hull. Once I got it split, I took the turret off. A few wires needed to be cut and cataloged for future assembly. Pretty straight forward on the control unit and plugs. Just like the Panther.
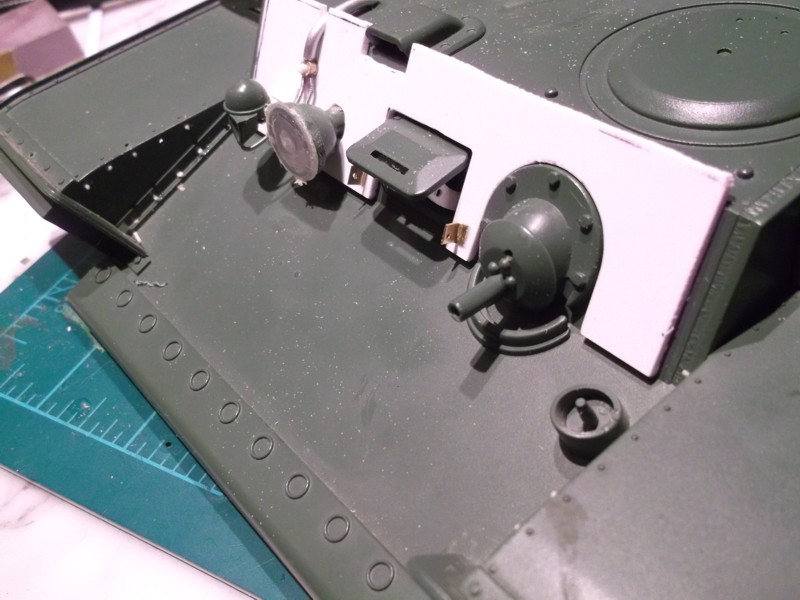
I decided to take this one up a notch as far as effort. I am sure you all suffered from this chronic syndrome, detailitis. The references I am using show quite a bit different bolt pattern on the engine covers and rear deck. I am not sure I feel like relocating the. I may, it depends on how many beers I can get into after church tomorrow. I added a bunch of small hoops made from heated plastic sprue. I wrapped them around the same diameter material I pulled them from. Then I made bases for each of the hoops to be located in the slight round depressions on the stock HL molds. They will get simulated welding in the future. There were a bunch of holes drilled in places according to my references.
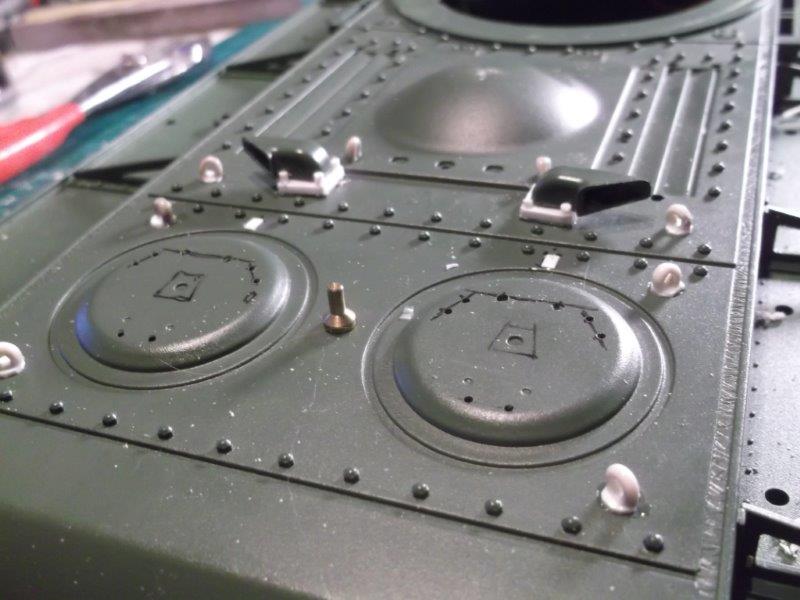
The exhaust stacks were hollowed out with my Dremel. I then removed the bolt heads from the stock plates and doubled up the flange, more to scale. Then I drilled out for 1/8th brass hollow tube to provide conduit for the smoke fest. Added new bolts and ...viola.
On the front, the armor plate was cut and fit. Then I fabricated the horn brackets in the same fashion that the original was, according to my sources. I also hollowed out the headlight and got it set up for a lens in the near future. I lifted the drivers viewing hatch and am contemplating making it my access to power switch. I used a guitar D string for the wiring that is seen on the exterior.
Thanks for all the inspiration and technical information provided here. My daughter will really dig beating me with this KV1 when it is all done.


First off, I was really impressed with the tank right out of the box. Tear down was pretty simple once I realized there were two screws just in front of the drives on the side of the hull.
I decided to take this one up a notch as far as effort. I am sure you all suffered from this chronic syndrome, detailitis. The references I am using show quite a bit different bolt pattern on the engine covers and rear deck. I am not sure I feel like relocating the. I may, it depends on how many beers I can get into after church tomorrow.
The exhaust stacks were hollowed out with my Dremel. I then removed the bolt heads from the stock plates and doubled up the flange, more to scale. Then I drilled out for 1/8th brass hollow tube to provide conduit for the smoke fest. Added new bolts and ...viola.
On the front, the armor plate was cut and fit. Then I fabricated the horn brackets in the same fashion that the original was, according to my sources. I also hollowed out the headlight and got it set up for a lens in the near future. I lifted the drivers viewing hatch and am contemplating making it my access to power switch. I used a guitar D string for the wiring that is seen on the exterior.
Thanks for all the inspiration and technical information provided here. My daughter will really dig beating me with this KV1 when it is all done.