I took the route of modifying the original KV-1 headlight on my tank. I also replaced the larger 5mm original LED with a 3mm LED.
First thing was to get the headlight out of the tank, then apart to take the LED out.

I then scrounged around in the recyclables a bit to find some nice clear plastic I could use for a lens.
I also found a round head bolt, where the round head just about perfectly fit when pushed into the headlight opening.
I filled the bolts Philip head groves with some solder & filed & sanded it pretty smooth.
Next I take the razor knife & lightly score the plastic with criss-crossed lines over an area that is much larger than the headlight opening.

I then used my heat station's hot air blower to heat up the plastic over the scored area until it's very soft, but not so much as to have it start melting or warping too much.

While the plastic was still hot, I held the headlight on the back side & the bolt on the scored side, then quickly stamped out the lens by pressing the bolt very firmly into the headlight opening.
I held it there for about 20 - 30 seconds while it formed the lens & the plastic cooled a little.


This was the first stamping that I was left with after I removed the bolt. Then slightly trimmed.


This is what it looked like after it was trimmed to size, then just popped into the empty stock headlight fixture.


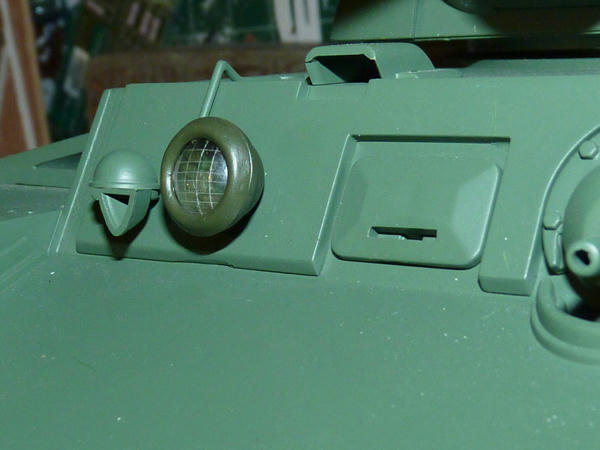
Here are a few images of it temporarily installed in the tank.


Not too bad, a definite improvement over the "pimple" light, lol, but it still didn't quite look good enough for me at this stage, so I created another lens using the same technique, but having straighter & more even score lines than my first tested hand made lens.
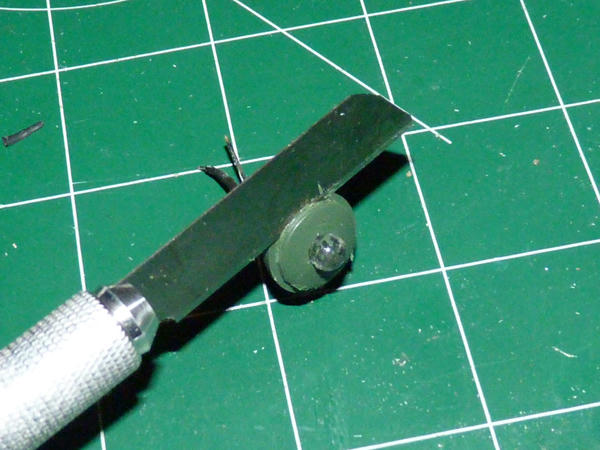
I also went out & purchased some #12 finishing washers to fabricate a better looking rim to give it a more over-all finished look.
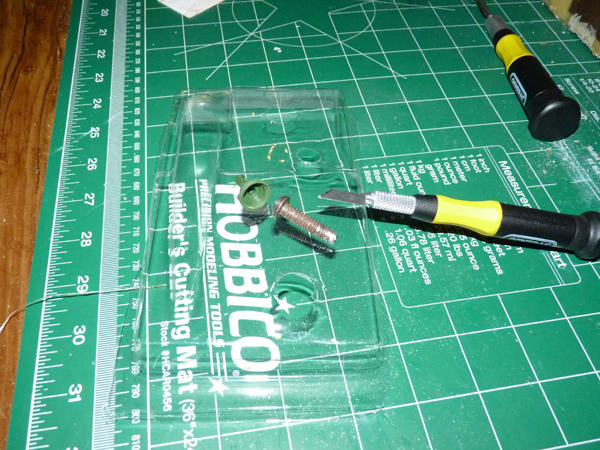
You can see the full #12 finishing washer next to one of the same beginning size which I then had ground down with my Dremel, reamed out, & sanded thinner & smaller to create the rim I would use.
Also in the image is the newer lens I made up with more score lines than the previous lens I was using.

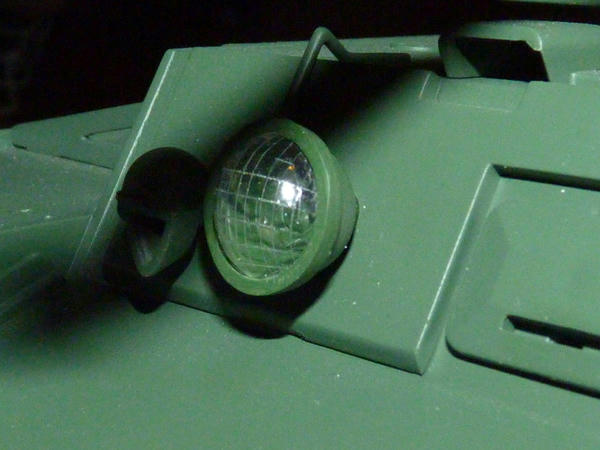
Here is a close-up after I had painted the new metal rim washer & assembled the headlight again. This new green on the light will eventually be used to paint the whole tank

Here are several pictures taken of the new headlight from different angles.


~ Craig ~