Jussek's Tiki Tiger I
Posted: Thu Sep 20, 2012 12:47 pm
Hello,
i open this tread to explain step by step the ‘little’ project I’m about to end soon (I hope!), i write this here with the hope it will be for some use to others, like i have taken ideas from this and other forums
Since I bought my first tank 18 months ago, an HL Tiger I, I’ve been doing things to it bit a bit, but never intending to end the project as a whole… until now
I bought it from Dominique at rctank.de (nice guy and better vendor); it’s the Tiki one, with asiatam metal lower hull, metal tracks, idler and sprocket wheels, BB shooter. After a deep search of info about Tiki, I’ve decided to mod the HL tank to be more accurate and similar to the real one, including the paint
The almost complete list of things/mods/corrections I’ve done (not in chronological order):
- Tracks jumping off. I’ve tried a lot of ideas and tips. I’ve been only able to solve it exchanging the track tensioning system (with springs) for the HennTEC one. No more tracks off since then (I will cross my fingers…)
- Ball bearing supports for gearbox shafts
- Plastic road wheels and axles reinforced with polyester putty. ‘Double’ wheels simulated.
- Frontal ‘armor’ added, sheet of metal under the extra track links in order to protect the lower frontal hull from rock hits.
- swapped HL airsoft system for a VS Leo2A6 one. It hurts now!
- correct canon length
- Track change cable made from cupper wire, supports from bits of metal (from a floppy disk)
- Tow cables made from steel, supports made from bits of resin
- Gun cleaning rods made from wood
- Discarded HL aerial, made a internal one from an old radio antenna (the cable type)
- Moved aerial to the correct spot, simulated it with the HL one cut to size and shrink tube.
- Corrected position of the commander cupola. Now to be exchanged with a metal one.
- Cut ‘separation’ between fenders
- Added armored cover to the lower hull air intake (next to the jack wooden block)
- Added engine grills
- Added periscopes
- made the turret vision slits look as if they were actual slits
- modified exhaust, off the protecting cover
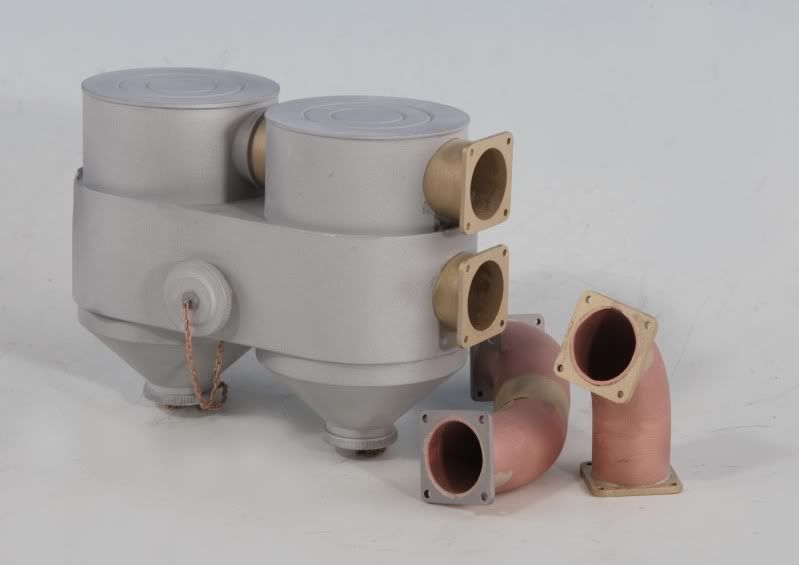
- modified Feifels to early two drums type
- modified the jack: added base, supports and crank handle
- added the Bosch lights wiring
- Added transmission armored covers
- Added cooling fan to the RX18
- Sound changed to a Beier USM-HL Soundmodul, customized sounds made by myself from internet sources.
- Speaker upgraded to a Visaton FRSW5 in a wooden box. If I could fit it, I will change it for a FRS 7.
- New ‘waterproof’ container for all the electronics inside the lower hull
- Rigid gearbox covers to prevent oil splashes
- moved sound potentiometer and all switches under radio operator and driver hatches
- Two wireless mini cameras installed one on the driver visor port, the other looking via the turret MG hole.
- swapped 'metal' gears with steel ones, very noise reduction achieved
And the list of things/mods/corrections I’m doing at this moment:
- working frontal fenders made from brass
- correct turn point for the turret
- correct shape to the Rommelkiste
- correct shape of the elevation trunnions (without hole and with mushroom shape)
- Added wiring to the smoke grenade launchers, and smoke grenades
- sanded off: molded tools, water tight cover for air intake, extra aerial tube on the left side of the hull, right convoy light.
- New jack block made from wood
- New pry bar made from metal
I’m going to add pics and explanations soon.
Best regards!
Jussek
i open this tread to explain step by step the ‘little’ project I’m about to end soon (I hope!), i write this here with the hope it will be for some use to others, like i have taken ideas from this and other forums
Since I bought my first tank 18 months ago, an HL Tiger I, I’ve been doing things to it bit a bit, but never intending to end the project as a whole… until now
I bought it from Dominique at rctank.de (nice guy and better vendor); it’s the Tiki one, with asiatam metal lower hull, metal tracks, idler and sprocket wheels, BB shooter. After a deep search of info about Tiki, I’ve decided to mod the HL tank to be more accurate and similar to the real one, including the paint
The almost complete list of things/mods/corrections I’ve done (not in chronological order):
- Tracks jumping off. I’ve tried a lot of ideas and tips. I’ve been only able to solve it exchanging the track tensioning system (with springs) for the HennTEC one. No more tracks off since then (I will cross my fingers…)
- Ball bearing supports for gearbox shafts
- Plastic road wheels and axles reinforced with polyester putty. ‘Double’ wheels simulated.
- Frontal ‘armor’ added, sheet of metal under the extra track links in order to protect the lower frontal hull from rock hits.
- swapped HL airsoft system for a VS Leo2A6 one. It hurts now!
- correct canon length
- Track change cable made from cupper wire, supports from bits of metal (from a floppy disk)
- Tow cables made from steel, supports made from bits of resin
- Gun cleaning rods made from wood
- Discarded HL aerial, made a internal one from an old radio antenna (the cable type)
- Moved aerial to the correct spot, simulated it with the HL one cut to size and shrink tube.
- Corrected position of the commander cupola. Now to be exchanged with a metal one.
- Cut ‘separation’ between fenders
- Added armored cover to the lower hull air intake (next to the jack wooden block)
- Added engine grills
- Added periscopes
- made the turret vision slits look as if they were actual slits
- modified exhaust, off the protecting cover
- modified Feifels to early two drums type
- modified the jack: added base, supports and crank handle
- added the Bosch lights wiring
- Added transmission armored covers
- Added cooling fan to the RX18
- Sound changed to a Beier USM-HL Soundmodul, customized sounds made by myself from internet sources.
- Speaker upgraded to a Visaton FRSW5 in a wooden box. If I could fit it, I will change it for a FRS 7.
- New ‘waterproof’ container for all the electronics inside the lower hull
- Rigid gearbox covers to prevent oil splashes
- moved sound potentiometer and all switches under radio operator and driver hatches
- Two wireless mini cameras installed one on the driver visor port, the other looking via the turret MG hole.
- swapped 'metal' gears with steel ones, very noise reduction achieved
And the list of things/mods/corrections I’m doing at this moment:
- working frontal fenders made from brass
- correct turn point for the turret
- correct shape to the Rommelkiste
- correct shape of the elevation trunnions (without hole and with mushroom shape)
- Added wiring to the smoke grenade launchers, and smoke grenades
- sanded off: molded tools, water tight cover for air intake, extra aerial tube on the left side of the hull, right convoy light.
- New jack block made from wood
- New pry bar made from metal
I’m going to add pics and explanations soon.
Best regards!
Jussek