The Zimmerit [Take 2]
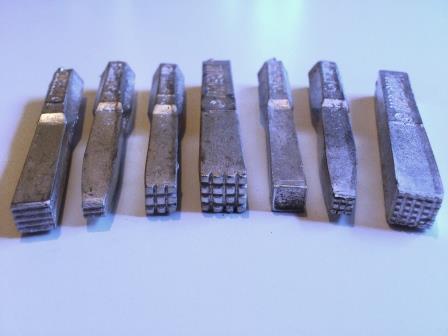
- The full set of Imperial-Modellbau zimmerit stamps includes waffle pattern - useful for any Stug!.jpg (22.58 KiB) Viewed 6375 times
Anyone who has read this diary will know that, ever since I chose what I thought was ‘the lazy option’, I have become gradually disenchanted with the Taigen stick-on zimmerit. I won’t repeat all of my gripes, but at the end of the day I just didn’t feel it looked ‘right’.
In any event wherever I had to replace it or fill in gaps I found the alternative, applied using Milliput and an old screwdriver, far more convincing. Unfortunately, although the Taigen variety was already too thick and the pattern too large, I had to replicate the same pattern to avoid mine looking out of place.
Well, in the end I had had enough. IT HAD TO GO. Getting the stick-on portions off was simple enough – I just peeled and pulled it until it was almost all gone – then used a sanding attachment to remove most of the glue residue. You don’t have to be too fanatical about this because a rough surface will help whatever putty you use to adhere. In fact I pitted the surfaces further using a drill bit.
Of course applying the putty is one thing – and I’ll come to this in a moment – but how do you texture it?
I was going to use my trusty screw driver again, but then these fantastic zimmerit stamps came to the rescue. A real find, they are made /marketed by either Imperial-Modellbau or Hagen Miniatures and available from:
http://www.hagen-miniatures.de/index.ph ... iew/45/108
They are made from heavy cast white metal and, at 19.90 euros [when I last looked on 10/09/15 only 11.90!] (+ postage), I think they are good value. I found them just by googling ‘1/16 zimmerit tool’.
The beauty of the stamps is that they create evenly spaced indentations. Of course they have to be used in a repetitive fashion (both horizontally and vertically) so the pattern is not perfect – but if you look at close ups of the real thing that is actually how it should be. On the original tanks the paste was actually indented by hand with either a roller or a serrated board (probably both) in small areas.
There are other methods. Some people use an actual roller. These are made for 1/35 scale (I haven’t seen one for 1/16), but the disadvantage of this comes when you need to apply zimmerit near to an obstruction – e.g. the side skirts – where the roller won’t be able to reach the putty alongside. Another way is to use a serrated edge. The Hobbyboss Tiger 1 comes with a set of metal scraping tools and I did try these – but I found that the serrations were too close together to be true to scale and, in any event, not deep enough so that when dragged over the wet putty they roughened the surface in a most unconvincing way.
Using Milliput and Magic Sculp with the zimmerit stamps
Having already used Magic Sculp for my weld beads I was ready to give it a go at the zimmerit. I had, however, already had a dry run using the stamps with Milliput on the hard-to-see lower hull plates at the front and back. If the results weren’t as good I was able to achieve with Magic Sculp this may simply have been because I hadn’t had the practice.
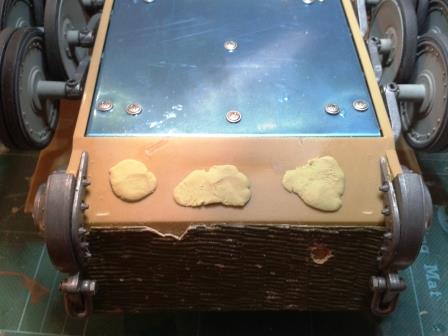
- AN early attempt using Milliput zimmerit - the putty was simply pressed on in lumps and spread out using wetted fingers.jpg (28.38 KiB) Viewed 6375 times
- Not bad - but a little uneven in depth.jpg (30.08 KiB) Viewed 6375 times
- The pattern was then indented using the stamps - but here spread a little too widely apart.jpg (34.28 KiB) Viewed 6375 times
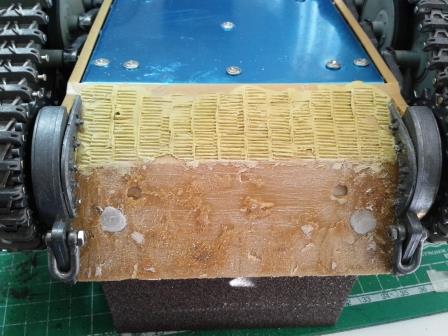
- Here's the same Milliput method used at the front - a bit of a mess if I'm honest, but luckily no one is going to see it!.jpg (37.36 KiB) Viewed 6375 times
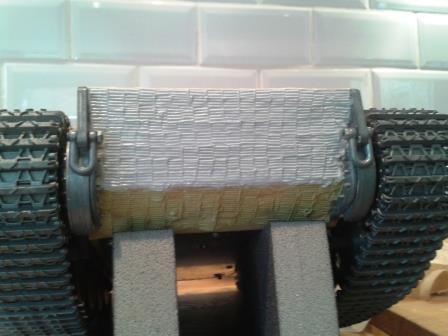
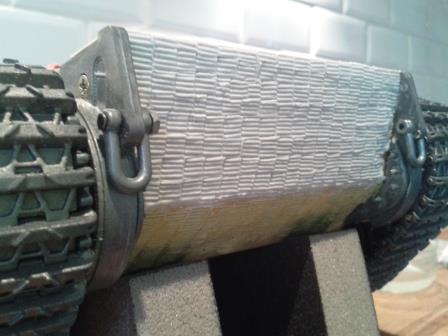
Compared to Millput, Magic Sculp appears to be a little stickier. Both can be rolled fairly flat using a rolling pin or pastry roller, but you need some talcum powder to stop it sticking to this and whatever surface you are rolling it on. I tried grease-proof paper, but this was a disaster – I simply couldn’t get it to come off. Better was to use a vinyl food chopping mat (mine from IKEA) – again with some talcum powder. I rolled the putty as flat as possible into the approximate size and shape needed before trimming it closer in size. The rectangle for the main front plate was then peeled off and laid in place on the tank before being worked into position (and as flat as possible) using my fingers wetted in a little water. After a few minutes setting time the putty was then trimmed along its edges using the same tools I used for my weld beads.
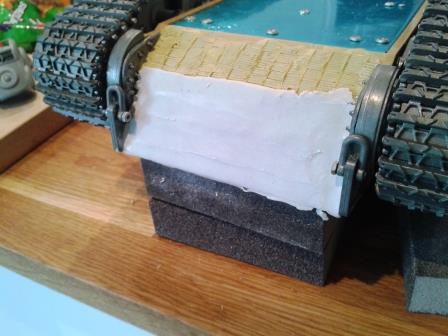
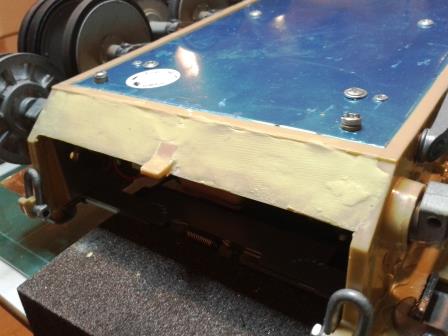
- Here's the sheet of rolled Magic Sculp roughly pressed in place.jpg (32 KiB) Viewed 6375 times
- And now trimmed and pressed more firmly into place.jpg (25.37 KiB) Viewed 6375 times
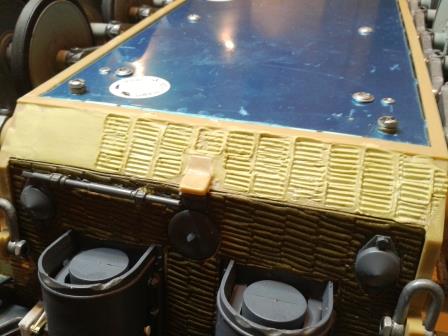
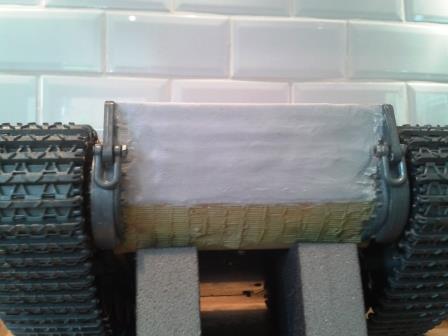
- The first lines pressed into place using the zimmerit stamps - now closer together.jpg (25.27 KiB) Viewed 6375 times
Then the fun commenced… The trick is to work across the puttied area in roughly parallel lines (although this doesn’t have to be too precise), pressing in the stamp at a right-angle (perpendicular?) to the surface (this may seem obvious but it’s hard to remember when the plate is set at an angle). Each line of indentations should just meet the last one, thus avoiding too much of a ridge between each vertical line. You can see on my earlier efforts (using Milliput) that I actually spaced them too widely apart.
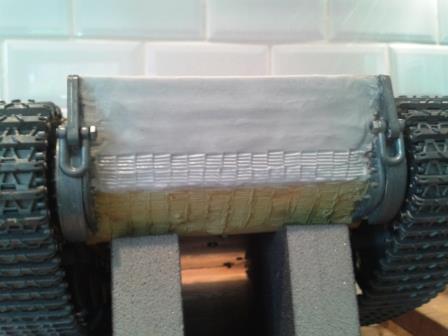
- Hoorah! The first plate is finished - only another five to go on the hull, then the turret....jpg (28.83 KiB) Viewed 6375 times
- But boy was it worth it! Good riddance Taigen zimmerit, hello Magic Sculp....jpg (29.53 KiB) Viewed 6375 times
At the time of writing the Magic Sculp is still drying and I am going to let it dry a little more before adding some of the battle damage which is so distinctive on battle-weary Tigers – zimmerit chipped away from impacts, whether from bullets/shells or walls/trees…