Page 8 of 12
Re: WINTER 23-24 KV-1 to KV-85 to KV-2 Phew!
Posted: Sun Feb 11, 2024 9:36 pm
by HERMAN BIX
Lovely 4BO Mr Coleman.
Just a word of advice, take the time now to sand the green off the road wheel contact surfaces, it will take a lot of running to remove it naturally.
As Mr Wolf says, following along

Re: WINTER 23-24 KV-1 to KV-85 to KV-2 Phew!
Posted: Sun Feb 11, 2024 10:10 pm
by MrChef
I absolutely Love that shade of 4bo. Which brand is it, or is it another color altogether doing a great masquerade as 4bo?
And yes Mr. Bix pointed out what I half learned. I knew to repaint the wheels because HL paints the wheels with tires which the real KV's didn't have, but I neglected to paint some worn metal on the wheels. If you have metal wheels all the easier to sand the paint off at the contact surfaces.
Nice work Coleman
Re: WINTER 23-24 KV-1 to KV-85 to KV-2 Phew!
Posted: Mon Feb 12, 2024 4:29 pm
by ColemanCollector
MrChef wrote: ↑Sun Feb 11, 2024 10:10 pm
I absolutely Love that shade of 4bo. Which brand is it, or is it another color altogether doing a great masquerade as 4bo?
And yes Mr. Bix pointed out what I half learned. I knew to repaint the wheels because HL paints the wheels with tires which the real KV's didn't have, but I neglected to paint some worn metal on the wheels. If you have metal wheels all the easier to sand the paint off at the contact surfaces.
Nice work Coleman
Ooooh, right! Plastic all around so it would take awhile to get to "steel". To the mixing desk!
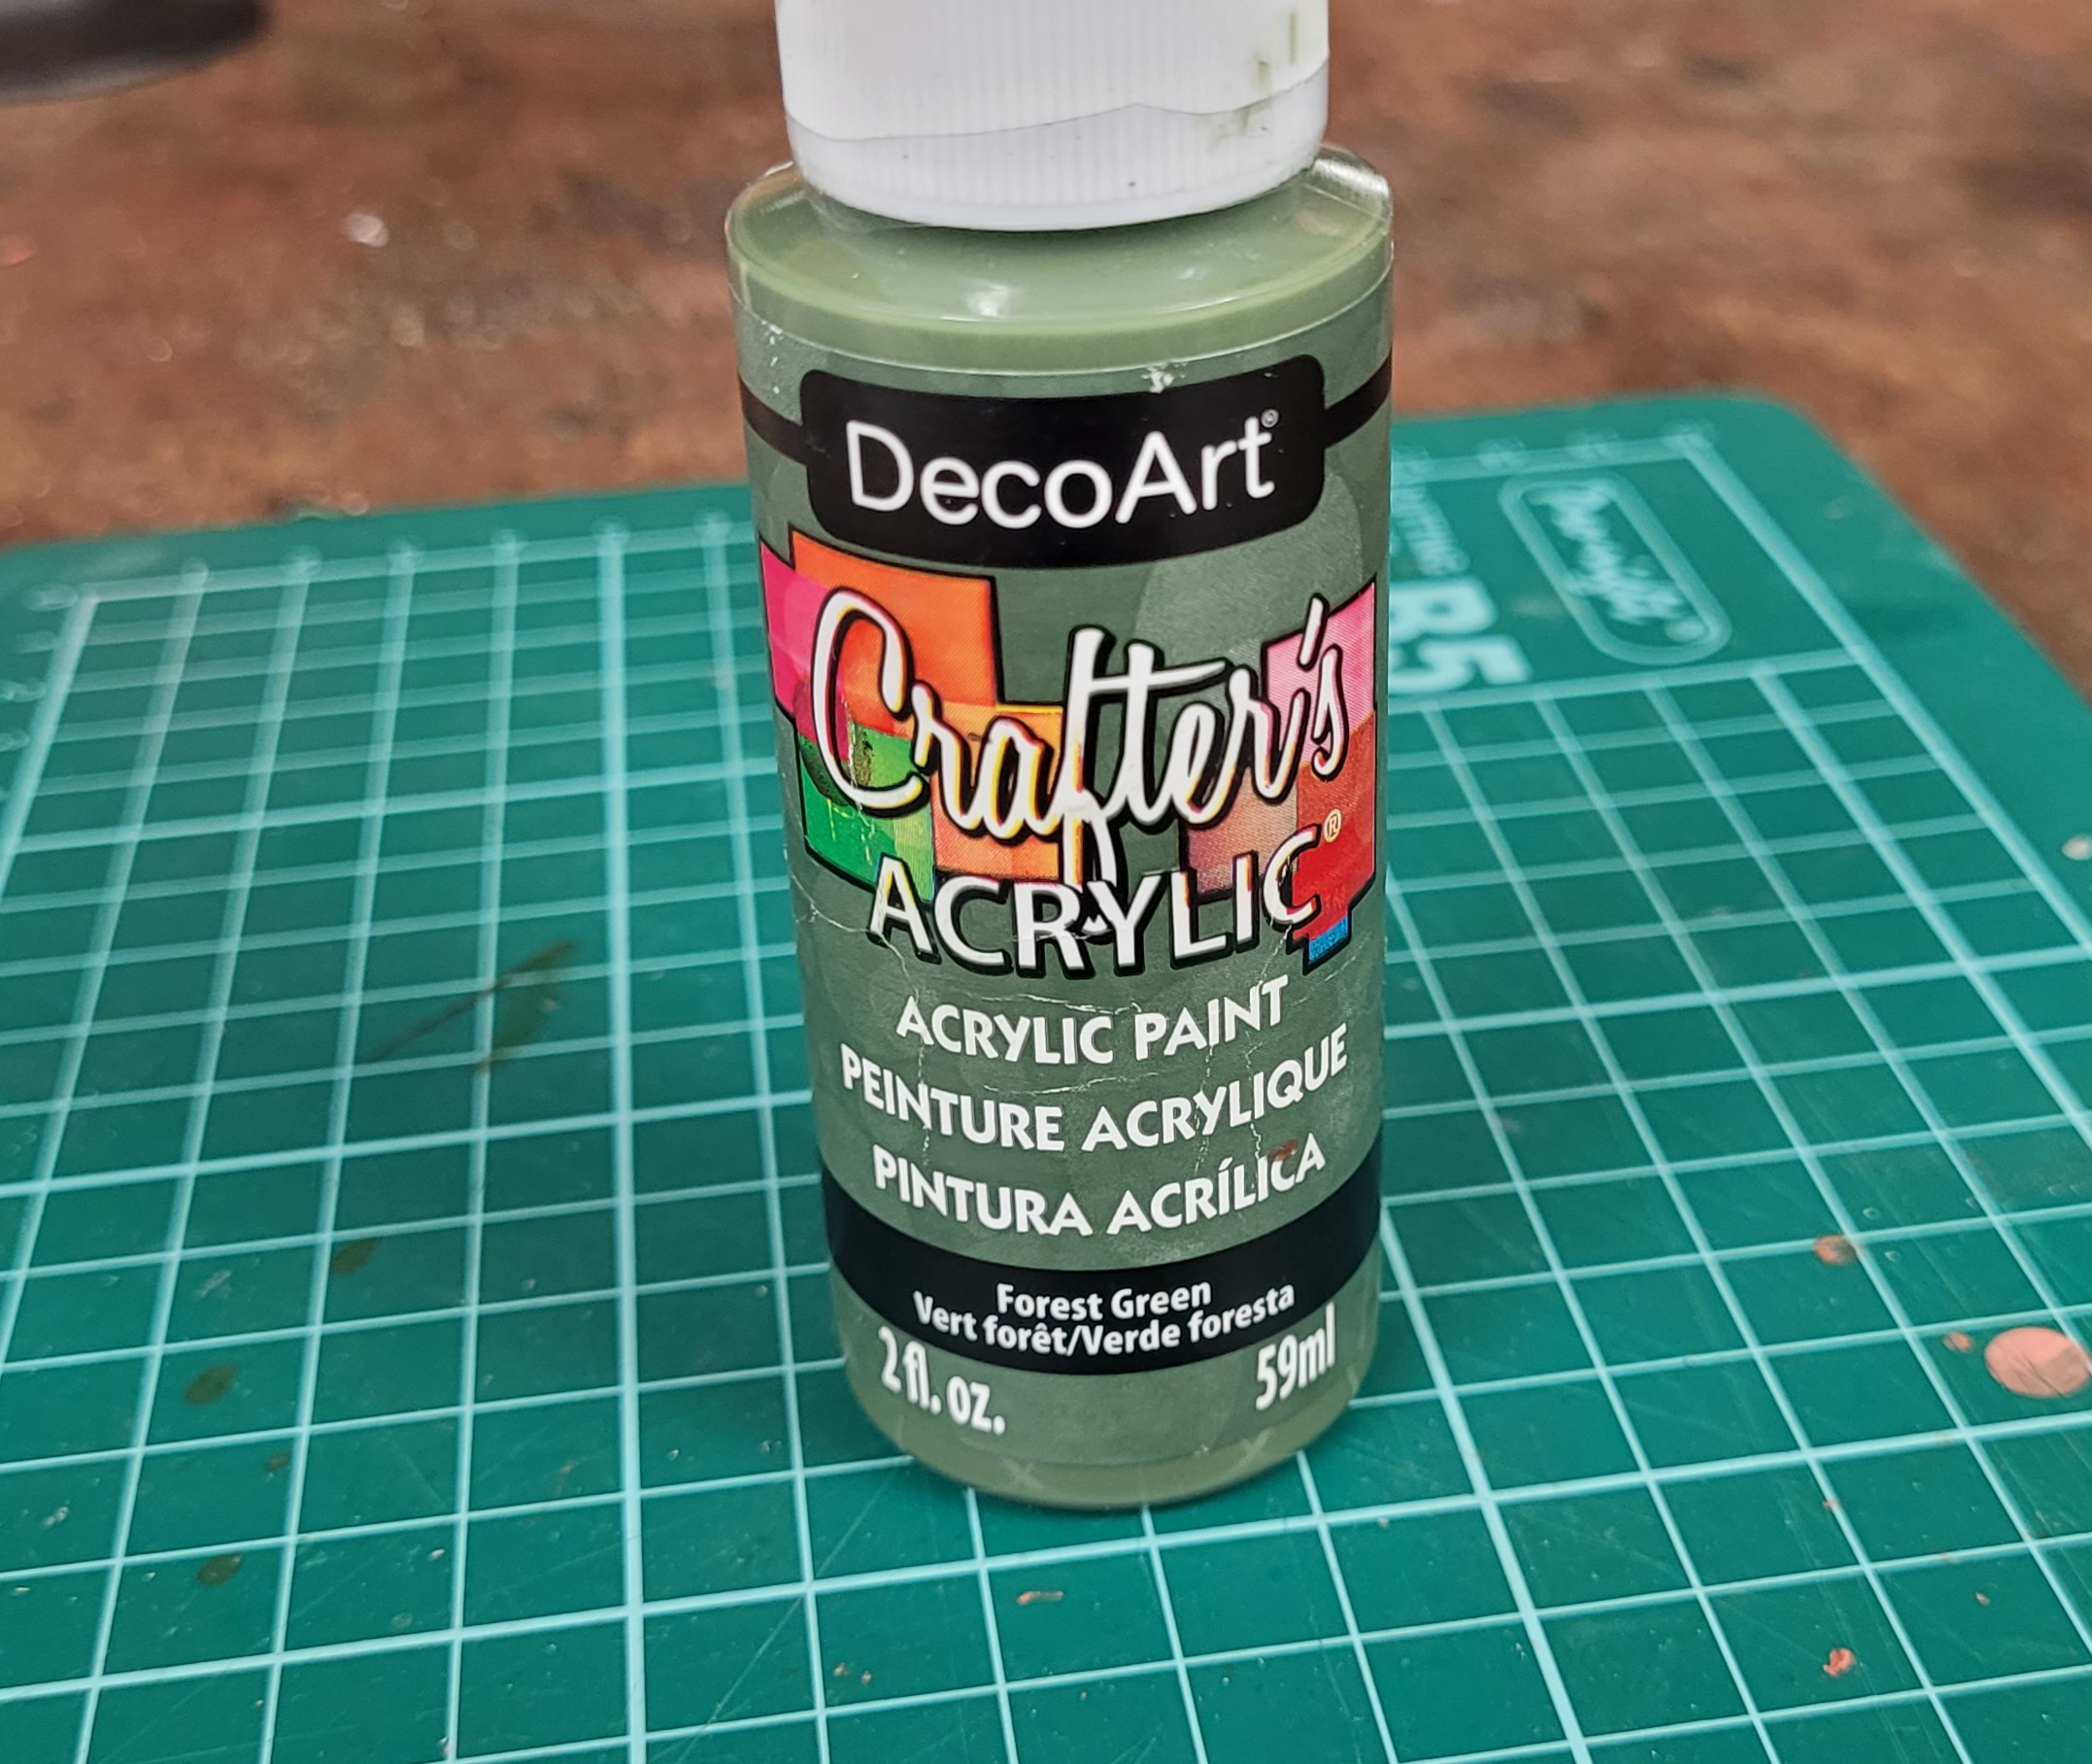
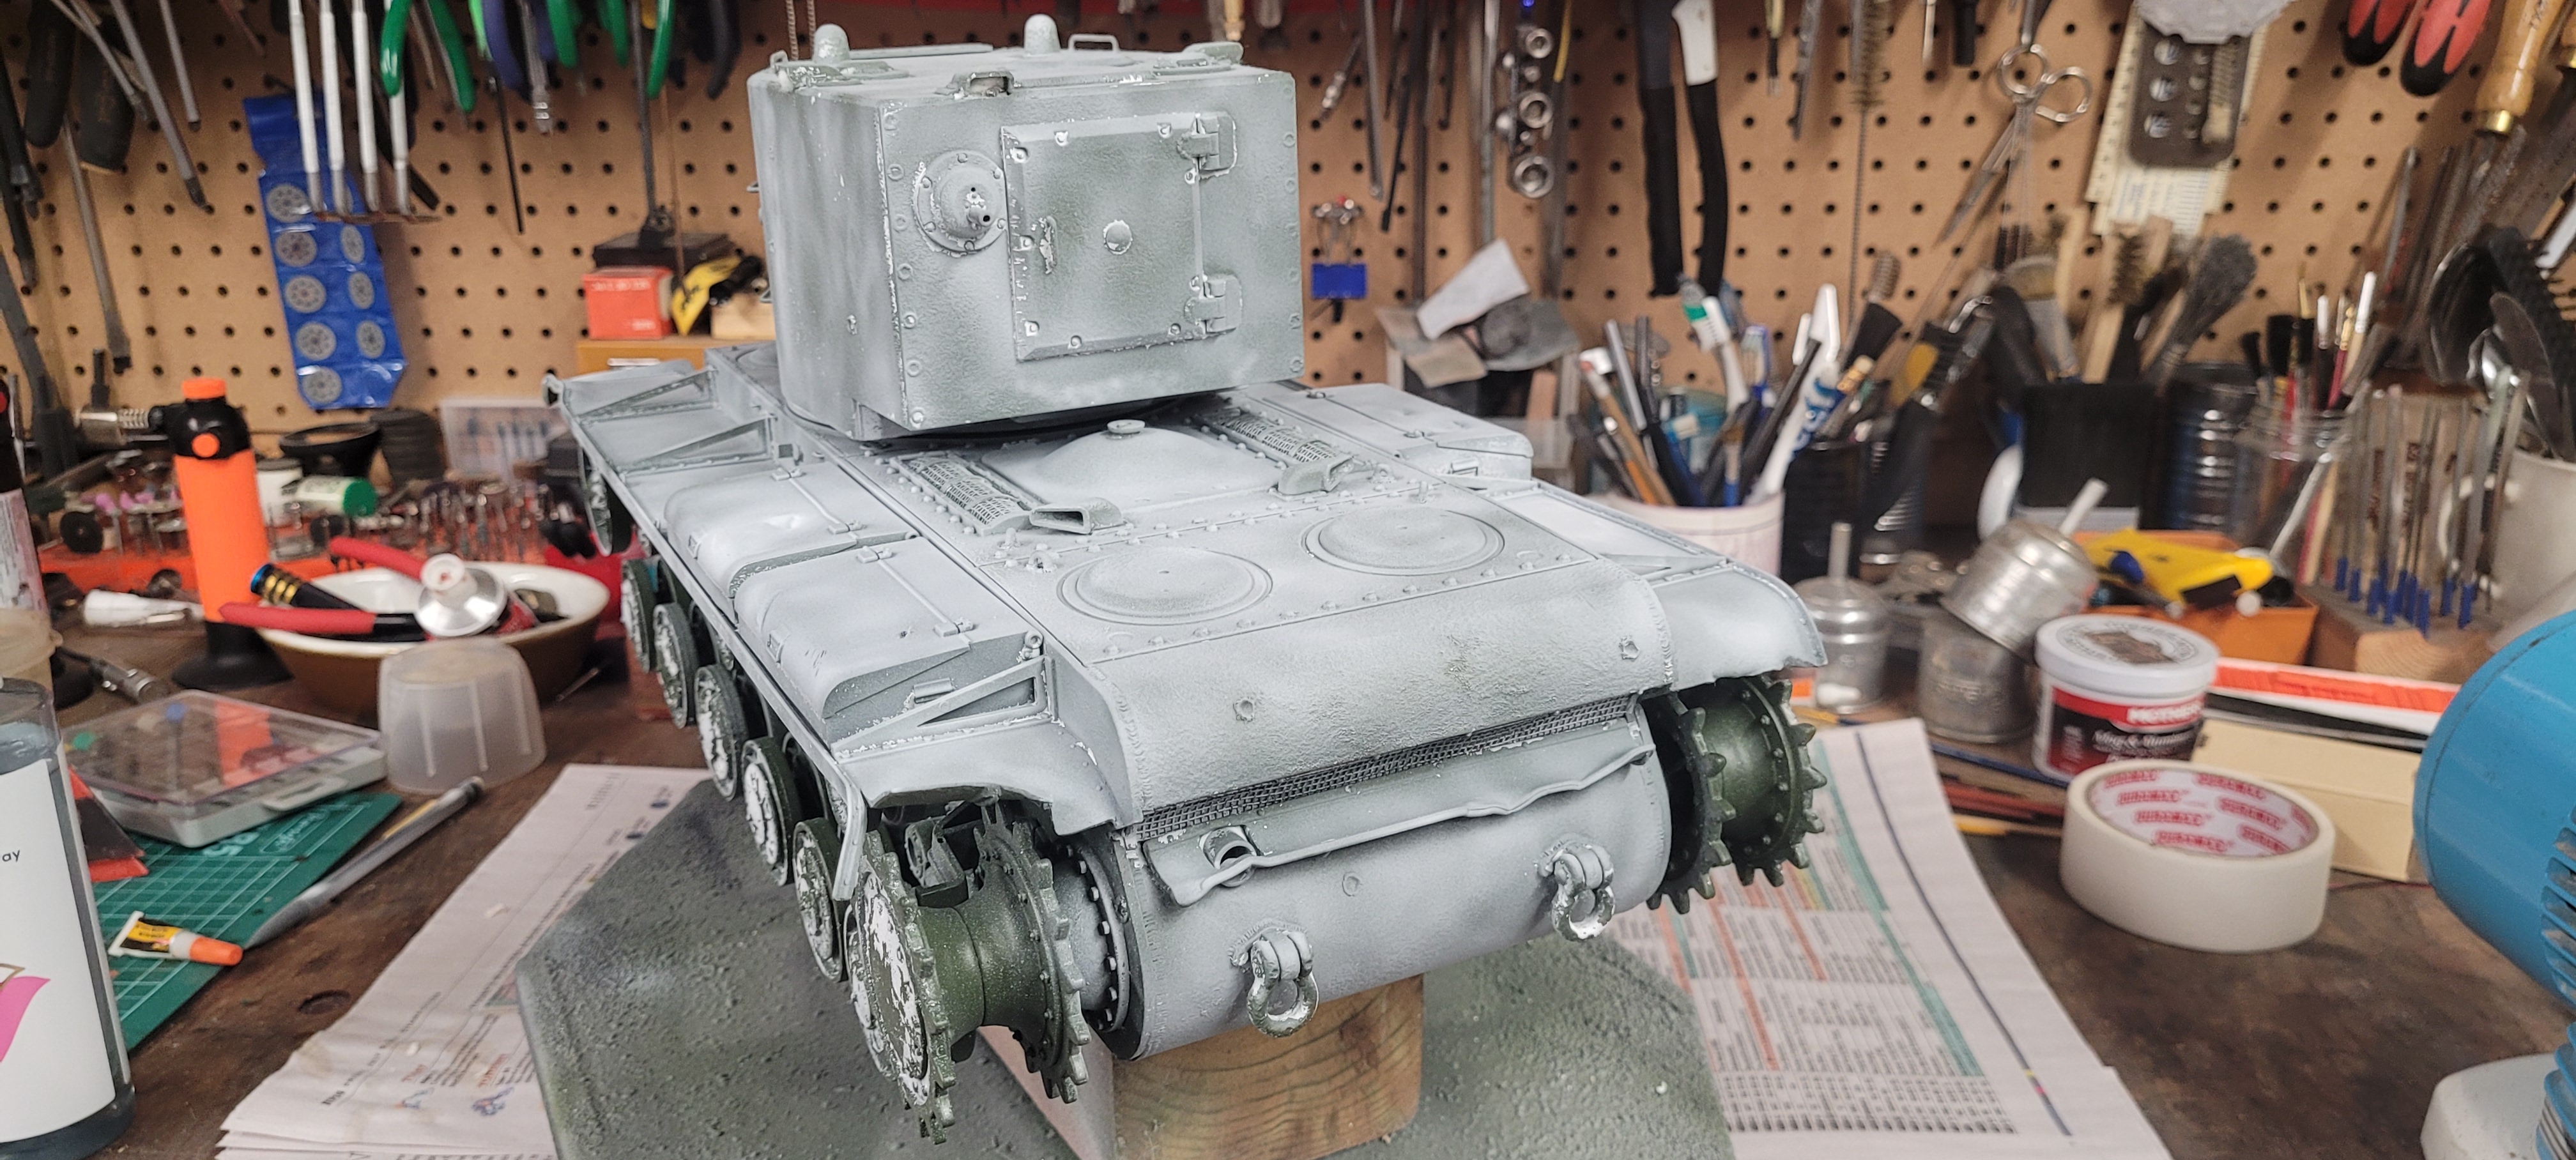
So here's the paint, don't laugh! Added a dropper of burnt umber and two droppers of black. Love the colour that turned out, and it sprayed just fine through my old Badger (thinned, of course). Now to cover it and uncover it with whitewash.
- 20240212_113601.jpg (869.7 KiB) Viewed 3460 times
Mike
Re: WINTER 23-24 KV-1 to KV-85 to KV-2 Phew!
Posted: Mon Feb 12, 2024 7:47 pm
by Herr Dr. Professor
Oh, yes, I, too, keep a selection of inexpensive crafter's acrylics on hand. That was something other modelers taught me.

for the instant-lathe idea. That's the kind of home-made smarts that I wish would come to me much more often. I need to remember that.
Re: WINTER 23-24 KV-1 to KV-85 to KV-2 Phew!
Posted: Tue Feb 13, 2024 7:57 am
by Raminator
I've used a cordless drill as an ersatz lathe before, but I wasn't smart enough to a) clamp it to the bench or b) clamp the trigger to maintain speed and leave a hand free. Big brain time!

The KV is coming along beautifully, Mr. Collector. The extra details like the toolboxes, shell impacts and weld beads add a lot of texture and depth to what could otherwise be a collection of big, flat, featureless surfaces.
Re: WINTER 23-24 KV-1 to KV-85 to KV-2 Phew!
Posted: Tue Feb 13, 2024 11:43 pm
by ColemanCollector
Thanks Raminator! Every once in awhile I figure out a better way. Between those times, there's lots of one-handing it.
KV-2's are a lot of real estate to putter around on and give some interest. There's a few more things to add on the fenders to give it the lived in look.
Mike.
Re: WINTER 23-24 KV-1 to KV-85 to KV-2 Phew!
Posted: Wed Mar 06, 2024 11:04 pm
by ColemanCollector
So the theme for the first part of this post is "one step forward, two steps back". Ominous foreshadowing!
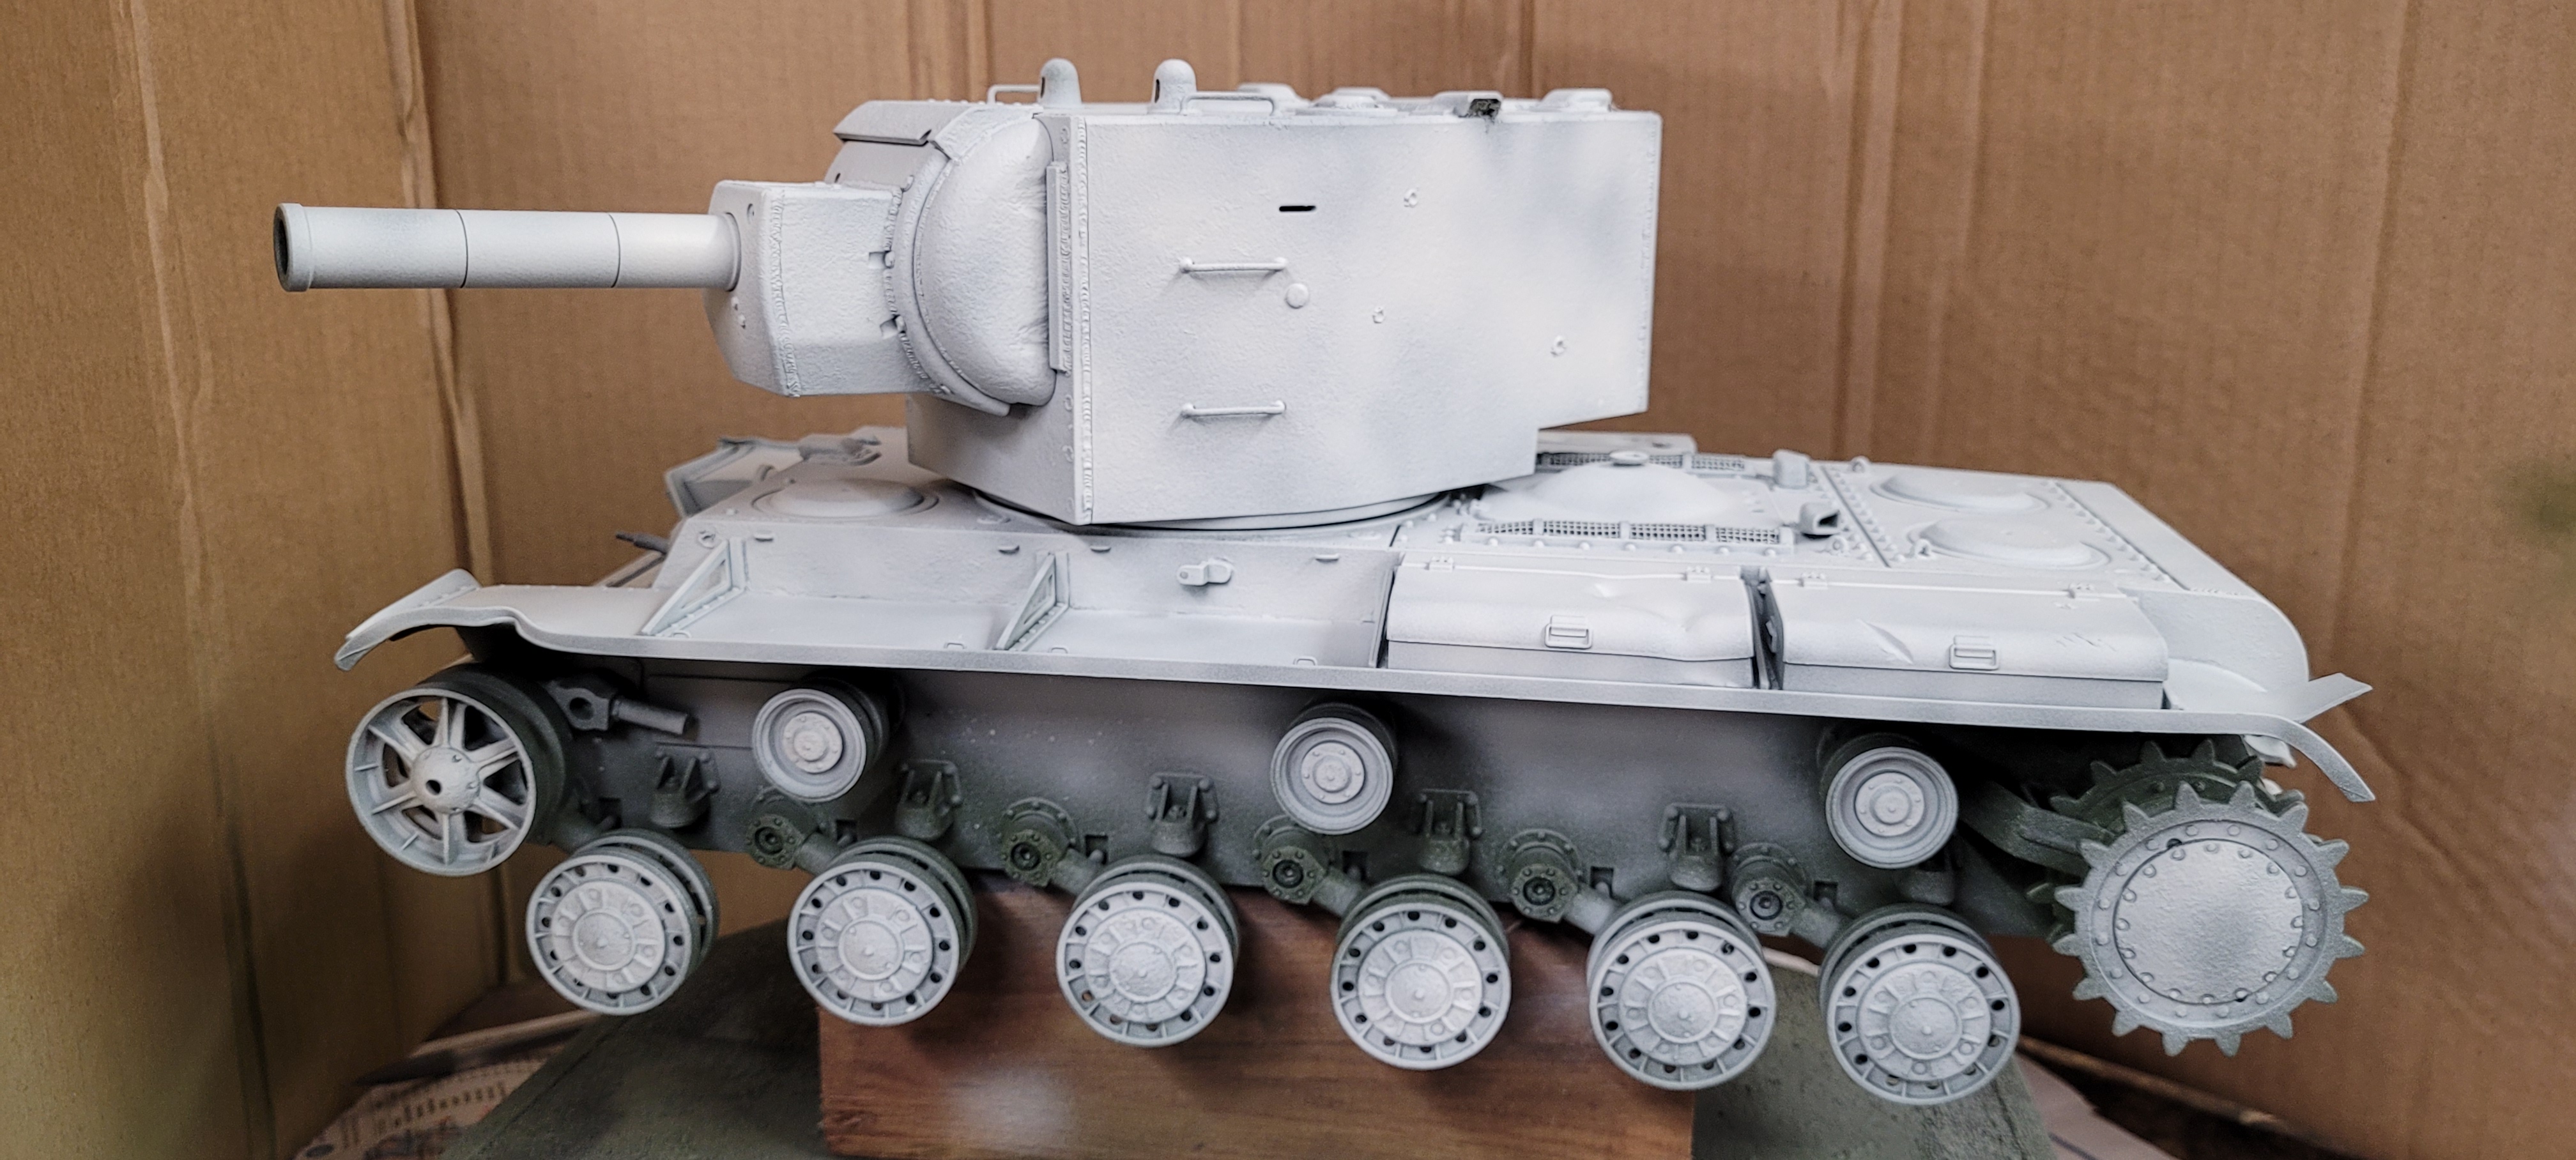
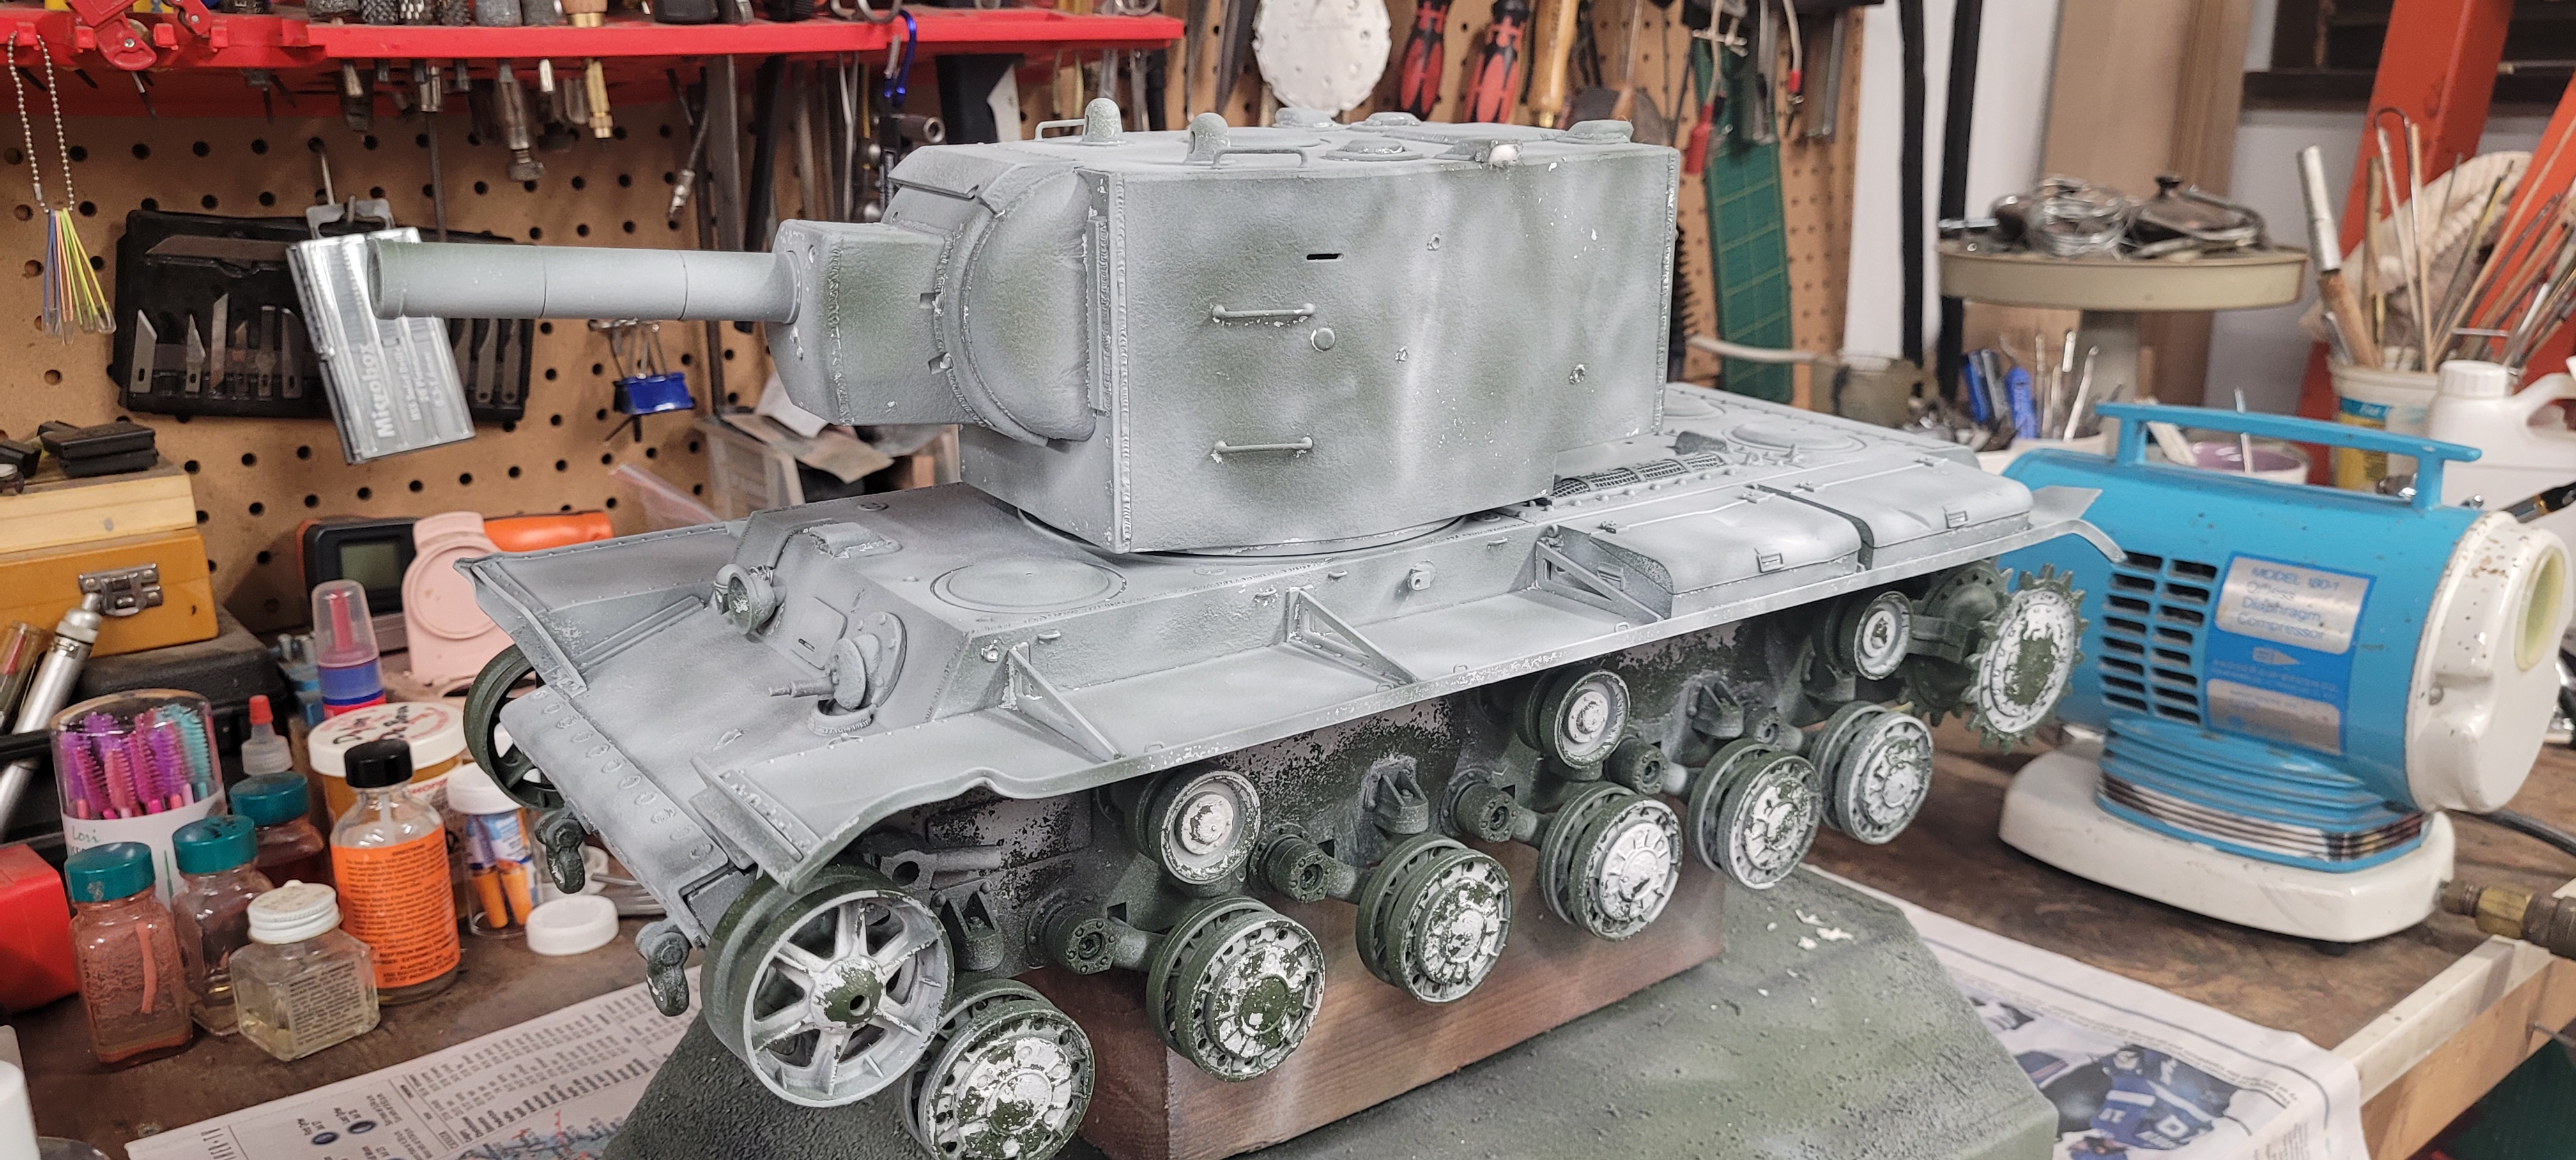
Another first on this build for me was using the hairspray method. Bought some hairspray with a handpump which sprayed out a pretty blotchy pattern on the hull. No probs, scrubbed it off with some warm water and used my novice airbrush skills to apply the hairspray. Jackpot! A nice even layer. Then on with whitewash and once again, my new bargain price airbrush put on a nice coat.
- 20240221_155326.jpg (1.66 MiB) Viewed 3318 times
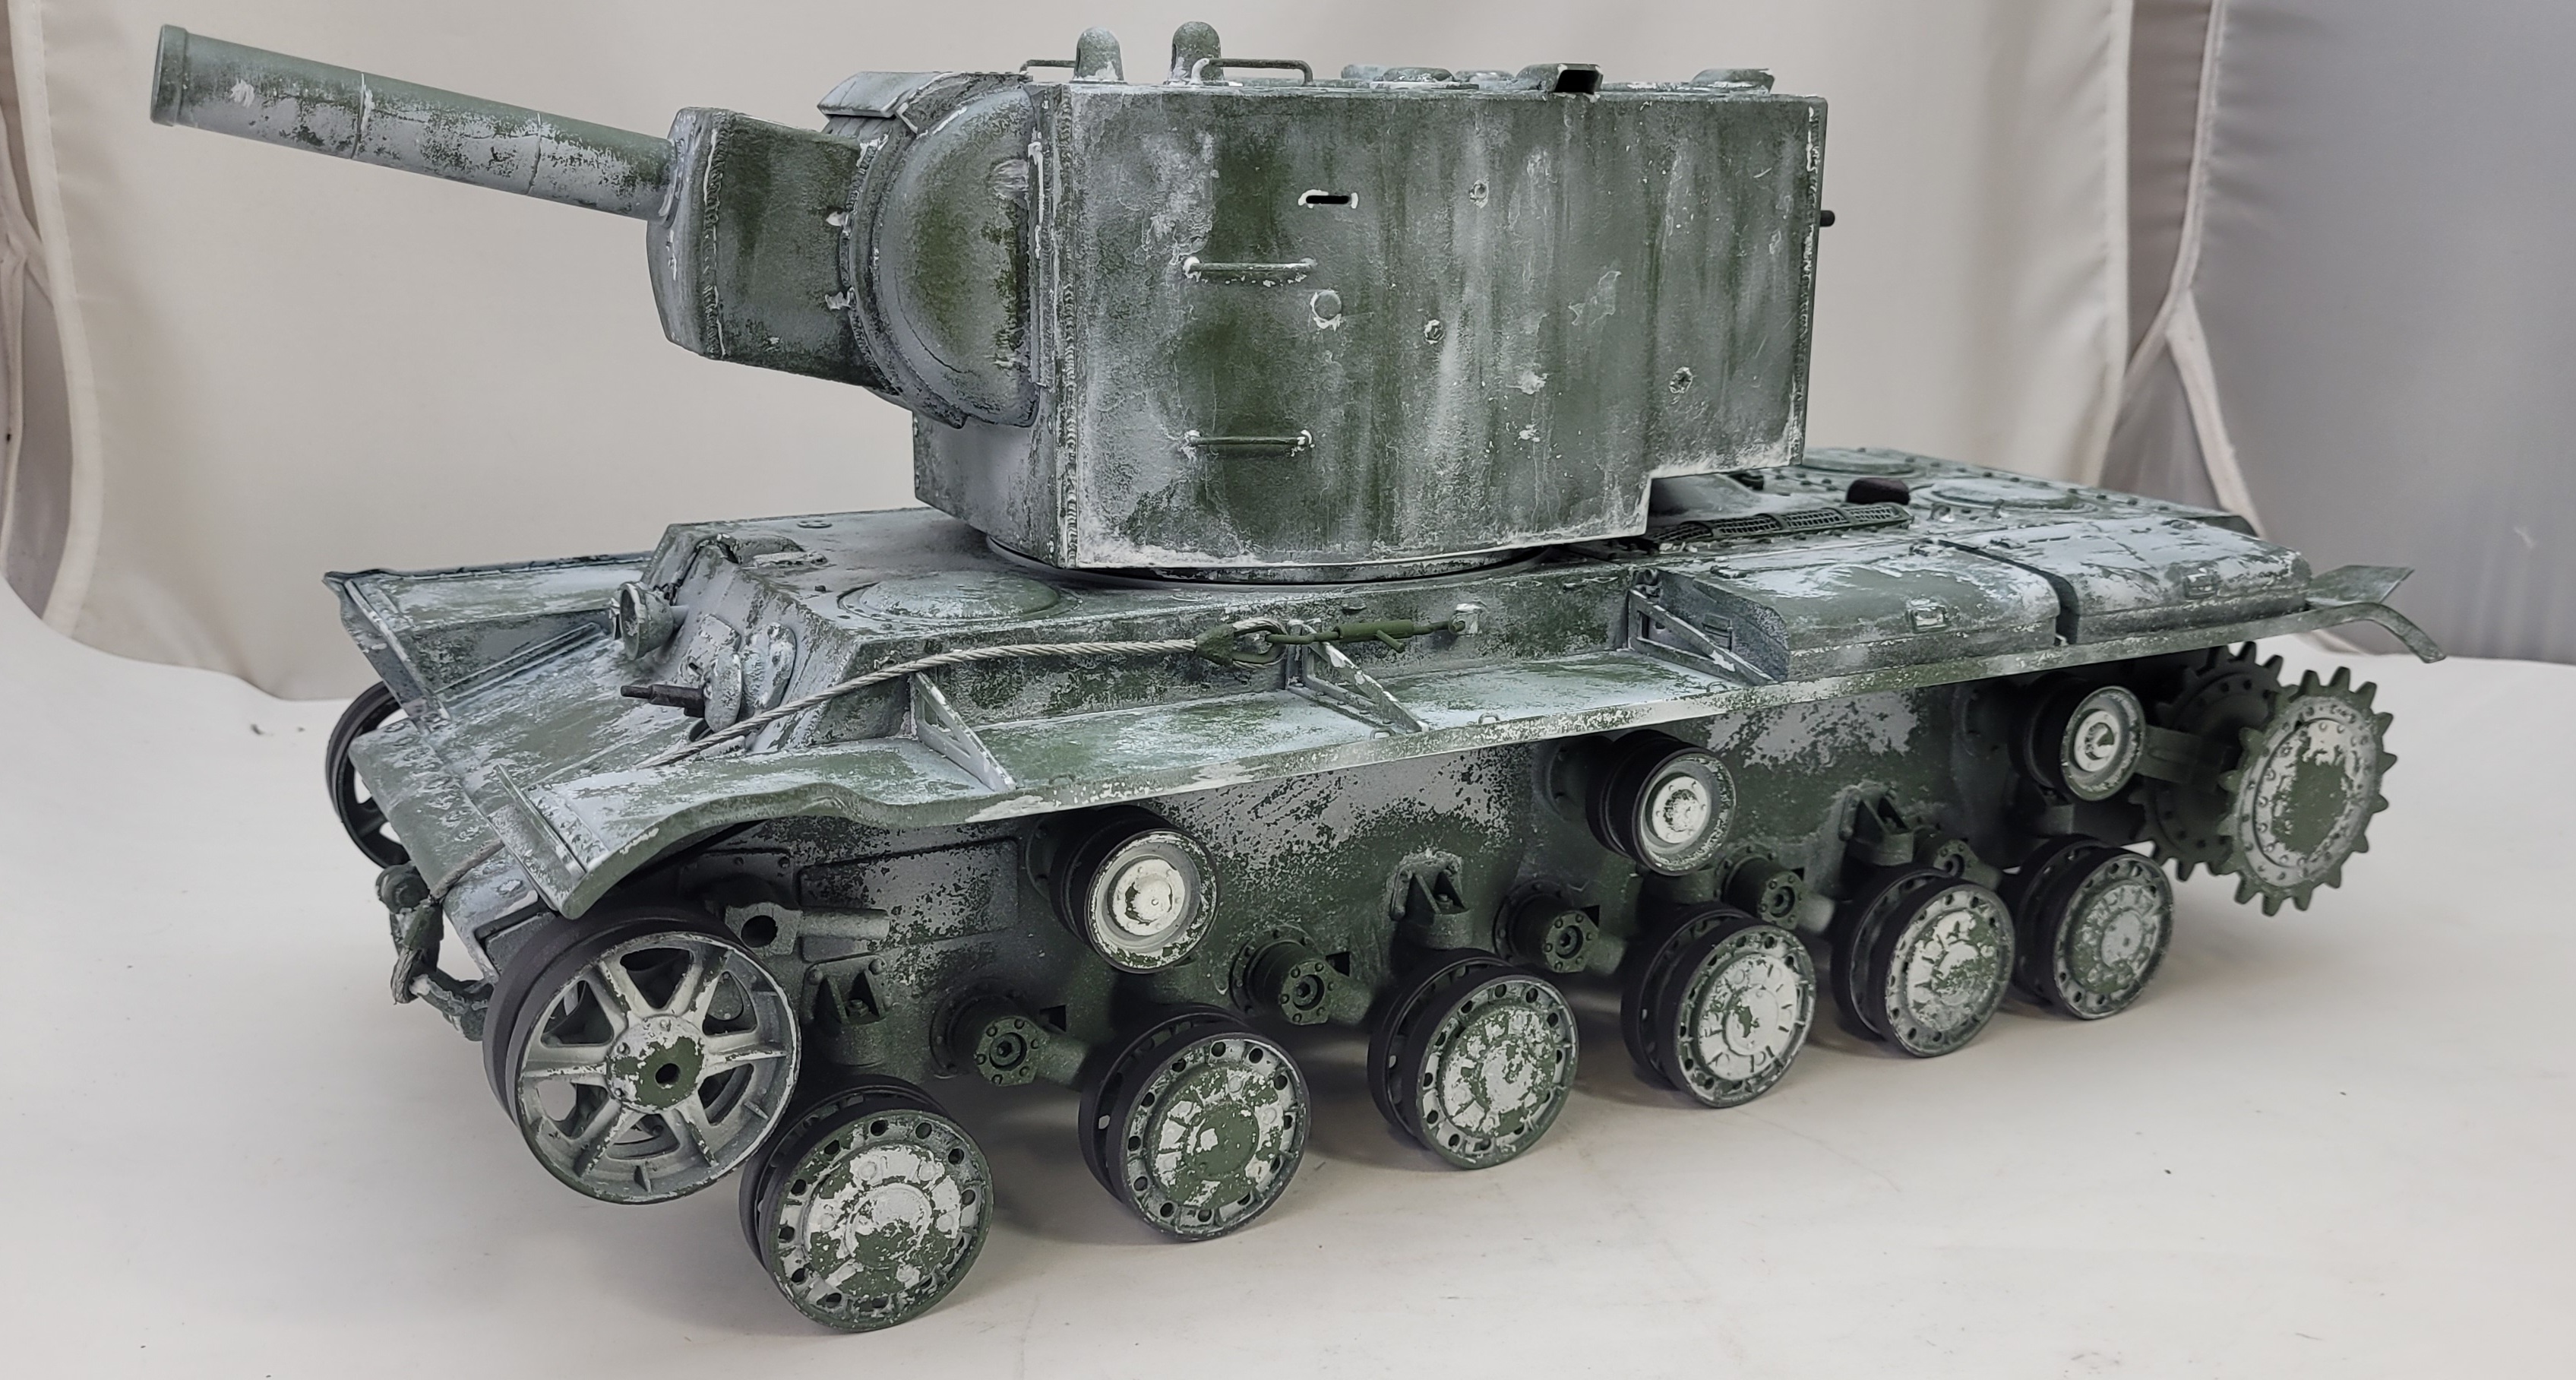
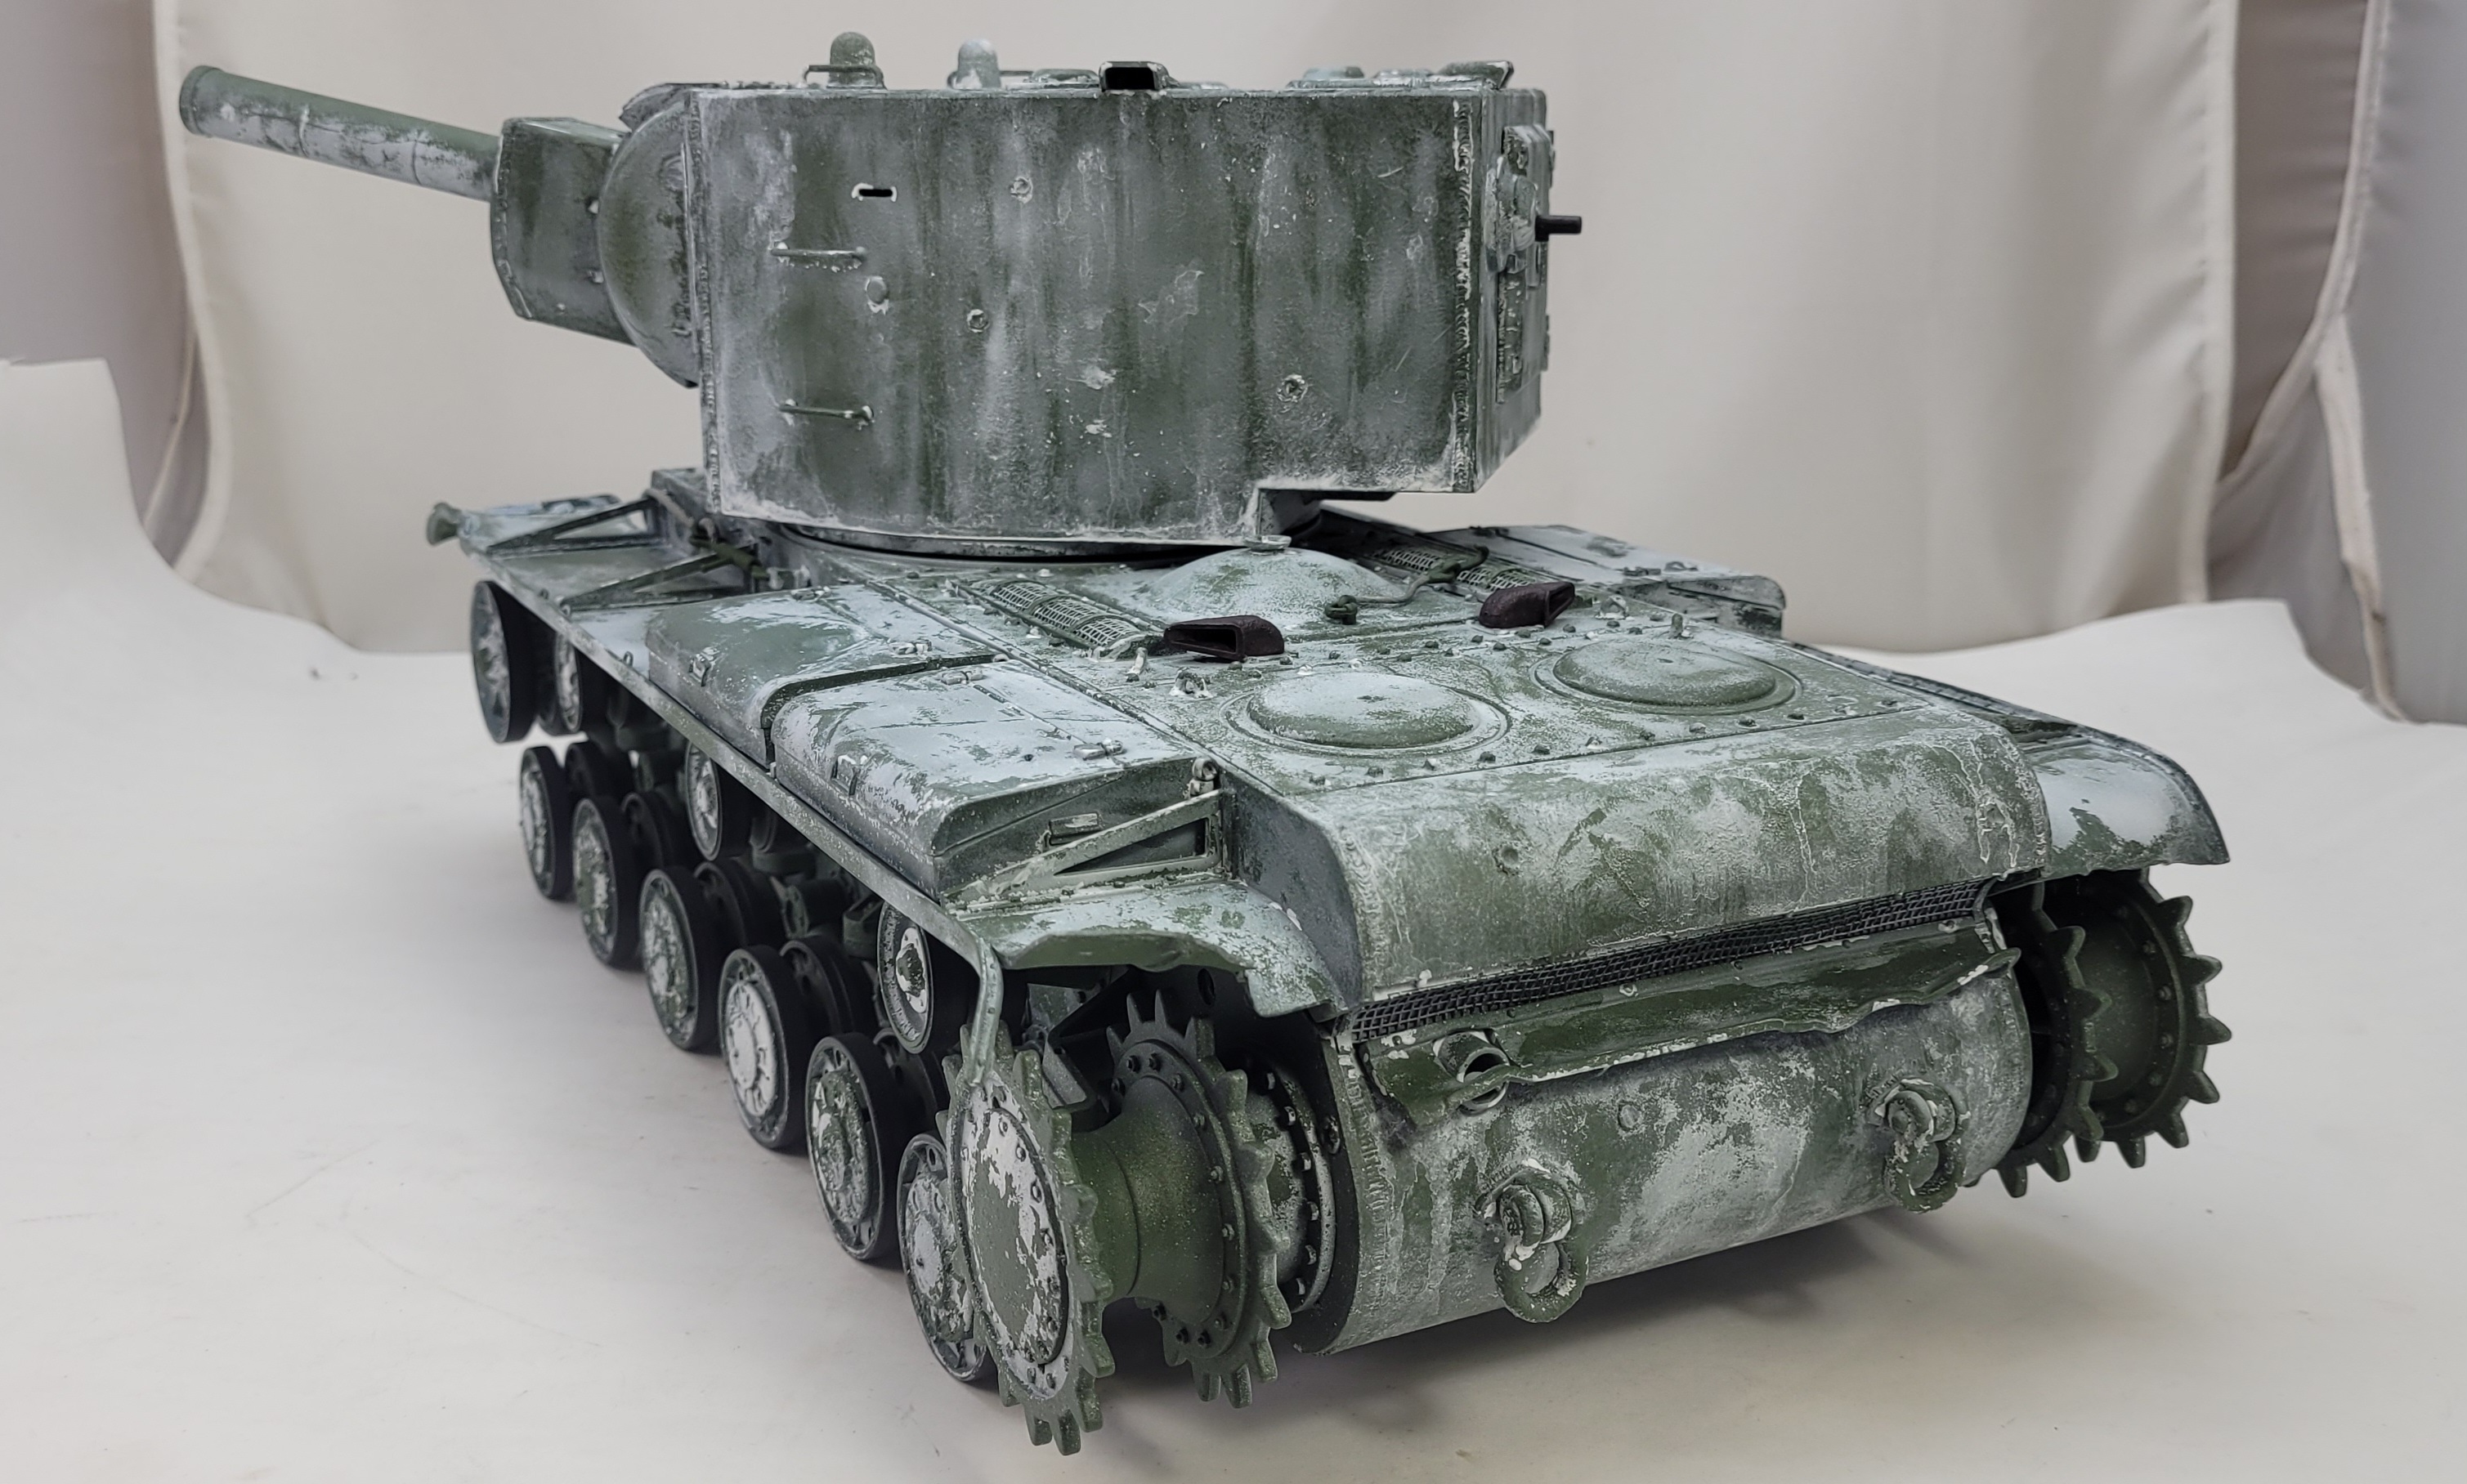
But...I put it on too uniformly and thick. When I started chipping it, I just wasn't getting the worn and faded look I was wanting. Sooooo, off to the sink to scrub off my layer of white and hairspray.
I did leave the bogies etc. alone as the thought of scrubbing them clean was a bit depressing. There will be mud and lots of washes on all of that area so I'm ok with the heavier white.
- 20240223_141823.jpg (2.33 MiB) Viewed 3318 times
- 20240223_141850.jpg (2.02 MiB) Viewed 3318 times
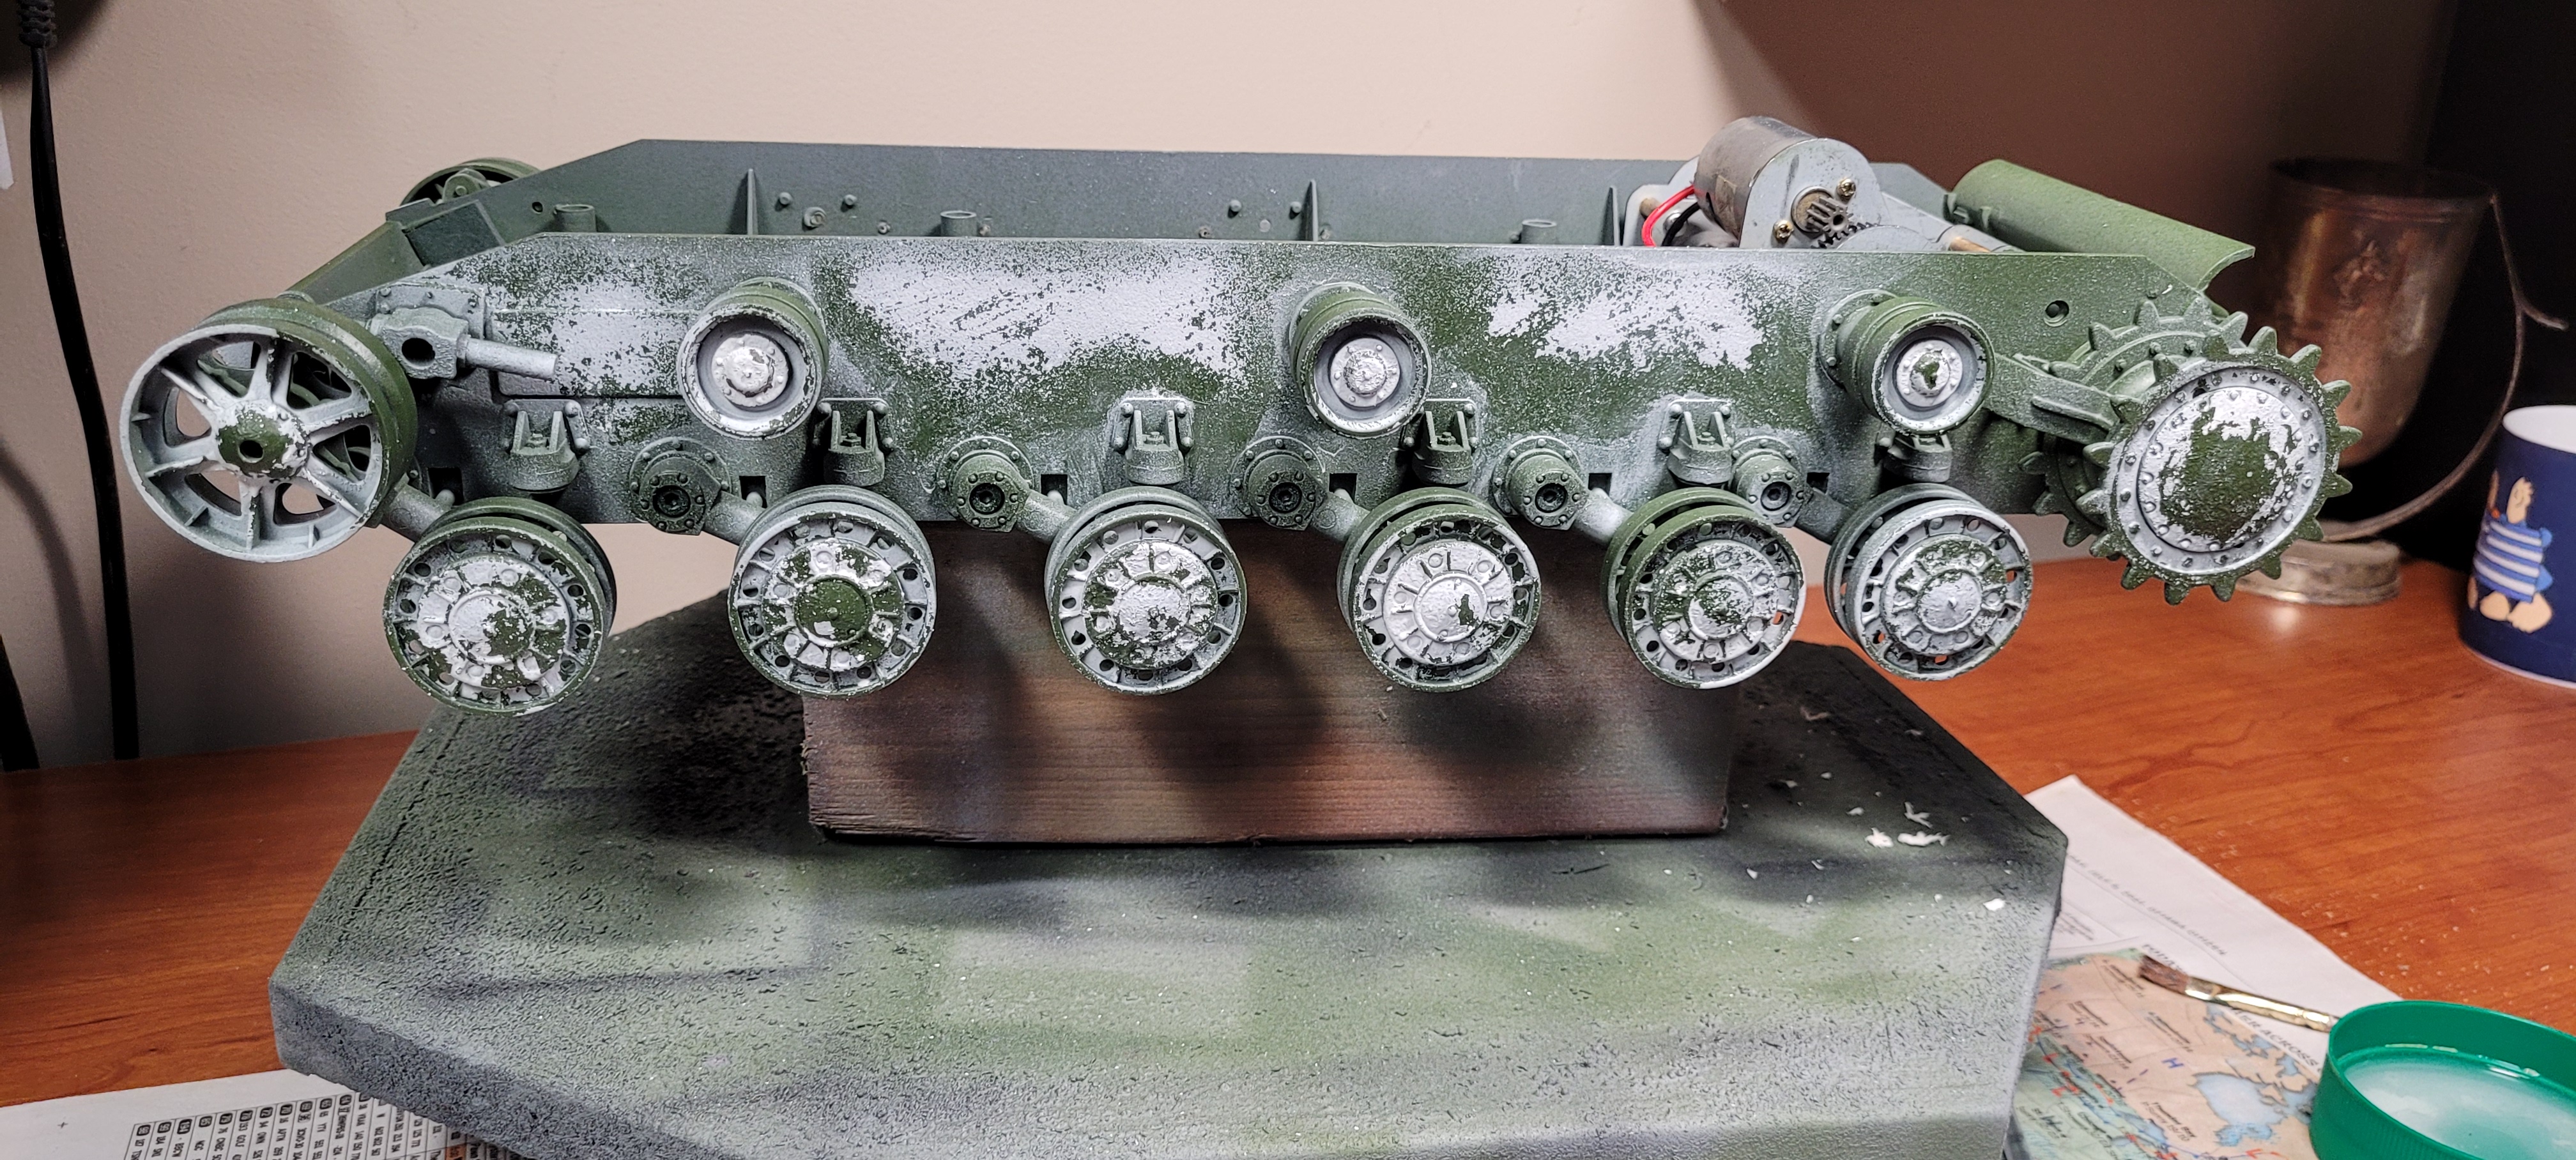
Regroup, and got less enthusuastic with my coverage. Dat's better! Something I'm finding with airbrushing is that I can, and need to get out of my rattlecan mindset of complete coverage because with a rattlecan that's about what you get with the volume and wide spray pattern they deliver. Less is more, Mike. Less is more.
- 20240224_232003.jpg (1.87 MiB) Viewed 3318 times
- 20240224_231955.jpg (2.08 MiB) Viewed 3318 times
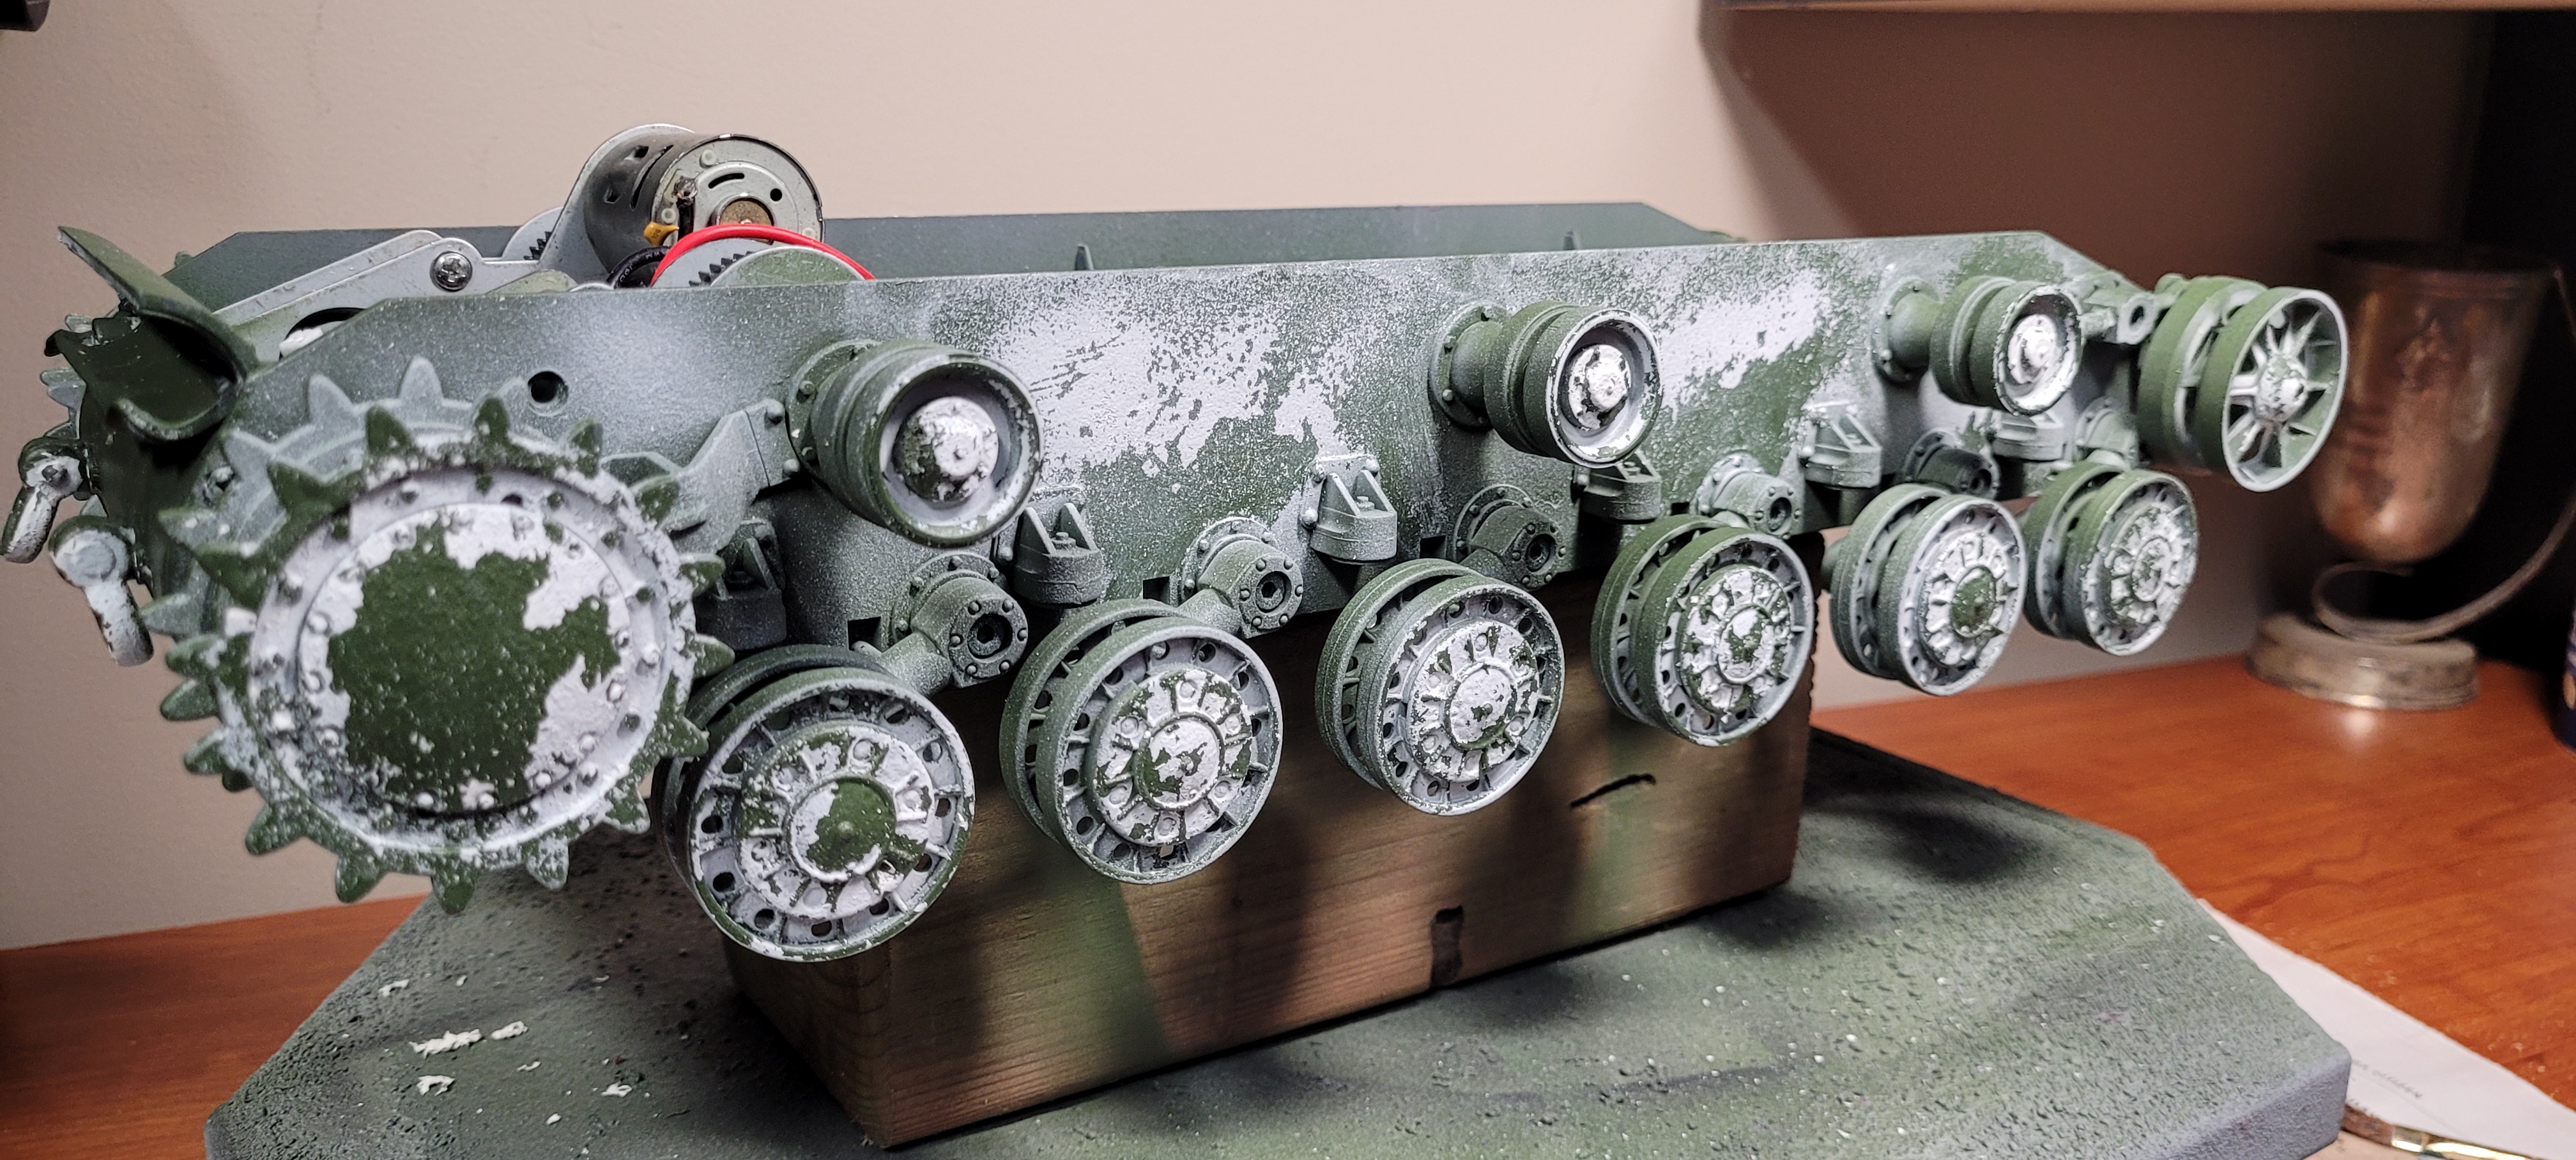
On with the chipping and scrubbing. It is a lot of fun! I like how some areas came out, others less so, but overall it gives the blandish billboard KV-2 more surface interest.
- 20240306_154716.jpg (1.4 MiB) Viewed 3318 times
- 20240306_154800.jpg (1.12 MiB) Viewed 3318 times
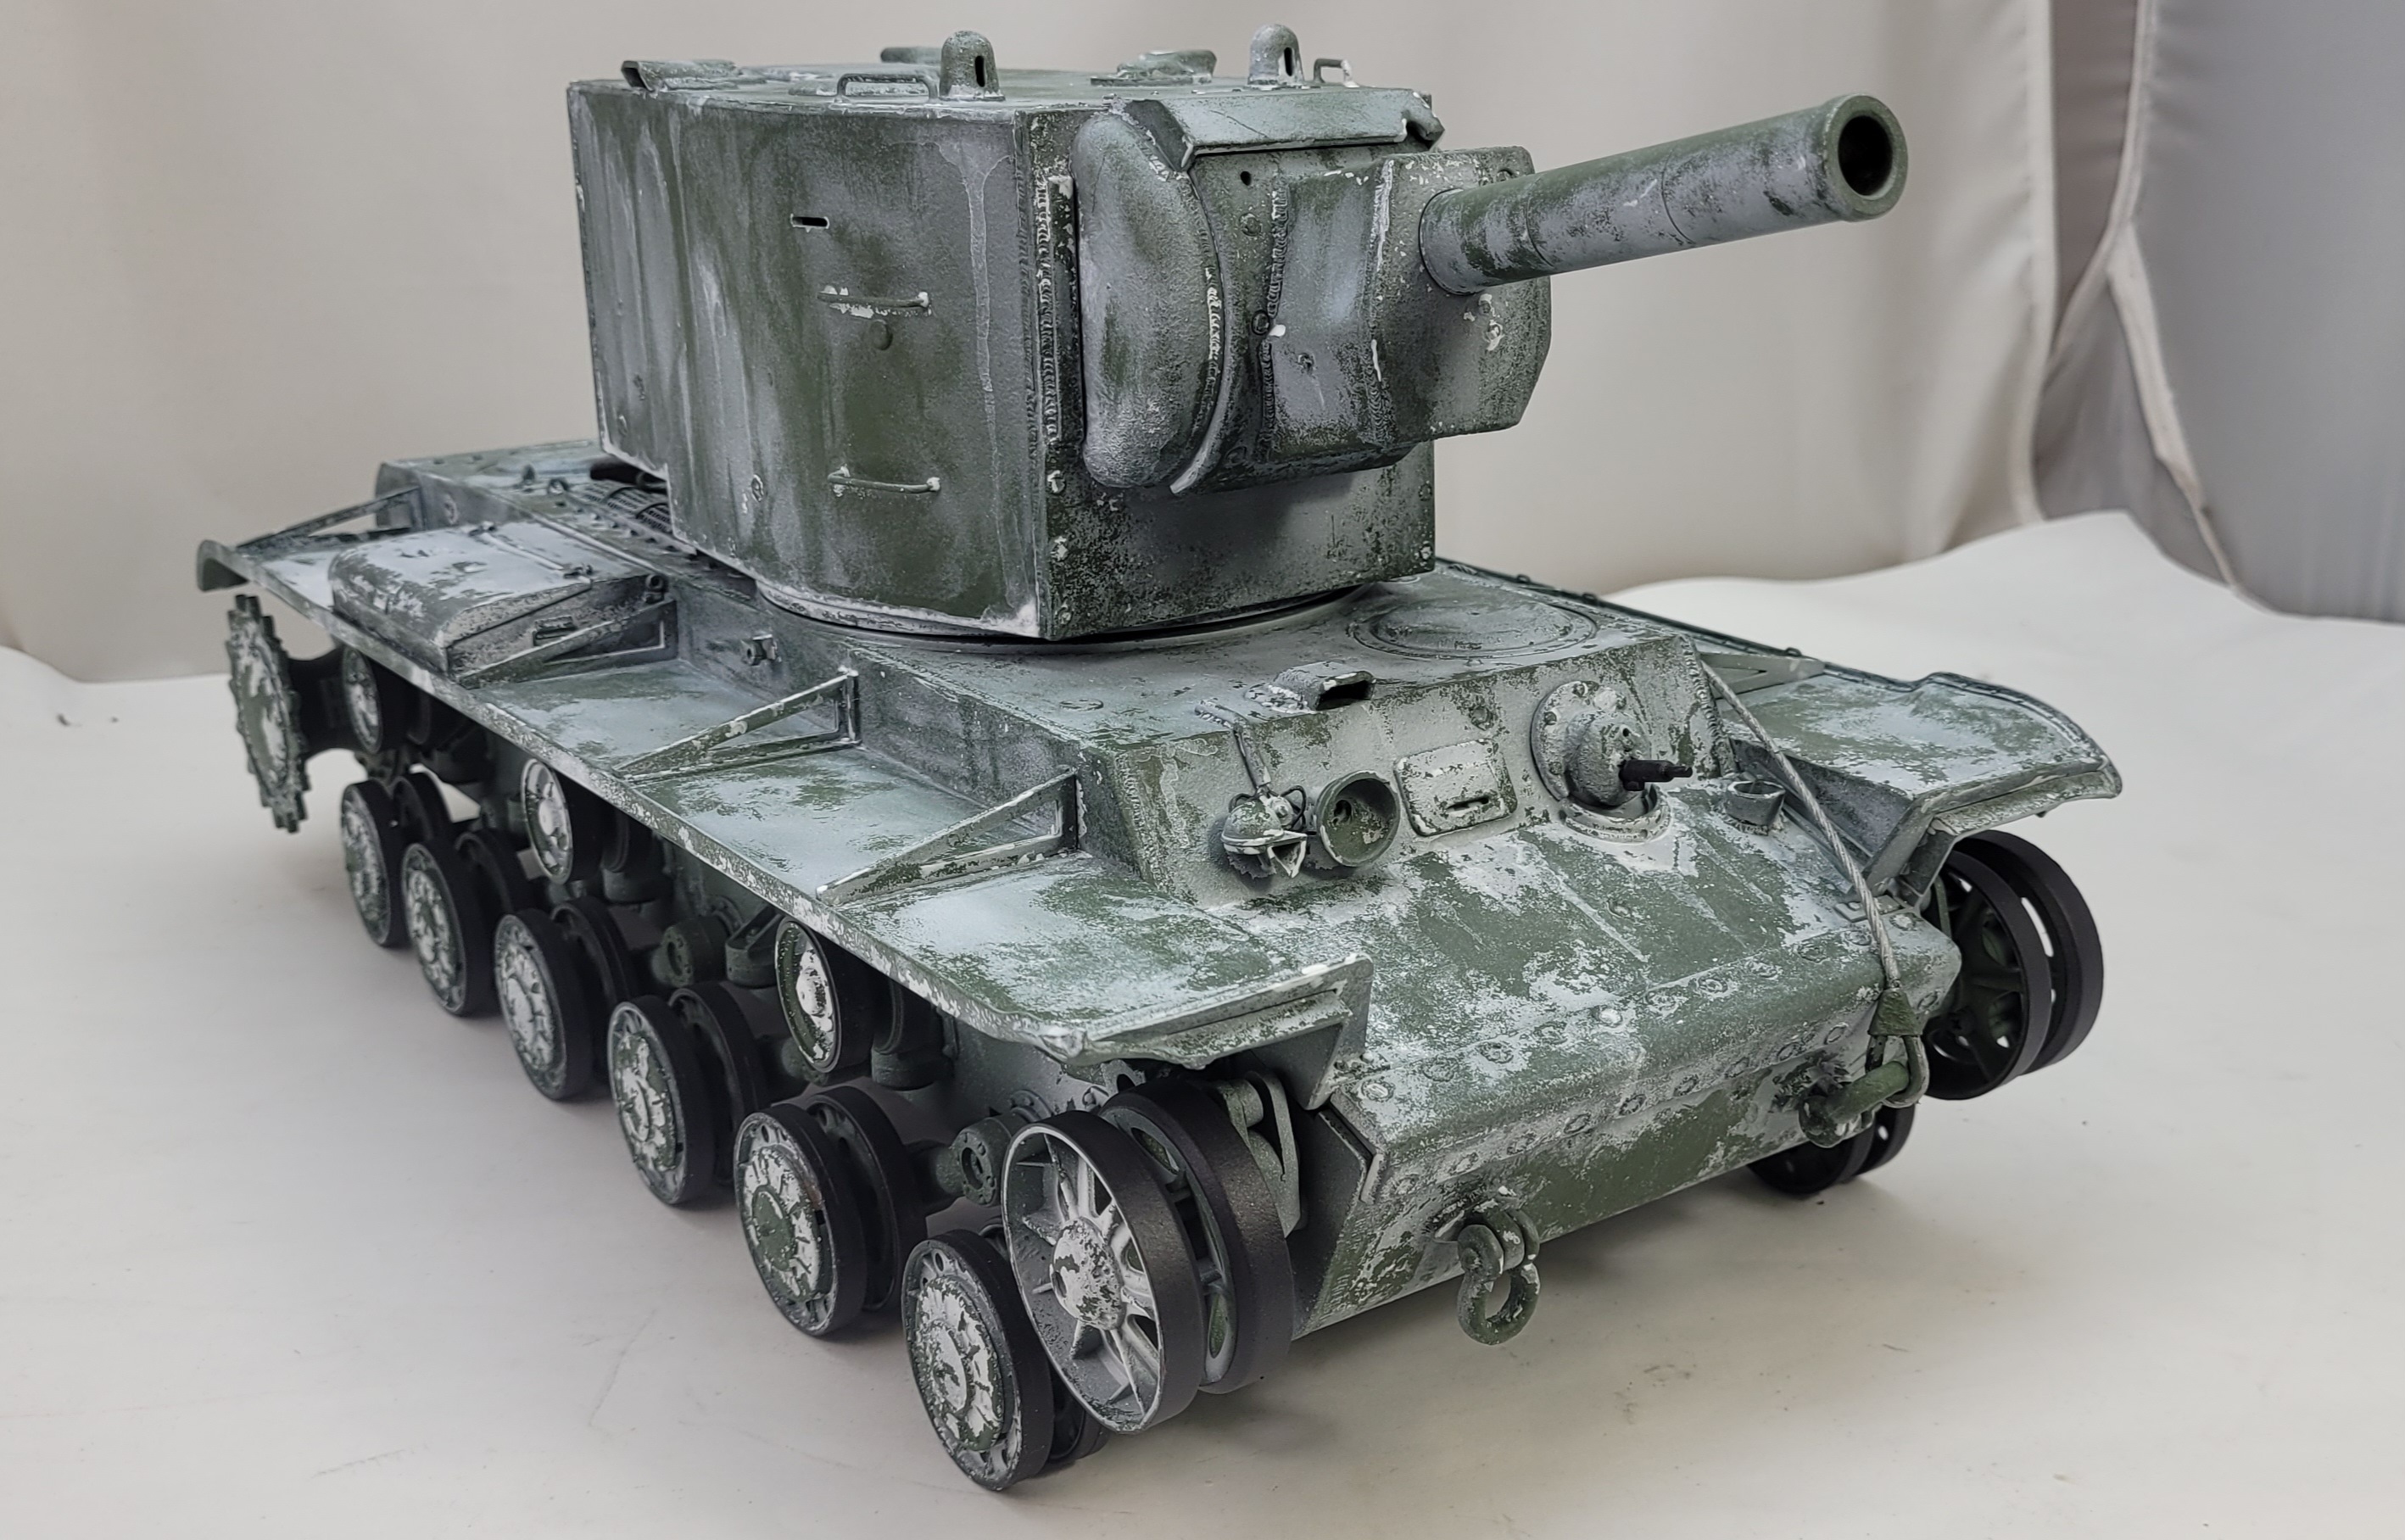
- 20240306_154834.jpg (1.05 MiB) Viewed 3318 times
Next steps--mud, washes, some filters to get a wider colour palette on the tank, a bit of rust and soot on those distinctive exhaust stubs, and lots of of detailing to do around the acres of this tank with some tarps and straps, and oil tanks.
Mike.
Re: WINTER 23-24 KV-1 to KV-85 to KV-2 Phew!
Posted: Thu Mar 07, 2024 3:54 am
by MrChef
You have done Excellent work here with your new tool. What white paint did you use?
I very much look forward to your weathering
Re: WINTER 23-24 KV-1 to KV-85 to KV-2 Phew!
Posted: Thu Mar 07, 2024 5:41 am
by Kaczor
White wash looks excelent.
Re: WINTER 23-24 KV-1 to KV-85 to KV-2 Phew!
Posted: Thu Mar 07, 2024 8:30 am
by Meter rat
Still can’t believe that is an actual tank. It’s so pig ugly and awkward looking. Great painting.