Thank you MonsieurTox !
Hello, this post is for the M2 Browning and its custom made Chaffee mount. The M24 Chaffee has an unshielded anti-aircraft Browning at the back, facing the rear on the sloped plate. On three of the ten tanks at DBP, the mount was move in front of the gunner to provide additional frontal firepower. On Conti, the position was unchanged. From the biography book that i have read, it was tempting for the crew or infantry support to use it against ground targets but as the Browning is extremely exposed, the intrepid users usually did not last long, being wounded or killed in few seconds after engagement by bullets or shrapnel.
Careful study of the pictures of the Chaffee M2 Browning mount in the WWP and Squadron Signal Walk Around books was required. Thankfully, both publications have extensive cover of the mount, a must for this build. Both books are highly recommended.
View of the complicated tripod mount from the gunner's hatch. Notice the knob to fix the rotation. The M2 cradle is standard WW2 and the Tamiya M2 from the Pershing kit is therefore a good fit.
 Viewed 1588 times")
- RC 1/16 M-24 Chaffee light tank- Dien Bien Phu 1954 - Build
The left side has a large bracket that can be elevated to lock the machine gun from the mount to the barrel sleeve, as shown.
 Viewed 1588 times")
- RC 1/16 M-24 Chaffee light tank- Dien Bien Phu 1954 - Build
When not in use, the bracket simply rests on its own.
 Viewed 1588 times")
- RC 1/16 M-24 Chaffee light tank- Dien Bien Phu 1954 - Build
As usual on my build featuring an M2 Browning, the Tamiya model coming with the Pershing and latest Sherman 1/16 kits is used, purchased separately in lots from AAF museum. It is enhanced with Aber 16L-04 brass upgrade. I've done this countless time so i will not go into any detail of the conversion again. Notice that the crank is not installed yet, i recommend leaving it to later. It is quite fragile and is usually easily broken when manipulating and depositing the machine gun during construction. No LED is installed in this one.
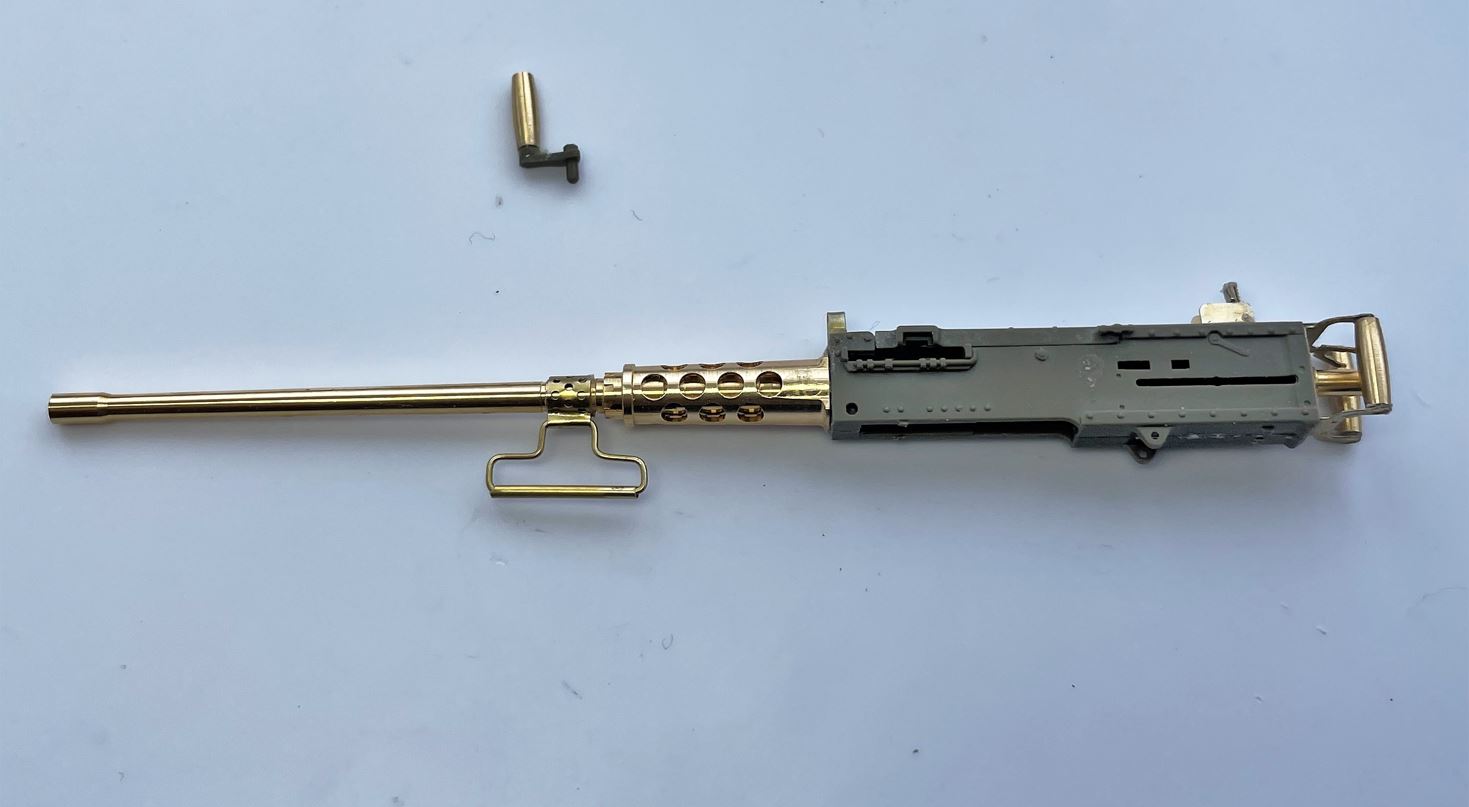
- RC 1/16 M-24 Chaffee light tank- Dien Bien Phu 1954 - Build
- Capture3.JPG (65.46 KiB) Viewed 1588 times
To facilitate painting, it is better not to glue the machine gun on the cradle. Instead, i recommend keeping it flexible and recreate the pins that are used to mount it on the cradle, like on the real thing. The tripod components are made in brass for more solidity.
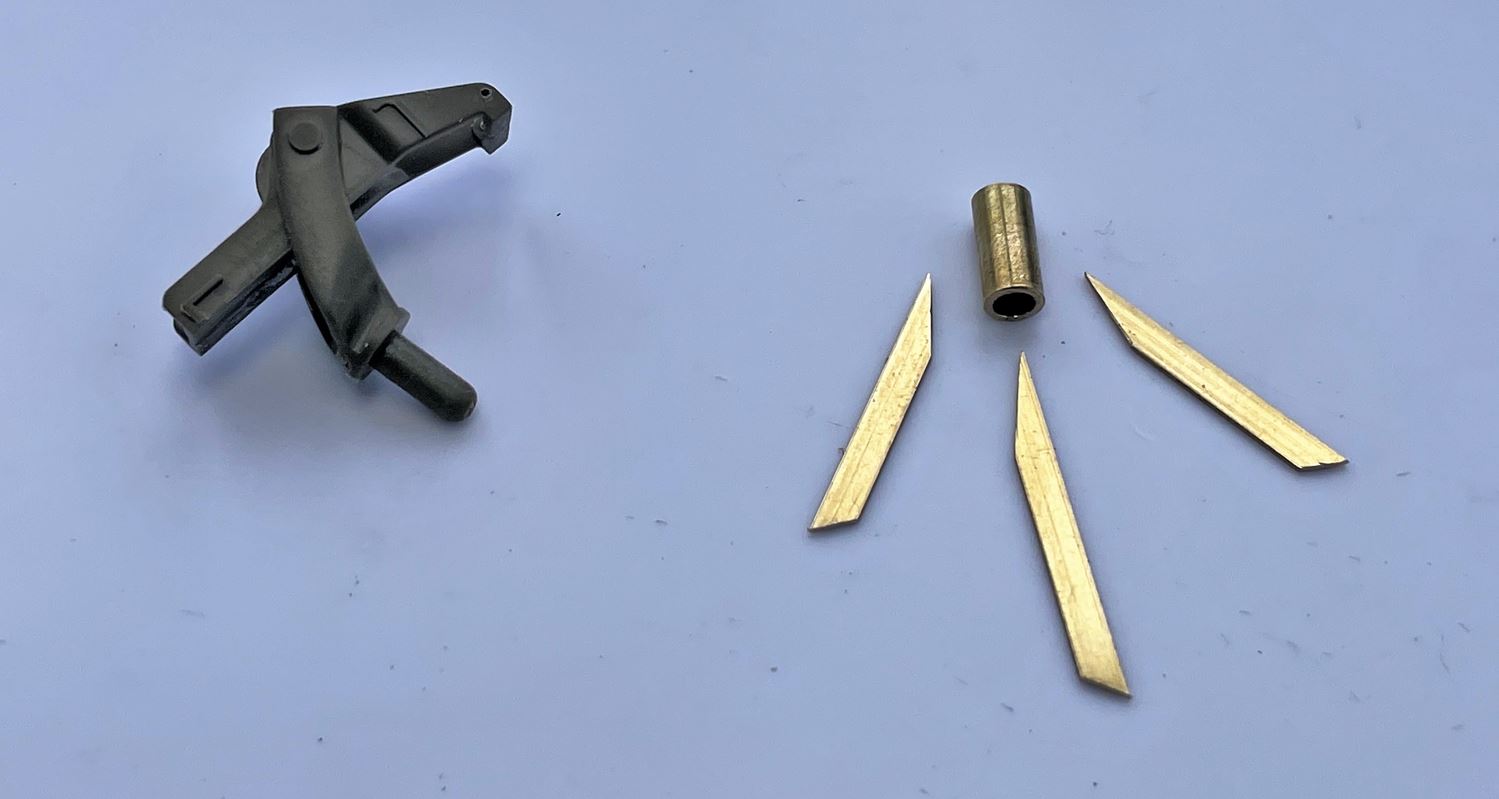
- RC 1/16 M-24 Chaffee light tank- Dien Bien Phu 1954 - Build
- Capture4.JPG (70.02 KiB) Viewed 1588 times
As the mount is installed on a sloped top plate, a jig was created to create and position the parts with all the proper angles (not easy), temporarily held with superglue, and then soldered in place when the proper shapes have been determined. It is critical that the middle tube section holding the cradle be absolutely vertical considering the angle of the turret top. I am junior at soldering small brass items and i had quite a bit of difficulty. The first leg is easily soldered, but when trying to solder the 2 others, the heat on the brass tube would melt the legs previously done. It gets ugly real fast, frustrating but i eventually managed. And then i had to do it twice when i noticed that the central tube i selected was externally to small. Internally, it matched the Tamiya cradle rod that slide into the tube, but the tube was not thick enough to match the outside of the cradle, i should have noticed that before. I had to add an overlay tube for the proper inner and outer diameter. Then the metal tripod is removed from the jig.
 Viewed 1588 times")
- RC 1/16 M-24 Chaffee light tank- Dien Bien Phu 1954 - Build
The important locking bracket is made partly functional, in brass with M1 bolt.
 Viewed 1588 times")
- RC 1/16 M-24 Chaffee light tank- Dien Bien Phu 1954 - Build
The tripod mount is installed.
 Viewed 1588 times")
- RC 1/16 M-24 Chaffee light tank- Dien Bien Phu 1954 - Build
The machine gun is put on the mount. All good. The Aber ammo is not installed yet. Notice the storage mount on the side of the turret. The cradle can be positioned there, and the Machine gun itself can be put on brackets above it, protected by the small shield at the front of it.
 Viewed 1588 times")
- RC 1/16 M-24 Chaffee light tank- Dien Bien Phu 1954 - Build
Being highly visible and interesting, i always make sure my Brownings are well detailed. Notice the pins on the side of the cradle, ensuring the machine gun can be removed from the cradle for the remaining of the build, painted separately from the cradle and re-installed at the total end of the build.
 Viewed 1588 times")
- RC 1/16 M-24 Chaffee light tank- Dien Bien Phu 1954 - Build
Continuing on following post.