Page 7 of 11
Re: Another Tamiya Leopard A4
Posted: Tue Sep 02, 2025 9:42 pm
by HERMAN BIX
Oven cleaner but wear gloves !!
Re: Another Tamiya Leopard A4
Posted: Wed Sep 03, 2025 1:15 am
by tankme
MrChef wrote: ↑Tue Sep 02, 2025 5:33 pm
Yeah a paint stripper will help you out a lot with that. I didn't notice the issue in smaller pictures on my phone.
People swear by the Testor's ELO stuff although its a bit pricey-
https://www.hobbylinc.com/testors-easy- ... ver-542143
Now lets try to figure out what happened with your paint so it doesn't happen a second time.
Whatever people say DO NOT try Brake fluid. I did, and it was the wrong thing to do and not worth it as well as cleanup.
Yeah, brake fluid eats plastic and paint. I have also heard oven cleaner works.
Re: Another Tamiya Leopard A4
Posted: Wed Sep 03, 2025 12:26 pm
by Meter rat
Welcome to the incompetent world of Meter Rat.

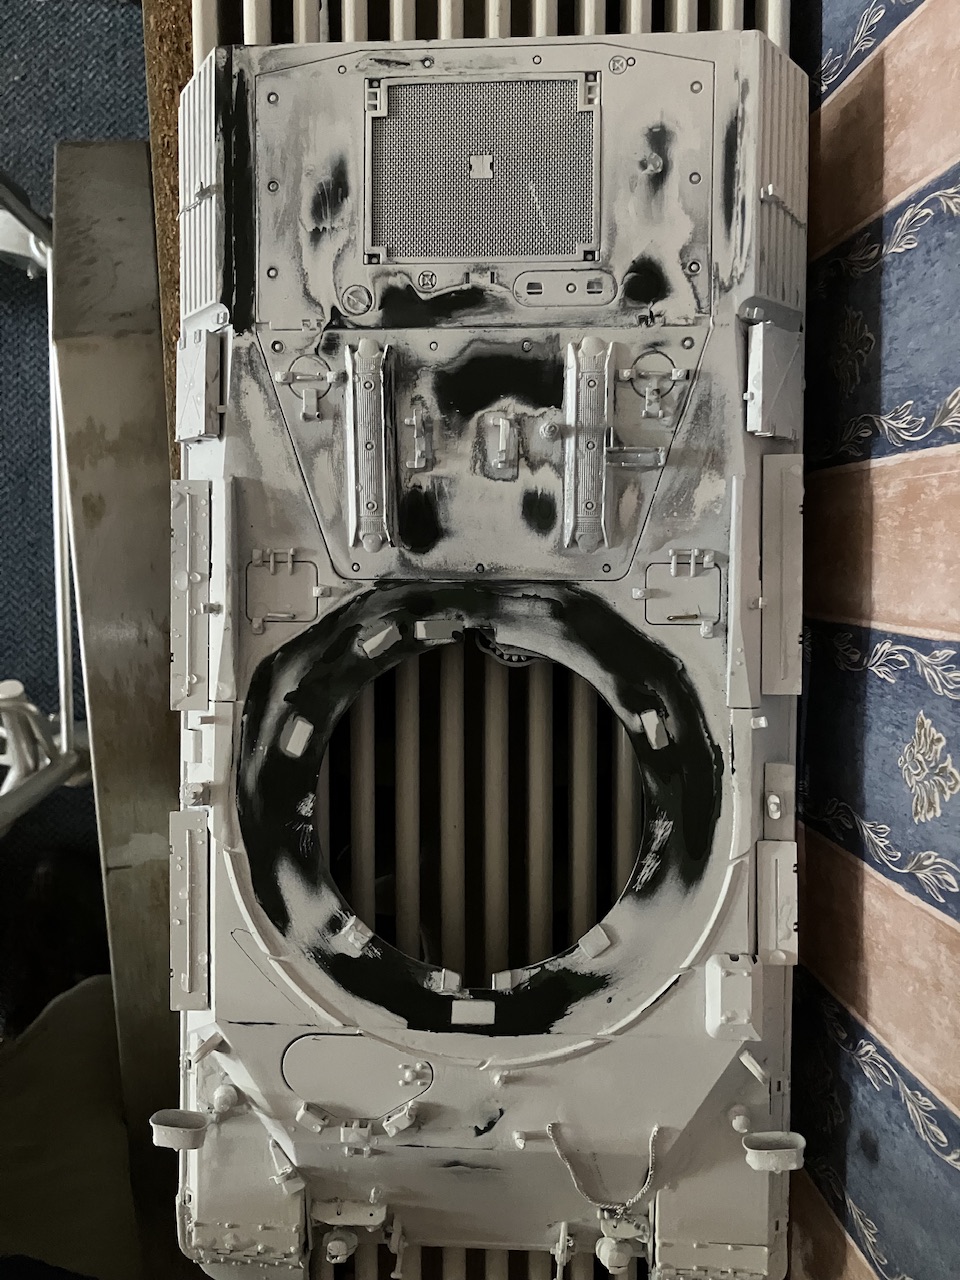
Went old skool. A further two hours with wet and dry, used wet got it back to good plastic, and sound paint. I am rather pleased that I made such a cock up, as it has allowed me to address a lot more issues that were highlighted.
- IMG_6296.jpeg (380.01 KiB) Viewed 930 times
Grey etch primer on tonight. And then try not to rush.
Re: Another Tamiya Leopard A4
Posted: Wed Sep 03, 2025 12:30 pm
by Stormbringer
Really hope the priming goes smoothly for you mate as that was a lot of hard work to get it back to that stage

do you think maybe a lower coat hadnt dried properly before you put next coat on ?
Re: Another Tamiya Leopard A4
Posted: Mon Sep 08, 2025 6:22 pm
by Meter rat
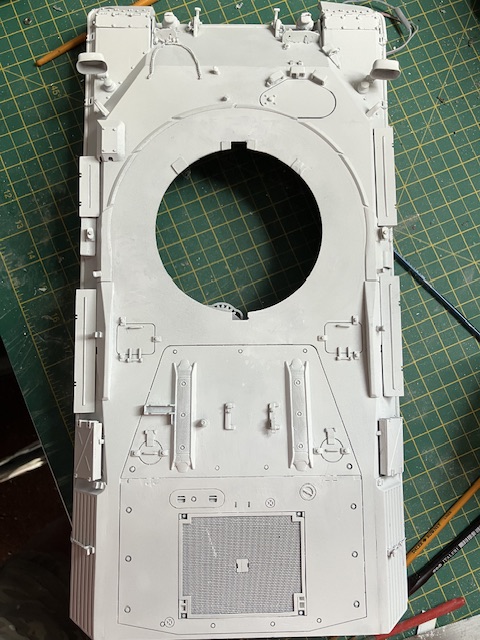
The paint came good in the end. Much sanding and filling was required. Made up a new mantlet cover but again unhappy with it so will make a new one.
- IMG_6298.jpeg (116.71 KiB) Viewed 786 times
- IMG_6299.jpeg (97.36 KiB) Viewed 786 times
Re: Another Tamiya Leopard A4
Posted: Mon Sep 08, 2025 6:56 pm
by Stormbringer
That really does look a lot better mate
Re: Another Tamiya Leopard A4
Posted: Sun Sep 14, 2025 5:21 pm
by Meter rat
Re: Another Tamiya Leopard A4
Posted: Sun Sep 14, 2025 5:50 pm
by Stormbringer
Oops its always the same mate

Hindsight is always 20/20 tho
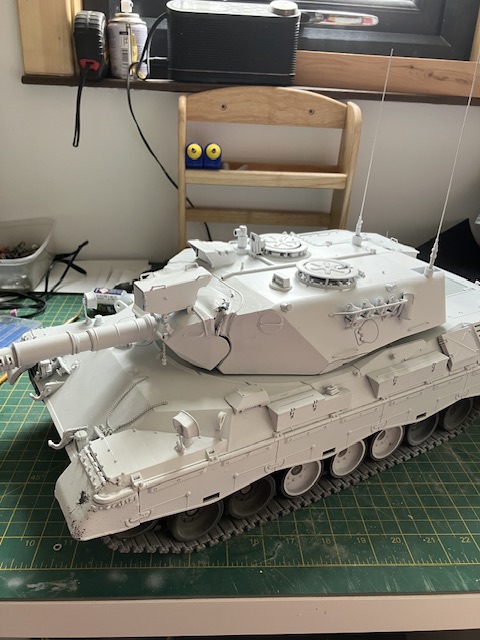
Tanks looking good and like the convoy lights
Re: Another Tamiya Leopard A4
Posted: Wed Sep 17, 2025 8:54 pm
by Meter rat
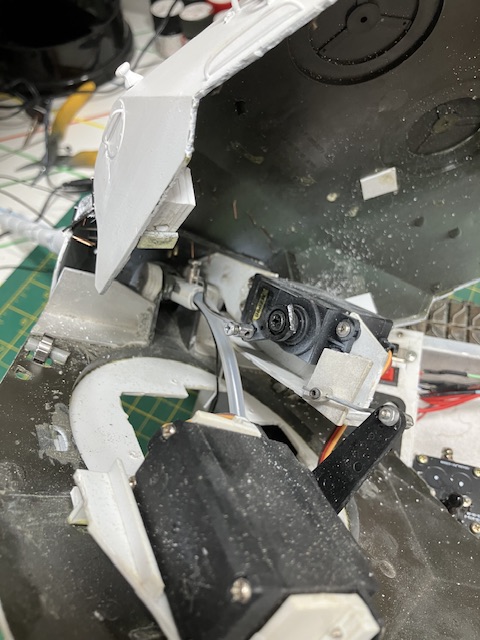
Spent 25mins getting the LED flash for the gun down the barrel. Of course, being a glaikit I should have done this before fitting the mantlet cover. Only knocked off the spot light from the mantlet, and lost one the pivots for the gun. Oh well, nothing that the glue can not resolve. A bit of soldering to extend the wires for the flash LED, and the supply for the heater. Then the turret can be buttoned up. And my stencils have arrived from Kaczor.

I hope I can doe them justice.
- IMG_6348.jpeg (169.2 KiB) Viewed 698 times
- IMG_6349.jpeg (99.79 KiB) Viewed 698 times
Re: Another Tamiya Leopard A4
Posted: Thu Sep 18, 2025 2:49 am
by MrChef
Shes's really coming along now Mr. Rat.
Ok I had an issue running the flash bulb down the barrel of Franzi after I had worked in the barrel recoil shuttle. I could no longer fit the bulb in and then there's that pesky plug on the opposite end of the wires. I remembered our asiatam rewiring where I had learned to disconnect the wires from the plugs by pushing the wire crimp connector in with a thumb tack. Removed the plug, slid the wires down the barrel, reattached the wires to the plug and voila. I didn't have a need to extend the wire though as it plugs right in the turret where I mounted the control board.
I had also originally mounted the barrel smoker units in the lower before I switched to servo recoil. The Asiatam recoil took up a lot of real estate in the turret.
 I hope I can doe them justice.