Page 7 of 13
Re: Asiatam StuG IV conversion kit...
Posted: Sun Feb 04, 2018 10:18 am
by Raminator
43rdRecceReg wrote:This is how the Section containing the driver's hatch, and periscopes, looks when offered up the casement:
Asiatam StuG IV driver's hatch- before A.jpeg
As you can, it doesn't FIT.

Should we be surprised by now?
It would have fit if you hadn't straightened the hull out. Begin as you mean to go on and all that.

You're really honing your skills and patience with this one Roy, and done great work so far. You'll be ready for a Juckenburg or Vandra after this!
Re: Asiatam StuG IV conversion kit...
Posted: Sun Feb 04, 2018 12:57 pm
by Arnie_DK
Nice build you have going here

Have the same kit and was never really happy myself with how it all lined up...
I have now pulled it apart and started gluing in extra reinforcements here and there, so thanks for the extra work I now have

Re: Asiatam StuG IV conversion kit...
Posted: Sun Feb 04, 2018 4:33 pm
by 43rdRecceReg
Raminator wrote:43rdRecceReg wrote:This is how the Section containing the driver's hatch, and periscopes, looks when offered up the casement:
The attachment Asiatam StuG IV driver's hatch- before A.jpeg is no longer available
As you can, it doesn't FIT.

Should we be surprised by now?
It would have fit if you hadn't straightened the hull out. Begin as you mean to go on and all that.

You're really honing your skills and patience with this one Roy, and done great work so far. You'll be ready for a Juckenburg or Vandra after this!
Hmmm.., I'm afraid it wouldn't have fitted, Dan, even if the hull were true in all dimensions, angles and directions. In fact, I
did straighten most of the curve it had lengthwise. I even reinforced it with aluminium braces, and checked for a true edge using a ruler. There is a residual slight upward curve at the front, going from the top of the glacis plate to the edge of the fenders. But that curve disappears when the glacis plate is pressed down against the lower hull- as it will be when the thing is actually in action. In any event, the slight curve has nothing to do with the roof problem. The aperture in the casement roof is rectangular, but the casemate roof is rhomboid. I've checked the aperture, and all the right angles are- well.....right angles, just as they should be.

However, the roof has corners angles that are anything
but 90 degs in shape.

Have a look here:
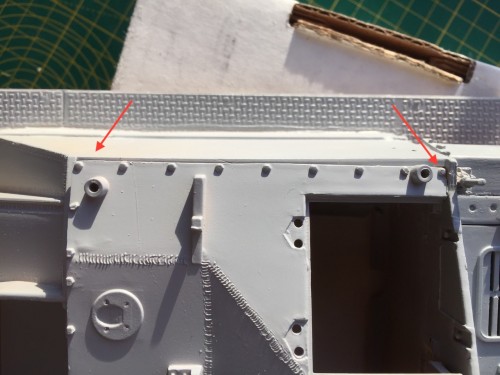
- Asiatan StuG IV_ casemate roof out of kilter
You'll notice that I've given the hull a once over with primer. The primer helps to highlight problems, and some of the crudeness of the kit's detailing. To make that (Top) left hand corner fit in the aperture, some of those 'bolt heads' will have to go.

... In a way, I don't mind some unevenness from the mould, as it adds a touch of authenticity and character. But plain 'wonky' doesn't cut the mustard for me..
Re: Asiatam StuG IV conversion kit...
Posted: Sun Feb 04, 2018 4:45 pm
by jarndice
Hi Roy, Have you thought of running a line of "Green" Putty filler along that awful edge to build it up and then abrade it square.
That way you at least save the bolt heads.
I have saved many an ineptly cut out hatch from my own lack of skill with "Green" Putty.
Shaun.
Re: Asiatam StuG IV conversion kit...
Posted: Sun Feb 04, 2018 4:48 pm
by 43rdRecceReg
Here's yet another example of how the fixtures and fittings, (whilst looking credible after they've been battered and polished into shape) are essentially crudely produced and executed. Just look at this hinge fitting for the Loader's hatch..follow the red arrow= and click to ENLARGE:
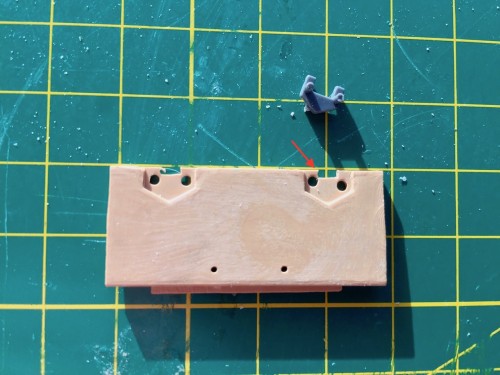
- StuG IV- loader's hatch hinge misaligned
With the hinges in place, the wayward nature of the fitting becomes painfully apparent..
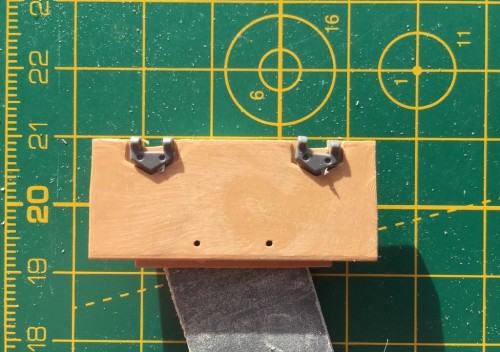
- Asiatam StuG IV- loader's hatch hinge misaligned
I have to say that this is typical of the fittings here. These errors
can be corrected, and the tank (Assault Gun really, but what the Hell) can be made to look attractive; but it takes an awful lot of effort and time to do it.

I spent an hour, for example, correcting the fit of one of the hinges on the engine access plate, only to find that the other two required my services too..
On the plus side. These kits are a less than an eighth of the price of a Tamiya. But, you have to have the life- expectancy of Methuselah to complete one satisfactorily....

Re: Asiatam StuG IV conversion kit...
Posted: Sun Feb 04, 2018 5:04 pm
by 43rdRecceReg
Time to fit the Cupola to the casemate roof.. Hmm. what hours wait me here, I wonder ?..
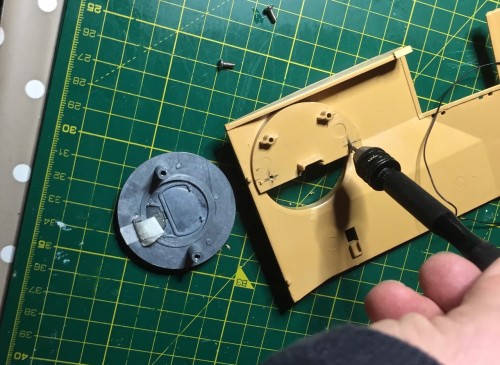
- Asiatam StuG IV- fitting the Commander's cupola..
Oddly enough, the metal casting representing the cupola looks quite refined compared with the other rough stuff..

It even comes with a brace of screws that fit in the appropriate holes, without recourse to my tap and die set.
Pity the same can't be said for the alloy lower hull..

That was a Hell worse than anything Pinhead could magic up

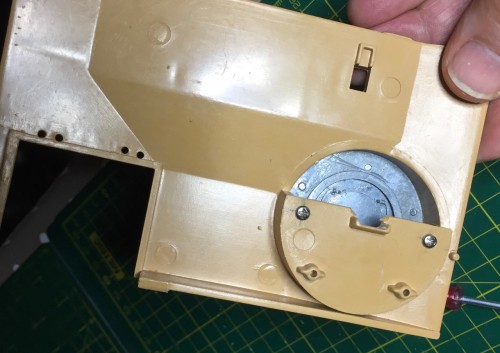
- StuG IV- Commander's cupola fitted
Here you can see the Cupola in place, as well as the gearbox covers. Both the hinges for the final drive covers needed remedial tweaking too..

Re: Asiatam StuG IV conversion kit...
Posted: Sun Feb 04, 2018 5:13 pm
by c.rainford73
Roy so nice to see something went somewhat seamlessly for once

The hatches look very nice and the coupala is a good one too

Re: Asiatam StuG IV conversion kit...
Posted: Sun Feb 04, 2018 5:28 pm
by 43rdRecceReg
Time for a cuppa soon, or something a tad more relaxing after this frustration in plastic..

I've just begun to add a few weld lines. They'll be enhanced after drying.
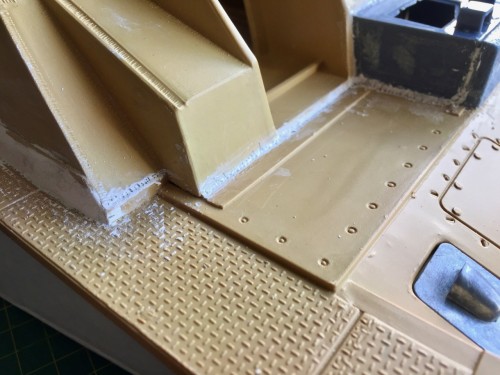
- Stug IV- adding some weld lines
By way of an experiment, instead of using two part epoxies for the hinges, I thought I'd give Loctite 401 a try... some day, I'll also give the 'Z-poxy' recommended by Stian, a go too. Ah..the joy of diversity, eh?
The Pz IV barrel lurking there is a reminder of my other parallel project, the Tamiya Pz IV...and what a gulf there is in- precision terms- between the two kits.. the woebegone to the wonderful

ah...
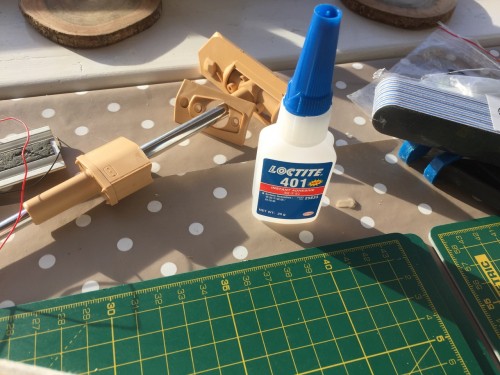
- Loctite 401 lurking near Tamiya Pz IV barrel assembly
Finally, here's an update of the accursed Asiatam's appearance after my recent efforts. The primer helps to identify bits that need filling etc...
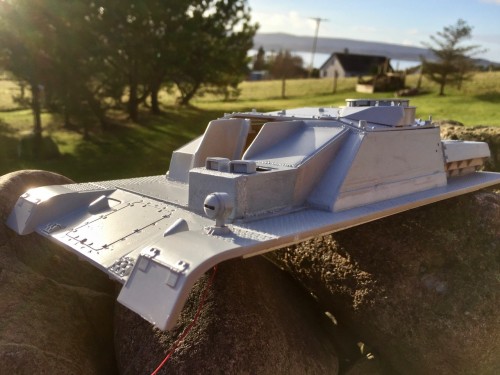
- Afternoon makeover for Asiatam StuG IV...
Now..where's that relaxing Glen Grant..

Re: Asiatam StuG IV conversion kit...
Posted: Sun Feb 04, 2018 5:35 pm
by 43rdRecceReg
jarndice wrote:Hi Roy, Have you thought of running a line of "Green" Putty filler along that awful edge to build it up and then abrade it square.
That way you at least save the bolt heads.
I have saved many an ineptly cut out hatch from my own lack of skill with "Green" Putty.
Shaun.
'Green putty' conjours up images of toddlers who've not had their noses wiped all day, Shaun.

As it happens, I have hex profile styrene in a variety of sizes for fabricating bolt heads. Given that the existing ones aren't exactly convincing, I'm not too bothered about hacking them off (literally..that is

).
Roy.
Re: Asiatam StuG IV conversion kit...
Posted: Sun Feb 04, 2018 5:43 pm
by 43rdRecceReg
Arnie_DK wrote:Nice build you have going here

Have the same kit and was never really happy myself with how it all lined up...
I have now pulled it apart and started gluing in extra reinforcements here and there, so thanks for the extra work I now have

Sorry about that, Arnie..

...but, to misquote your Carlsberg advert that has been running on TV here for years: "Arnie's: probably be the best StuG in the World. I'm sure it will be..

Incidentally, I did mention your build earlier in the thread, but when I went to consult it again for handy tips, I found that quite a few the pictures had been kidnapped by Photobucket. I stated, incorrectly, that they were all present.
It's a pity that so many useful pics have vanished..

Should we be surprised by now?
