Busy days indeed Herman! Though bit might look otherwise it's not a problem removing and replacing the the tools. Since my rebuild includes, where possible, installing and securing tools and accessories as the original tank they are all simply held in place by the hull fittings (I will make and fit the securing straps in final detailing stage).
Painless, yes, agreed on Mato's need to address the cheese metal problem on some of these components. i maintain this is a great tank, it really is, but the kind of re-building some like ourselves undertake should not be necessary to have a reliable tank out the box at these prices. In a way I hope the work we do acts as a 'suggestion box' for Mato, and perhaps a shortcut guide for new owners wanting to do a quick check over before running.
43rd, thank you for the generous and much appreciated praise coming, as it does, from someone with your all too obvious talents - I remain entirely seduced by your scratch built Cromwell, such that I need for my wallet's sake to stay away from Ludwig's site!
Ok, some small upgrades but, while I'm here........
I had a spare periscope from the Shapeways' set I got for the hatches so had the idea that I would use the spare parts to add a 'periscope up' position on the drivers side (since, if running with the hatches closed this would be necessary - I get hung up on these details, don't we all?.. dohh)....................
 Viewed 4693 times")
- I used the viewing window and part of the base to start. I then added a clear plastic glass window painted with Tamiya clear green for effect and placed reflective foil behind this. I have no idea what color these windows were in reality (they 'appear' black or smoked) but since I only have the clear green to hand, and it looks good enough, I though I'd apply a little artistic license and go with it anyway. The periscope material is translucent so the clor shows through until it is painted of course.
I then attached to the drivers hatch and fabricated a hinged periscope cover as follows;
- Here is a view with the hatch open, giving the illusion that the periscope is protruding, as it should, through the hatch door.
- Mods-Upper Hull07.JPG (95.55 KiB) Viewed 4693 times
It might be noticed in the above pics that I have also added two little hooks either side of the drivers hatch - these were there for attaching the drivers side periscope rain cover - complete with windscreen wiper!
A further mod I mentioned earlier, and just for information, here is a pic of the hatch hinges properly screwed in place. Gluing is fine in many respects but does not allow for easy removal, adjustment, and replacement as is the case using a screw fastener;
 Viewed 4693 times")
- Notice the black rubber trim around the rim of the hatch opening - this is my effort in imitating the leather padding that was fitted here - and, yes, it looks a lot better from the outside!
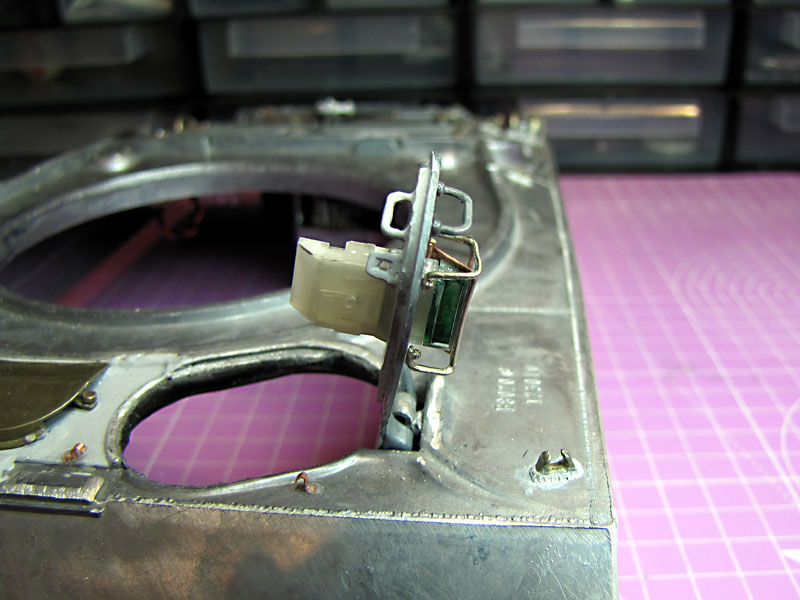
And lastly, an upgraded metal turret gearbox and motor by DKLM (supplied by Forgebear). This is a fully metal unit, including all metal drive gears so is consistent with the all metal Mato theme so to speak. However, if you are considering this upgrade some points to note; 1) it is about four time heavier that the original, and a little larger, 2) it is much, much stronger and more precise, especially when mated to a metal turret gear (as I have done here) and 3) if set up like this (all metal) then nothing will give if the barrel jams against something and, consequently, the motor will overload (burn) very quickly. This may be a problem for certain MFUs (e.g. Clark) so a load resistor should ideally be fitted (this is in fact recommended on Clark's website anyway);
 Viewed 4693 times")
- The turret gear ring is here simply placed for demonstration purposes.
More to follow soon..................


 Beyond impressed!