Afternoon, Pale,
The color is by Model Master. #4662 Arctic Blue Metallic. Part of their acrylic line. It is over at Hobbytown in Longmont. I looked at lots of color pictures and previous builds before going with this one. It has the benefit of being cleanable with water while it is still wet. I may coat the lenses with a gloss overcoat just to protect them but I don't plan to run the tank through water or out in a downpour.
warm regards,
Painless
1944 M4A3 105mm
-
PainlessWolf

- Colonel
- Posts: 7863
- Joined: Sun Feb 26, 2012 9:09 pm
- Location: Southern Colorado Rocky Mountains
Re: 1944 M4A3 105mm
Last edited by PainlessWolf on Tue Feb 18, 2014 3:27 am, edited 1 time in total.
...Money!? What's that!?...
Re: 1944 M4A3 105mm
Boy Painless... She's really there.... I am really taking in all her lines and details you have done....I'm almost thinking you need to put some Sanders markings on her and demote your other commander and put a female figure in there 

ALPHA
ALPHA
-
PainlessWolf
- Colonel
- Posts: 7863
- Joined: Sun Feb 26, 2012 9:09 pm
- Location: Southern Colorado Rocky Mountains
Re: 1944 M4A3 105mm
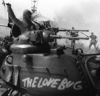
79th Day: TKCommander, you came in right at the end which is not a bad place to catch one of my builds. (Saves you all the blather *chuckles*) Alpha, almost but She has already gone to the 3rd Army, 5th Armored. I need to pick up a white paint pen and give her the name I came up with today, 'Maxene' Aside from mounting the antenna, this Sherman is _done_! Pics:
- Attachments
-
- A full load of supplies
-
- 6 feet of scale rope
-
- Rear stowage
-
- Chained into place
-
- Front Stowage
-
- Exhaust deflector painted
-
- Blackout lights
- Blackout lights.JPG (78.28 KiB) Viewed 3433 times
-
- Taken from a picture of a Sherman 76mm gun tank in Germany in January of 45
- Taken from a picture of a Sherman 76mm gun tank in Germany in January of 45.JPG (86.45 KiB) Viewed 3433 times
-
- Scratch built spare road wheel mounts
-
- Time to start on the last bits of work
Last edited by PainlessWolf on Tue Apr 15, 2014 5:33 pm, edited 2 times in total.
...Money!? What's that!?...
-
PainlessWolf
- Colonel
- Posts: 7863
- Joined: Sun Feb 26, 2012 9:09 pm
- Location: Southern Colorado Rocky Mountains
Re: 1944 M4A3 105mm
79th Day: Cont. Complete on 02\17\14
- Attachments
-
- Finished 021714
...Money!? What's that!?...
-
palepainter
- Sergeant
- Posts: 564
- Joined: Sun Nov 03, 2013 4:04 am
- Location: Lafayette, CO
Re: 1944 M4A3 105mm
Hey Painless... You seemed to have forgotten the rocking chair and kitchen sink ...just kidding... how perfect are your cross roping of the stowage.... very very cool sir 
You have really accomplished something worth while very balanced ..... a beauty that can be taken in visually and mechanically ...Thank you for allowing us to tag along with this build... it's truly outstanding
ALPHA
You have really accomplished something worth while very balanced ..... a beauty that can be taken in visually and mechanically ...Thank you for allowing us to tag along with this build... it's truly outstanding
ALPHA
-
PainlessWolf
- Colonel
- Posts: 7863
- Joined: Sun Feb 26, 2012 9:09 pm
- Location: Southern Colorado Rocky Mountains
Re: 1944 M4A3 105mm
Pale,
*chuckles* Fourteen separate pieces of rear stowage lashed together. If I start losing stuff when running in rough country, I'm going to glue the pieces into four subsections which will be a lot easier to lash down. Glad you like it, my friend. I'll do a Show Off page when I get the antenna mounted and some light weathering applied.
Regards,
Painless
Last edited by PainlessWolf on Tue Feb 18, 2014 4:34 am, edited 1 time in total.
...Money!? What's that!?...
-
PainlessWolf
- Colonel
- Posts: 7863
- Joined: Sun Feb 26, 2012 9:09 pm
- Location: Southern Colorado Rocky Mountains
Re: 1944 M4A3 105mm
Alpha,
You've been there every step of the way from day one on this build. Between your's and Sassgrunt's able and invaluable assistance, this Sherman really got moving in the right direction. Thank you!
Regards,
Painless
You've been there every step of the way from day one on this build. Between your's and Sassgrunt's able and invaluable assistance, this Sherman really got moving in the right direction. Thank you!
Regards,
Painless
...Money!? What's that!?...
Re: 1944 M4A3 105mm
Good morning, Painless!
You have an impressive Sherman! Excelent work!
But I want to add a small recomendation... May be it's better to use clear doublesided "scotch" innstead of the glue for fixing the stovage elements? After some time You may want to change some elements or place of dislocation and glue will left some traces on painted surface...
But once again - Your Sherman is awesome!
Edmunds
-
scalawag
Re: 1944 M4A3 105mm
Hi Painless,
Great to watch this build coming together. Very nice sherman indeed. I can't wait to see it with the aerial and weathering now. Great job
Great to watch this build coming together. Very nice sherman indeed. I can't wait to see it with the aerial and weathering now. Great job
