Page 6 of 9
Re: Early Tiger I - Taigen Build
Posted: Fri Aug 23, 2019 4:38 pm
by orntar
I agree. I searched their site for "magnetic" and it was the only hit.
Also, I have a ton of mini magnets from my order for this conversion. I could mail you some if you would like. They are the rare earth strong kind.
Re: Early Tiger I - Taigen Build
Posted: Fri Aug 23, 2019 4:46 pm
by Son of a gun-ner
Thank you very much for your offer, it is very kind of you

But I'm not desperate for any magnets at the moment, and I need to work out some sizes for other things. I made my daughter a steel blackboard over 4 foot long and three foot high for her kitchen, so I need various other magnets and can't avoid making an order.
Re: Early Tiger I - Taigen Build
Posted: Fri Aug 23, 2019 5:16 pm
by midlife306
Ohhh, matron....

Sent from my iPhone using Tapatalk
Re: Early Tiger I - Taigen Build
Posted: Sat Aug 24, 2019 10:49 pm
by orntar
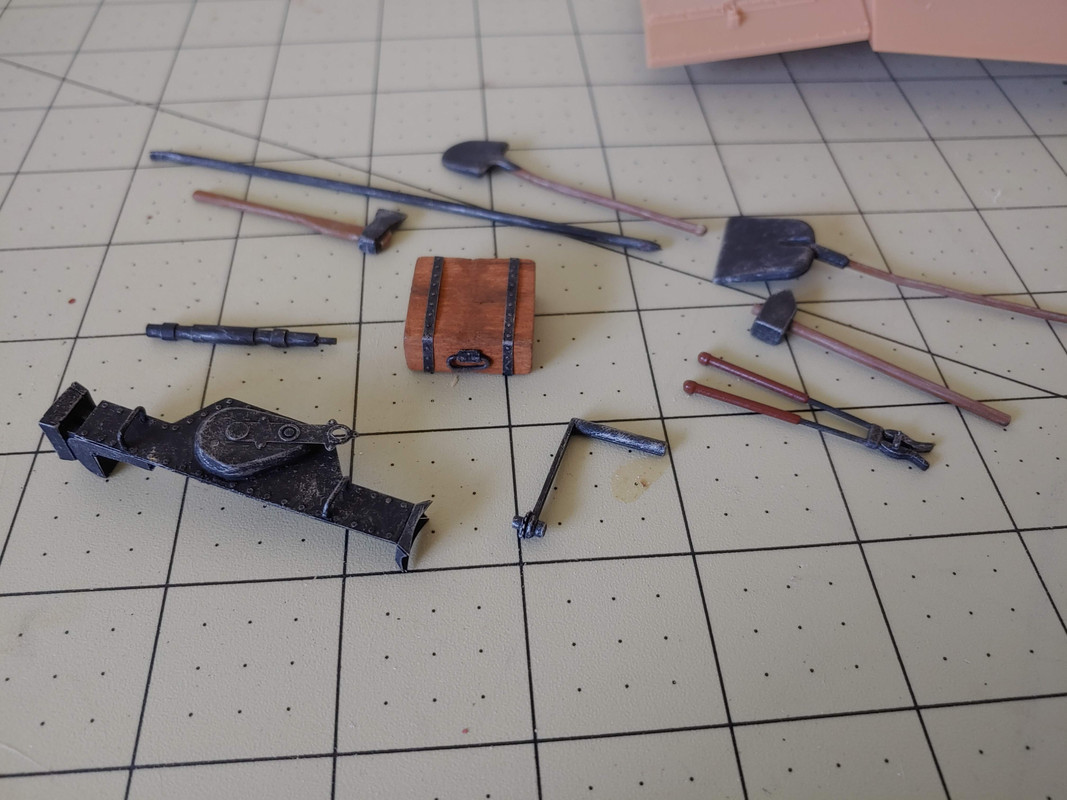
While I wait, I finished the tools and things.
Re: Early Tiger I - Taigen Build
Posted: Sat Aug 24, 2019 11:00 pm
by Jimster
Very nice job. I especially like the jack and bolt cutters.
Re: Early Tiger I - Taigen Build
Posted: Sun Aug 25, 2019 7:22 am
by Von Mooflesaaa
Some great work being shown, what site did you get the photo etch from.
Re: Early Tiger I - Taigen Build
Posted: Sun Aug 25, 2019 3:34 pm
by orntar
I got them both from eBay. Voyager 16011 fender kit just for the exhaust shields. And Voyager 16009 mid version detail. I didn't use all the mid version items, because mine is early, but it has a lot of good stuff
Re: Early Tiger I - Taigen Build
Posted: Sun Aug 25, 2019 4:46 pm
by jarndice
I assume you are going to use "Voyager/Aber" cable clamps to hold the tools in place,
I tried,Oh how I tried but I finally decided that life is too short so I bought a couple of bags of large Mato Metal Buckles and a couple of bags of small Mato metal buckles from ----
http://www.forgebeartanks.com
I snipped off the short pin then using a small round file on the underside I filed a groove the same size as the tool handle then using an M2 DIE I chased a thread down the long shaft and pin viced a hole and pushed the clamp into place finishing off by putting a washer and a nut on the thread under the clamp.
A smear of metal etch paint then a coat of "Humbrol 62 (Leather) on the top surface of the clamp and the jobs done.
I can do ten of these clamps in the same time it took me to do one "Voyager/Aber" Clamp.

Re: Early Tiger I - Taigen Build
Posted: Sun Aug 25, 2019 6:41 pm
by orntar
Jarndice, thanks for the advice.
Currently I am using the Voyager tool clamps. And boy are they tiny. So far so good. But I am up to the painting portion of the project, I will have to see how it works out. I have the clamps separated into their 3 parts for painting. I may give up on that .
Re: Early Tiger I - Taigen Build
Posted: Thu Aug 29, 2019 6:56 pm
by jarndice
[quote
Looks just like what i did to mine.
[/quote]
Orntar I just received the Quick Release System which consists of four 5mmx3mm neo-dymion magnets and four 3mmx3mm neo-dymion magnets and a sheet of illustrated instructions in German

priced at 9.95 Euros plus postage.
I just went to my goto supplier of magnets---
www.first4magnets.com
to find out what they charged for them,
They don't sell them in fours the smallest amount is a pack of twenty five,
5x3 X pack of 25= £5.18
3x3 X pack of 25= £4.02
Total 50 neo-dymion magnets £9.20,
Like a fool I was expecting a completed pair of arms.
So I now find myself doing what I could have done years ago and for a lot less money.
This is one product I most certainly will not be recommending

