STILL ALIVE!!!!!!
I was looking to add belly armour to my M1 like BarryC but because of the following, that will be a no-go already due to space constraints hehehe
Besides, M1s with mine plows are just so cool

I have a 1/35 Trumpeter mine plow from one of their ye olde M1 kits as a guide. It was a simple matter of applied mathematics hehehe
First was the mounting plate. My intention is to have the mine plow removable. The solution to make it stick to the hull is to use magnets. There are magnets embedded in the mounting plate...

...and inside the hull.

Result is a very secure hold.

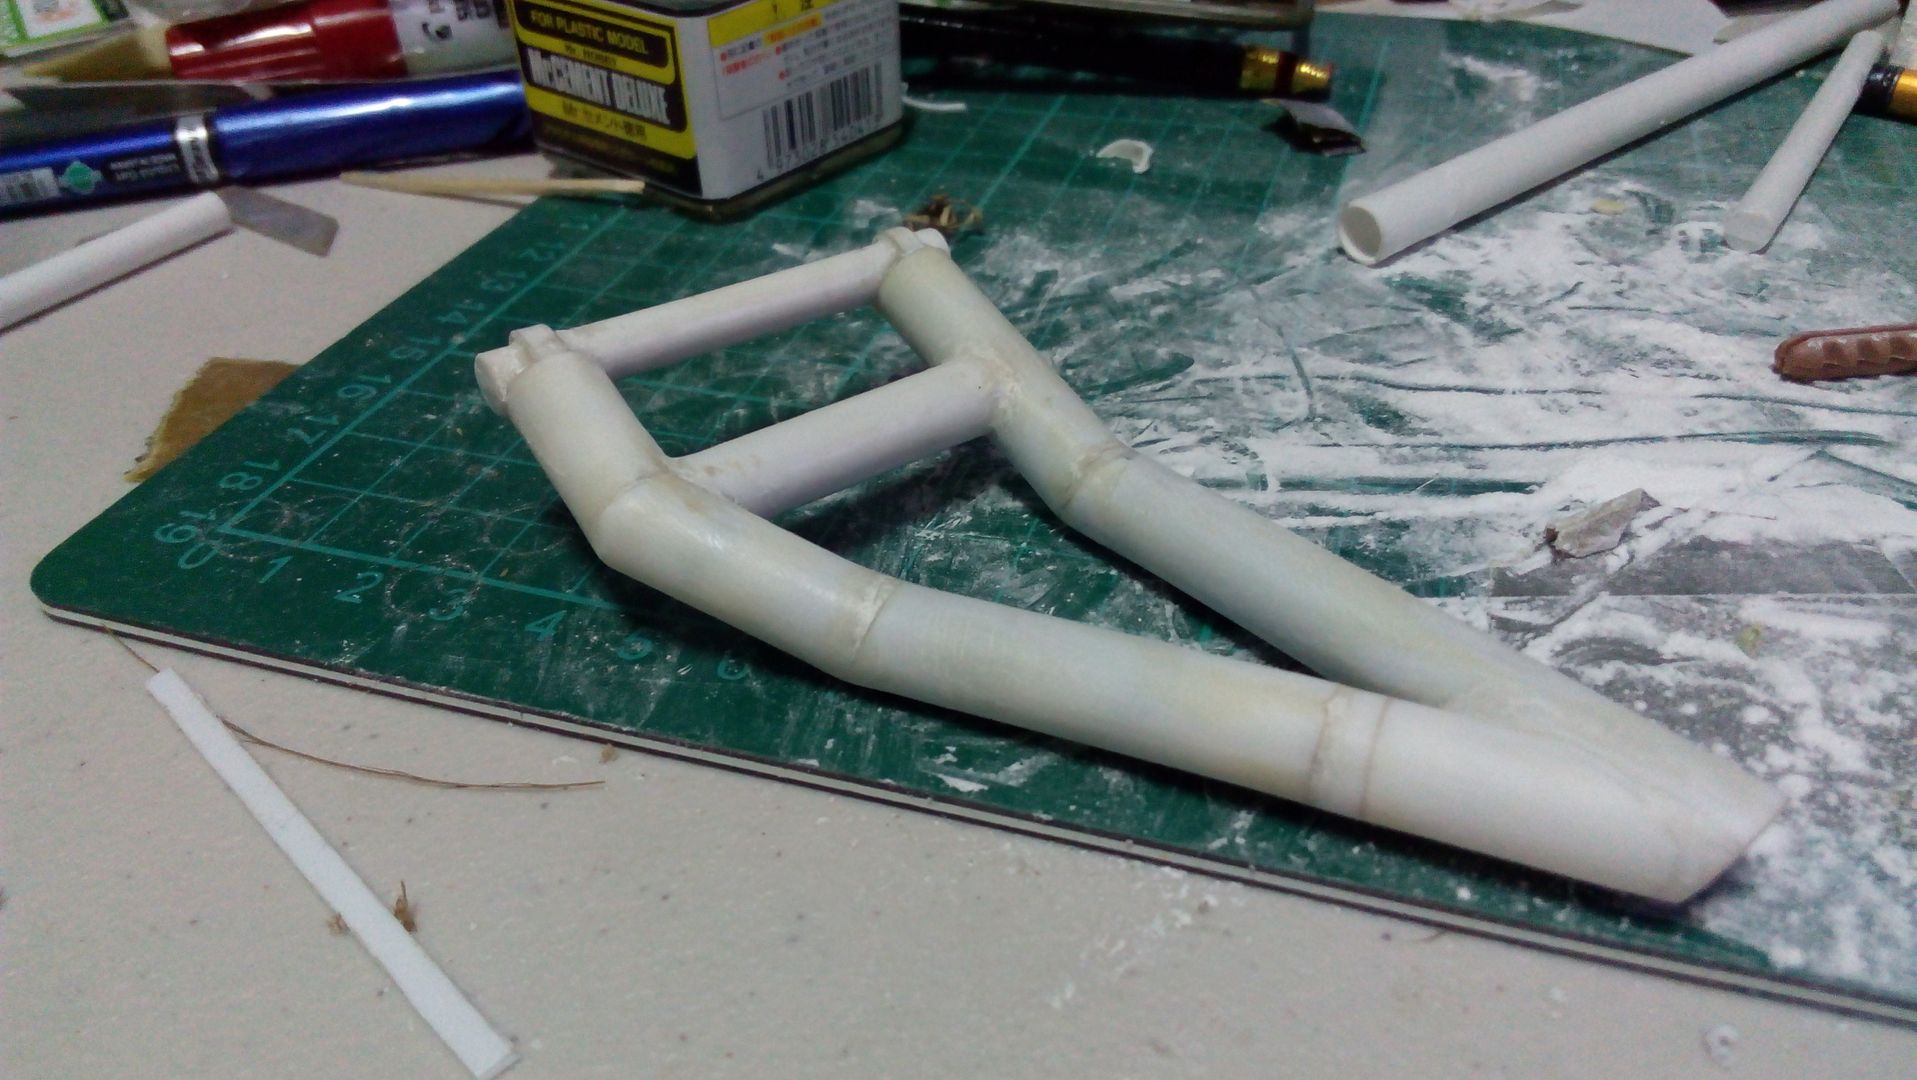
With that bit solved, time to build up the mount.


Those cylinders are the housing for the motors that turns the pulley that raises the mine plow. I intend to make a fully functioning mine plow, hence my queries on
small servos and
the feasibility of using such small motors.
Note that the central thingy. That is where the power cable of the mine plow goes through. The wires from the motors will pass through holes in the motor housings (just like the real thing) and enter the mount (just like the real thing) and will join together inside, from which a cable is connected to the center thingy (just like the real thing).
With the general shape of the mount done, it was time to do the mine plow arms. Now, for the mine plows to actually work, it should be heavy. But plastic is light, so I used styrene tubes and filled these with nails, powder, and superglue to give it weight and strength. Result are very solid arms that have withstood falls without breaking apart.


With the plow arms generally done. It was time to start with the most complex part of the mine plow - the plows itself. I started with one side first. The plow blades are mounted to a triangular mount. Now, to add more weight to the mine plow, flat lead weights were sandwiched between the plastic triangles. Ideally, the blades would be of similar construction, but that would be difficult and I was impatient so those are layered plastic instead hehehe

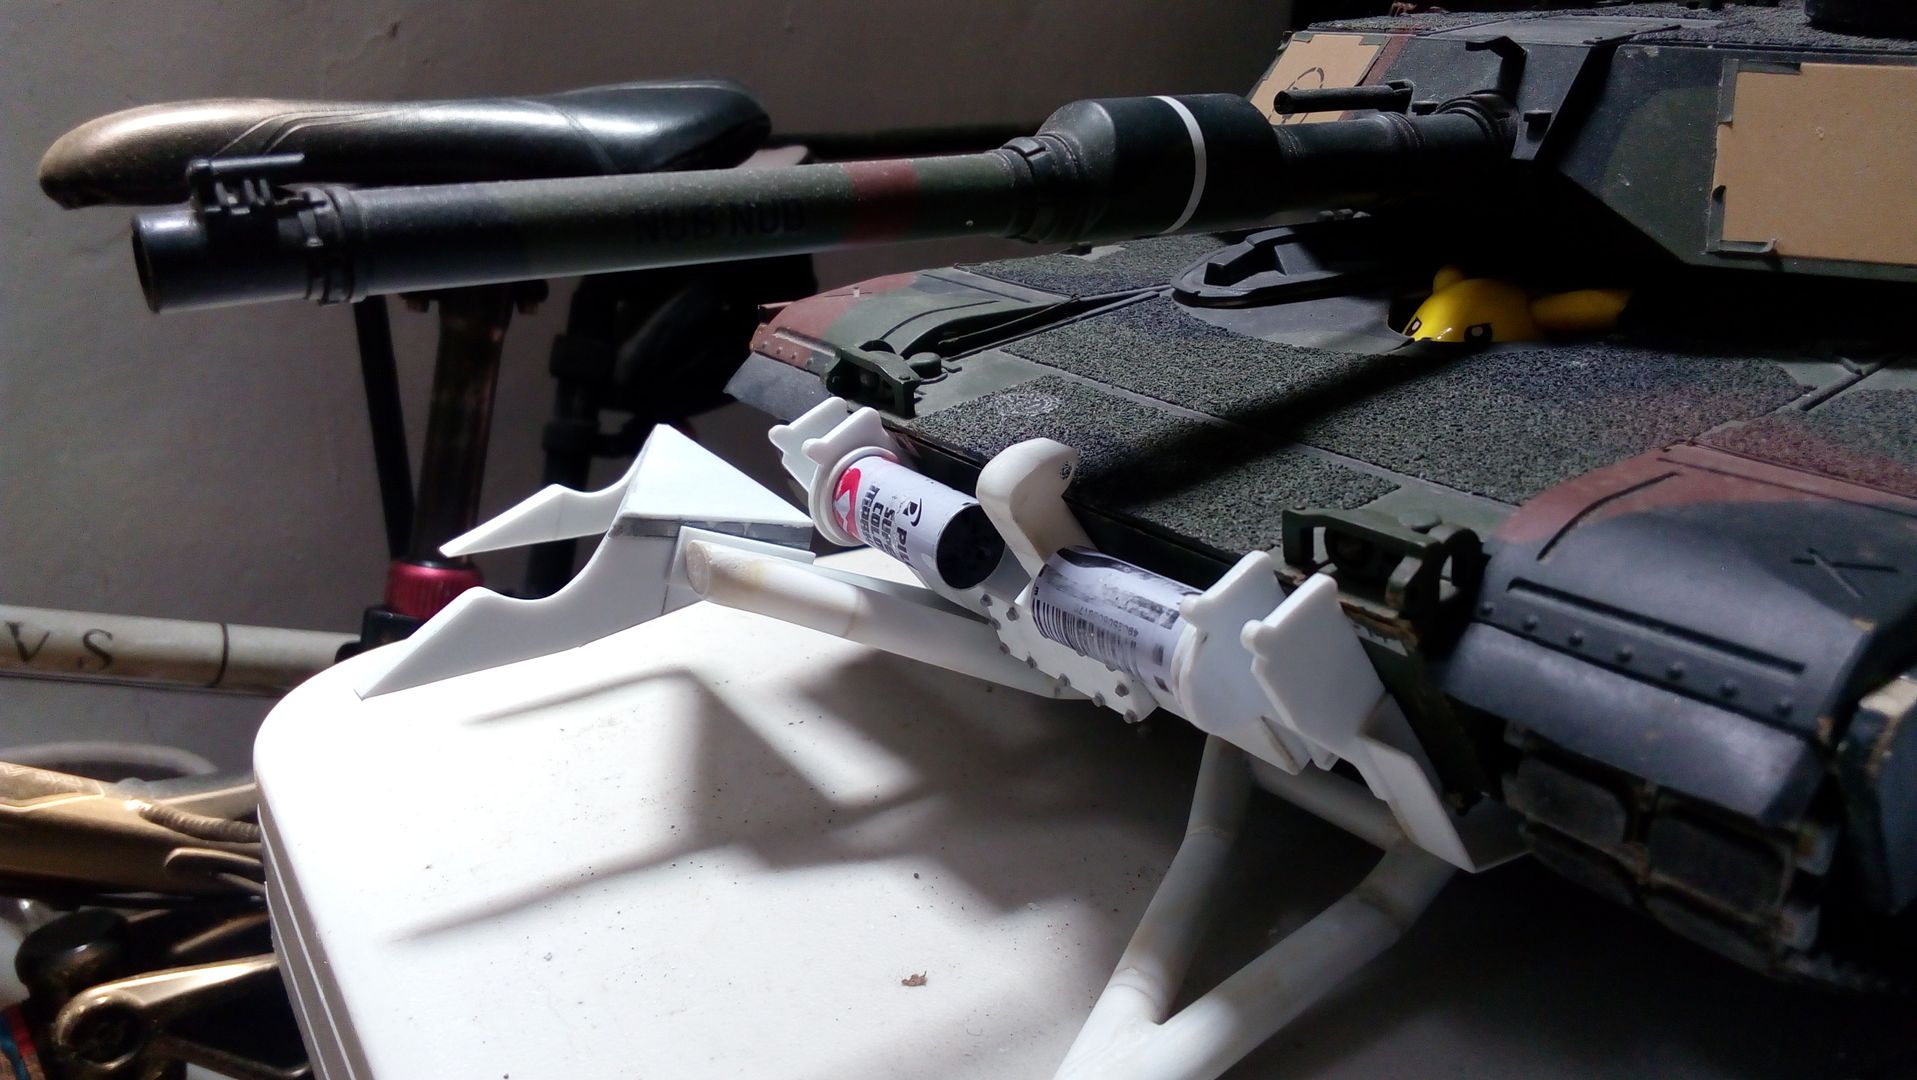


I haven't finished the mine plow and stopped at the third blade as my hands were aching already and the weekend was over hehehe construction to be continued.

Anyhow, the problem of how to motorize and make this work presented itself. The motor issue was solved thanks to Frankie and wibblywobbly's posts at one of the threads linked above. How to power the whole thing and be detachable was an issue. The solution is courtesy of that phone company called Nokia.

You see, before micro-USB became a popular connector for charging mobile phones, Nokia produced the 2mm small pin for its celphones. And that is wot was needed - a cheap mobile phone charger with the 2mm pin, and the charging port itself. The charger was easy. The port, well, that needed a bit of "creativity" to source, which was just a simple stroll to a mobile phone repair shop, chat with the technician, and acquire from him the required piece which was salvaged from a mobile phone. The plan is to connect the charging port to wires, the ends of which will be on a connector that will attach to one of the motor ports of HL's MFU board. The power cable with the small pin will emanate from the mine plow mount and plug to the port which will be where the port is like on the real tank.


To be continued....
