Page 5 of 18

Re: Scratchbuilding C&Cs Mammoth Tank

Posted: Sun Apr 03, 2011 2:48 pm
by Munty
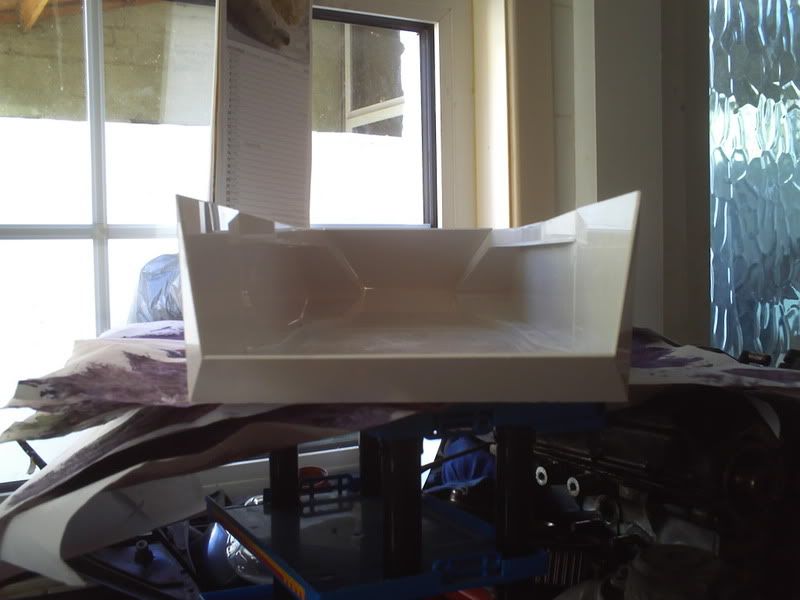
Thanks Blimp, will definitely reinforce but not decided on how yet. The angles that these wings have introduced has already strengthened it a lot so it's not as bad as expected but it will definitely get some more help down the line.

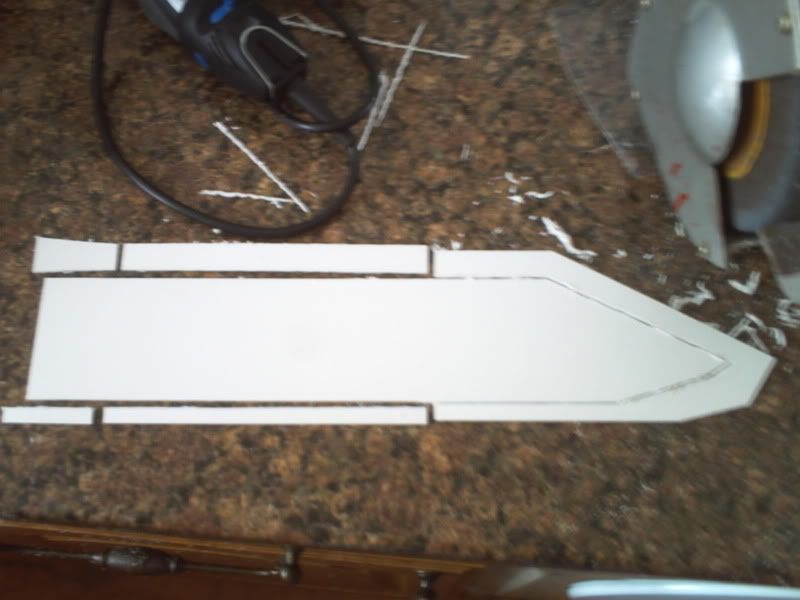
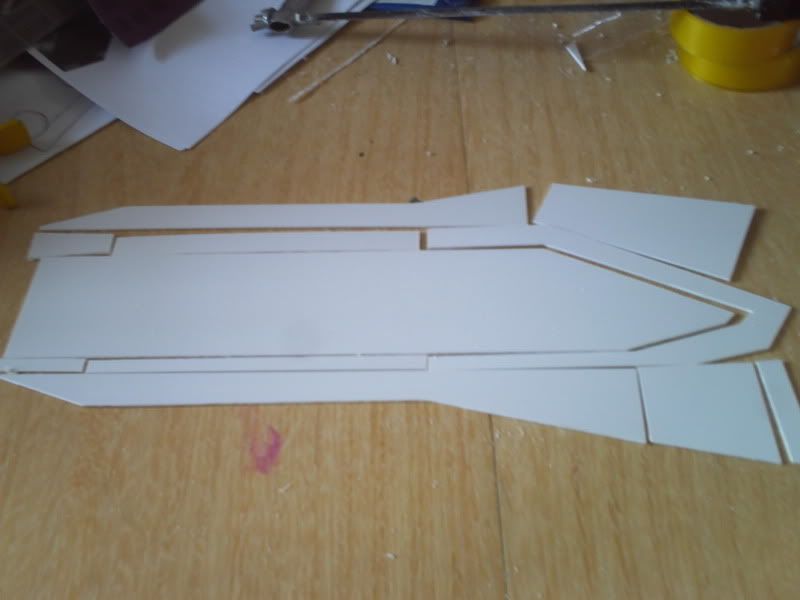
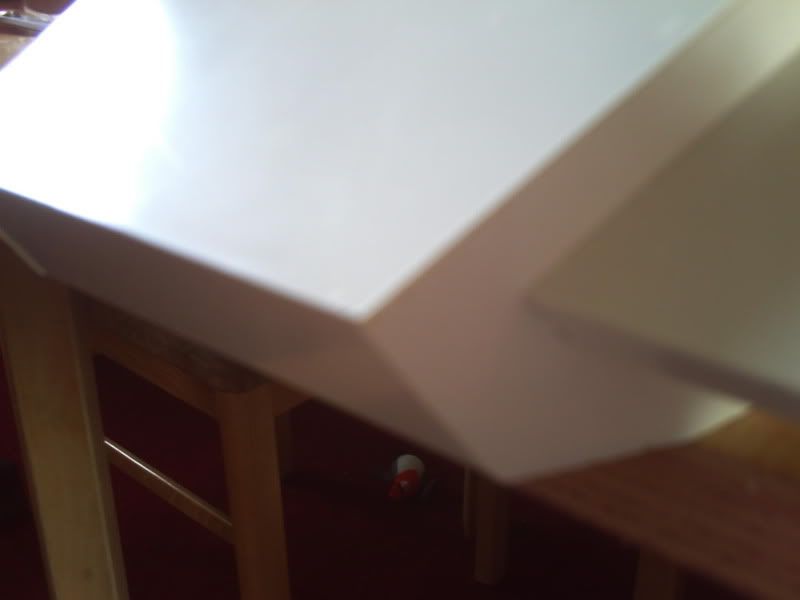
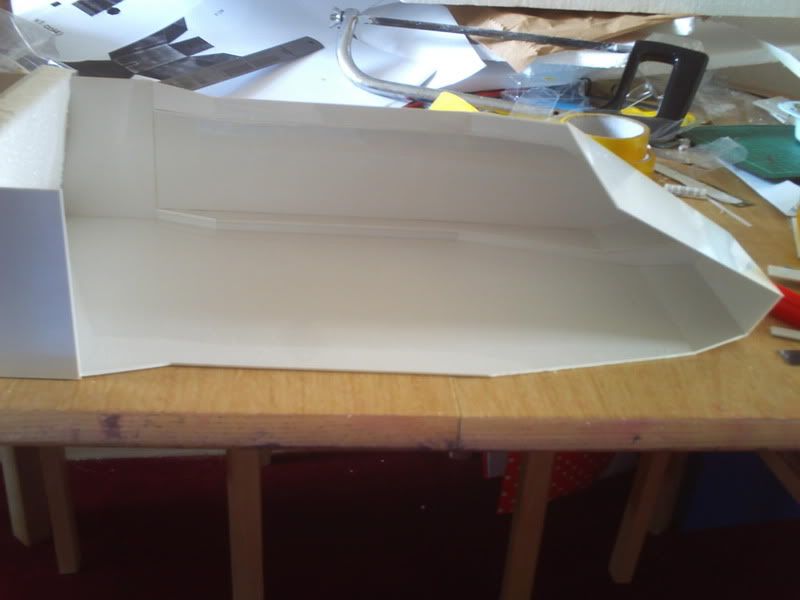
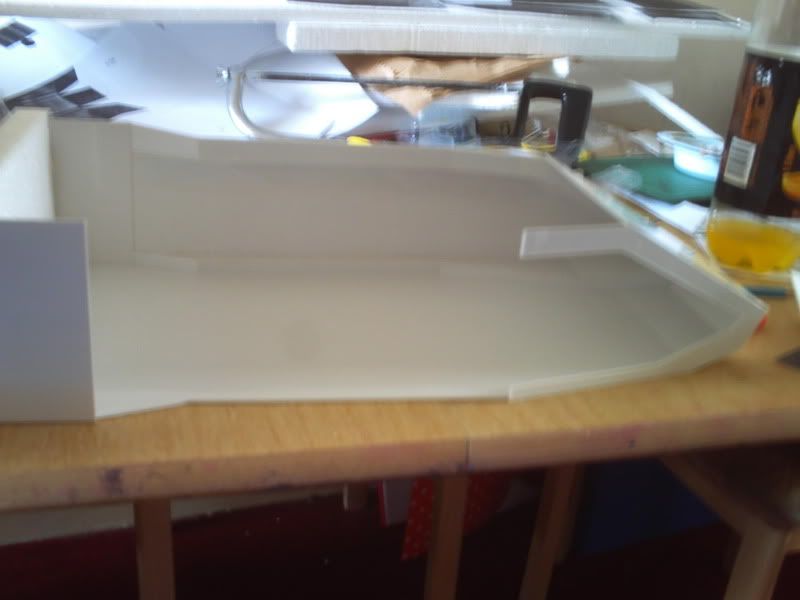
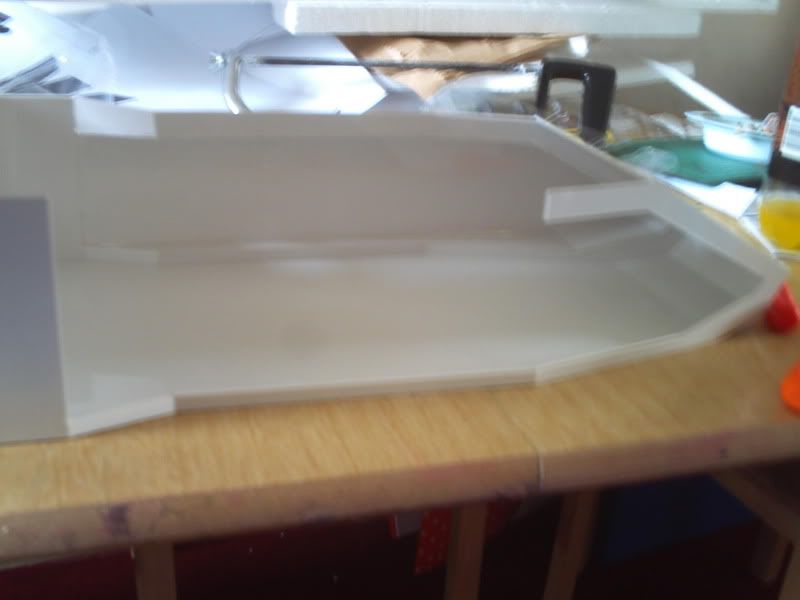
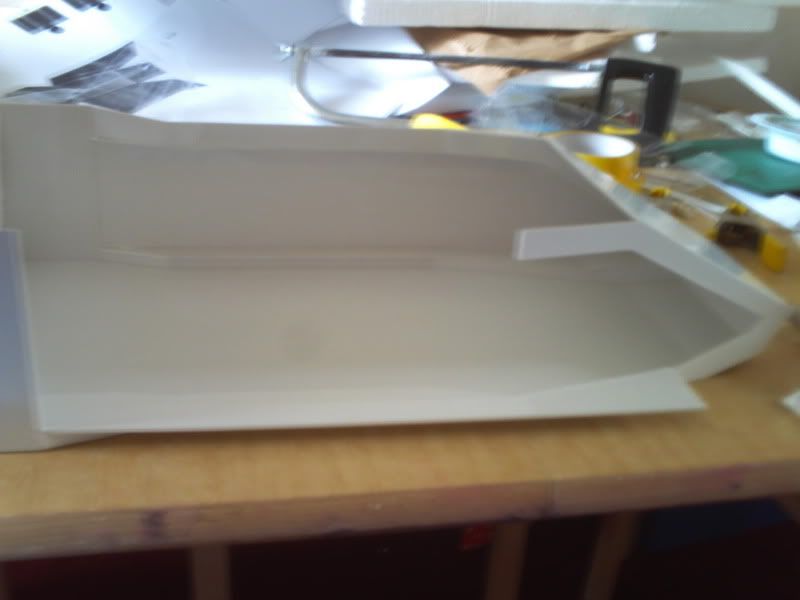
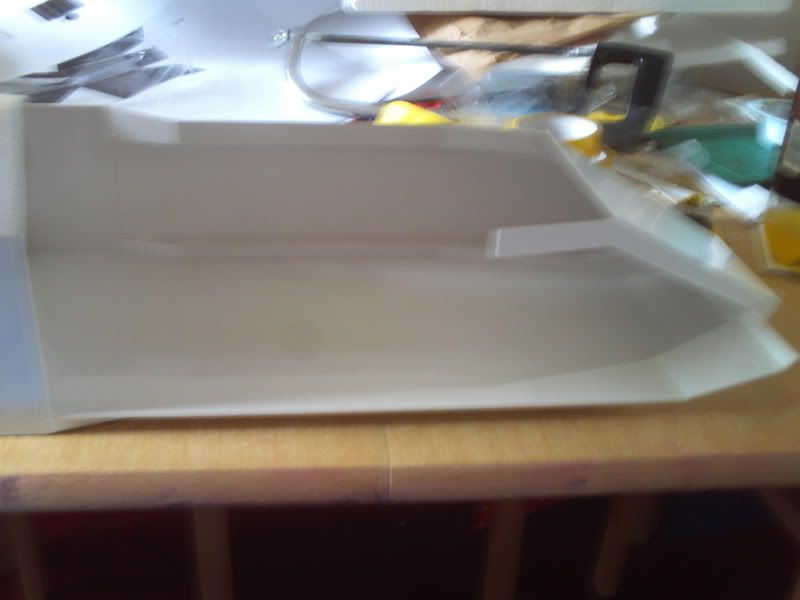
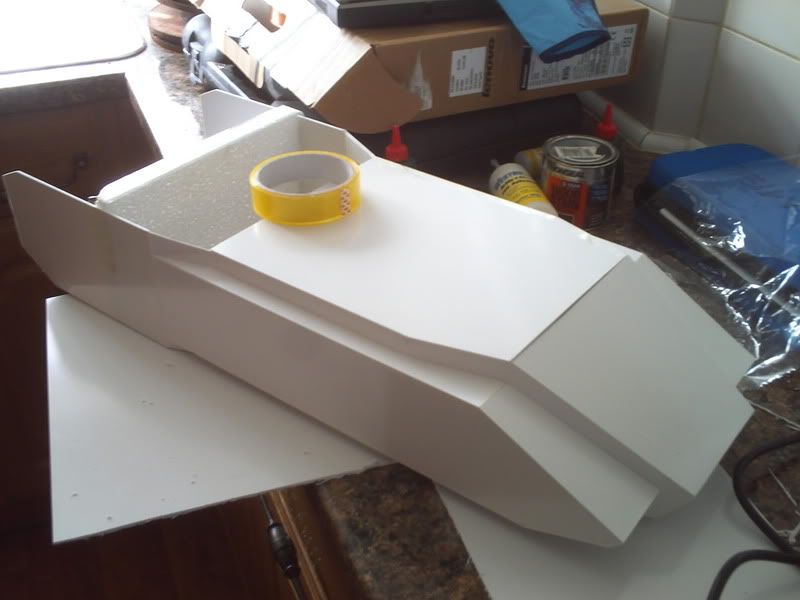
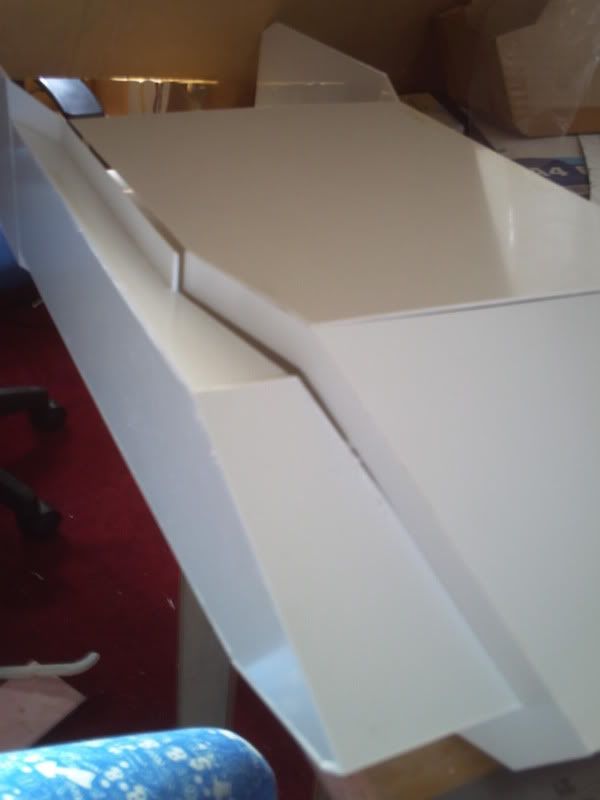
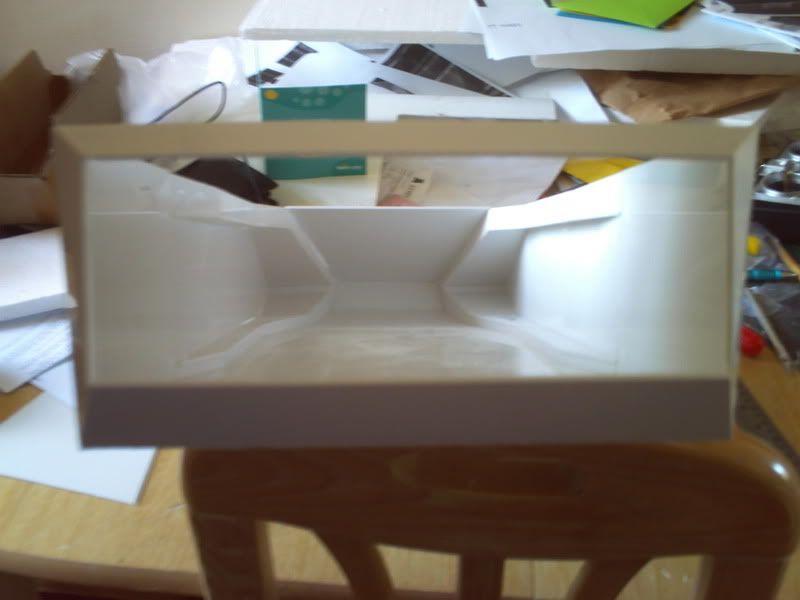
I've just finished the right side but am going to pop out for a bit now before I crack on with the top. I've also realised that the back of the hull is not solid but is rather some sort of grill which I presume is behind the engine to allow exhaust/cooling/etc. Scaling up the original makes it a serious 'death star' weak spot in the overall design of what is essentially a super heavy tank so I'll have to have a think about what to do with it but not sure yet...

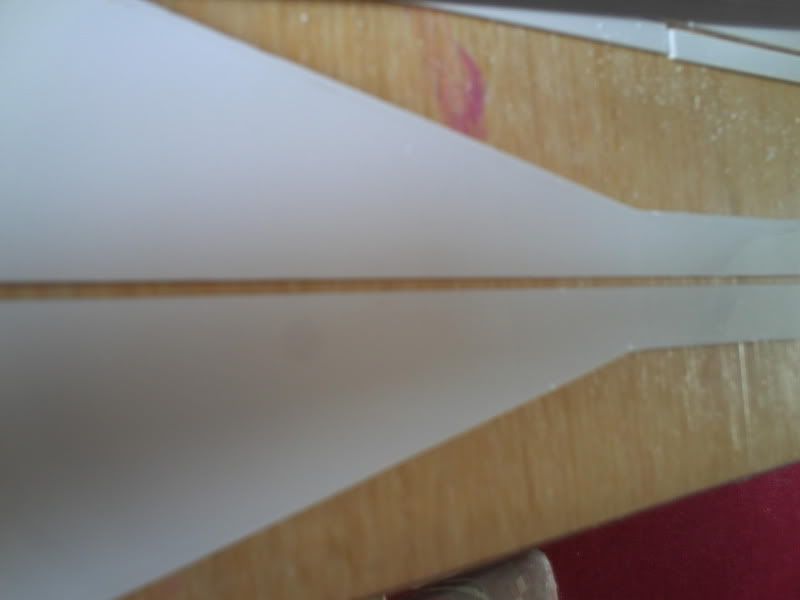
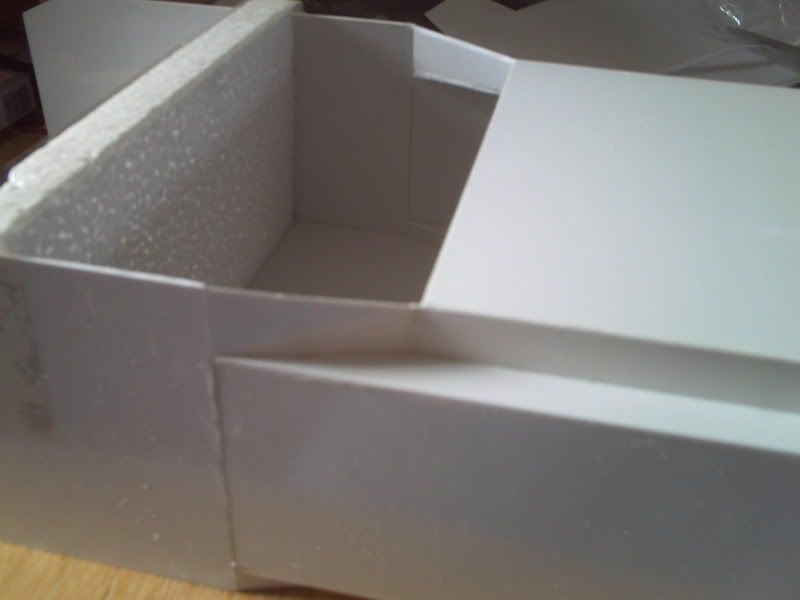
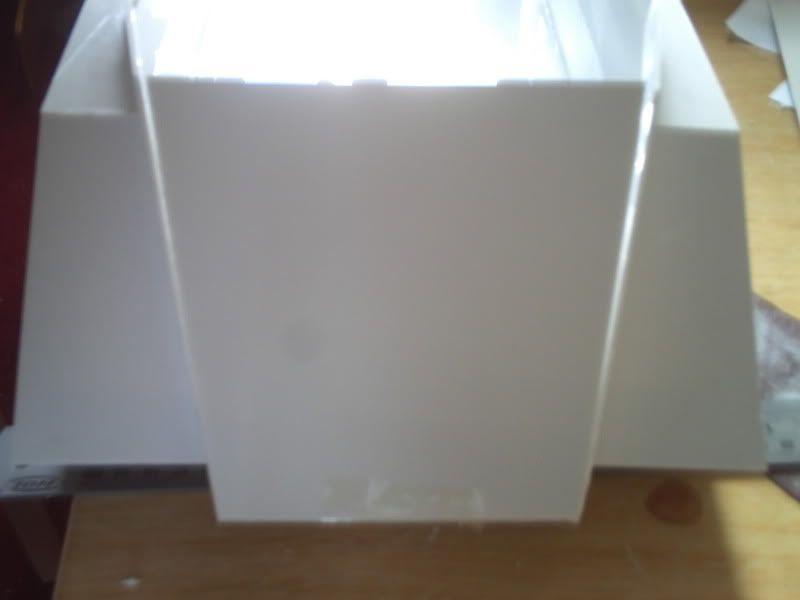
I'm also continuing to ponder how to allow access to the main body of the build and I think the removable top will be the only way. For now I'll be cutting out the top panels but not fastening them to the bottom.

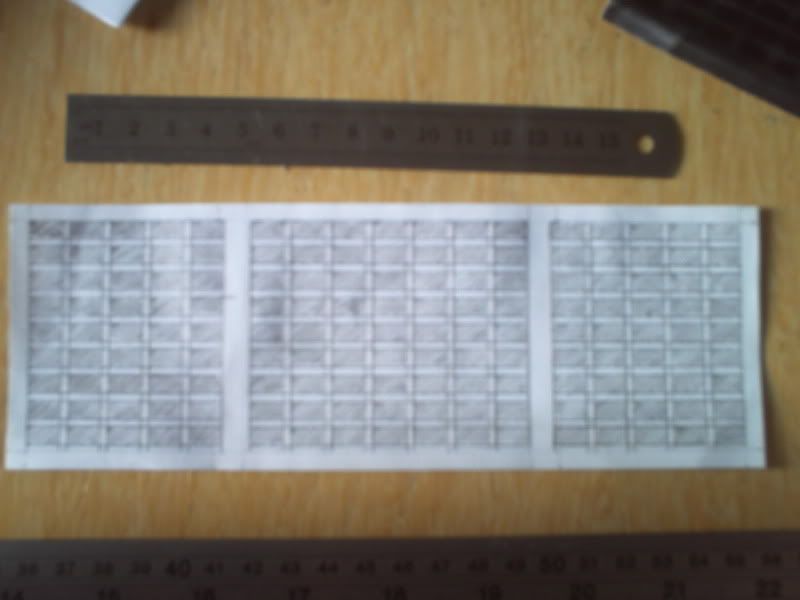
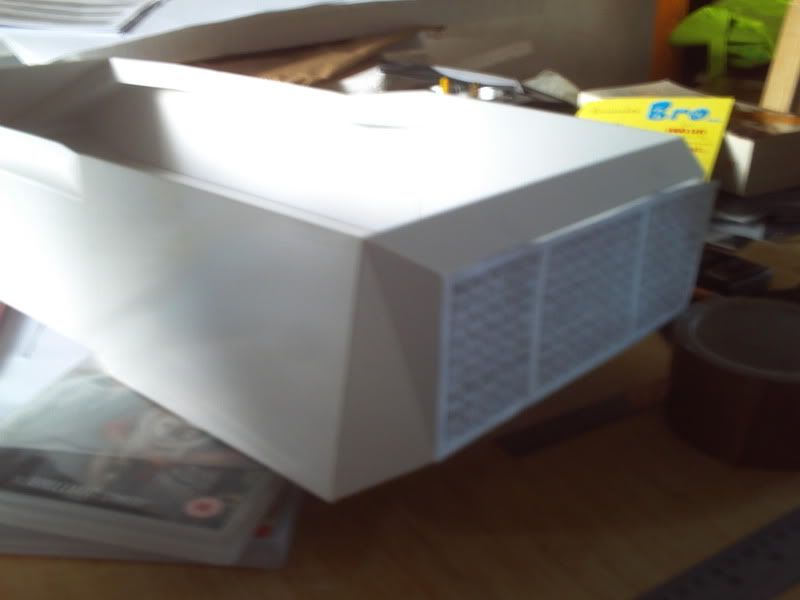
Another thought I've just had now is that it would be very cool to have a visible engine through this rear grill (I'll make the gaps smaller but I don't want to deviate from the original design too much) I have a massive space inside the tank where I could put something rather impressive, though for weight purposes it would have to be some kind of scientific model or mini-kit or something... I wonder what kind of powerplant a vehicle this size and weight would use? The Abrahms uses a turbine right? And that's about half the size and almost certainly less than a third of the weight of the fictional mammoth...

Will have a think and see what I can find. Off out now but will post up as much as I can later, hopefully with the top cut out as well as the complete right side I've just finished! Will be onto the tracks before you know it at this rate ;)

Oh and any advice on reinforcement specifics (based on the dimensions of the build) would be pretty handy. I'll update the strength and stability of the hull when it's more fully enclosed.

Re: Scratchbuilding C&Cs Mammoth Tank

Posted: Sun Apr 03, 2011 10:17 pm
by Munty
Got an update but it's not a full hull as promised. I had a few more blunders today which you'll be educated of in the following post! I've managed to end the day with both sides finished and the front back on (yep it came off again!) but the top isn't done and neither is the back. Here's how I got on...

I took a few extra images today to fill in the gaps I left when doing the left side yesterday but it's probably not incredibly interesting so feel free to skip ahead to the progress shots :p This first one gives a better example of how I cut the majority of the side pieces all from the same material to save on waste.
Image

And the next one is all of the other bits of the side which weren't in the last shot! This is what I meant when I mentioned scoring and breaking for a nice neat line yesterday. Here's before the break...
Image
And a perfectly straight edge after!
Image

Here's all the pieces to build up the right flank of the hull.
Image

And this next one is an attempt to show the newly improved 'nose' piece which was test fitted in the final images of yesterday's update. I removed it and then put a champfer on both it's edges and those of the hull pieces it joins to.
Image
And here it is in place for a much neater fit, not that the camera shows it very well...
Image

Now prepare for a very minute step-by-step picture-account of building up the right side! As I missed a few stages yesterday I thought I may as well catch up here in minute detail so you won't want to spend too much time looking at the next half-dozen pics but they do serve as a simple form of time-lapse imagery :D
Image
Image
Image
Image
Image
Image
Image

And so ends the construction of the right side! If only it had been that quick when I did it :D Like yesterday everything fitted really quite well but each piece needed a little attention to get it just right. Exactly like the left side, the hardest part here was once again the point at the front where getting the shapes, sizes and angles just right was harder than anywhere else.

The next job was to start on the top so I got to work on the large front piece which would be the first to date not glued into position. It was a big piee which always comes with logistical difficulties but it's nowhere near the size of previous constructs so it was easy enough! The sellotape, for the curious among us, represents the approximate whereabouts of the turret sometime in the future.
Image

The following image is amongst my worst yet but you may be able to just make out that the top left piee is too short and the longer right piece (top-side piece not top-top piece) is too long. I removed the left piece and cut about 2mm off the longer piece on the right. This was my first mathematical error and also my first part replacement so far.
Image

Another duff pictrue showing just how minute the error in calculation was. The fact it's an angle and I'm anal however demands that it be replaced with a slightly larger piece!
Image

This is where the first major design flaw became apparent (the sandwich joints on the bottom and the 2mm short side piece not counting as major anything) and it required some drastic action. When I sat back to admire my work for the first time since completing the right side I realised it was far too tight up top and this was pinching the flanks in and causing an unpleasant angle. I carefully reverse engineered a few joints to see how much rectification was needed and this is the end result.
Image

Although it appears that the C-shaped piece is at fault it's actually not and the real problem was that I'd somehow made the top pieces too narrow. The nose piece was fine at the front but towards the back was about 8mm too narrow so the whole right side was being pulled up and in towards the left one. I removed the top and nose pieces and attached the C-piece to the right pieces as it should be and that fixed the problem. I was now down by two rather large and time consuming pieces though... This is the old front held in place to illustrate the gaps either side when the hull was correctly level.
Image

The final image (I seem to have gone without a final update today but it's less impressive than some of the above so that's not a big deal!) shows the old and new nose panels top to top and demonstrates again how a relatively small gap can cause such chaos. I forgot to take a picture of how messed up the front looked before splitting the joins but it was a heart-breaking moment when I noticed it...
Image

As the day finished (or rather was finished for me by a friend with computer problems) I managed to refit the nose panel and began working on the rear but am currently pondering what to do with the old top piece to save it from the scrap pile. It's 8mm too narrow now and extending it by that amount would not only be messy but it would produce a weakness very close to where the turret will be mounted and take almost as long as making a new one! Perhaps I'll just use the material to make some smaller pieces from later.

Anyway, got a busier day tomorrow and therefore I may or may not complete the hull which I had planned to finish yesterday! We'll see though as I don't want to rush and I still have to figure out what to do about access and also how to create the grill in the rear of the hull. Some advice on how to mount a turret than I plan to leave operational (or freely rotational at the very least) would go down very well about now.

As I sit here and think about it, my plan for tomorrow will probably be to fit all of the back end except the grill (that's 6 parts) and then move away from the hull for a while until I manage to experiment with some tracks and hardware so I can decide on interior layout and access. Maybe I'll start on the track housings as each one of the four uses identical parts so could be an easy option.

Re: Scratchbuilding C&Cs Mammoth Tank

Posted: Mon Apr 04, 2011 7:34 pm
by Munty
Very small update today as have been busy as expected. Managed to do the 6 pieces I wanted to though so I am where I want to be for now. That means there are only 3 pieces of the top that I haven't done yet but I'll leave them till I decide how to allow access. The rear grilled panel is also missing as I can't make it with the usual process and I've also decided that I'm going to replace the two lowest panels at the front with full width pieces so that there is no sandwiching anywhere but the very bottom of the build.

So here are 5 of the 6 pieces that wee today's goal, not a big job by any means but the angle of all the champfers was a pig to get a smooth fit! It's not a perfect result but it's good enough. The 2 pieces at either side of the image were actually cut from the rectangular piece already attached to the hull as they were among the first pieces assembled but I'd forgotten they would need angling later on.
Image

The next one is the job almost done with the bottom piece and the first 2 of the 4 side pieces also fitted.
Image

And finally with the top piece and remaining 2 sides also in place. Given the number of angles involved with this part of the build I'm very pleased it turned out as well as it did!
Image
Image

The last thing I've done today is just a bit of pencil-work to try and design the grill at the back. I've come up with something that looks very close to the original design so this is what I'll use. It does transfer to a grid of perfect grenade sized holes in the real world however so it'll have to have some form of mesh inside here or some removable 'battle armour' for combat situations.
ImageImage

Regarding the above grill. I really want it to be cut from 2mm material like the rest of the build but it's going to need some very precise tooling so I wonder if there are any members on the site who work with some sort of cutting machinery or CNC tool that may be able to make this for me? Let me know if there is as I'd like the add this piece to the build asap but I physically can't make it myself!

That's all there is for today anyway but will try to get started on the tracks tomorrow and post up anything I manage to accomplish! I'm undecided on whether to make them individually or mass produce each part 4 at a time then build them all together. We'll see how I feel in the morning, for now though I'm signing off for movie night with the missus!

Re: Scratchbuilding C&Cs Mammoth Tank

Posted: Mon Apr 04, 2011 7:58 pm
by Saxondog
Chris3, he has a CNC router and will cut what ever you need. Just PM him. Super nice guy and he makes kits very similar to what you are doing. On another subject I have the set of plastic tracks and sprockets from my Jagdpanther if you decide these will work shipping cost only and their yours, I also have set of the old style Tiger metal wheels,possibly this could be used on your project as well.

cheers Blake

Re: Scratchbuilding C&Cs Mammoth Tank

Posted: Tue Apr 05, 2011 8:58 am
by Munty
Thanks a lot Blake, that sounds great, I'm slowly starting to gather tracks from the world over so we'll soon see which is best I guess :D I shall be PM'ing you shortly and thanks for the offer, it's much appreciated. Also thanks for the name as Chris will also be recieving a PM shortly :D And isn't it great that I'm building a C&C tank and he's using a CNC router lol

Re: Scratchbuilding C&Cs Mammoth Tank

Posted: Tue Apr 05, 2011 9:33 am
by Munty
Hmm... I marked out the turret base yesterday while we were watching a DVD and having just cut it roughly to size this morning it does strike me as being absolutely gigantic... I'm taking the measurements for this build from a 3D model of the tank used in C&C Renegade but the turret:hull ratio doesn't seem to match any other illustrations. Think I'll have to build up the tracks before I can get a better overview of the project but I'm considering scaling the turret down slightly to tie it in with some of the original artwork from the first games.

I've also come across an old blueprint style image which I believe is original concept art and that marks the armament as 2x120mm cannons. Still an impressive array but nowhere near the battleship grade weapons I've arrived on by scaling up the plans from the game. In fact that's just over a third of the size I arrived on previously! While I realise that 12" guns on a tank is completely ridiculous, there's not much about this particular vehicle that isn't if we're abject about it. The hull is too long to provide good mobility, it's too heavy for any kind of period power source to be able to move it, the size of the hull and turret are far larger than the machinery they would need to hold and the cannons are gigantic. I think I'd rather stay with the game and give it artillery size cannons than settle for puny little 120mm ones. I mean what's big about that? WW2 tanks went up to 120mm and although they didn't tend to go much bigger, the whole point of this particular tank is that it went MUCH bigger! Why make it twice the size of any tank before it with 4 tracks and a turret the size of a Tiger if it's not going to up the ante on every front?

We'll see what I decide about the turret size once I have the tracks in place but it bugs me that it's current dimensions make it illogical to place the side ladders where they're shown in early concept artwork from the original game.

On a further note, I'm going to switch attention back to my previous build shortly as my long-awaited scenery bitz should be here either today or tomorrow with luck. It shouldn't take much longer to complete but I may well lay off this one completely until it's done so expect possible absences ;)

Re: Scratchbuilding C&Cs Mammoth Tank

Posted: Tue Apr 05, 2011 10:46 pm
by Von kraftwerk
Really cracking on,somewhere I've got a pic of a super heavy post WW2 US tank project that had 2 sprockets and tracks running next to each other on each side,same kind of track as M26,M46 etc,so they got really wide track effect without,making a super wide new type,makes sense,

Re: Scratchbuilding C&Cs Mammoth Tank

Posted: Wed Apr 06, 2011 7:38 am
by Munty
Thanks VK, I don't think I've ever seen that tank. Most of the super-heavies I've come across were German prototypes, most never leaving the paper... Anyway I think I may have solved my track issues so hopefully I'll have a delivery about the same time as I finish the housings! They aren't a massive job, only 7 pieces per corner for a total of 28. I've made 4 so far and am building them in pairs starting at the back.That means there's another 10 bits to make before I can start building but we'll get there.

Also as far as the turret goes it is still looking gigantic even after being tidied up round the edges. I'm going to keep it to scale though as it's a fundamental part of the tank so I think it would look very odd if altered. Sadly my scale is off by slightly more than I thought so I'm not quite at the size I was hoping for. Thankfully there is no record anywhere of how big this tank actually should be in real life so it really doesn't matter that I'm going to end up with something a few meters longer than planned :p Of course once the build is complete it will become the guiding light for any future references and therefore it will be official as far as possible. So it doesn't matter! But yes I did want it to come out slightly smaller than it actually is...

Got nursery for my little boy today so 6 hours peace starting in about half an hour. Been working on my other project again though as my bits arrived yesterday to finish that (I missed the postman as I was filing the turret base but they did arrive!) The missus will be collecting that little lot from the post office for me later at which point I'll be cracking on with it. So we're probably going to see minimal progress here for a while but I'll update as and when I can :D

Re: Scratchbuilding C&Cs Mammoth Tank

Posted: Wed Apr 06, 2011 12:06 pm
by Von kraftwerk
the US super heavy was called T28 changed to motor gun carriage T95 in march 45 its suspension was made up of Sherman HVSS units,8 units doubled up into 4 pairs side by side double sprockets and tracks each side,the outer run was removed for transport,it weighed in at 190,000 lbs.

Re: Scratchbuilding C&Cs Mammoth Tank

Posted: Wed Apr 06, 2011 12:34 pm
by majordisastor
Here are a couple of 'heavy' links on Wikki .....

http://en.wikipedia.org/wiki/T28_Super_Heavy_Tank" onclick="window.open(this.href);return false;

Interesting that they managed to 'mis place' the Ameriacn T-28 for 27 years !!
I know somtimes you can forget which street you park ed the car in .............but somthing on this scale ??

Here is a link to the British heavyweight contender - of course its more understated than its German or American rivals..

http://www.tanks.net/british-world-war- ... toise.html" onclick="window.open(this.href);return false;

What a fantastic project you have there .....this is one I will be keeping tabs on for sure !!

Andy