Page 5 of 7
Re: Witness the birth of a new monster...the IS-4
Posted: Fri Dec 19, 2025 10:37 pm
by tankme
I took the slicer and cut off the end of the sprocket:

With it sliced off, I increased the thickness of the sprocket ring and removed the center section that got cut off off the old sprocket.

I drug a new copy of the original sprocket onto the build plate. It then duplicated the ring I made thicker and overlayed it to the top and bottom set of sprocket teeth. All of this was done with the sprocket sitting vertically because you can right click on any item on the build plate choosing "center". It perfectly centers it on the plate. After centering the orignal sprocket, I centered both the sprocket rings which made them line up in exactly the right orientation getting rid of any guess work. The slicer doesn't allow you to elevate or depress the sprocket rings I cut off so I left them on the build plate (flat), I moved the unmodified sprocket below the build plate and merged it with the thicker sprocket once it where I wanted it. I did the same process with the other sprocket ring so that both rings were merged. I had a copy of the KV-1 sprocket on the build plate so that I new exactly how thick the ring had to be. You can see that the only thing that changed was the thickness of the teeth.

And the final product after printing. As you can see, the teeth are now beefier. They should hold up much better now.

That's all for now...
Re: Witness the birth of a new monster...the IS-4
Posted: Fri Dec 19, 2025 10:47 pm
by Stormbringer
Cool so hopefully you wont strip these teeth

Re: Witness the birth of a new monster...the IS-4
Posted: Sat Dec 20, 2025 1:27 am
by MrChef
Very interesting. Definitely beefier.
How do the new sprocket teeth mesh with the tracks?
Re: Witness the birth of a new monster...the IS-4
Posted: Sat Dec 20, 2025 3:52 am
by tankme
MrChef wrote: ↑Sat Dec 20, 2025 1:27 am
Very interesting. Definitely beefier.
How do the new sprocket teeth mesh with the tracks?
Great. There was some extra space with the thin teeth. All I did was make them wide enough to fill up that extra space.
Re: Witness the birth of a new monster...the IS-4
Posted: Sat Dec 20, 2025 8:40 am
by Meter rat
Just read this all the way through again. And none of it makes any more sense. I do see an awesome model emerging, from a very skilled builder.
Re: Witness the birth of a new monster...the IS-4
Posted: Sat Dec 20, 2025 2:47 pm
by Herr Dr. Professor
"Just read this all the way through again. And none of it makes any more sense." Hey, Ian, that's what happens every time I try to read about one of these sophisticated builds. I just say "DUH" and get awed.
I didn't say I'm getting "old"; I said "awed."
Re: Witness the birth of a new monster...the IS-4
Posted: Sat Dec 20, 2025 3:26 pm
by Stormbringer
yer getting "Awed" mate

Re: Witness the birth of a new monster...the IS-4
Posted: Sun Dec 21, 2025 6:18 pm
by tankme
Meter rat wrote: ↑Sat Dec 20, 2025 8:40 am
Just read this all the way through again. And none of it makes any more sense. I do see an awesome model emerging, from a very skilled builder.
Sorry...I guess without knowing something about the way the slicer works it's probably Greek for some.

The Bambu slicing software allows some pretty powerful functions where you can create shapes like boxes, cylinders, circles, discs, rounded rectangles, cones, etc. You can combine a lot of those things together and "merge" them into a single part. You can also draw "negatives" of all those items which basically cut holes instead of create solid objects. As an example, I needed a speaker box for the IS-4 as there isn't a lot of space in it. The Heng Long 7.1 seems to keep blowing my Taigen speakers so I grabbed a Visaton FRS 5X 2" speaker I had in the stash. That meant I needed a box that fit in the hull for that speaker so I ended up drawing one in the slicer that fit the space and the speaker. I also ported the box and integrated the porting tube into the lid. I didn't measure out the mounting holes for the speaker or draw the holes in the main box. I'll just use a drill for those. I printed it in a really fast draft mode so it's not the prettiest thing, but it doesn't have to be. The gray part the arrow is pointing to is a "negative" cylinder to make the port tube hollow when it prints.
As drawn in the slicer:
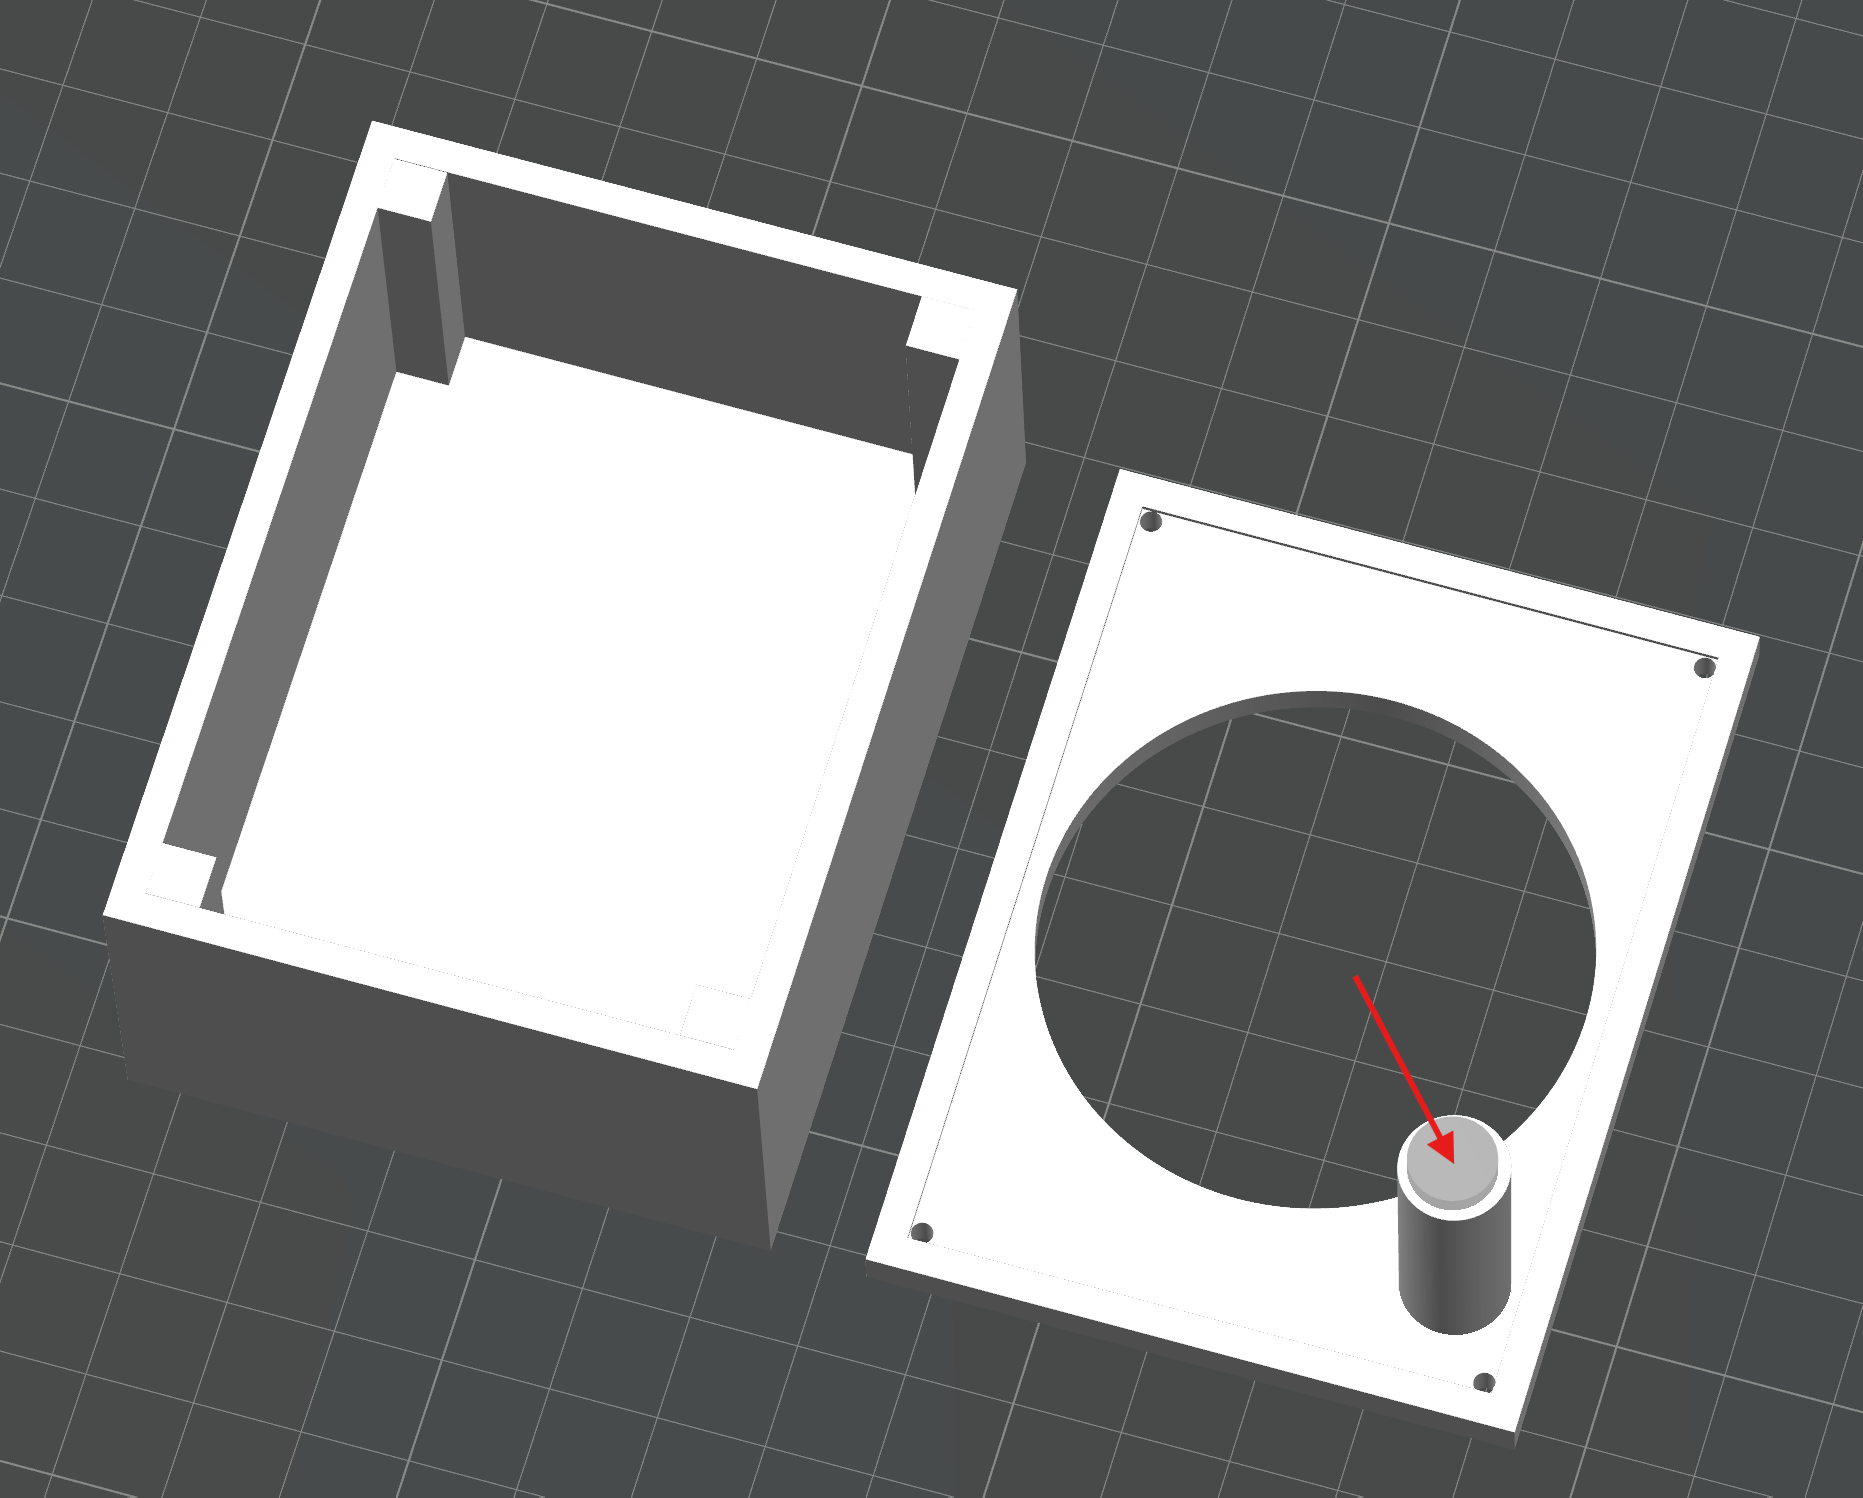
- Screenshot 2025-12-20 191509.png (213.78 KiB) Viewed 458 times
And with the speaker mounted and installed. The battery will be mounted in the nose of the tank.

That's all for now...
Re: Witness the birth of a new monster...the IS-4
Posted: Mon Dec 22, 2025 4:58 am
by HERMAN BIX
Just Greek you say ??
How about Greco-Swahili


For such a big-ish tank its snug internally
Re: Witness the birth of a new monster...the IS-4
Posted: Mon Dec 22, 2025 11:02 pm
by tankme
HERMAN BIX wrote: ↑Mon Dec 22, 2025 4:58 am
For such a big-ish tank its snug internally
The torsion bars take up a bit of space at the bottom of the tank and the hull bulkheads tend to get in the way a little. I have opened up the holes in the bulkheads so that stuff can be mounted through them which is why the battery pack will fit in the nose of the tank. Russian tanks tend to be a little lower profile than most.
My new resin printer is in transit so once that gets here, I found some more detailed fuel tanks and smoke dischargers to mount to the back of the tank. I'm also going to reprint the DShK MG as the barrel on the old one has warped since I printed it. I want to print some basic tools in resin, but haven't found any really good Russian tool sets as of yet. If anyone knows of any, please let me know. I also need to fabricate some mounts for the anti-ditching log to sit on and the mounts for the tow cables. I have a wide variety of tow cable ends that I can resin print. There are some spring steel wires attached to each hatch that I'd like to fabricate that help with reducing the weight of the hatches in real life. They will have to be semi-functional so that should be fun to build. The second turret exhaust fan in the back of the turret was molded welded over by the designer. I'm guessing the the tank used for reference was a museum piece where it was blocked off. I've got an idea how I can open it up and insert the fan blades and bring that detail back.
I'm hoping that I can get it moving under its own power by this weekend. I still have to wire up the on/off switch under the driver's hatch, wire up the barrel flash, mount the IR battle system, wire the main headlight, make a lens for that headlight and possibly get the convoy lights working. I have some pico sized LEDs that I think will work for the convoy lights.
Well those are the plans for the build as it stands now.