Hi,
Presenting the M113 Lynx trim vane.
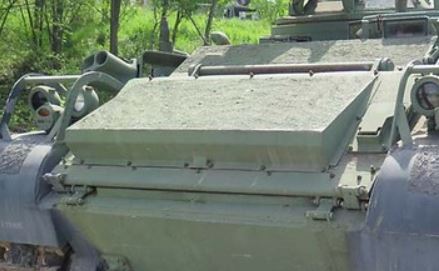
The M113 Lynx is equipped with a trim vane featuring a custom floater box. It can be lowered and it helps keeping the nose up when the vehicle is entering water. It would normally be extended at about 45 degrees for that. The manual unlocking mechanism is on the right. The basic part of the trim vane is made of plywood with metal sheets and bolts.
- RC 1/16 M113 Lynx Command and Recon tank - build
- Capture1.JPG (29.42 KiB) Viewed 4649 times
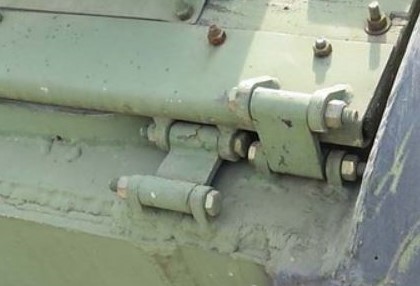
Like most M-113, the trim vane features a double hinge mechanism that will allow for the lowering all the way down to provide access to the gearbox inside. Notice the shape of the central extension part of the hinge, their position and orientation of the bolts. As the RC vehicle also need to give access to its gearbox, the modeller has no choice but to also provide some kind of similar access and create a mechanism.
- RC 1/16 M113 Lynx Command and Recon tank - build
- Capture2.JPG (49.28 KiB) Viewed 4649 times
Shown here from an extract from a Youtube video featuring a Lynx from the Ontario Regiment tank museum, the soldier dressed in 1980s Canadian airborne regiment uniform explains the maintenance operation of the Lynx when it was operational. The museum has functional vehicles to give rides to visitors. The trim vane is completely lowered down for maintenance on the gearbox.

- RC 1/16 M113 Lynx Command and Recon tank - build
- Capture3a.JPG (63.68 KiB) Viewed 4649 times
On previous M113 builds, i used a micro hinge hidden under the trim vane, and vaguely replicated the real hinges for static display. This has not proven very successful because the trim vane does not lower realistically all the way down and has proven to be weak during maintenance work.
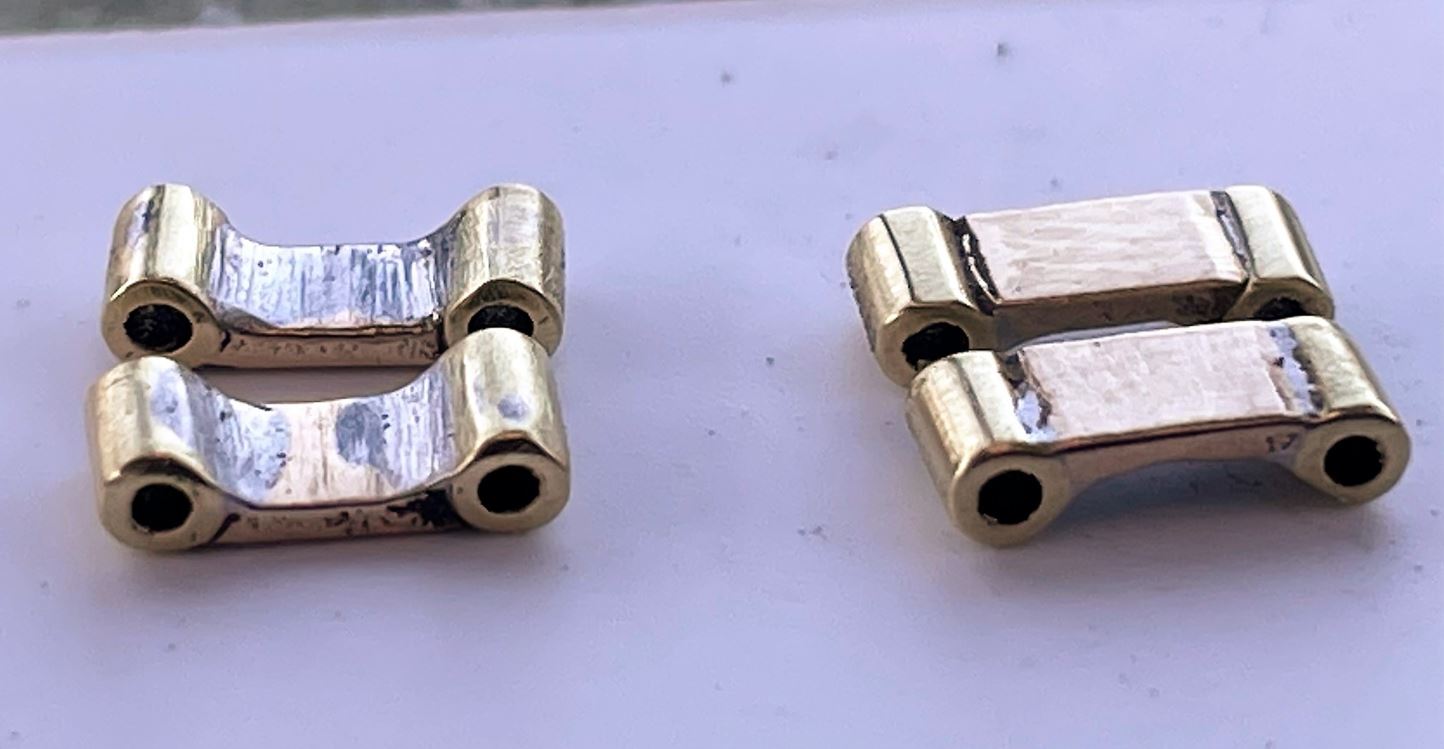
This time, I have decided that the best way to go is to replicate the M113 hinge mechanism as is. The key part of the M113 hinge is the central extension sections that need to be at the right length, and made real solid. I have therefore created a simple jig with brass rods to solder brass strips and tube sections together, creating central hinge parts with exactly the same length.
 Viewed 4649 times")
- RC 1/16 M113 Lynx Command and Recon tank - build
Then the parts are finetuned with a nail file. Imperfections will be corrected later with some putty and the enamel primer coat.
- RC 1/16 M113 Lynx Command and Recon tank - build
- Capture5.JPG (94.82 KiB) Viewed 4649 times
The four custom functional hinges are created. The plastic parts are a bit bigger than they should be in order to make them more solid.
 Viewed 4649 times")
- RC 1/16 M113 Lynx Command and Recon tank - build
The trim vane is being created in plasticard. The 1/35 kit has dimensional errors. Notice the issue with the 1/35 part on the top right of the picture below, the opening mechanism is completely squeezed on the right and too small. That created issues for me because i was mostly using the kit for hull dimensions. I fixed some issues but i have to live with others when they were not identified on time. M113 experts will notice a few issues here and there.
 Viewed 4649 times")
- RC 1/16 M113 Lynx Command and Recon tank - build
This is the M113 Lynx trim vane.
As it is a much exposed item right in front of the vehicle, i used M0.8 brass bolts and nuts to provide finer details.
 Viewed 4649 times")
- RC 1/16 M113 Lynx Command and Recon tank - build
The hinges are using M1x8 brass bolts. They are thoroughly tested for usability and solidity before installation on the hull.
 Viewed 4649 times")
- RC 1/16 M113 Lynx Command and Recon tank - build
Overview of the trim vane.
 Viewed 4649 times")
- RC 1/16 M113 Lynx Command and Recon tank - build
Continuing on following post