43rdRecceReg wrote:It seems there's no obstacle in model making you can't overcome, Louis. Problems that would be impossible for many of us to solve, in years of trying, seemingly take you but a few days. Simply amazing
Hi, thank you. I am trying to make it simple. I must advise though that having a good selection of polystyrene plates (0.5mm, 1mm, 1.5mm, 2mm, 3mm) and a well stocked reserve of overlapping metal tubes at home ranging from 2mm to 10mm, brass and aluminum really help in finding quick solutions to many modelling problems. These can be purchased cheaply on ebay from China. I have a simple tube cutter and basic tools. Not everything can or should be 3D printed.
Presenting the turret electronics and a short Youtube video of the turret in action at the end of today's last post.
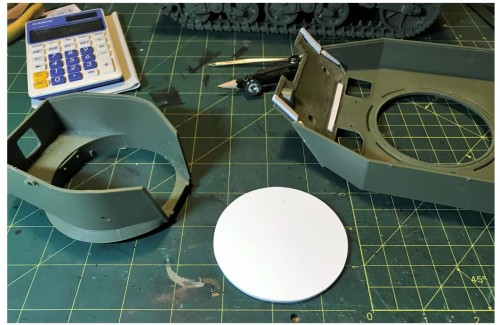
A base for the turret internal ring to rest on (and a floor for the electronics) is prepared. The ring must be the size of the hull ring, not the turret hole. A simple school geometry kit is helpful to draw a perfect cycle of the right size into a plasticard plate of the right thickness, and carved out with the Dremel and nail file. The thickness of the plasticard is important as this determines the space between the turret base and the turret rotation wheel. It should be just enough to leave a little room for the turret to rotate freely with the upper hull in between. I don't remember what i used but its either 1.5mm or 2mm thick.
- 1/16 RC M5A1 Stuart Light tank - build
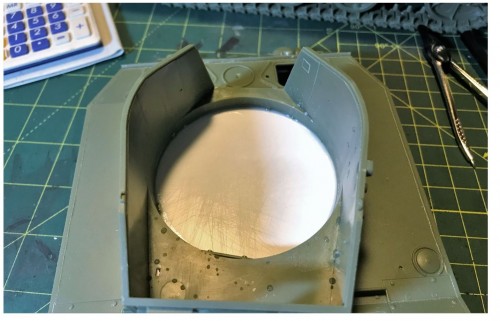
It is made to fit the hull interior ring. The bottom of the turret base is glued on top like if it was a seamless extension into the hull, to which the rotation wheel will be attached to.
- 1/16 RC M5A1 Stuart Light tank - build
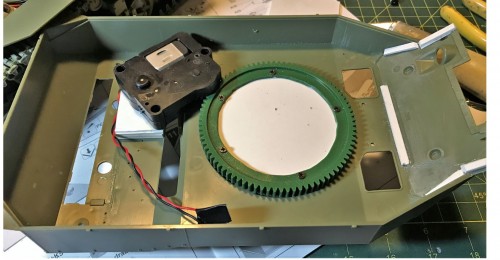
A hollowed large size VEX gear is screwed to in the inside. The VEX wheel is turning against the upper hull bolt heads under it, with strength but little resistance. The turret is small and light so no need for fancy gears or complicated ball bearings, really. Before drilling holes and screwing it, the center for the wheel has been properly located using a few drops of superglue to test the integration first to ensure the gears are all aligned in 360 degrees rotation with the Heng Long rotation unit gear installed at the back right side. It took a couple of attempts to find the perfect center point. The slightest wobble in the turret rotation wheel will create havoc in its operation. This provides a very easy and efficient turret rotation. The VEX robotics basic gear kit seems to have become more rare and expensive lately. I purchased a small reserve of these gear kits for future use. Its the kind of part that an out of the box builder need to always have on inventory anyway. The teeth match the Heng Long type of rotation units, and the various wheel sizes available can really be useful for builds like this, an earlier tip from Carl. I can create turret rotation solutions in minutes.
- 1/16 RC M5A1 Stuart Light tank - build
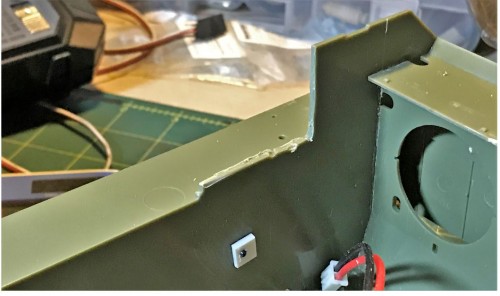
A dent is made inside the hull on the right so that the rotation unit can be positioned there, clearing the other side for the Control board.
- 1/16 RC M5A1 Stuart Light tank - build
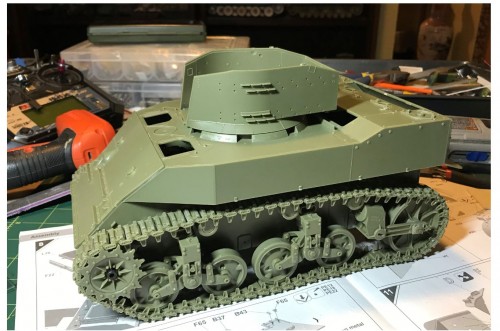
Here we go, turret rotation is done.
- 1/16 RC M5A1 Stuart Light tank - build
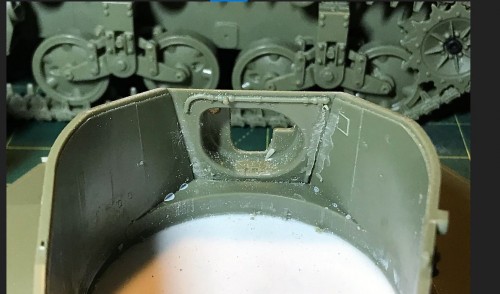
The front plate for the gun mount is put on. It is detailed for static model. Its emptiness will leave RC modellers to ponder their options.
- 1/16 RC M5A1 Stuart Light tank - build
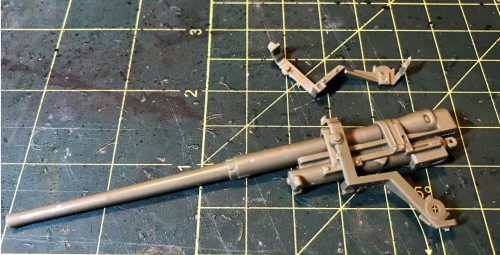
The kit comes with a nicely detailed plastic gun. However, it is not hollow and the fragile mount that fits inside the gun hole in the turret and holds by 2 little pins would not support any RC operations. It would be ripped off at the first recoil swing. Something new to support a sudden servo activated gun recoil is required. However, the kit plastic gun and other associated parts are very nice and are kept for future use, maybe to mount on a half track where the detailed and exposed breech would have much more value than being broken apart for RC operation inside the turret.
- 1/16 RC M5A1 Stuart Light tank - build
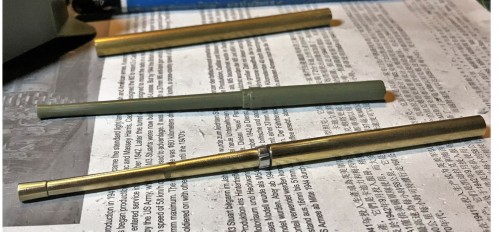
A new stronger and hollow barrel is made of overlapping brass tubes matching the plastic gun size. The brass tubes are cut to the proper length, glued together, and then sanded with a strong nail file to give it the shape of the gun barrel, decreasing in size towards the muzzle. It looked acceptable on my second attempt. It takes about an hour of filing while slowly rotating the barrel in one hand and sanding on the other hand. Sanding brass may sound crazy but it works well and skills improve with practice. The key area that need special attention are the joints. Of course, it would be great to use a lathe to create a turned barrel in aluminum... but i would need a lathe...one day. For now, this is acceptable.
- 1/16 RC M5A1 Stuart Light tank - build
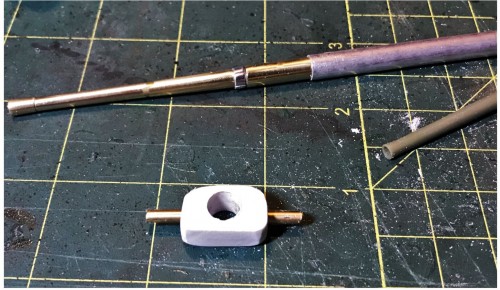
Forget about installing these 3D printed gun recoil units sold for larger kits. A home made custom RC gun mount and recoil unit are created for the Stuart. An aluminum tube is used as a sleeve for the recoil.
- 1/16 RC M5A1 Stuart Light tank - build
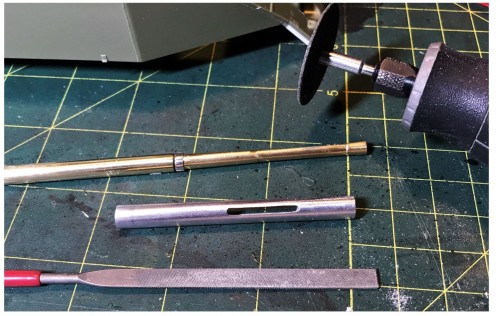
A slot for the recoil is made using the Dremel and manually fine tuned. The overlapping tubes need to be loose and greased.
- 1/16 RC M5A1 Stuart Light tank - build
Continuing on following post
